Watch Now This tutorial has a related video course created by the Real Python team. Watch it together with the written tutorial to deepen your understanding: Cool New Features in Python 3.11
Python 3.11 was published on October 24, 2022. This latest version of Python is faster and more user-friendly. After seventeen months of development, it’s now ready for prime-time use.
As in every version, Python 3.11 comes with lots of improvements and changes. You can see a list of all of them in the documentation. Here, you’ll explore the coolest and most impactful new features.
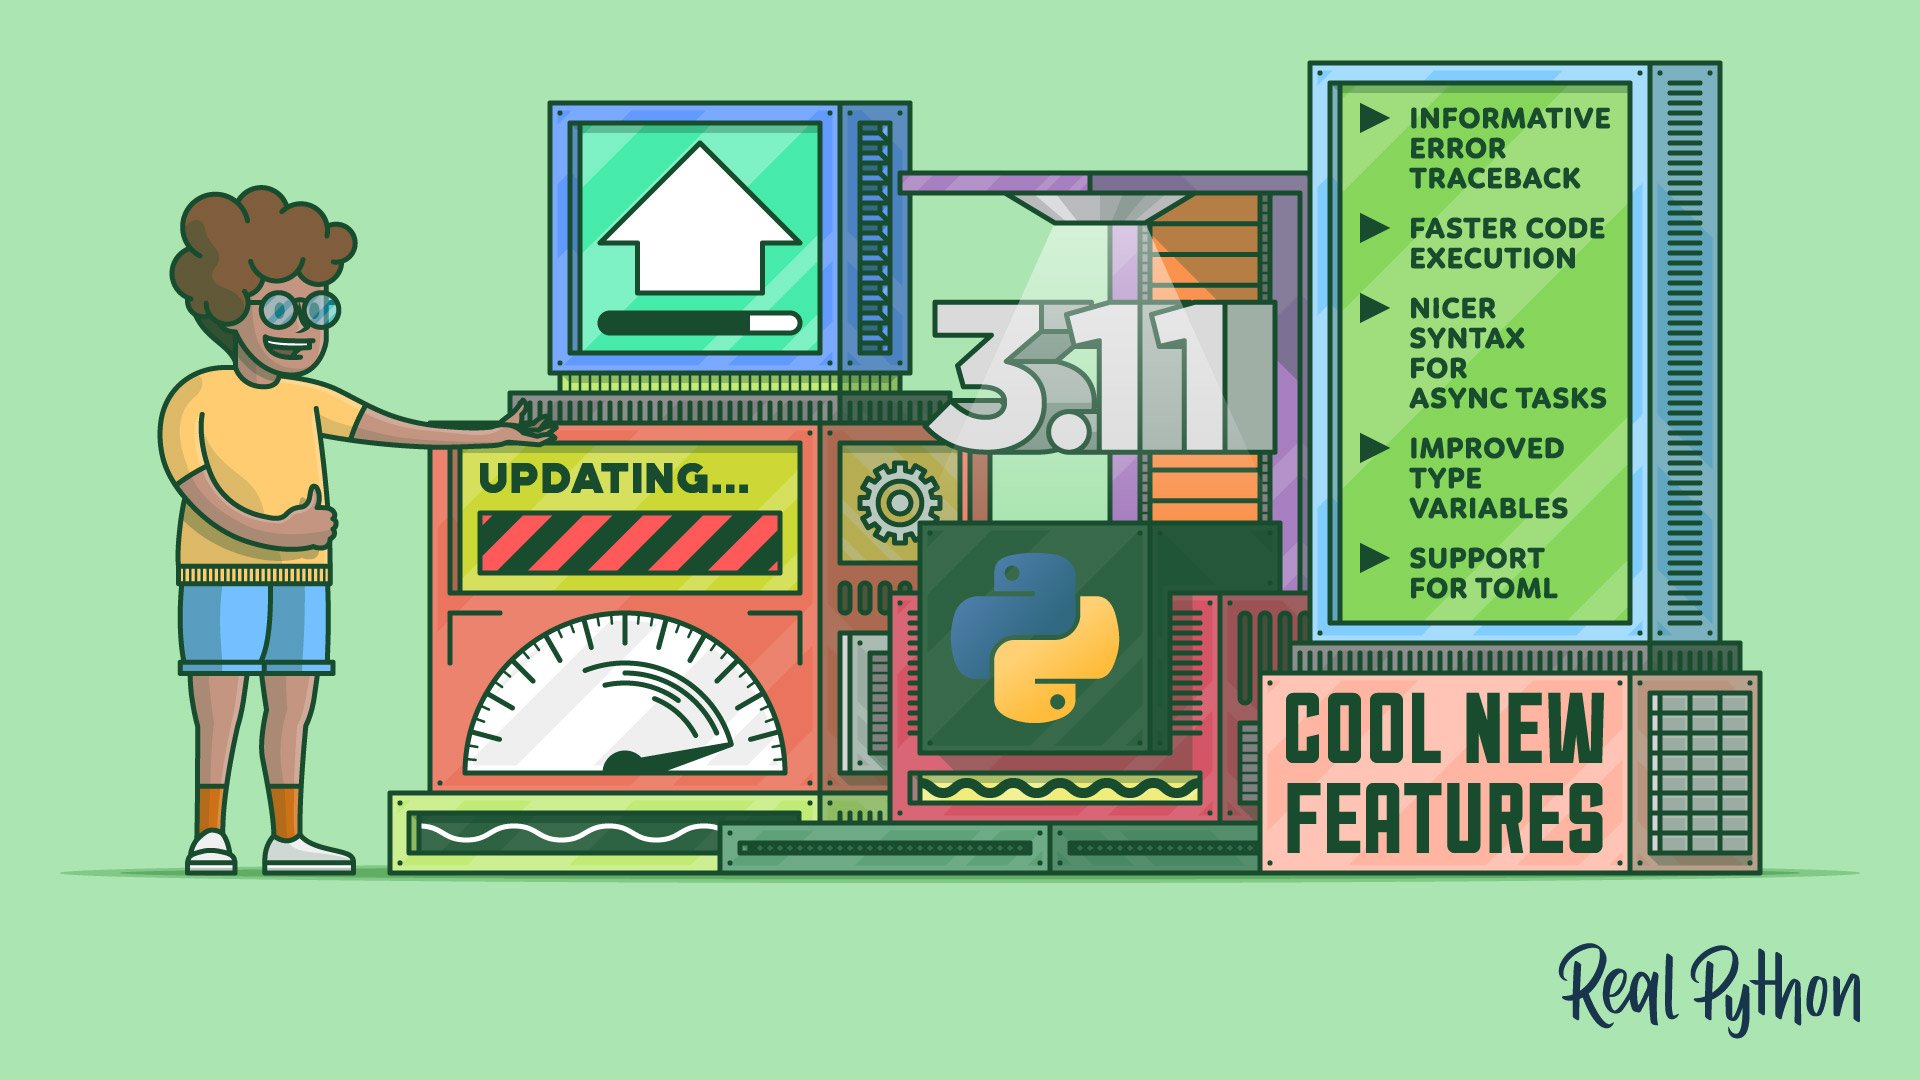
In this tutorial, you’ll learn about new features and improvements like:
- Better error messages with more informative tracebacks
- Faster code execution due to considerable effort in the Faster CPython project
- Task and exception groups that simplify working with asynchronous code
- Several new typing features that improve Python’s static typing support
- Native TOML support for working with configuration files
If you want to try any of the examples in this tutorial, then you’ll need to use Python 3.11. The Python 3 Installation & Setup Guide and How Can You Install a Pre-Release Version of Python? walk you through several options for adding a new version of Python to your system.
In addition to learning more about the new features coming to the language, you’ll also get some advice about what to consider before upgrading to the new version. Click the link below to download code examples demonstrating the new capabilities of Python 3.11:
Free Download: Click here to download free sample code that demonstrates some of the new features of Python 3.11.
More Informative Error Tracebacks
Python is often recognized as a good beginner programming language, with its readable syntax and powerful data structures. A challenge for all, but especially those new to Python, is how to interpret the traceback that’s displayed when Python encounters an error.
In Python 3.10, Python’s error messages were greatly improved. Similarly, one of Python 3.11’s most anticipated features will also boost your developer experience. Decorative annotations are added to the tracebacks and can help you more quickly interpret an error message.
To see a quick example of the enhanced traceback, add the following code to a file named inverse.py:
# inverse.py

def inverse(number):
    return 1 / number

print(inverse(0))
You can use inverse() to calculate the multiplicative inverse of a number. There’s no multiplicative inverse of 0, so your code raises an error when you run it:
$ python inverse.py
Traceback (most recent call last):
  File "/home/realpython/inverse.py", line 6, in <module>
    print(inverse(0))
          ^^^^^^^^^^
  File "/home/realpython/inverse.py", line 4, in inverse
    return 1 / number
           ~~^~~~~~~~
ZeroDivisionError: division by zero
Note the ^ and ~ symbols embedded within the traceback. They’re used to guide your attention to the code that’s causing the error. As usual with tracebacks, you should start at the bottom and work your way up. In this example, a ZeroDivisionError is caused by the division 1 / number. The actual culprit is calling inverse(0), as 0 has no inverse.
Getting this extra help in spotting mistakes is useful. However, the annotated tracebacks are even more powerful if your code is more complex. They may be able to convey information that you couldn’t get from the traceback by itself before.
To appreciate the power of the improved tracebacks, you’ll build a small parser of information about a few programmers. Assume you have a file named programmers.json with the following content:
[
    {"name": {"first": "Uncle Barry"}},
    {
        "name": {"first": "Ada", "last": "Lovelace"},
        "birth": {"year": 1815},
        "death": {"month": 11, "day": 27}
    },
    {
        "name": {"first": "Grace", "last": "Hopper"},
        "birth": {"year": 1906, "month": 12, "day": 9},
        "death": {"year": 1992, "month": 1, "day": 1}
    },
    {
        "name": {"first": "Ole-Johan", "last": "Dahl"},
        "birth": {"year": 1931, "month": 10, "day": 12},
        "death": {"year": 2002, "month": 6, "day": 29}
    },
    {
        "name": {"first": "Guido", "last": "Van Rossum"},
        "birth": {"year": 1956, "month": 1, "day": 31},
        "death": null
    }
]
Note that the information about the programmers is quite inconsistent. While the information about Grace Hopper and Ole-Johan Dahl is complete, you’re missing Ada Lovelace’s day and month of birth as well as her year of death. Naturally, you only have birth information about Guido van Rossum. To top it off, you’ve only recorded Uncle Barry’s first name.
You’ll create a class that can wrap this information. Start by reading the information from the JSON file:
# programmers.py

import json
import pathlib

programmers = json.loads(
    pathlib.Path("programmers.json").read_text(encoding="utf-8")
)
You use pathlib to read the JSON file and json to parse the information into a Python list of dictionaries.
Next, you’ll use a data class to encapsulate the information about each programmer:
# programmers.py

from dataclasses import dataclass

# ...

@dataclass
class Person:
    name: str
    life_span: tuple[int, int]

    @classmethod
    def from_dict(cls, info):
        return cls(
            name=f"{info['name']['first']} {info['name']['last']}",
            life_span=(info["birth"]["year"], info["death"]["year"]),
        )
Each Person will have a name and a life_span attribute. Additionally, you add a convenience constructor that can initialize Person based on the information and structure in your JSON file.
You’ll also add a function that can initialize two Person objects in one go:
# programmers.py

# ...

def convert_pair(first, second):
    return Person.from_dict(first), Person.from_dict(second)
The convert_pair() function uses the .from_dict() constructor twice to convert a pair of programmers from the JSON structure to Person objects.
It’s time to explore your code and, in particular, have a look at some tracebacks. Run your program with the -i flag to open Python’s interactive REPL with all variables, classes, and functions available:
$ python -i programmers.py
>>> Person.from_dict(programmers[2])
Person(name='Grace Hopper', life_span=(1906, 1992))
Grace’s information is complete, so you’re able to encapsulate her into a Person object with information about her full name and life span.
To see the new traceback in action, try to convert Uncle Barry:
>>> programmers[0]
{'name': {'first': 'Uncle Barry'}}

>>> Person.from_dict(programmers[0])
Traceback (most recent call last):
  File "/home/realpython/programmers.py", line 17, in from_dict
    name=f"{info['name']['first']} {info['name']['last']}",
                                    ~~~~~~~~~~~~^^^^^^^^
KeyError: 'last'
You get a KeyError because last is missing. While you may remember that last is a subfield within name, the annotations immediately point this out for you.
Similarly, recall that the life span information about Ada is incomplete. You can’t create a Person object for her:
>>> programmers[1]
{
    'name': {'first': 'Ada', 'last': 'Lovelace'},
    'birth': {'year': 1815},
    'death': {'month': 11, 'day': 27}
}

>>> Person.from_dict(programmers[1])
Traceback (most recent call last):
  File "/home/realpython/programmers.py", line 18, in from_dict
    life_span=(info["birth"]["year"], info["death"]["year"]),
                                      ~~~~~~~~~~~~~^^^^^^^^
KeyError: 'year'
You’re getting another KeyError, this time because year is missing. In this case, the traceback is even more useful than in the previous example. You have two year subfields, one for birth and one for death. The traceback annotation immediately shows you that you’re missing a death year.
What happens with Guido? You only have information about his birth:
>>> programmers[4]
{
    'name': {'first': 'Guido', 'last': 'Van Rossum'},
    'birth': {'year': 1956, 'month': 1, 'day': 31},
    'death': None
}

>>> Person.from_dict(programmers[4])
Traceback (most recent call last):
  File "/home/realpython/programmers.py", line 18, in from_dict
    life_span=(info["birth"]["year"], info["death"]["year"]),
                                      ~~~~~~~~~~~~~^^^^^^^^
TypeError: 'NoneType' object is not subscriptable
In this case, a TypeError is raised. You may have seen these kinds of 'NoneType' type errors before. They can be notoriously hard to debug because it’s not clear which object is unexpectedly None. However, from the annotation, you’ll see that info["death"] is None in this example.
In the final example, you’ll explore what happens with nested function calls. Remember that convert_pair() calls Person.from_dict() twice. Now, try to pair up Ada and Ole-Johan:
>>> convert_pair(programmers[3], programmers[1])
Traceback (most recent call last):
  File "/home/realpython/programmers.py", line 24, in convert_pair
    return Person.from_dict(first), Person.from_dict(second)
                                    ^^^^^^^^^^^^^^^^^^^^^^^^
  File "/home/realpython/programmers.py", line 18, in from_dict
    life_span=(info["birth"]["year"], info["death"]["year"]),
                                      ~~~~~~~~~~~~~^^^^^^^^
KeyError: 'year'
Trying to encapsulate Ada raises the same KeyError as earlier. However, take note of the traceback from within convert_pair(). Because the function calls .from_dict() twice, it normally would require some effort to figure out if the error was raised when processing first or second. In the latest version of Python, you see immediately that the issues are caused by second.
These tracebacks make debugging in Python 3.11 easier than in earlier versions. You can see more examples, more information about how the tracebacks are implemented, and other tools you can use in your debugging in the Python 3.11 preview tutorial Even Better Error Messages. For more technical details, have a look at PEP 657.
Annotated tracebacks will be a boon to your productivity as a Python developer. Another exciting development is that Python 3.11 is the fastest version of Python yet.
Faster Code Execution
Python has a reputation as a slow language. For example, a regular loop in Python is orders of magnitude slower than a similar loop in C. This drawback is countered in several ways. Often programmer productivity is more important than code execution time.
Python is also very capable of wrapping libraries written in faster languages. For example, calculations done in NumPy are much faster than similar calculations done in pure Python. Matched with the ease of developing code, this makes Python a strong contender in the data science space.
Still, there’s been a push toward making the core Python language faster. In the fall of 2020, Mark Shannon suggested several performance improvements that could be implemented in Python. The proposal, which is known as the Shannon Plan, is very ambitious and hopes to make Python five times faster over several releases.
Microsoft has gotten on board and is currently supporting a group of developers—including Mark Shannon and Python’s creator, Guido van Rossum—working on the Faster CPython project, as it’s now known. There are many improvements in Python 3.11 based on the Faster CPython project. In this section, you’ll learn about the specializing adaptive interpreter. In later sections, you’ll also learn about faster startup times and zero-cost exceptions.
PEP 659 describes a specializing adaptive interpreter. The main idea is to speed up code while it’s running by optimizing operations that are done often. This is similar to just-in-time (JIT) compilation, except that it doesn’t affect compilation. Instead, Python’s bytecode is adapted or changed on the fly.
Note: Python code is compiled to bytecode before it’s run. Bytecode consists of more basic instructions than regular Python code, so each line of Python is converted into several bytecode statements.
You can use dis to have a look at Python’s bytecode. As an example, consider a function that can convert from feet to meters:
 1>>> def feet_to_meters(feet):
 2...     return 0.3048 * feet
 3...
You can disassemble this function into bytecode by calling dis.dis():
>>> import dis
>>> dis.dis(feet_to_meters)
  1           0 RESUME                   0

  2           2 LOAD_CONST               1 (0.3048)
              4 LOAD_FAST                0 (feet)
              6 BINARY_OP                5 (*)
             10 RETURN_VALUE
Each line shows information about one bytecode instruction. The five columns are the line number, the byte address, the operation code name, the operation parameters, and an interpretation of the parameters in parentheses.
In general, you don’t need to know about bytecode to write Python. It can help you understand how Python works internally, though.
A new step called quickening has been added to the bytecode generation. This takes instructions that could be optimized during runtime and replaces them with adaptive instructions. Each such instruction will look at how it’s used and may specialize itself accordingly.
The quickening kicks in once a function has been called a certain number of times. In CPython 3.11, this happens after eight invocations. You can observe how the interpreter adapts bytecode by calling dis() and setting the adaptive parameter. First define a function and call it seven times with floating-point numbers as arguments:
>>> def feet_to_meters(feet):
...     return 0.3048 * feet
...

>>> feet_to_meters(1.1)
0.33528
>>> feet_to_meters(2.2)
0.67056
>>> feet_to_meters(3.3)
1.00584
>>> feet_to_meters(4.4)
1.34112
>>> feet_to_meters(5.5)
1.6764000000000001
>>> feet_to_meters(6.6)
2.01168
>>> feet_to_meters(7.7)
2.34696
Next, have a look at the bytecode of feet_to_meters():
>>> import dis
>>> dis.dis(feet_to_meters, adaptive=True)
  1           0 RESUME                   0

  2           2 LOAD_CONST               1 (0.3048)
              4 LOAD_FAST                0 (feet)
              6 BINARY_OP                5 (*)
             10 RETURN_VALUE
You won’t observe anything special yet. This version of the bytecode is still the same as the non-adaptive one. That changes when you call feet_to_meters() the eighth time:
>>> feet_to_meters(8.8)
2.68224

>>> dis.dis(feet_to_meters, adaptive=True)
  1           0 RESUME_QUICK                 0

  2           2 LOAD_CONST__LOAD_FAST        1 (0.3048)
              4 LOAD_FAST                    0 (feet)
              6 BINARY_OP_MULTIPLY_FLOAT     5 (*)
             10 RETURN_VALUE
Now, several of the original instructions have been replaced by specialized ones. For example, BINARY_OP has been specialized to BINARY_OP_MULTIPLY_FLOAT, which is faster at multiplying two float numbers.
Even if feet_to_meters() has been optimized for the case where feet is a float parameter, it still works as normal for other types of parameters by falling back to the original bytecode instruction. The internal operations have changed, but your code will behave exactly the same as before.
The specialized instructions are still adaptive. Call your function fifty-two more times, but now with an integer argument:
>>> for feet in range(52):
...     feet_to_meters(feet)
...

>>> dis.dis(feet_to_meters, adaptive=True)
  1           0 RESUME_QUICK                 0

  2           2 LOAD_CONST__LOAD_FAST        1 (0.3048)
              4 LOAD_FAST                    0 (feet)
              6 BINARY_OP_MULTIPLY_FLOAT     5 (*)
             10 RETURN_VALUE
The Python interpreter still hopes to be able to multiply two float numbers. When you call feet_to_meters() one more time with an integer, it resigns and converts back to an unspecialized, adaptive instruction:
>>> feet_to_meters(52)
15.8496

>>> dis.dis(feet_to_meters, adaptive=True)
  1           0 RESUME_QUICK              0

  2           2 LOAD_CONST__LOAD_FAST     1 (0.3048)
              4 LOAD_FAST                 0 (feet)
              6 BINARY_OP_ADAPTIVE        5 (*)
             10 RETURN_VALUE
In this case, the bytecode instruction is changed to BINARY_OP_ADAPTIVE and not BINARY_OP_MULTIPLY_INT because one of the operators, 0.3048, is always a floating-point number.
Multiplications between integers and floating point numbers are harder to optimize than multiplications between numbers of the same type. At least for now, there’s no specialized instruction to do multiplication between float and int.
This example is meant to give you some insight into how the adaptive specializing interpreter works. In general, you shouldn’t worry about changing your existing code to take advantage of it. Most of your code will simply run more quickly as it is.
That said, there are a few cases where you may be able to refactor your code so that it can be specialized more effectively. Brandt Bucher’s specialist is a tool that visualizes how your code is treated by the interpreter. The tutorial shows an example of manually improving code. You can learn even more on the Talk Python to Me podcast.
A couple of important guidelines for the Faster CPython project are:
- The project won’t introduce any breaking changes to Python.
- The performance of most code should be improved.
In benchmarks, “CPython 3.11 is on average 25% faster than CPython 3.10” (Source). However, you should be more interested in how Python 3.11 performs on your code than how well it does on benchmarks. Expand the box below for some ideas about how you can measure the performance of your own code:
In general, there are three approaches that you’ll use to measure code performance:
- Benchmark small pieces of code that are important in your program.
- Profile your program to find bottlenecks that can be improved.
- Monitor the performance of your full program.
Typically, you want to do all of these. Benchmarks can help you choose between different implementations while you’re developing your code. Python has built-in support for micro-benchmarking with the timeit module. The third-party richbench tool is nice for benchmarking functions. Additionally, pyperformance is the benchmark suite used by the Faster CPython project to measure improvements.
It’s useful to profile your code if you need to speed up your program and want to figure out which part of your code to focus on. Python’s standard library provides cProfile, which you can use to collect statistics about your program, and pstats, which you can use to explore those statistics.
The third approach, monitoring your program’s runtime, is something that you should do with all your programs that run for more than a few seconds. The simplest approach is to add a timer in your log messages. The third-party codetiming allows you to do this, for example by adding a decorator to your main function.
One approachable and essential way you can contribute to making Python faster is by sharing benchmarks exemplifying your use cases. Especially if you don’t notice much speedup in Python 3.11, it would be helpful for the core developers if you’re able to share your code. See Mark Shannon’s lightning talk, How you can help speed up Python, for more information.
The Faster CPython project is an ongoing effort, and there are already several optimizations that are slated for release with Python 3.12 in October 2023. You can follow the project on GitHub. To learn more, you can also check out the following discussions and presentations:
- Talk Python to Me: Making Python Faster With Guido and Mark
- EuroPython 2022: How We Are Making Python 3.11 Faster by Mark Shannon
- Talk Python to Me: Python Perf: Specializing, Adaptive Interpreter with Brandt Bucher
- PyCon ES: Faster CPython Project: Como estamos haciendo Python 3.11 más rápido by Pablo Galindo Salgado, in Spanish
Faster CPython is a massive project that touches all parts of Python. The adaptive specializing interpreter is one piece of the effort. Later in this tutorial, you’ll learn about two other optimizations: faster startup and zero-cost exceptions.
Nicer Syntax for Asynchronous Tasks
Support for asynchronous programming in Python has evolved over a long time. Foundations were laid in the Python 2 era with the addition of generators. The asyncio library was originally added in Python 3.4, and the async and await keywords followed suit in Python 3.5.
The development has continued in later releases, with many small improvements added to Python’s asynchronous capabilities. In Python 3.11, you can use task groups, which provide a cleaner syntax for running and monitoring asynchronous tasks.
Note: If you’re not already familiar with asynchronous programming in Python, then you can check out the following resources to get started:
- Speed Up Your Python Program With Concurrency
- Getting Started With Async Features in Python
- Async IO in Python: A Complete Walkthrough
You can also learn even more details about asynchronous task groups in Python 3.11 Preview: Task and Exception Groups.
The asyncio library is part of Python’s standard library. However, it’s not the only way to work asyncronously. There are several popular third-party libraries that offer the same capabilities, including Trio and Curio. In addition, packages like uvloop, AnyIO, and Quattro enhance asyncio with better performance and more features.
The traditional way to run several asynchronous tasks with asyncio has been to create the tasks with create_task() and then await them with gather(). This gets the tasks done, but it’s a bit cumbersome to work with.
To organize child tasks, Curio introduced task groups and Trio introduced nurseries as alternatives. The new asyncio task groups are heavily inspired by these.
When you organize your asyncronous tasks with gather(), part of your code will typically look like this:
tasks = [asyncio.create_task(run_some_task(param)) for param in params]
await asyncio.gather(*tasks)
You manually track all your tasks in a list before passing them to gather(). By awaiting on gather(), you make sure that each task is done before moving on.
The equivalent code is more straightforward with task groups. Instead of using gather(), you use a context manager to define when tasks will be awaited:
async with asyncio.TaskGroup() as tg:
    for param in params:
        tg.create_task(run_some_task(param))
You create a task group object, named tg in this example, and use its .create_task() method to create new tasks.
To see a full-fledged example, consider the task of downloading several files. You want to download the text of some of the historical PEP documents that show how Python’s asyncronous features have developed. To be efficient, you’ll use the third-party library aiohttp to download the files asyncronously.
Start by importing the necessary libraries, and note the URL to the repository where the text of each PEP is stored:
# download_peps_gather.py

import asyncio
import aiohttp

PEP_URL = (
    "https://raw.githubusercontent.com/python/peps/master/pep-{pep:04d}.txt"
)

async def main(peps):
    async with aiohttp.ClientSession() as session:
        await download_peps(session, peps)
You add a main() function that initializes an aiohttp session to manage a pool of connections that may be reused. For now, you’re calling a function, named download_peps(), that you haven’t written yet. This function will create one task for each PEP that needs to be downloaded:
# download_peps_gather.py

# ...

async def download_peps(session, peps):
    tasks = [asyncio.create_task(download_pep(session, pep)) for pep in peps]
    await asyncio.gather(*tasks)
This follows the pattern that you saw earlier. Each task consists of running download_pep(), which you’ll define next. Once you’ve set up all the tasks, you pass them on to gather().
Each task downloads one PEP. You’ll add a few print() calls so that you can see what’s happening:
# download_peps_gather.py

# ...

async def download_pep(session, pep):
    print(f"Downloading PEP {pep}")
    url = PEP_URL.format(pep=pep)
    async with session.get(url, params={}) as response:
        pep_text = await response.text()

    title = pep_text.split("\n")[1].removeprefix("Title:").strip()
    print(f"Downloaded PEP {pep}: {title}")
For each PEP, you find its individual URL and use session.get() to download it. Once you have the text of the PEP, you find the title of the PEP and print it to the console.
Finally, run main() asynchronously:
# download_peps_gather.py

# ...

asyncio.run(main([492, 525, 530, 3148, 3156]))
You’re calling your code with a list of PEP numbers, all related to async features in Python. Run your script to see how it works:
$ python download_peps_gather.py
Downloading PEP 492
Downloading PEP 525
Downloading PEP 530
Downloading PEP 3148
Downloading PEP 3156
Downloaded PEP 3148: futures - execute computations asynchronously
Downloaded PEP 492: Coroutines with async and await syntax
Downloaded PEP 530: Asynchronous Comprehensions
Downloaded PEP 3156: Asynchronous IO Support Rebooted: the "asyncio" Module
Downloaded PEP 525: Asynchronous Generators
You can see that all the downloads are happening at the same time, because all tasks print that they start to download a PEP before any of the tasks report that they’re done. Also, note that the tasks are started in the order that you defined, with the PEPs in numerical order.
Conversely, the tasks finish in a seemingly random order. The call to gather() ensures that all tasks are done before your code continues.
You can update your code to use a task group instead of gather(). First, copy download_peps_gather.py to a new file named download_peps_taskgroup.py. These files will be quite similiar. You only need to edit the download_peps() function:
# download_peps_taskgroup.py

# ...

async def download_peps(session, peps):
    async with asyncio.TaskGroup() as tg:
        for pep in peps:
            tg.create_task(download_pep(session, pep))

# ...
Note that your code follows the general pattern outlined before the example. You first set up a task group inside a context manager, and then you use that task group to create child tasks: one task for each PEP to download. Run your updated code and observe that it behaves the same as the earlier version.
One challenge when you’re working with several asyncronous tasks is that any one of them may raise an error at any time. In theory, two or more tasks can even raise an error at the same time.
Libraries like Trio and Curio have handled this with a special kind of multi-error object. This has worked but has been a bit cumbersome because Python didn’t offer much in the way of built-in support.
To support error handling in task groups properly, Python 3.11 introduces exception groups designed to keep track of several concurrent errors. You’ll learn more about them later in this tutorial.
Task groups use exception groups to provide better error handling support than the old approach. For a more in-depth discussion of task groups, see Python 3.11 Preview: Task and Exception Groups. You can learn more about the underlying principles in Guido van Rossum’s Reasoning about asyncio.Semaphore.
Improved Type Variables
Python is a dynamically typed language, but it supports static typing through optional type hints. The foundations of Python’s static type system were defined in PEP 484 in 2015. Since Python 3.5, several new proposals related to typing have been introduced for every Python release.
There are five typing-related PEPs announced for Python 3.11—a record high:
- PEP 646: Variadic generics
- PEP 655: Marking individual
TypedDictitems as required or potentially missing - PEP 673:
Selftype - PEP 675: Arbitrary literal string type
- PEP 681: Data class transforms
In this section, you’ll focus on two of these: variadic generics and the Self type. For more information, check out the PEP documents and the coverage of typing in this Python 3.11 preview.
Note: Support for typing features depends on your type checker in addition to your version of Python. For example, several of the new features aren’t supported by mypy at the time of Python 3.11’s release.
Type variables have been part of Python’s static typing system since the beginning. You use them to parametrize generic types. In other words, if you have a list, then you can use a type variable to check the type of items inside the list:
from typing import Sequence, TypeVar

T = TypeVar("T")

def first(sequence: Sequence[T]) -> T:
    return sequence[0]
The first() function picks out the first element from a sequence type, like a list. The code works the same independently of the type of the elements of the sequence. Still, you need to track the element types so that you know the return type of first().
The type variable does exactly this. For example, if you pass in a list of integers to first(), then T will be set to int during type checking. The type checker can therefore deduce that this invocation of first() returns int. In this example, the list is referred to as a generic type because it can be parametrized by other types.
One pattern that has developed over time tries to solve the issue of type hints that refer to the current class. Recall the Person class from earlier:
# programmers.py

from dataclasses import dataclass

# ...

@dataclass
class Person:
    name: str
    life_span: tuple[int, int]

    @classmethod
    def from_dict(cls, info):
        return cls(
            name=f"{info['name']['first']} {info['name']['last']}",
            life_span=(info["birth"]["year"], info["death"]["year"]),
        )
The .from_dict() constructor returns a Person object. However, you’re not allowed to use -> Person as a type hint for the return value of .from_dict() because the Person class isn’t fully defined at this point in your code.
In addition, if you were allowed to use -> Person, then this wouldn’t work well with inheritance. If you created a subclass of Person, then .from_dict() would return that subclass and not a Person object.
One solution to this challenge is to use a type variable that’s bound to your class:
# programmers.py

# ...

from typing import Any, Type, TypeVar

TPerson = TypeVar("TPerson", bound="Person")

@dataclass
class Person:
    name: str
    life_span: tuple[int, int]

    @classmethod
    def from_dict(cls: Type[TPerson], info: dict[str, Any]) -> TPerson:
        return cls(
            name=f"{info['name']['first']} {info['name']['last']}",
            life_span=(info["birth"]["year"], info["death"]["year"]),
        )
You specify bound to ensure that TPerson will only ever be Person or one of its subclasses. This pattern works, but it’s not especially readable. It also forces you to annotate self or cls, which usually isn’t necessary.
You can now use the new Self type instead. It’ll always refer to the encapsulating class, so you won’t have to manually define a type variable. The following code is equivalent to the previous example:
# programmers.py

# ...

from typing import Any, Self

@dataclass
class Person:
    name: str
    life_span: tuple[int, int]

    @classmethod
    def from_dict(cls, info: dict[str, Any]) -> Self:
        return cls(
            name=f"{info['name']['first']} {info['name']['last']}",
            life_span=(info["birth"]["year"], info["death"]["year"]),
        )
You can import Self from typing. You don’t need to create a type variable or annotate cls. Instead, you note that the method returns Self, which will refer to Person.
See the Python 3.11 Preview for another example of how to use Self. You can also check out PEP 673 for more details.
One limitation of type variables is that they can only stand in for one type at a time. Say that you have a function that flips the order of a two-element tuple:
# pair_order.py

def flip(pair):
    first, second = pair
    return (second, first)
Here, pair is assumed to be a tuple with two elements. The elements can be of different types, so you need two type variables in order to annotate your function:
# pair_order.py

from typing import TypeVar

T0 = TypeVar("T0")
T1 = TypeVar("T1")

def flip(pair: tuple[T0, T1]) -> tuple[T1, T0]:
    first, second = pair
    return (second, first)
This is a bit cumbersome to write, but it’s still okay. The annotations are explicit and readable. The challenge comes if you want to annotate a variant of your code that works for tuples with an arbitrary number of elements:
# tuple_order.py

def cycle(elements):
    first, *rest = elements
    return (*rest, first)
With cycle(), you move the first element to the end of a tuple with an arbitrary number of elements. If you pass in a pair of elements, then this works equivalently to flip().
Think about how you would annotate cycle(). If elements is a tuple with n elements, then you’d need n type variables. But the number of elements can be anything, so you don’t know how many type variables you’d need.
PEP 646 introduces TypeVarTuple to handle this use case. A TypeVarTuple can stand in for an arbitrary number of types. You can therefore use it to annotate a generic type with variadic parameters.
You can add type hints to cycle() as follows:
# tuple_order.py

from typing import TypeVar, TypeVarTuple

T0 = TypeVar("T0")
Ts = TypeVarTuple("Ts")

def cycle(elements: tuple[T0, *Ts]) -> tuple[*Ts, T0]:
    first, *rest = elements
    return (*rest, first)
TypeVarTuple will replace any number of types, so this annotation will work for tuples with one, three, eleven, or any other number of elements.
Note that the star (*) in front of Ts is a necessary part of the syntax. It resembles the unpacking syntax that you’re already using in your code, and it reminds you that Ts represents an arbitrary number of types.
The motivating use case for introducing type variable tuples is annotating the shape of multidimensional arrays. You can learn more about this example in this Python 3.11 preview and in the PEP.
To end this section about type hints, recall that static typing combines two different tools: the Python language and the type checker. To use new typing features, your version of Python must support them. In addition, they need to be supported by your type checker.
Many typing features, including Self and TypeVarTuple, are backported to older versions of Python in the typing_extensions package. On Python 3.10, you can use pip to install typing-extensions into your virtual environment and then implement the last example as follows:
# tuple_order.py

from typing_extensions import TypeVar, TypeVarTuple, Unpack

T0 = TypeVar("T0")
Ts = TypeVarTuple("Ts")

def cycle(elements: tuple[T0, Unpack[Ts]]) -> tuple[Unpack[Ts], T0]:
    first, *rest = elements
    return (*rest, first)
The *Ts syntax is only allowed in Python 3.11. An equivalent alternative that works on older versions of Python is Unpack[Ts]. Even if your code works on your version of Python, not all type checkers support TypeVarTuple yet.
Support for TOML Configuration Parsing
TOML is short for Tom’s Obvious Minimal Language. It’s a configuration file format that’s gotten popular over the last decade. The Python community has embraced TOML as the format of choice when specifying metadata for packages and projects.
TOML has been designed to be easy for humans to read and easy for computers to parse. You can learn about the configuration file format itself in Python and TOML: New Best Friends.
While TOML has been used for years by many different tools, Python hasn’t had built-in TOML support. That changes in Python 3.11, when tomllib is added to the standard library. This new module builds on top of the popular tomli third-party library and allows you to parse TOML files.
The following is an example of a TOML file named units.toml:
# units.toml

[second]
label   = { singular = "second", plural = "seconds" }
aliases = ["s", "sec", "seconds"]

[minute]
label      = { singular = "minute", plural = "minutes" }
aliases    = ["min", "minutes"]
multiplier = 60
to_unit    = "second"

[hour]
label      = { singular = "hour", plural = "hours" }
aliases    = ["h", "hr", "hours"]
multiplier = 60
to_unit    = "minute"

[day]
label      = { singular = "day", plural = "days" }
aliases    = ["d", "days"]
multiplier = 24
to_unit    = "hour"

[year]
label      = { singular = "year", plural = "years" }
aliases    = ["y", "yr", "years", "julian_year", "julian years"]
multiplier = 365.25
to_unit    = "day"
The file contains several sections with headlines in square brackets. Each such section is called a table in TOML, and its headline is called a key. Tables contain key-value pairs. Tables can be nested such that values are new tables. In the example above, you can see that each table, except second, has the same structure, with four keys: label, aliases, multiplier, and to_unit.
Values can have different types. In this example, you can see four data types:
labelis an inline table, similar to Python’s dictionary.aliasesis an array, similar to Python’s list.multiplieris a number, either an integer or a floating-point number.to_unitis a string.
TOML supports a few more data types, including Booleans and dates. See Python and TOML: New Best Friends for in-depth coverage of the format and examples of its syntax.
You can use tomllib to read a TOML file:
>>> import tomllib
>>> with open("units.toml", mode="rb") as file:
...     units = tomllib.load(file)
...
>>> units
{'second': {'label': {'singular': 'second', 'plural': 'seconds'}, ... }}
When using tomllib.load() you pass in a file object that must be opened in binary mode by specifying mode="rb". Alternatively, you can parse a string with tomllib.loads():
>>> import tomllib
>>> import pathlib
>>> units = tomllib.loads(
...     pathlib.Path("units.toml").read_text(encoding="utf-8")
... )
>>> units
{'second': {'label': {'singular': 'second', 'plural': 'seconds'}, ... }}
In this example, you first use pathlib to read units.toml into a string, which you then parse with loads(). TOML documents should be stored in a UTF-8 encoding. You should specify the encoding explicitly to ensure that your code runs the same on all platforms.
Next, turn your attention to the result of calling load() or loads(). In the examples above, you see that units is a nested dictionary. This will always be the case: tomllib parses TOML documents into Python dictionaries.
In the rest of this section, you’ll practice working with TOML data in Python. You’ll create a small unit converter that parses your TOML file and uses the resulting dictionary.
Note: If you’re doing unit conversion for real, then you should check out Pint. This library can convert between hundreds of units and is well integrated into other packages like NumPy.
Add your code to a file named units.py:
# units.py

import pathlib
import tomllib

# Read units from file
with pathlib.Path("units.toml").open(mode="rb") as file:
    base_units = tomllib.load(file)
You want to be able to look up each unit by its name or one of its aliases. You achieve this by copying the unit information so that each alias can be used as a dictionary key:
# units.py

# ...

units = {}
for unit, unit_info in base_units.items():
    units[unit] = unit_info
    for alias in unit_info["aliases"]:
        units[alias] = unit_info
Your units dictionary will now, for example, have the key second as well as its aliases s, sec, and seconds all pointing to the second table.
Next, you’ll define to_baseunit(), which can convert any unit in the TOML file to its corresponding base unit. In this example, the base unit is always second. However, you could expand the table to include, for instance, length units with meter as their base unit.
Add the definition of to_baseunit() to your file:
# units.py

# ...

def to_baseunit(value, from_unit):
    from_info = units[from_unit]
    if "multiplier" not in from_info:
        return (
            value,
            from_info["label"]["singular" if value == 1 else "plural"],
        )

    return to_baseunit(value * from_info["multiplier"], from_info["to_unit"])
You implement to_baseunit() as a recursive function. If the table corresponding to from_unit doesn’t contain a multiplier field, then you treat the unit as a base unit and return its value and name. On the other hand, if there’s a multiplier field, then you convert to the next unit in the chain and call to_baseunit() again.
Start your REPL. Then, import units and convert a few numbers:
>>> import units
>>> units.to_baseunit(7, "s")
(7, 'seconds')

>>> units.to_baseunit(3.11, "minutes")
(186.6, 'seconds')
In the first example, "s" is interpreted as second because it’s an alias. Since this is the base unit, 7 is returned untouched. In the second example, "minutes" causes your function to look up in the minute table. It finds that it can convert to second by multiplying by 60.
The chain of conversions can be longer:
>>> units.to_baseunit(14, "days")
(1209600, 'seconds')

>>> units.to_baseunit(1 / 12, "yr")
(2629800.0, 'seconds')
In order to convert "days" to its base unit, your function first converts day to hour, then hour to minute, and then finally minute to second. You find that there are about 1.2 million seconds in fourteen days and about 2.6 million seconds in one-twelfth of a year.
Note: In the example, you use the TOML file to store information about the units that your unit converter supports. You could alternatively put the information directly in your code by defining base_units as a literal dictionary.
However, using a configuration file brings several advantages related to the separation of code and data:
- Your logic is separated from your data.
- Non-developers can contribute to your unit converter without touching—or even knowing about—Python code.
- With minimal effort, you can support additional unit configuration files. Users can add these to include custom units in the converter.
You should consider setting up a configuration file for any project that you work with.
As noted earlier, tomllib is based on tomli. If you want to parse TOML documents in code that needs to support older Python versions, then you can install tomli and use it as a backport of tomllib as follows:
try:
    import tomllib
except ModuleNotFoundError:
    import tomli as tomllib
On Python 3.11, this imports tomllib as usual. On earlier versions of Python, the import raises a ModuleNotFoundError. Here, you catch the error and import tomli instead while aliasing it to the name tomllib so that the rest of your code works unaltered.
You can learn more about tomllib in Python 3.11 Preview: TOML and tomllib. Furthermore, PEP 680 outlines the discussions that led to tomllib being added to Python.
Other Pretty Cool Features
So far, you’ve learned about the biggest changes and improvements in Python 3.11. However, there are many more features to explore. In this section, you’ll take a look at some of the new features that may be sneaking under the headlines. They include more speedups, more changes to exceptions, and a small improvement to string formatting.
Faster Startup
Another exciting outcome of the Faster CPython project is faster startup times. When you run a Python script, several things happen as the interpreter initializes. This causes even the simplest program to take a few milliseconds to run:
You use -c to pass in a program directly on the command line. In this case, your entire program consists of a pass statement, which does nothing.
In many cases, the time it takes to start your program is neglible when compared to the time it takes to run your code. However, in shorter-running scripts, like typical command-line applications, the startup time may affect the performance of your program significantly.
For a concrete example, consider the following script—inspired by the classical cowsay program:
# snakesay.py
import sys

message = " ".join(sys.argv[1:])
bubble_length = len(message) + 2
print(
    rf"""
       {"_" * bubble_length}
      ( {message} )
       {"‾" * bubble_length}
        \
         \    __
          \  [oo]
             (__)\
               λ \\
                 _\\__
                (_____)_
               (________)Oo°"""
)
In snakesay.py, you read a message from the command line. Then, you print the message in a speech bubble accompanied by a cute snake. Now, you can make the snake say anything:
$ python snakesay.py Faster startup!
       _________________
      ( Faster startup! )
       ‾‾‾‾‾‾‾‾‾‾‾‾‾‾‾‾‾
        \
         \    __
          \  [oo]
             (__)\
               λ \\
                 _\\__
                (_____)_
               (________)Oo°
This is a basic example of a command-line application. Like many other command-line applications, it runs quickly. Still, it’ll take some milliseconds to run. A big portion of this overhead happens as Python imports modules, even some that you don’t import explicitly yourself.
You can use the -X importtime option to show an overview of the time spent importing modules:
$ python -X importtime -S snakesay.py Imports are faster!
import time: self [us] | cumulative | imported package
import time:       283 |        283 |   _io
import time:        56 |         56 |   marshal
import time:       647 |        647 |   posix
import time:       587 |       1573 | _frozen_importlib_external
import time:       167 |        167 |   time
import time:       191 |        358 | zipimport
import time:        90 |         90 |     _codecs
import time:       561 |        651 |   codecs
import time:       825 |        825 |   encodings.aliases
import time:      1136 |       2611 | encodings
import time:       417 |        417 | encodings.utf_8
import time:       174 |        174 | _signal
import time:        56 |         56 |     _abc
import time:       251 |        306 |   abc
import time:       310 |        616 | io
       _____________________
      ( Imports are faster! )
       ‾‾‾‾‾‾‾‾‾‾‾‾‾‾‾‾‾‾‾‾‾
        \
         \    __
          \  [oo]
             (__)\
               λ \\
                 _\\__
                (_____)_
               (________)Oo°
The numbers in the table are measured in microseconds. Note the formatting of the module names in the last column. The tree structure indicates that there are a few top-level modules and that these import other modules. For example, io is a top-level import, while abc was imported by io.
Note: You used the -S option above. According to the documentation, this will “disable the import of the module site and the site-dependent manipulations of sys.path that it entails” (Source).
In the case of this simple program, -S causes it to run more quickly because there are fewer imports necessary. However, this isn’t an optimization that you can use in most scripts, because you won’t be able to import any third-party libraries.
The example was run on Python 3.11. The following table compares those numbers, in microseconds, to running the same command with Python 3.10:
| Module | Python 3.11 | Python 3.10 | Speed-up |
|---|---|---|---|
_frozen_importlib_external |
1573 | 2255 | 1.43x |
zipimport |
358 | 558 | 1.56x |
encodings |
2611 | 3009 | 1.15x |
encodings.utf_8 |
417 | 409 | 0.98x |
_signal |
174 | 173 | 0.99x |
io |
616 | 1216 | 1.97x |
| Total | 5749 | 7620 | 1.33x |
Your numbers will be different, but you should see the same pattern. Imports are faster on Python 3.11, and this helps Python programs start more quickly.
One big reason for the speedup is how cached bytecode is stored and read. As you learned, Python compiles your source code to bytecode that’s run by the interpreter. For a long time, Python has stored the compiled bytecode in a directory named __pycache__ to avoid unnecessary recompilation.
But in the newest version of Python, many modules are frozen and stored in a way that makes it quicker to load them into memory. You can read more about faster startup in the documentation.
Zero-Cost Exceptions
The internal representation of exceptions is different in Python 3.11. The exception objects are more lightweight, and exception handling has changed so that there’s little overhead in a try … except block as long as the except clause isn’t triggered.
So-called zero-cost exceptions are inspired by other languages like C++ and Java. The goal is that the happy path—when no exception is raised—should be virtually free. Handling an exception will still take some time.
Zero-cost exceptions are implemented by having the compiler create jump tables when your source code is compiled to bytecode. These tables are consulted if an exception is raised. If there are no exceptions, then the code in a try block has no runtime overhead.
Recall the multiplicative inverse example that you worked with earlier. You add a bit of error handling:
 1>>> def inverse(number):
 2...     try:
 3...         return 1 / number
 4...     except ZeroDivisionError:
 5...         print("0 has no inverse")
 6...
If you try to calculate the inverse of zero, then a ZeroDivisionError is raised. In your new implementation, you catch these errors and print a descriptive message. As before, you use dis to peek at the bytecode under the hood:
>>> import dis
>>> dis.dis(inverse)
  1           0 RESUME                   0

  2           2 NOP

  3           4 LOAD_CONST               1 (1)
              6 LOAD_FAST                0 (number)
              8 BINARY_OP               11 (/)
             12 RETURN_VALUE
        >>   14 PUSH_EXC_INFO

  4          16 LOAD_GLOBAL              0 (ZeroDivisionError)
             28 CHECK_EXC_MATCH
             30 POP_JUMP_FORWARD_IF_FALSE    19 (to 70)
             32 POP_TOP

  5          34 LOAD_GLOBAL              3 (NULL + print)
             46 LOAD_CONST               2 ('0 has no inverse')
             48 PRECALL                  1
             52 CALL                     1
             62 POP_TOP
             64 POP_EXCEPT
             66 LOAD_CONST               0 (None)
             68 RETURN_VALUE

  4     >>   70 RERAISE                  0
        >>   72 COPY                     3
             74 POP_EXCEPT
             76 RERAISE                  1
ExceptionTable:
  4 to 10 -> 14 [0]
  14 to 62 -> 72 [1] lasti
  70 to 70 -> 72 [1] lasti
You don’t need to understand the details of the bytecode. But, you can compare the numbers in the leftmost column with the line numbers in the source code. Note that line 2, which is try:, is translated to a single NOP instruction. This is a no operation, which does nothing. More interestingly, at the end of the disassembly is an exception table. This is the jump table that the interpreter will use if it needs to handle an exception.
In Python 3.10 and earlier, there’s a little bit of exception handling at runtime. For example, a try statement is compiled to a SETUP_FINALLY instruction that includes a pointer to the first exception block. Replacing this with the jump table speeds up try blocks when exceptions aren’t raised.
Zero-cost exceptions fit in nicely with an easier-to-ask-forgiveness-than-permission code style, which typically uses a lot of try … except blocks.
Exception Groups
Earlier, you learned about task groups and how they’re able to handle several errors at once. They do so with a new feature called an exception group.
One way to think about exception groups is that they’re regular exceptions wrapping several other regular exceptions. However, while exception groups behave like regular exceptions in many respects, they also support special syntax that helps you handle each of the wrapped exceptions effectively.
You create an exception group by giving it a description and listing the exceptions that it wraps:
>>> ExceptionGroup("twice", [TypeError("int"), ValueError(654)])
ExceptionGroup('twice', [TypeError('int'), ValueError(654)])
Here you’ve created an exception group with the description "twice" that wraps a TypeError and a ValueError. If an exception group is raised without being handled, then it displays a nice traceback that illustrates the grouping and nesting of errors:
>>> raise ExceptionGroup("twice", [TypeError("int"), ValueError(654)])
  + Exception Group Traceback (most recent call last):
  |   File "<stdin>", line 1, in <module>
  | ExceptionGroup: twice (2 sub-exceptions)
  +-+---------------- 1 ----------------
    | TypeError: int
    +---------------- 2 ----------------
    | ValueError: 654
    +------------------------------------
This error message spells out that an exception group with two sub-exceptions was raised. Each wrapped exception is shown in its own panel.
In addition to introducing exception groups, the new version of Python adds new syntax for working effectively with them. You can do except ExceptionGroup as eg and loop over each error in eg. However, this is cumbersome. Instead, you should use the new except* keyword:
>>> try:
...     raise ExceptionGroup("twice", [TypeError("int"), ValueError(654)])
... except* ValueError as err:
...     print(f"handling ValueError: {err.exceptions}")
... except* TypeError as err:
...     print(f"handling TypeError: {err.exceptions}")
...
handling ValueError: (ValueError(654),)
handling TypeError: (TypeError('int'),)
In contrast to regular except statements, several except* statements can trigger. In this example, both the ValueError and TypeError were handled.
Unhandled exceptions inside an exception group will stop your program and show a traceback as usual. Note that errors that are handled by except* are filtered out of the group:
>>> try:
...     raise ExceptionGroup("twice", [TypeError("int"), ValueError(654)])
... except* ValueError as err:
...     print(f"handling ValueError: {err.exceptions}")
...
handling ValueError: (ValueError(654),)
  + Exception Group Traceback (most recent call last):
  |   File "<stdin>", line 2, in <module>
  | ExceptionGroup: twice (1 sub-exception)
  +-+---------------- 1 ----------------
    | TypeError: int
    +------------------------------------
You handle the ValueError, but the TypeError isn’t touched. This is reflected in the traceback, where the twice exception group now only has one sub-exception.
Exception groups and the except* syntax won’t replace regular exceptions and plain except. In fact, you probably won’t have many use cases for creating exception groups yourself. Instead, they’ll mostly be raised by libraries like asyncio.
It’s possible to catch regular exceptions with except*. Still, you’d want to stick to plain except in most cases, and only use except* for code that actually may raise an exception group.
To learn more about how exception groups work, how they can be nested, and the full power of except*, see Python 3.11 Preview: Task and Exception Groups. Irit Katriel, one of Python’s core developers, presented exception groups at the Python Language Summit in 2021 and at PyCon UK in 2022.
You can read more about the motivation for exception groups and the discussions that led to the current implementation in PEP 654.
Exception Notes
One extension to regular exceptions is the ability to add arbitrary notes. PEP 678 describes how these notes can be used to add information to an exception in a different piece of code than the one that raised the exception originally. For example, a testing library like Hypothesis can add information about which test failed.
You can add a note to any exception with .add_note() and look at existing notes by inspecting the .__notes__ attribute:
>>> err = ValueError(678)
>>> err.add_note("Enriching Exceptions with Notes")
>>> err.add_note("Python 3.11")

>>> err.__notes__
['Enriching Exceptions with Notes', 'Python 3.11']

>>> raise err
Traceback (most recent call last):
  ...
ValueError: 678
Enriching Exceptions with Notes
Python 3.11
If an error is raised, then any related notes are printed at the bottom of the traceback.
In the following example, you’re wrapping your main loop in a try … except block that adds a timestamp to the error. This can be useful if you need to compare the error message with a running log for your program:
# timestamped_errors.py

from datetime import datetime

def main():
    inverse(0)

def inverse(number):
    return 1 / number

if __name__ == "__main__":
    try:
        main()
    except Exception as err:
        err.add_note(f"Raised at {datetime.now()}")
        raise
As you’ve seen earlier, this program calculates the multiplicative inverse. Here, you’ve added a short main() function, which you later call.
You’ve wrapped the call to main() in a try… except block that catches any Exception. While you normally want to be more specific, you use Exception here to effectively add context to any exception that your main program happens to raise.
When you run this code, you’ll see the expected ZeroDivisionError. Additionally, your traceback contains a timestamp that may help you in your debugging efforts:
$ python timestamped_errors.py
Traceback (most recent call last):
  ...
ZeroDivisionError: division by zero
Raised at 2022-10-24 12:18:13.913838
You can use the same pattern to add other useful information to your exceptions. See this Python 3.11 preview and PEP 678 for more information.
Negative Zero Formatting
One weird concept that you may run into when doing calculations with floating-point numbers is negative zero. You can observe that negative zero and regular zero are rendered differently in your REPL:
>>> -0.0
-0.0
>>> 0.0
0.0
Normally, there’s only one zero, and it’s neither positive nor negative. However, representation of floating-point numbers is easier when allowing for signed zeros. Internally, numbers are represented with their sign and magnitude as separate quantities. It’s simpler to represent zero just like any other number, with either a positive or a negative sign.
Python knows that both representations are equal:
>>> -0.0 == 0.0
True
In general, you don’t need to worry about negative zero in your calculations. Still, you may get some unexpected results when you present data with small negative numbers that are rounded:
>>> small = -0.00311
>>> f"A small number: {small:.2f}"
'A small number: -0.00'
Normally, when a number is rounded to zero, it’ll be represented as an unsigned zero. In this example, the small negative number is rounded to two decimal places when presented as an f-string. Note that a negative sign is shown before the zero.
PEP 682 introduces a small extension to the format mini-language used by f-strings and str.format(). In Python 3.11, you can add a literal z to the format string. This will force any zeros to be normalized to positive zero before formatting:
>>> small = -0.00311
>>> f"A small number: {small:z.2f}"
'A small number: 0.00'
You’ve added a z to the format string: z.2f. This ensures that negative zeros don’t bleed through into user-facing representations of your data.
Dead Batteries
One of Python’s strengths in its early days was that it came with batteries included. This somewhat mythical phrase is used to point out that a lot of functionality is included in the programming language itself. For example, Python was one of the earliest languages to include high-level support for containers like lists, tuples, and dictionaries.
However, the real batteries are available in Python’s standard library. This is a collection of packages that come included with every installation of Python. For example, the standard library includes functionality for:
- Parsing different file types and formats, like JSON and XML
- Running a simple web server
- Composing and sending emails
- Communicating with sockets and other processes
In total, the standard library consists of several hundred modules:
>>> import sys
>>> len(sys.stdlib_module_names)
305
You can see which modules are available in the standard library by inspecting sys.stdlib_module_names. Having so much power built into the language was a boon for Python in the early days.
Over time, the usefulness of the standard library has diminished, primarily because distribution and installation of third-party modules have gotten much more convenient. Many of Python’s most popular features now live outside the main distribution. Data science libraries like NumPy and pandas, visualization tools like Matplotlib and Bokeh, and web frameworks like Django and Flask are all developed independently.
PEP 594 describes an initiative to remove dead batteries from the standard library. The idea is that modules that are no longer relevant should be removed from the standard library. This will help the maintainers of Python focus their efforts where they’re most needed and will have the greatest benefit. Additionally, a slimmer standard library makes Python better suited to alternative platforms like microcontrollers or browsers.
No modules are removed from the standard library in this release of Python. Instead, several little-used modules are marked for removal in Python 3.13. The modules in question will start to emit a warning in Python 3.11:
>>> import imghdr
<stdin>:1: DeprecationWarning: 'imghdr' is deprecated and slated for
           removal in Python 3.13
If your code starts to issue these kinds of warnings, then you should start thinking about rewriting your code. In most cases, a more modern alternative will be available. For example, if you’re currently using imghdr, then you can rewrite your code to use python-magic instead. Here, you’re identifying the type of a file:
>>> import imghdr
<stdin>:1: DeprecationWarning: 'imghdr' is deprecated and slated for
           removal in Python 3.13
>>> imghdr.what("python-311.jpg")
'jpeg'

>>> import magic
>>> magic.from_file("python-311.jpg")
'JPEG image data, JFIF standard 1.02, precision 8, 1920x1080, components 3'
Both the old, deprecated imghdr and the third-party python-magic library recognize that python-311.jpg represents a JPEG image file.
Note: The python-magic package relies on a C library that needs to be installed. Check the documentation for details on how to install it on your operating system.
You can find a list of all the deprecated modules in the dead batteries PEP.
So, Should You Upgrade to Python 3.11?
This concludes your tour of the coolest improvements and new features in Python 3.11. An important question is whether you should upgrade to the new version of Python. And if so, when is the best time to upgrade?
As usual with these kinds of questions, the answer is a loud and clear it depends!
The biggest wins with Python 3.11 are the improvements to the developer experience: the better error messages and the faster code execution. These are great incentives for upgrading the environment that you use for local development as soon as possible. This is also the kind of upgrade that carries the least risk, as any bugs that you encounter should have limited effect.
The increased speed is also a good argument to update your production environment. However, as always, you should be careful when updating environments where bugs and errors can have serious consequences. Make sure you do proper testing before running the switch. As part of the Faster CPython project, the internal changes in the new version have been bigger and more wide-reaching than usual. Pablo Galindo Salgado, the release manager, talks about how these changes affected the release process on the Real Python podcast.
One common problem with new releases is that some of the third-party packages that you depend on might not be ready for the new release on day one. For Python 3.11, big packages like NumPy and SciPy started to package wheels for 3.11 well before the release. Hopefully, you won’t have to wait for your dependencies to be ready for the upgrade this time around.
Another aspect of upgrading is when you should start taking advantage of new syntax. If you’re maintaining a library that supports older versions of Python, then you can’t use TaskGroup() or syntax like except* in your code. Still, your library will be faster for anyone using Python 3.11.
If, instead, you’re creating an application where you control the environment it’s running in, then you’ll be able to use the new features as soon as you’ve upgraded the environment.
Conclusion
A new release of Python is always cause for celebration, and acknowledgment of all the effort that’s been poured into the language by volunteers from around the world.
In this tutorial, you’ve seen new features and improvements like:
- Better error messages with more informative tracebacks
- Faster code execution due to considerable effort in the Faster CPython project
- Task and exception groups that simplify working with asynchronous code
- Several new typing features that improve Python’s static typing support
- Native TOML support for working with configuration files
You may not be able to take advantage of all the features right away. Still, you should strive to test your code on Python 3.11 to make sure your code is future-ready. Do you notice any speedup? Share your experience in the comments below.
Free Download: Click here to download free sample code that demonstrates some of the new features of Python 3.11.
Watch Now This tutorial has a related video course created by the Real Python team. Watch it together with the written tutorial to deepen your understanding: Cool New Features in Python 3.11


