
GitHub Copilot is a thrilling new technology that promises to deliver to your code editor a virtual assistant powered by artificial intelligence, and it stirred up considerable controversy when it was released to the general public. Python is among the languages that are particularly well-supported by this tool. After reading this tutorial, you’ll know whether GitHub Copilot is a risk, a gimmick, or a true game changer in software engineering.
In this tutorial, you’ll learn how to:
- Install the GitHub Copilot extension in your code editor
- Transform your natural language description of a task into working code
- Choose between multiple alternative intelligent code completion suggestions
- Explore unfamiliar frameworks and programming languages
- Teach GitHub Copilot how to use your custom API
- Exercise test-driven development with a virtual pair programmer in real time
To continue with this tutorial, you need to have a personal GitHub account and a code editor such as Visual Studio Code or an integrated development environment like PyCharm.
Free Download: Click here to download a free cheat sheet of keyboard shortcuts to make coding with GitHub Copilot even faster.
Get Started With GitHub Copilot in Python
GitHub Copilot is the first commercial product based on the OpenAI Codex system, which can translate natural language to code in over a dozen programming languages in real time. OpenAI Codex itself is a descendant of the GPT-3 deep learning language model. The neural network in Codex was trained on both text and hundreds of millions of public code repositories hosted on GitHub.
Note: You can learn more about GPT-3 by listening to Episode 121 of the Real Python Podcast, featuring data scientist Jodie Burchell.
GitHub Copilot understands a few programming languages and many human languages, which means that you’re not confined to English only. For example, if you’re a native Spanish speaker, then you can talk to GitHub Copilot in your mother tongue.
Initially, the product was only available as a technical preview to a select group of people. This has changed recently, and today, anyone can experience the incredible power of artificial intelligence in their code editors. If you’d like to take it for a test drive, then you’ll need a subscription for GitHub Copilot.
Subscribe to GitHub Copilot
To enable GitHub Copilot, go to the billing settings in your GitHub profile and scroll down until you see the relevant section. Unfortunately, the service doesn’t come free of charge for most people out there. At the time of writing, the service costs ten dollars per month or a hundred dollars per year when paid upfront. You can enjoy a sixty-day trial period without paying anything, but only after providing your billing information.
Note: Be sure to cancel the unpaid subscription plan before it expires to avoid unwanted charges!
Students and open-source maintainers may get a free GitHub Copilot subscription. If you’re a lucky one, then you’ll see the following information after enabling the service:
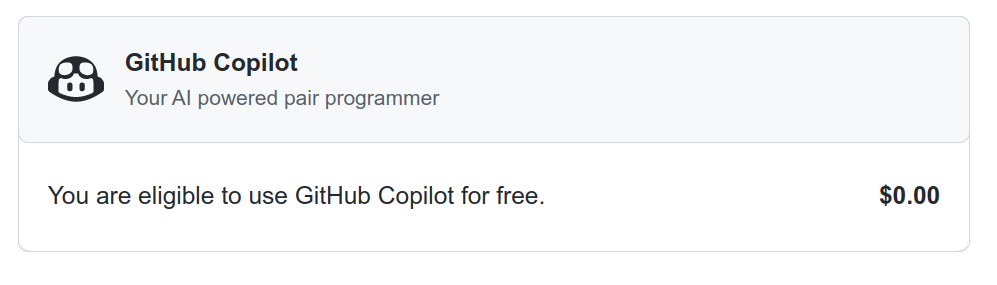
GitHub will verify your status once a year based on proof of academic enrollment, such as a picture of your school ID or an email address in the .edu domain, or your activity in one of the popular open-source repositories.
For detailed instructions on setting up and managing your GitHub subscription, follow the steps in the official documentation. Next up, you’ll learn how to install the GitHub Copilot extension for Visual Studio Code. If you’d prefer to use GitHub Copilot with PyCharm instead, then skip ahead to learn how.
Install a Visual Studio Code Extension
Because Microsoft owns GitHub, it’s no surprise that their Visual Studio Code editor was the first tool to receive GitHub Copilot support. There are a few ways to install extensions in Visual Studio Code, but the quickest one is probably by bringing up the Quick Open panel using Ctrl+P or Cmd+P and then typing the following command:
ext install GitHub.copilot
When you confirm it by pressing Enter, it’ll install the extension and prompt you to reload the editor afterward.
Alternatively, you can find the Extensions icon in the Activity Bar located on the left-hand side of the window and try searching for the GitHub Copilot extension on the Visual Studio Marketplace:
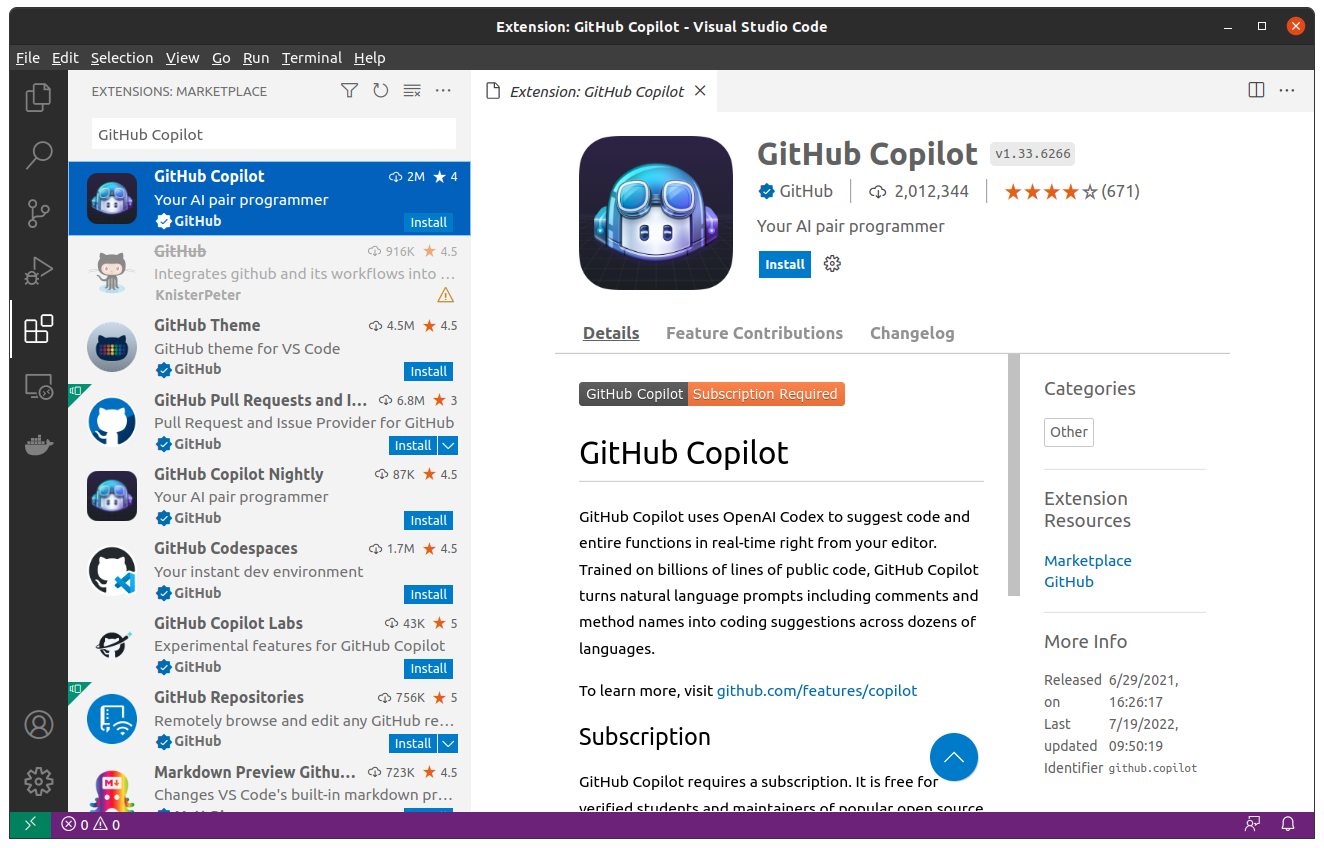
You might also show the Extensions view in Visual Studio Code directly by using a corresponding keyboard shortcut.
After the installation is complete, Visual Studio Code will ask you to sign in to GitHub to give it access to your GitHub profile, which your new extension requires:
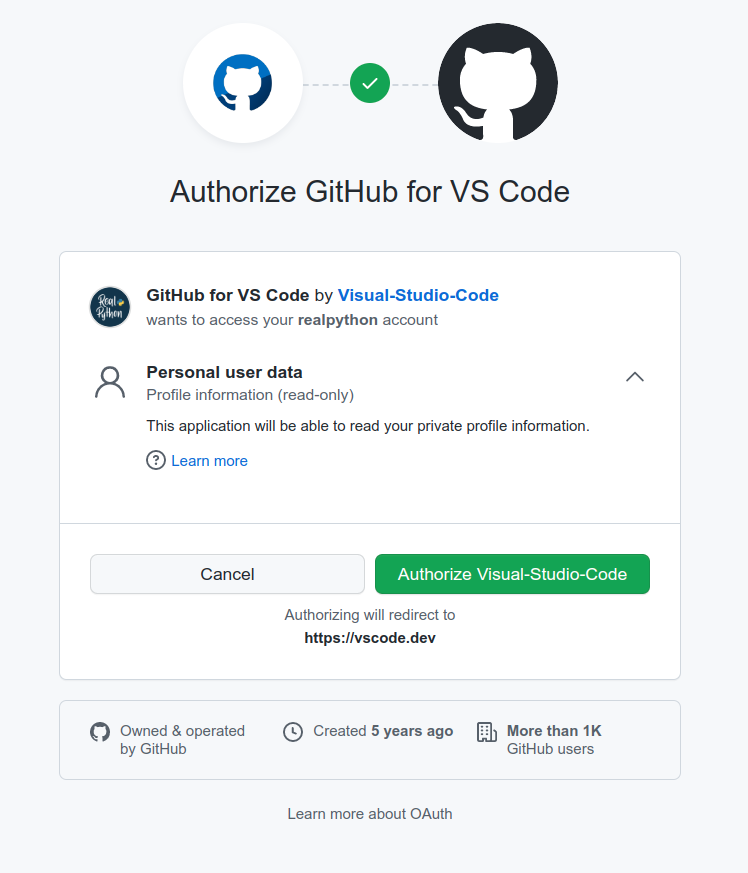
Visual Studio Code needs to know who you are to verify your GitHub Copilot subscription status. However, granting access to your GitHub profile will also allow the editor to read your private repositories. If you change your mind, then you can revoke this authorization at any time by going to your GitHub profile settings and finding GitHub for VS Code in the Authorized OAuth Apps.
Note: Check out the official Getting started with GitHub Copilot in Visual Studio Code guide if you’re stuck at any point.
To make working with GitHub Copilot in Visual Studio Code even more productive, here are the most common keyboard shortcuts worth remembering:
| Action | Windows / Linux | macOS |
|---|---|---|
| Trigger inline suggestions | Alt+\ | Option+\ |
| See the next suggestion | Alt+] | Option+] |
| See the previous suggestion | Alt+[ | Option+[ |
| Accept a suggestion | Tab | Tab |
| Dismiss an inline suggestion | Esc | Esc |
| Show all suggestions in a new tab | Ctrl+Enter | Ctrl+Enter |
If you run into issues getting the default shortcuts to work, then try defining your own key bindings in Visual Studio Code. This might be especially helpful if you’re working with a non-US keyboard layout.
Sometimes GitHub Copilot suggestions may get in your way. If that’s the case, then you can disable them globally or for a particular programming language by clicking on the extension’s icon in the bottom right corner of the editor’s window:
That’s it! You’re all set to start using the GitHub Copilot extension in Visual Studio Code. But if you’d prefer to use GitHub Copilot with PyCharm, read on to find out how.
Install a PyCharm Plugin
PyCharm is one of many popular integrated development environments provided by JetBrains and sharing a common GitHub Copilot plugin. You can install that plugin by opening the Settings in your IDE, and choosing Plugins from the list of options. Then, on the Marketplace tab, search for the GitHub Copilot plugin and click the Install button next to it:

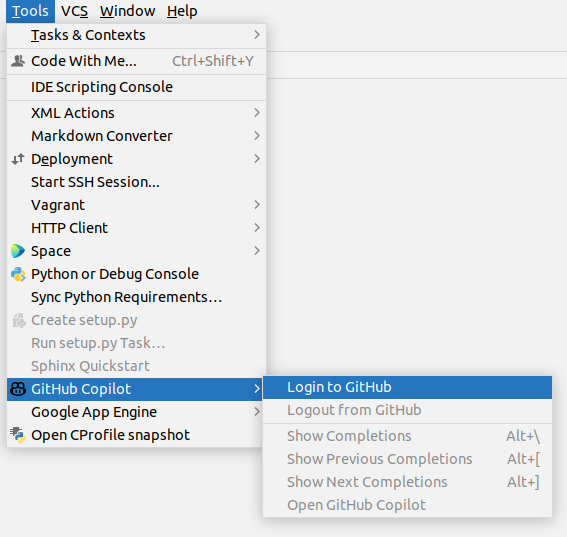
After installing the plugin, you’ll be prompted to restart your IDE. When you do, you’ll have to log in to GitHub by choosing Tools from the PyCharm menu, then GitHub Copilot, and Login to GitHub:
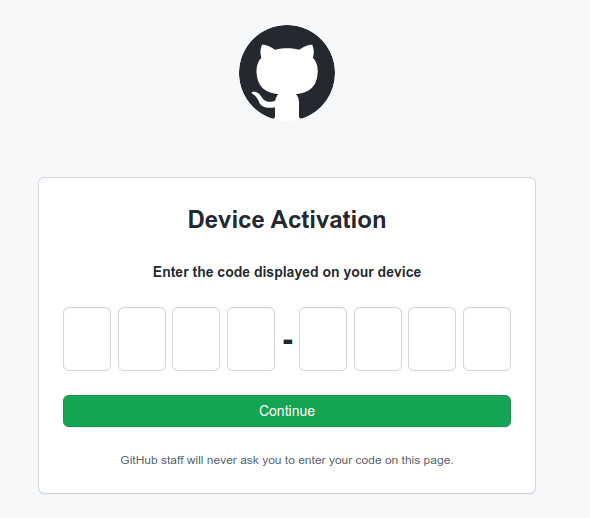
That’ll generate a pseudo-random device code that you must copy and paste into the Device Activation page in your web browser, which you’ll be taken to after logging in to GitHub:
As with Visual Studio Code, you’ll need to authorize PyCharm’s plugin to verify your identity and the corresponding GitHub Copilot subscription status. However, PyCharm uses the GitHub API instead of an OAuth token, so the authorization process looks a little different:
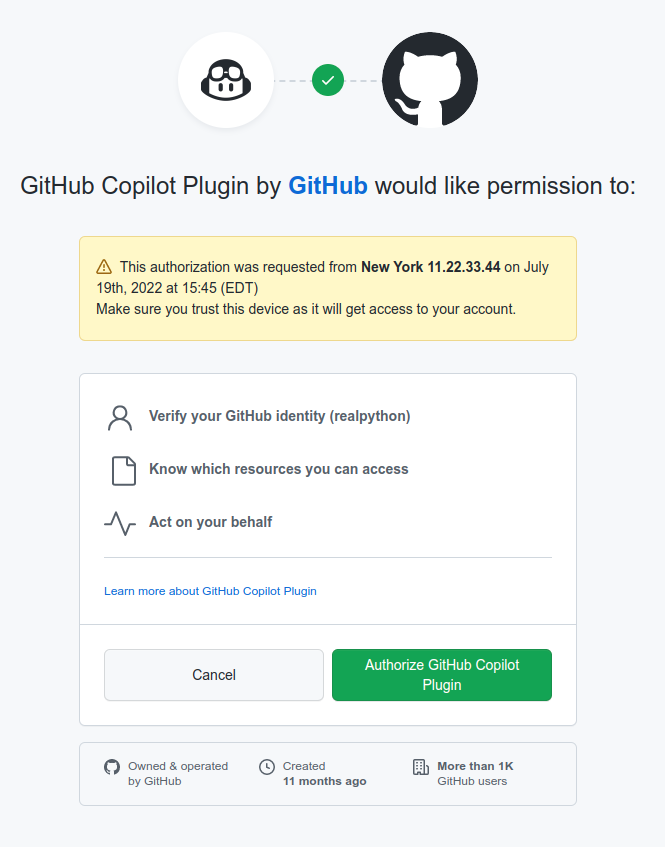
Note that granting access to your GitHub profile will allow the plugin to retrieve your profile information, such as your email address, and to read your private repositories. If you change your mind, then you can revoke this authorization at any time by going to your GitHub profile settings and finding GitHub Copilot Plugin in the Authorized GitHub Apps.
Note: Check out the official Getting started with GitHub Copilot in a JetBrains IDE guide if you’re stuck at any point.
To make working with GitHub Copilot in PyCharm even more productive, here are the most common keyboard shortcuts worth remembering:
| Action | Windows / Linux | macOS |
|---|---|---|
| Trigger inline suggestions | Alt+\ | Option+\ |
| See the next suggestion | Alt+] | Option+] |
| See the previous suggestion | Alt+[ | Option+[ |
| Accept a suggestion | Tab | Tab |
| Dismiss an inline suggestion | Esc | Esc |
| Show all suggestions in a new tab | Alt+Enter | Alt+Enter |
Sometimes GitHub Copilot automatic completions may get in your way. If that’s the case, then you can disable them globally or for a particular programming language by clicking on the plugin’s icon in the bottom right corner of the editor’s window:
That’s it! You’re all set to start using the GitHub Copilot plugin in PyCharm.
Hand Over the Reins to GitHub Copilot
Now it’s time to make sure GitHub Copilot is working as expected in either Visual Studio Code or PyCharm. To check if GitHub Copilot is working as expected in your Visual Studio Code editor, create a new text file, select Python as the underlying programming language, and start writing a sample function signature, such as hello():
As soon as you type the colon (:) at the end of the first line to introduce a new code block, GitHub Copilot fills in the suggested function body for you. Until you either accept it by hitting Tab or reject it with Esc, it’ll show up in gray font. The suggested code calls the print() function to display the Hello World text on the screen in this case. While that wasn’t spectacular, it confirms that GitHub Copilot is indeed working correctly.
Note: Did you notice how quickly the extension filled in your function body? The engineering team behind GitHub Copilot put a lot of effort into ensuring a low latency of the given suggestions for a better developer experience.
Working with GitHub Copilot in PyCharm is virtually the same as in other code editors. To verify if the plugin installation succeeded, try a different example. Start writing a function signature whose name may indicate that you wish to add two numbers together, such as add(a, b):
Sure enough, GitHub Copilot gives a very sensible suggestion, which returns the sum of a and b. Notice the difference between returning a value from the function and printing the result on the screen. Your clever virtual assistant can infer the intent from the function’s name and arguments.
Note: It’s fair to say that there’s no inherent magic to GitHub Copilot. It was trained on an enormous amount of high-quality data, allowing it to decide on the most likely output based on what it’s seen so far in your file or project. Because the tool can’t understand your code, it doesn’t always get those suggestions right.
In the rest of this tutorial, you’ll explore several hands-on use cases for GitHub Copilot in daily software engineering tasks. You’ll learn how to take your productivity to a whole new level by getting instant code suggestions tailored to your programming needs.
Synthesize Python Code From Natural Language
Because GitHub Copilot was trained on natural language as well as curated samples of different programming languages, it appears to understand both domains. Therefore, it’s perfectly possible to explain an abstract problem to GitHub Copilot using plain English or another natural language and expect it to generate the corresponding code in the desired programming language.
The underlying machine learning model is also capable of doing the opposite—that is, explaining a piece of code in a natural language or even translating one programming language into another. Imagine how helpful this could be for beginners and creative souls who have a vision of what they want to accomplish but haven’t yet mastered computer programming.
You’re about to see how this translation between human and computer languages looks in practice.
Use a Python Comment to Describe the Problem
Although influential figures in the programming world like Robert C. Martin consider code comments to be an anti-pattern, comments can sometimes be helpful in explaining why a certain piece of code looks the way it does. You typically write comments for your future self or your teammates working on the same codebase.
When you add GitHub Copilot into the mix, then it becomes yet another target audience who can read your code comments. Consider the following single-line comment in Python, which describes the classic Hello, World! program:
# Print "Hello, World!"
After typing that comment into your code editor, you’ll notice that GitHub Copilot doesn’t automatically pick it up. When you choose to communicate with it through comments, you must open the GitHub Copilot side panel or tab to see the suggestions. Alternatively, you may start typing a bit of code to have it auto-completed. Either way, writing the comment from above should present you with the following Python code:
print("Hello, World!")
That’s almost the same suggestion that you got when you verified the Visual Studio Code extension by writing the hello() function stub. However, this time, you get a slightly different output. GitHub Copilot understands that you wish to treat the quoted fragment of your comment as literal text rather than an instruction.
Apparently, that was too easy for GitHub Copilot. How about raising the bar by requesting a more specific output? For example, you may want to print Hello, World! backward in Spanish:
# Print "Hello, World!" backward in Spanish.
You’ll see new suggestions after refreshing the GitHub Copilot panel in your editor. Their number and quality may vary each time you trigger GitHub Copilot. The best one that you’ll ever get for this particular comment is this:
print("¡Hola, mundo!"[::-1])
Now, that’s impressive! GitHub Copilot nails it by generating not only correct but also Pythonic code that experienced Pythonistas would write themselves. The suggestions will get even more interesting when you include more comments.
Add More Comments to Increase the Problem Complexity
Using a single-line comment to describe a problem is fine, but you can only pack so much content in it. Fortunately, it’s possible to combine multiple consecutive comments into a logical and cohesive story that GitHub Copilot will treat as a whole. It’s best to put a complete sentence on each line without breaking it, but you can optionally include an explicit backslash (\) in the middle of a sentence to mark a line break:
# Ask the user to provide a line of text.
# Scan the text for the following mildly offensive words: \
# arse, bloody, damn, dummy.
# If you find any, then replace its letters with asterisks \
# except for the first letter in each offensive word.
# Print the resulting text.

def main():
Be sure to use grammatically correct language and watch out for your punctuation to get accurate results. In this case, you also follow up the comments with a function signature, which provides additional clues for GitHub Copilot. One of the suggestions that you’ll get looks pretty darn good:
def main():
    text = input("Enter a line of text: ")
    offensive_words = ["arse", "bloody", "damn", "dummy"]
    for word in offensive_words:
        if word in text:
            text = text.replace(word, word[0] + "*" * (len(word) - 1))
    print(text)
If you’re looking for an explanation of what’s going in the function above, look no further than the textual description in your comments. The suggested code very closely mirrors what you described there.
Note: GitHub Copilot generates code in a variety of styles and conventions. To achieve consistency and remove unnecessary distractions, all the code suggestions presented in this tutorial have been reformatted to comply with the PEP 8 style guide. Remember that you can reformat the code yourself in most editors with the push of a button.
When you call the main() function, you’ll be able to assess how well the generated code performs:
Enter a line of text: She loves you, dummy.
She loves you, d****.
Isn’t that amazing? You gave GitHub Copilot a natural language description of a task, and it got exactly the right solution for you.
Note: Keep in mind that the suggestions you’ll get might be different from those presented in this tutorial. Sometimes it takes trial and error before getting the desired result, so try tweaking your comments a little bit if you’re not getting satisfactory results immediately.
An important point to note about GitHub Copilot is that it has a number of filters implemented to block truly offensive words, obscenity, and sensitive information like personal data or secret API keys. It’ll strive to never give you suggestions containing those elements. You can experiment with those filters by trying to lure GitHub Copilot into giving away someone’s personal details or secrets:
| Code Fragment | Suggested Completion |
|---|---|
offensive_words = [ |
None |
# My phone number is |
# My phone number is +1 (###) ###-#### |
GITHUB_API_KEY = |
GITHUB_API_KEY = '<GITHUB_API_KEY>' |
In most cases, it does a pretty good job of recognizing sensitive information and providing a random or anonymized output. However, the filtering mechanism isn’t perfect, so it could theoretically leak someone’s actual data from its training dataset. According to the official website, the likelihood of this happening is tiny:
The vast majority of the code that GitHub Copilot suggests has never been seen before. Our latest internal research shows that about 1% of the time, a suggestion may contain some code snippets longer than ~150 characters that matches the training set. (Source)
You’ll explore this possibility in more detail later, but now, it’s time to step up your game by making GitHub Copilot solve a programming puzzle for you.
Solve a Programming Contest Puzzle
To test the true power of GitHub Copilot, you can copy and paste a fragment of the textual description of a coding challenge and see how it’ll cope. For example, why don’t you grab the first part of the Sonar Sweep puzzle from the first day of the 2021 Advent of Code calendar:
# For example, suppose you had the following report:
#
# 199
# 200
# 208
# 210
# 200
# 207
# 240
# 269
# 260
# 263
#
# (...)
#
# In this example, there are 7 measurements that are larger \
# than the previous measurement.
#
# How many measurements are larger than the previous measurement?

def solve(measurements):
The complete description of the problem is slightly longer and was abbreviated in the code block above to save space. In short, your goal is to determine the number of times a depth measurement increases with respect to the previous measurement. GitHub Copilot works out the solution to this specific problem particularly well, considering how many people have tackled exactly the same task and shared their solutions on GitHub:
def solve(measurements):
    count = 0
    for i in range(1, len(measurements)):
        if measurements[i] > measurements[i - 1]:
            count += 1
    return count
It’s a short loop that starts at the second item on the measurements list and compares the current reading to the previous one. If the current reading is bigger, then it increases the counter, which the function returns at the end. This solution works correctly and is reasonably efficient and readable, but don’t feel obliged to use GitHub Copilot’s suggestions in literal form. It’s not all or nothing!
You can edit the code generated by GitHub Copilot just like your own code. Sometimes, you may not like its formatting, the naming conventions that it applied, or a specific fragment of the logic that you’d rather rewrite. On other occasions, seeing a suggestion may inspire you to come up with a more clever alternative. In this case, you could use this one-liner solution, for instance:
def solve(measurements):
    return sum(1 for x, y in zip(measurements, measurements[1:]) if y - x > 0)
You take the sum of the sequence of ones produced with a generator expression for every pair of adjacent measurements if their difference is positive. Depending on your Python knowledge level, you may like this or the suggested code snippet better.
Now you know how to generate code from natural language using one or more Python comments. However, as a software engineer, you’ll probably appreciate contextual code suggestions even more.
Receive Even More Intelligent Code Completion Suggestions
You can think of GitHub Copilot as an intelligent code completion mechanism on steroids that understands the context of your project at a deep level, providing the most appropriate suggestions for you. When you work with GitHub Copilot long enough, it may sometimes give you the creepy feeling that it can read your mind. You’ll see a few examples that demonstrate such behavior in this section.
Let GitHub Copilot Read Your Mind
Say that you want to find the roots of the second-degree polynomial, also known as the quadratic function, with three coefficients: 𝑎, 𝑏, and 𝑐. You can express such a function using the following algebraic form:

For example, the concrete function 𝑥2 + 2𝑥 - 3 has these coefficient values: 𝑎 = 1, 𝑏 = 2, 𝑐 = -3, which you can use to calculate the so-called discriminant, often denoted with the Greek letter delta:

In this case, the discriminant of the function is equal to sixteen (Δ = 16) when you replace the letters 𝑎, 𝑏, and 𝑐 with the corresponding values in the formula above. Depending on the sign of the discriminant, your quadratic function can have two, one, or no roots at all:

Since the discriminant calculated before is a positive number, sixteen, you know that your quadratic function has precisely two roots, which evaluate to 𝑥1 = -3 and 𝑥2 = 1 when you apply the formulas above. Plugging either of them into your quadratic function as the value of the 𝑥 variable makes the function return zero. The roots of the function are the points where the corresponding parabola crosses the horizontal axis when plotted.
You can now implement a Python function to find the roots of such a polynomial based on its three coefficients, 𝑎, 𝑏, and 𝑐. You’ll want to follow the same algorithm by calculating the discriminant and evaluating the correct number of roots. Start by writing a descriptive function signature, which may suggest what your intent is:
def find_roots(a, b, c):
After a short while, GitHub Copilot will start giving you suggestions. If you’re lucky, then one of them will be astonishingly accurate:
def find_roots(a, b, c):
    d = b**2 - 4 * a * c
    if d < 0:
        return None
    elif d == 0:
        return -b / (2 * a)
    else:
        return (-b + d**0.5) / (2 * a), (-b - d**0.5) / (2 * a)
The function calculates the discriminant using the correct formula and stores the result in a helper variable. Depending on the discriminant’s sign, it returns None, a single root value, or a tuple comprising the two root values, all calculated correctly. Note that the suggested solution uses the exponentiation operator (**) to compute the square root of the discriminant. That avoids importing the sqrt() function from Python’s math module.
Note: The suggestions that you see might look different because artificial intelligence isn’t completely deterministic, as it keeps learning new things. You may even get alternative results for identical input requested at other times. That’s especially true when you have additional source code in your project, from which GitHub Copilot will draw the context.
Okay, but the generated function can only find real number roots if they exist. What if you wanted to reveal all roots in the domain of the complex numbers instead? In the next section, you’ll discover how to give such hints to GitHub Copilot.
Provide Context to Get Better Suggestions
The fundamental theorem of algebra states that a degree 𝑛 polynomial with complex coefficients has exactly 𝑛 complex roots. In other words, a quadratic function, which is a second-degree polynomial, always has exactly two complex roots even when there are none in the real domain.
Consider the function 𝑥2 + 1, whose determinant is negative, indicating no roots. You can confirm the lack of roots graphically by plotting the function’s parabola, which doesn’t cross the horizontal axis anywhere. However, the same function has two complex roots, 𝑥1 = -𝑖 and 𝑥2 = 𝑖, where 𝑖 is the imaginary unit that evaluates to -1 when squared: 𝑖2 = -1.
How can you request that GitHub Copilot change the implementation so that you’ll get the complex roots instead of the real ones?
You need to add constraints to the problem by giving GitHub Copilot some context to draw from. For example, you may import a module that you wish to be used or write a Python docstring that describes the expected result in natural language:
import cmath

def find_roots(a, b, c):
    """Return a tuple of complex numbers."""
Here, you import the cmath module, which is the math module’s complex counterpart. It contains the cmath.sqrt() function, which can compute the square root of a negative number, whereas math.sqrt() raises an error in such a case:
>>> import cmath
>>> cmath.sqrt(-1)
1j

>>> import math
>>> math.sqrt(-1)
Traceback (most recent call last):
  File "<stdin>", line 1, in <module>
ValueError: math domain error
The square root of -1 in the complex domain yields the imaginary unit, which Python refers to as 1j. You can read more about using complex numbers in Python to learn why it uses the letter j instead of i to denote the imaginary unit.
Your docstring indicates the expected data type that the function should return. In some cases, you may need to clarify your expectations by including more specific words. For instance, writing “a tuple of both complex numbers” will imply a tuple consisting of exactly two elements. On the other hand, the word pair instead of tuple would be less explicit.
Note: Apart from docstrings, GitHub Copilot understands type hints in your Python code.
With the addition of these two small clues, GitHub Copilot will now generate a different implementation for the very same function signature:
import cmath

def find_roots(a, b, c):
    """Return a tuple of complex numbers."""
    d = (b**2) - (4 * a * c)
    x1 = (-b + cmath.sqrt(d)) / (2 * a)
    x2 = (-b - cmath.sqrt(d)) / (2 * a)
    return x1, x2
It calculates the discriminant as before but no longer checks its sign. Instead, the function calculates the two complex roots by leveraging the cmath.sqrt() function, just as you wanted. You can test your new function in the Python REPL to check if the function calculates both complex roots correctly:
>>> import cmath

>>> def find_roots(a, b, c):
...     """Return a tuple of complex numbers."""
...     d = (b**2) - (4 * a * c)
...     x1 = (-b + cmath.sqrt(d)) / (2 * a)
...     x2 = (-b - cmath.sqrt(d)) / (2 * a)
...     return x1, x2
...
>>> find_roots(1, 0, 1)  # Function f(x) = x² + 1
(1j, -1j)

>>> 1j**2 + 1
0j

>>> (-1j)**2 + 1
0j
This code works brilliantly! The function x² + 1 returns 0 for the two complex roots, 1j and -1j.
Even if that doesn’t strike you as particularly exciting, you’ll probably be impressed by the creativity of GitHub Copilot, which can save you a lot of time. Next up, you’ll use GitHub Copilot to generate the body of a class.
Benefit From GitHub Copilot’s Creativity
How many times have you been designing a new data type, only to get stuck on figuring out the right attributes or their implementation? With GitHub Copilot, you can sit back and relax while it invents new attributes, methods, and properties out of thin air for you at the push of a Tab.
Suppose you wanted to define a Person class using Python’s data classes. You start by giving your new data type a meaningful name and introducing the first attribute, called .first_name:
GitHub Copilot immediately picks up from there by suggesting the next most likely attribute, .last_name, and then .age. However, you know that a person’s age changes over time, so you keep a record of their birth date instead. The next logical suggestion from GitHub Copilot is a method that calculates a person’s age based on the current date. When you define a new property, it neatly completes its body by concatenating the first and last names.
In the end, this is the result that you get with only a few keystrokes in your code editor:
from dataclasses import dataclass
from datetime import date

@dataclass
class Person:
    first_name: str
    last_name: str
    birth_date: date

    def age(self):
        return (date.today() - self.birth_date).days // 365

    @property
    def full_name(self):
        return f"{self.first_name} {self.last_name}"
It’s a huge time saver and a productivity boost like no other. Even when you know what to type, GitHub Copilot lets you code with the speed of thought, guessing what you might be thinking about and then providing a suitable suggestion, which you can accept with a single click of a button or a keystroke.
Become a Programming Polyglot With a Personal Translator
It’s not uncommon to mix multiple languages, such as HTML, CSS, JavaScript, Django templating language, and Python, in one file. Fortunately, GitHub Copilot knows over a dozen programming languages, even more frameworks, and several human languages. It has no trouble switching between them on the go depending on the context, all without breaking your flow.
For example, you may want to define a Python variable to store a SQL query that retrieves users by a matching name. As long as you use the right words in your variable name, you should get a sensible suggestion, such as this one:
Notice how you get the individual lines separately in stages because you defined a multiline string literal using the triple-quote ("""). The result depicted in the video above is the following:
query_users_by_first_or_last_name = """
SELECT * FROM users
WHERE first_name LIKE %s OR last_name LIKE %s
"""
The query looks okay at first glance, although GitHub Copilot made some assumptions about your table name and the two columns to search through. Still, it’s comforting to see that it produced a prepared statement rather than a plain string with a SQL query, thus helping to prevent a SQL injection attack.
All right, you’re getting quite comfortable with GitHub Copilot at this point. But sit tight because there’s still a lot of ground to cover!
Practice Pair Programming With a Virtual Buddy
Even before visiting the official GitHub Copilot website, you’ll quickly notice in your web search results that it’s being advertised as an AI pair programmer. In a nutshell, pair programming is a popular Agile technique that involves two engineers working on the same piece of functionality together. On the surface, it costs more money to produce software like this, but in the long run, it promises fewer costly-to-fix bugs.
The benefits of pair programming include:
- Higher quality of produced code
- Better overall understanding of the codebase across the team
- Knowledge and sharing of best practices
It’s hard to beat the advantages of sitting next to a real person who can give honest feedback on your code, discover underlying issues, and lead you in the right direction. Many benefits of pair programming are only seen when it’s done as a collaborative team effort. On the other hand, artificial intelligence may potentially give you poor suggestions, resulting in lower code quality. Ultimately, it’s up to you to decide whether to listen!
That said, GitHub Copilot works really well at increasing your productivity, as you’re about to find out.
Generate Sample Data Fixtures for Testing
During your daily development, you often need to think of sample data for your tests, documentation, or default settings. If you’re drawing a blank, then GitHub Copilot comes to the rescue. For example, recall the Person class that you defined earlier:
from dataclasses import dataclass
from datetime import date

@dataclass
class Person:
    first_name: str
    last_name: str
    birth_date: date

    def age(self):
        return (date.today() - self.birth_date).days // 365

    @property
    def full_name(self):
        return f"{self.first_name} {self.last_name}"
Now, suppose you need to create a few instances of this class to represent employees of a company. While you’re still editing the same file or have imported the Person class from another module, you may use GitHub Copilot to populate a list of employees. Declare an empty Python list using an expressive variable name, and hit Enter just after the opening square bracket ([) to trigger the suggestions:
employees = [
As you keep hitting Tab after each suggested line, you might end up with the following list of employees:
employees = [
    Person("John", "Smith", date(1970, 1, 1)),
    Person("Jane", "Doe", date(1980, 1, 1)),
    Person("Joe", "Doe", date(1990, 1, 1)),
    Person("Jack", "Doe", date(2000, 1, 1)),
    Person("Jill", "Doe", date(2010, 1, 1)),
    Person("Jana", "Doe", date(2020, 1, 1)),
]
GitHub Copilot successfully figured out to use your Person class for the employee list elements. Later, you can use that list as a common test fixture for a group of test cases that require it. For example, you may wrap the list in a function that your test framework will call. GitHub Copilot can be an excellent help in the testing process itself by suggesting both tests and the code under test.
Wish for a Test Case to Magically Appear
It’s a good practice to give your test functions long and descriptive names because they get to be shown in the test run report. When one of them fails, a well-named test function will immediately draw your attention to what’s not working. Advocates of behavior-driven development recommend using whole sentences starting with the word should to focus on the behavior under test, which makes the test look like a business requirement specification.
The added benefit of such sometimes ridiculously long function names is that GitHub Copilot can use them to assist you in generating the test case implementation. For example, define the following function signature in a test module of your Person class:
def test_should_not_be_able_to_set_full_name():
Most test frameworks will automatically discover test cases if they follow standard naming conventions, such as when you prefix test function names with test_. With GitHub Copilot, the suggestion triggered for the function above may look like the following:
def test_should_not_be_able_to_set_full_name():
    person = Person("John", "Doe", date(1980, 1, 1))
    with pytest.raises(AttributeError):
        person.full_name = "Jane Doe"
Curiously enough, GitHub Copilot prefers an external pytest library, which you must install and import manually, over the built-in unittest module available in the standard library.
Note: This choice might tell you something about the popularity of both tools, and indeed, pytest is arguably one of the most widespread and versatile test frameworks in the Python ecosystem.
While automating the implementation of a test case for existing code may sometimes be helpful, it’s probably even more desirable to flip the steps and develop software in a top-down fashion using test-driven development. In this approach, you write your test case first as a high-level specification of code, which doesn’t exist yet. Once you have an automated test case, then you write some code to make it pass.
Exercise Test-Driven Development (TDD)
If you haven’t practiced TDD before, then check out the Build a Hash Table in Python With TDD tutorial for a hands-on, step-by-step crash course on test-driven development.
Briefly, you can summarize the process in three steps:
- Write a failing test case that you’re about to satisfy
- Implement the smallest amount of code to make your test case pass
- Optionally, refactor the code while all your test cases are still passing
Then, rinse and repeat! As long as you’re disciplined enough to stay in this perpetual cycle, you’ll write testable code that has high test coverage and documents itself. At the same time, you’ll avoid writing code that you’ll never need, reducing the overall maintenance cost. That said, test-driven development isn’t a silver bullet, so it may not be practical in research and development projects, for example.
Okay, how about replicating the HashTable implementation from the tutorial mentioned above, using GitHub Copilot as your virtual pair programmer? Create two empty Python files next to each other in the same folder:
src/
├── hashtable.py
└── test_hashtable.py
The first one, depicted on the left in the video below, will contain the code under test. The other one, depicted on the right, will be home to your test cases driving the implementation. Next, write your first test case to verify the instantiation of a new HashTable class:
Note that to follow test-driven development, you should run each test case before and after implementing the corresponding bit of code to be sure that you’re testing the right thing. Apart from that, you should only implement the bare minimum to satisfy your tests. But GitHub Copilot went one step ahead by trying to predict the code that you might need in the future. That’s not a strictly genuine test-driven development methodology.
To recap, these are the two test cases that you just wrote to check if you can create a hash table with or without an initial capacity:
# test_hashtable.py

from hashtable import HashTable

def test_should_create_hashtable():
    assert HashTable() is not None

def test_should_create_hashtable_with_capacity():
    assert HashTable(capacity=10) is not None
Based on them, GitHub Copilot has generated the following hash table implementation so far:
# hashtable.py

class HashTable:
    def __init__(self, capacity=10):
        self.capacity = capacity
        self.buckets = [None] * capacity
        self.size = 0
The initializer method sets a default capacity of ten in case someone creates a hash table without providing any arguments, a decision which is driven by your first test case. The capacity is then stored in an instance attribute. Notice that GitHub Copilot correctly recognized the difference between a hash table’s size and its capacity. It also assumed the classic hash table implementation based on separate chaining by creating empty buckets.
While GitHub Copilot may not be as good as a human pair programmer at watching your back, it does a truly fantastic job as a virtual assistant providing answers to your questions. It’s like someone searching Google or Stack Overflow for a solution to your unique problem, built into the code editor right where you need it!
Ditch Stack Overflow for Instant, Context-Aware Solutions
The Internet is full of jokes about overusing sites like Stack Overflow or Google to seek answers to a programmer’s questions. For example, there have been parodies of the covers of the popular O’Reilly books, such as the famous Copying and Pasting from Stack Overflow:
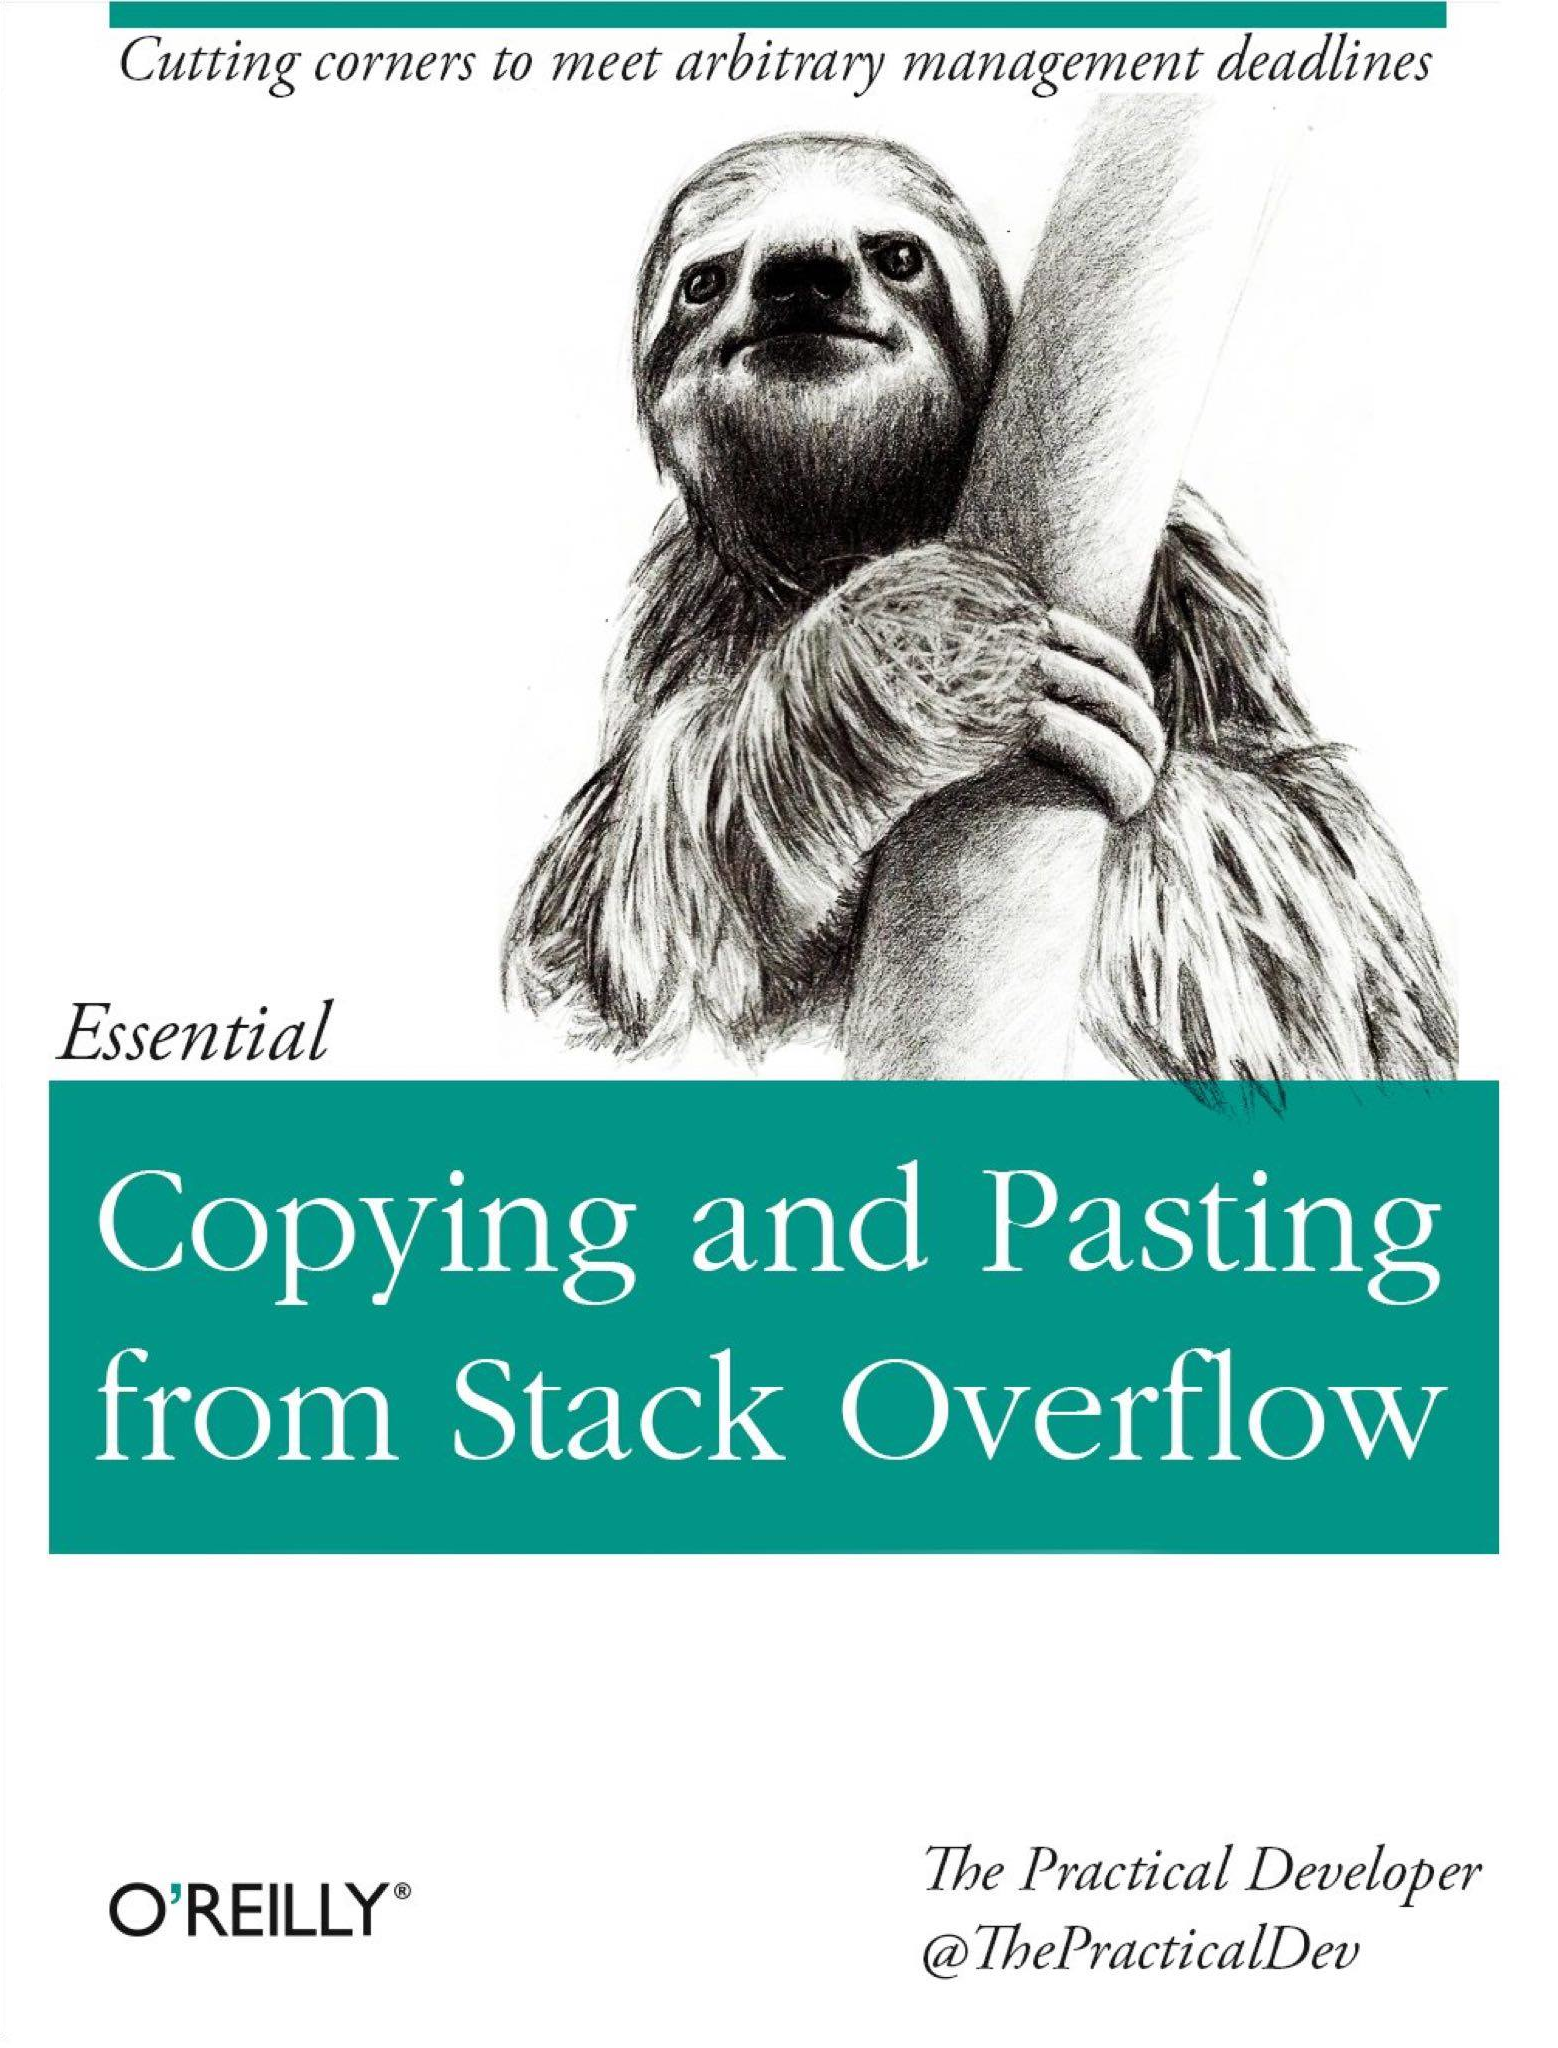
It’s not surprising, given that most developers use those tools regularly while working on their daily tasks, and it would be tough to live without them nowadays.
GitHub Copilot can reduce your dependence on those tools. It can instantly deliver tailor-made code snippets that fit the context of your project like a glove, unlike even the best answer you’d find online. Moreover, it doesn’t force you to leave the code editor, so you can stay in the zone and accelerate your progress. Read on to get a taste of having the collective knowledge of the Python community at your fingertips.
Never Think About Boilerplate Code Again
Python has a relatively expressive syntax, which allows you to write concise and readable code. Nevertheless, occasional boilerplate code is unavoidable, even in your favorite programming language. Sometimes, there’s no way around writing a piece of code that looks long and verbose yet seemingly doesn’t do a lot of useful work.
For example, fetching data from a URL address, serializing it to JSON, and saving the result to a file involves a lot of boring details, which don’t contribute much value. Wouldn’t it be cool if you could focus on what matters to you the most—that is, sorting out a solution to a higher-level problem while letting GitHub Copilot map the individual steps to fragments of code?
Well, it turns out that you can! As before, start by writing a descriptive function signature, and leave the rest to GitHub Copilot:
def save_json(url, filename):
The suggested function body in response to the above signature might be the following:
def save_json(url, filename):
    import json
    import requests
    import os

    if not os.path.exists(filename):
        with open(filename, "w") as f:
            f.write(json.dumps(requests.get(url).json()))
    else:
        print("File already exists")
It relies on the external requests library, which you might need to install, as it’s the de facto standard for making HTTP requests in Python. The function takes advantage of the context manager to close the file after dumping JSON into it. It’s already good enough, but you may want to add a few cosmetic tweaks:
import json
import os
import requests

def save_json(url, filename):
    if not os.path.exists(filename):
        with open(filename, mode="w", encoding="utf-8") as file:
            file.write(json.dumps(requests.get(url).json()))
    else:
        print("File already exists")
Per the PEP 8 style guide, you should generally define your import statements outside of functions, and the external library modules should come after the standard library ones. Also, it’s recommended that you explicitly state the character encoding, such as UTF-8, when working with files in Python to avoid discrepancies between different operating systems that might assume incompatible defaults.
Note: You can use black or a similar tool to keep the generated code’s formatting consistent with the rest of your project.
Using GitHub Copilot might be slightly safer than Stack Overflow. With Stack Overflow, you might find yourself mindlessly copying and pasting someone else’s code in verbatim form without fully understanding it or thinking about whether it makes sense in your situation. Accepting a GitHub Copilot suggestion can be equally reckless, if not more, but at least it gives you a fine-tuned, context-specific piece of the puzzle that’s more likely to work than not.
Another area where GitHub Copilot shines is in sparing you from diving into the documentation of a library or an API you want to use.
Always Have the API Documentation at Your Fingertips
Say you wanted to write a small Python function to get a list of the public repositories of a GitHub user. In the traditional approach, you’d start by making a web search for github api, and you’d land on the GitHub REST API documentation page. Then, you’d probably get overwhelmed by the number of alternative REST APIs to choose from, as well as all their guides, quick starts, and reference documentation.
Fortunately, you have GitHub Copilot, which has been trained to use well-known APIs, so you can give it a minimal hint about which API to call. Create a new Python module called github_api_client, and type the following code in it:
# github_api_client.py

import os

GITHUB_API_TOKEN = os.getenv("GITHUB_API_TOKEN")

def get_repository_names(username):
Later, you’ll run this script in a terminal session with your token stored in an environment variable. It’s customary to read secret keys and configuration data through environment variables, so you take advantage of Python’s os module to read your personal GitHub API token, which you may need in order to access the API.
Note: While you don’t need the token to fetch someone’s public repositories, you’ll be limited to sixty API requests per hour as an anonymous client. To bump this limit, you’ll need to authenticate yourself using your personal access token. It makes sense to do it now since most API endpoints require authentication anyway.
One of the suggested results ends up working right out of the box:
# github_api_client.py

import os

GITHUB_API_TOKEN = os.getenv("GITHUB_API_TOKEN")

def get_repository_names(username):
    import requests

    url = f"https://api.github.com/users/{username}/repos"
    headers = {"Authorization": f"token {GITHUB_API_TOKEN}"}
    response = requests.get(url, headers=headers)
    response.raise_for_status()
    return [repo["name"] for repo in response.json()]
Before testing this function, remember to generate a new personal access token on your GitHub profile and set the corresponding environment variable in your terminal:
Then, while you’re still in the same terminal session where you defined the environment variable, run the source file with your code in an interactive mode so that Python reads the generated function that you can call:
$ python -i github_api_client.py
>>> for name in get_repository_names("gvanrossum"):
...     print(name)
...
500lines
asyncio
ballot-box
cpython
ctok
exceptiongroup
guidos_time_machine
gvanrossum.github.io
http-get-perf
minithesis
mirror-cwi-stdwin
mypy
mypy-dummy
path-pep
patma
pep550
peps
Pyjion
pythonlabs
pythonlabs-com-azure
pytype
pyxl3
In this case, you’re getting a rather short list of the public repositories made by Guido van Rossum, the creator of Python.
All right, using a well-known API wasn’t particularly difficult, but what about leveraging a custom API that GitHub Copilot hasn’t seen before? Well, you’ll find out next.
Teach GitHub Copilot to Speak Your Own Dialect
Suppose you have the following Python module, which defines a custom API for speech synthesis by wrapping a text-to-speech (TTS) command on one of the three major platforms:
# custom_api.py

import platform
import subprocess

class TextToSpeechAPIClient:
    def __init__(self, command=None):
        self.command = command or get_default_command()

    def say(self, text):
        subprocess.call(self.command(text))

def get_default_command():
    match platform.system():
        case "Darwin":
            return lambda text: ["say", text]
        case "Linux":
            return lambda text: ["spd-say", text]
        case "Windows":
            return lambda text: \
            "PowerShell -Command \"Add-Type –AssemblyName System.Speech; " \
            "(New-Object System.Speech.Synthesis.SpeechSynthesizer)." \
            f"Speak('{text}');\""
The TextToSpeechAPIClient class takes an optional argument with the speech synthesis command relevant to your operating system. The helper function defined below takes advantage of the match statement introduced in Python 3.10 to determine the right command.
Now, create another Python module and tell GitHub Copilot to learn how to use your new API by making a wish in a comment:
# main.py

# Say "Hello, World!" using the custom text-to-speech API client.

if __name__ == "__main__":
The execution condition at the end of your file gives GitHub Copilot the necessary context by communicating that you want to write a Python script. Otherwise, you might be getting less useful suggestions. However, with this vital check in place, one of the suggestions will look like this:
# main.py

# Say "Hello, World!" using the custom text-to-speech API client.

if __name__ == "__main__":
    import custom_api

    client = custom_api.TextToSpeechAPIClient()
    client.say("Hello, World!")
Excellent! GitHub Copilot found your custom API in another Python module, imported it where needed, and used the TextToSpeechAPIClient class exactly as it should. While it did so nicely with a local module, it might as well suggest snippets of code for third-party modules.
Navigate an Unfamiliar Framework or Library
Exploring new libraries in Python with GitHub Copilot is an enjoyable experience. Perhaps you’re revisiting a framework for which your knowledge has become a little rusty, and you’re struggling to remember where to begin. But even when you’re quite familiar with a given tool, GitHub Copilot can sometimes surprise you by suggesting more efficient solutions or parts of its API that you had no idea about.
Say you want to expose a REST API endpoint using the Flask framework to serve a JSON-serialized list of books queried from a file-based SQLite database. Now, create a new Python source file, import the necessary modules, and adapt the previous sentence from this paragraph into a Python comment:
import sqlite3
import flask

# Expose a REST API endpoint using the Flask framework \
# to serve a JSON-serialized list of books queried from \
# a file-based SQLite database.
Wait for the suggestions to arrive, and then pick the one that looks the best. Sometimes, you’ll get better results when you start typing the expected code and incrementally request line-by-line suggestions by hitting Tab on each line. Eventually, you may end up with something like this:
import sqlite3
import flask

# Expose a REST API endpoint using the Flask framework \
# to serve a JSON-serialized list of books queried from \
# a file-based SQLite database.

app = flask.Flask(__name__)

@app.route("/books")
def get_books():
    conn = sqlite3.connect("books.db")
    c = conn.cursor()
    c.execute("SELECT * FROM books")
    books = c.fetchall()
    conn.close()
    return flask.jsonify(books)

if __name__ == "__main__":
    app.run(debug=True)
In this case, GitHub Copilot scaffolded the typical structure of a Flask application, which you might have forgotten about, and it defined the endpoint you requested. To test if it works, open your terminal in the same folder as your Flask application, and create a new file-based database called books.db with a few sample books.
To enter SQL queries, you can run the sqlite3 command in batch mode and terminate it with the end-of-file (EOF) character:
$ sqlite3 books.db -batch
CREATE TABLE books(
   id INTEGER PRIMARY KEY AUTOINCREMENT,
   isbn TEXT,
   author TEXT,
   title TEXT
);
INSERT INTO books(isbn, author, title) VALUES
   ('978-0132350884', 'Robert C. Martin', 'Clean Code'),
   ('978-1449340377', 'David Beazley', 'Python Cookbook'),
   ('978-0131872486', 'Bruce Eckel', 'Thinking in Java'),
   ('978-1775093329', 'David Amos', 'Python Basics');
On Windows, you can typically send the EOF character to the standard input stream using Ctrl+Z, while on Linux and macOS, you’ll use the Ctrl+D key combination.
Next, start your Flask application on the default network interface and port number by running your script, and then navigate your web browser to the /books endpoint. Alternatively, you can use a command like cURL directly in your terminal to fetch the books if you’re on macOS or Linux:
$ curl http://127.0.0.1:5000/books
[
  [
    1,
    "978-0132350884",
    "Robert C. Martin",
    "Clean Code"
  ],
  [
    2,
    "978-1449340377",
    "David Beazley",
    "Python Cookbook"
  ],
  [
    3,
    "978-0131872486",
    "Bruce Eckel",
    "Thinking in Java"
  ],
  [
    4,
    "978-1775093329",
    "David Amos",
    "Python Basics"
  ]
]
Quite remarkably, the code generated by GitHub Copilot is alive! Just think about it. You merely provided the natural language description of your desired program and imported two modules to give context on which libraries to use. Meanwhile, artificial intelligence turned your description into a working web application.
That being said, GitHub Copilot has its dark sides, which you’ll learn about in the next section.
Consider the Arguments Against Using GitHub Copilot
When you search for information about GitHub Copilot on the web, you’ll find words of praise and excitement, as well as a fair bit of criticism. Some of it is valid, while some stems from a misunderstanding of the purpose of the technology. Ultimately, GitHub Copilot means different things to different people. After reading this section, you’ll become aware of the most significant drawbacks of your AI-powered virtual assistant.
Is Definitely Not Autopilot!
The name copilot was a clever choice by GitHub to describe this product. It avoids misleading people into thinking it could take control and replace you as the programmer. Just like the first officer in aviation, who’s commonly referred to as the copilot, GitHub Copilot assists you but doesn’t do the job for you. This wording contrasts with advanced driver-assistance systems, which some car manufacturers baldly call autopilot today.
You have to remember that the code produced by GitHub Copilot isn’t always ideal. In fact, it can sometimes be suboptimal or insecure, and it might follow bad programming practices.
It’s less of a problem when the code contains syntactical errors or if it’s completely nonsensical, because that’s easy to spot. However, the code that looks plausible at first glance can still be incorrect and contain logical errors. Therefore, you should never trust GitHub Copilot without carefully reviewing and testing the code it generates!
In other words, GitHub Copilot is a valuable tool to have under your belt, but you definitely shouldn’t rely on its suggestions alone when building mission-critical software for a nuclear power plant, for instance.
Poses a Potential Security Risk
Because the machine learning model behind GitHub Copilot was trained on public repositories, it’s vulnerable to data poisoning. A bad actor could’ve intentionally contaminated the training dataset with malicious code that may trick the model into suggesting similar patterns in your code editor. This could also happen by accident due to the vast amount of code in the training data.
Again, use GitHub Copilot at your own risk!
Raises Intellectual Property Rights Concerns
GitHub Copilot could be violating intellectual property rights, which is by far the most serious concern at the moment. Because it synthesizes code based on what it has seen before, it could be leaking proprietary algorithms from private repositories, copyrighted public repositories, or even open-source repositories with a non-permissive license.
Note: To use GitHub Copilot, you must accept its terms and conditions, which explicitly state that you give consent to share the code and data located in your repositories, including your private ones, to improve the service.
The creator of Flask, Armin Ronacher, has recently demonstrated in a tweet how GitHub Copilot quotes Quake’s implementation of the fast inverse square root algorithm to the letter. While the generated code is attributed to John Carmack, GitHub Copilot suggested a completely random license on top of it:
The produced code in the example above even includes the original comment with a curse word. GitHub claims to have filters in place that should theoretically block such words. They should also remove sensitive information like API keys or email addresses that might’ve been accidentally committed to GitHub. Yet, you can never know for sure.
Encourages Cheating
GitHub Copilot can be a fantastic learning tool if you’re looking to grasp a new programming language, framework, library, or API. At the same time, it’s not terribly difficult to imagine some students abusing GitHub Copilot to cheat by copying and pasting a task’s description in plain English and having their assignment solved within seconds. Recall the Advent of Code puzzle that you did at the beginning of this tutorial.
Also, students with no intention of cheating may prefer to stay away from GitHub Copilot, as it may make them lazy and discourage them from thinking independently. Like with every powerful tool, you can use GitHub Copilot for the right or wrong purposes.
Requires a Subscription Plan
One of the most common complaints about GitHub Copilot is the fact that it requires a paid subscription, which limits the number of potential users. A lot of people seem to be upset about being charged money for a tool that was supposedly trained on mostly open-source code.
To make matters worse, the flat fee is fixed regardless of where you are in the world. It doesn’t take purchasing power parity into account, making the subscription a bigger burden for customers in some countries than in others. The pricing probably seems reasonable if you’re on an engineering salary in a country with high purchasing power or if your company buys the subscription in bulk. Otherwise, the price might be very steep.
On the other hand, it’s fair that GitHub at least offers the trial period and makes the service accessible for free to verified students and open-source maintainers. Ultimately, though the pricing may be prohibitive to some, it’s generally a good value for what you get, especially considering the maintenance cost of the infrastructure for such a huge neural network. After all, it requires a distributed cluster to run and to achieve low latency.
Note: If you’d like to access AI-powered programming assistance for free, then perhaps ChatGPT is the coding mentor for you.
If you’d like to take a deeper dive and learn more about the underlying machine learning model, then read the original paper on OpenAI Codex.
Conclusion
GitHub Copilot is a revolutionary programming aid that can increase your speed and productivity as a software engineer. It saves you time by generating boilerplate code and sparing you from diving into documentation. Because it understands the context of your project, the instant suggestions that you get are tailor-made and usually work the way you intended.
In this tutorial, you learned how to:
- Install the GitHub Copilot extension in your code editor
- Transform a natural language description of a task into working code
- Choose between multiple alternative intelligent code completion suggestions
- Explore unfamiliar frameworks and programming languages
- Teach GitHub Copilot how to use your custom API
- Exercise test-driven development with a virtual pair programmer in real time
What do you think about GitHub Copilot? Is it worth the price? Are you hooked enough to use it in your future projects? Leave us a comment below!
Free Download: Click here to download a free cheat sheet of keyboard shortcuts to make coding with GitHub Copilot even faster.


