Watch Now This tutorial has a related video course created by the Real Python team. Watch it together with the written tutorial to deepen your understanding: Process Images Using the Pillow Library and Python
When you look at an image, you see the objects and people in it. However, when you read an image programmatically with Python or any other language, the computer sees an array of numbers. In this tutorial, you’ll learn how to manipulate images and perform basic image processing using the Python Pillow library.
Pillow and its predecessor, PIL, are the original Python libraries for dealing with images. Even though there are other Python libraries for image processing, Pillow remains an important tool for understanding and dealing with images.
To manipulate and process images, Pillow provides tools that are similar to ones found in image processing software such as Photoshop. Some of the more modern Python image processing libraries are built on top of Pillow and often provide more advanced functionality.
In this tutorial, you’ll learn how to:
- Read images with Pillow
- Perform basic image manipulation operations
- Use Pillow for image processing
- Use NumPy with Pillow for further processing
- Create animations using Pillow
This tutorial provides an overview of what you can achieve with the Python Pillow library through some of its most common methods. Once you gain confidence using these methods, then you can use Pillow’s documentation to explore the rest of the methods in the library. If you’ve never worked with images in Python before, this is a great opportunity to jump right in!
In this tutorial, you’ll use several images, which you can download from the tutorial’s image repository:
Get Images: Click here to get access to the images that you’ll manipulate and process with Pillow.
With those images in hand, you’re now ready to get started with Pillow.
Basic Image Operations With the Python Pillow Library
The Python Pillow library is a fork of an older library called PIL. PIL stands for Python Imaging Library, and it’s the original library that enabled Python to deal with images. PIL was discontinued in 2011 and only supports Python 2. To use its developers’ own description, Pillow is the friendly PIL fork that kept the library alive and includes support for Python 3.
There’s more than one module in Python to deal with images and perform image processing. If you want to deal with images directly by manipulating their pixels, then you can use NumPy and SciPy. Other popular libraries for image processing are OpenCV, scikit-image, and Mahotas. Some of these libraries are faster and more powerful than Pillow.
However, Pillow remains an important tool for dealing with images. It provides image processing features that are similar to ones found in image processing software such as Photoshop. Pillow is often the preferred option for high-level image processing tasks that don’t require more advanced image processing expertise. It’s also often used for exploratory work when dealing with images.
Pillow also has the advantage of being widely used by the Python community, and it doesn’t have the same steep learning curve as some of the other image processing libraries.
You’ll need to install the library before you can use it. You can install Pillow using pip within a virtual environment:
Now that you’ve installed the package, you’re ready to start familiarizing yourself with the Python Pillow library and perform basic manipulations of images.
The Image Module and Image Class in Pillow
The main class defined in Pillow is the Image class. When you read an image using Pillow, the image is stored in an object of type Image.
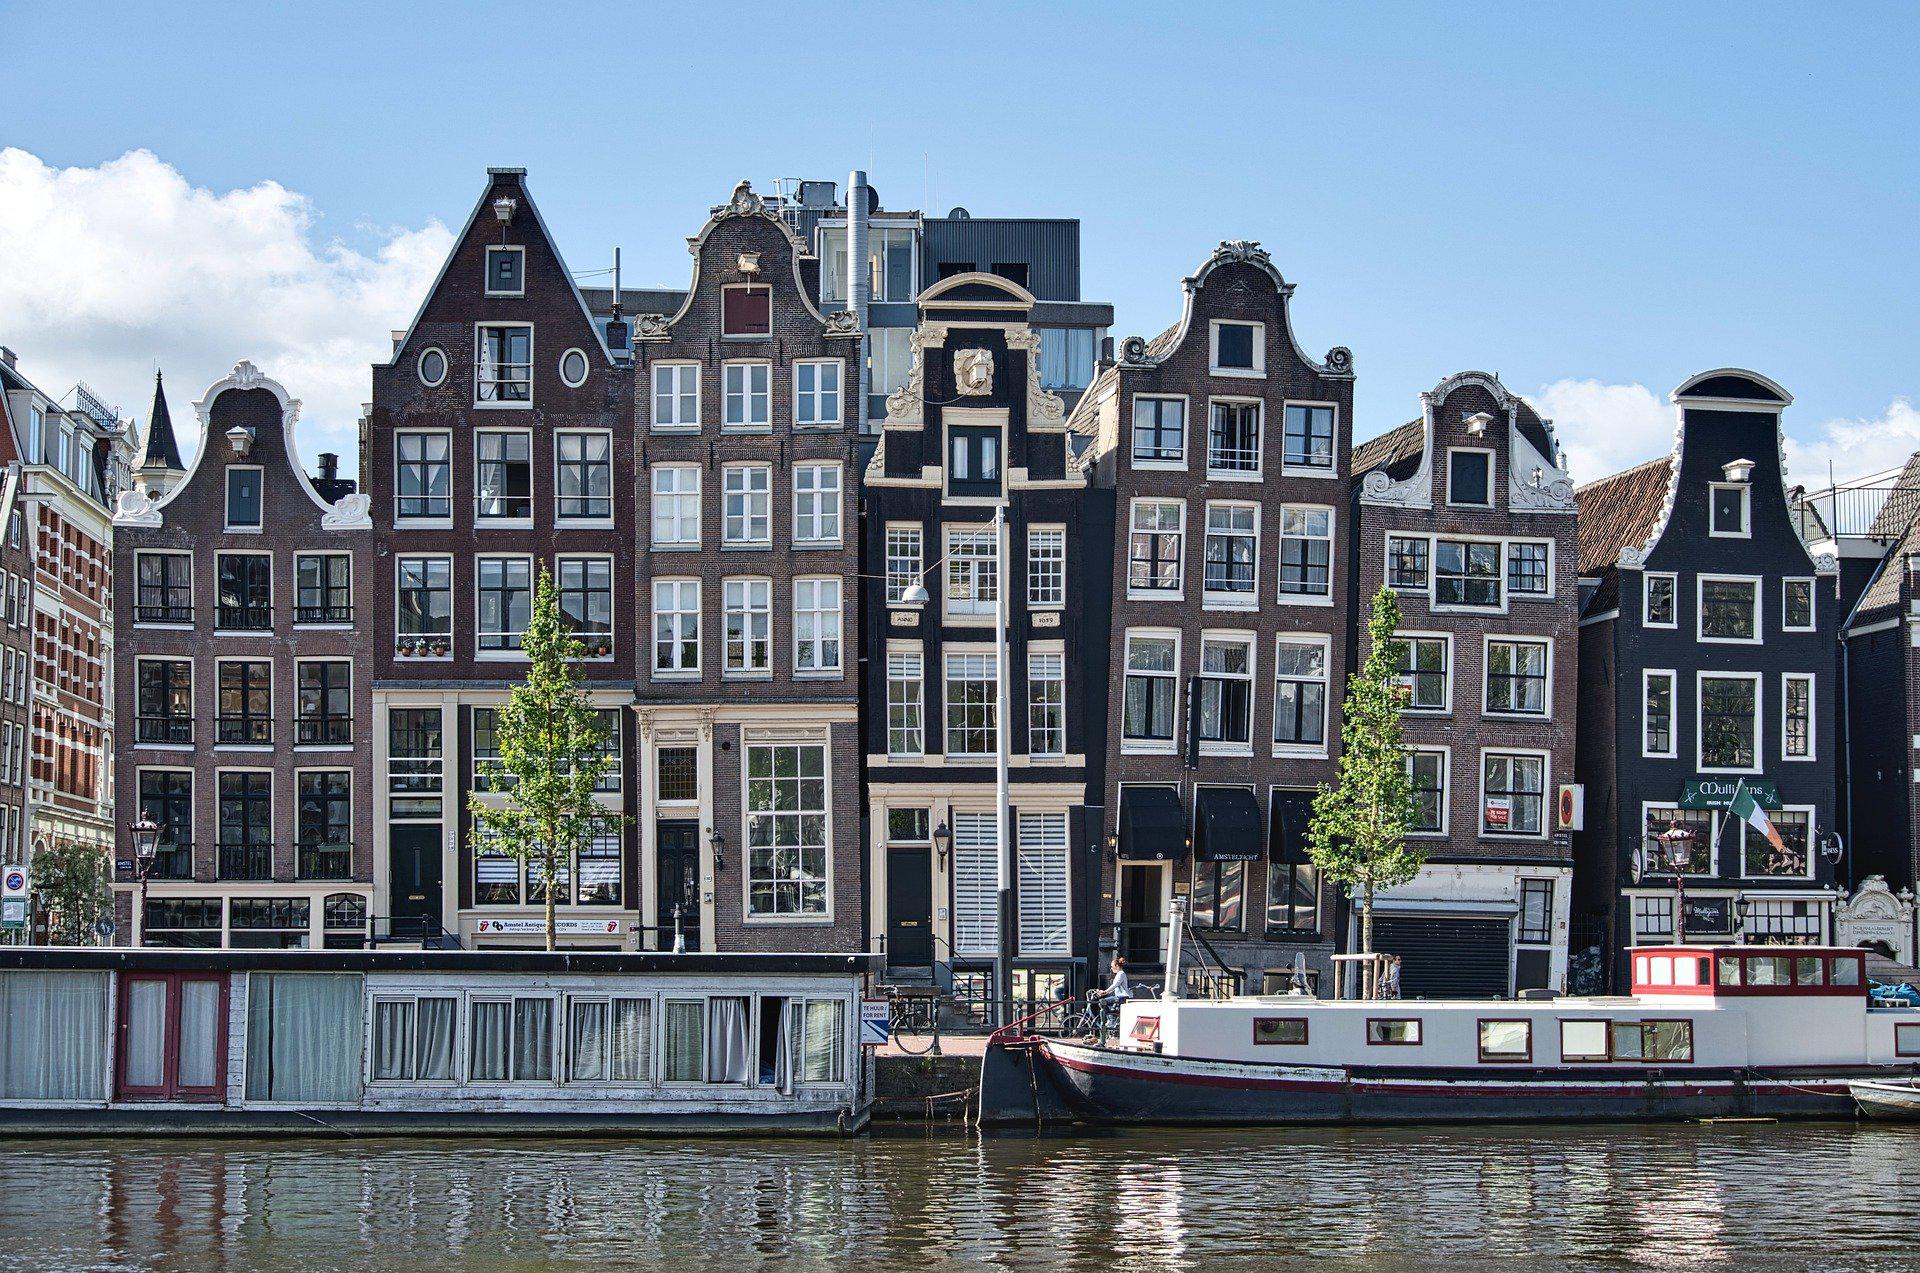
For the code in this section, you’ll need the image file named buildings.jpg (image credit), which you can find in the image repository for this tutorial:
Get Images: Click here to get access to the images that you’ll manipulate and process with Pillow.
You can place this image file in the project folder that you’re working in.
When exploring images with Pillow, it’s best to use an interactive REPL environment. You’ll start by opening the image that you just downloaded:
>>> from PIL import Image
>>> filename = "buildings.jpg"
>>> with Image.open(filename) as img:
...     img.load()
...

>>> type(img)
<class 'PIL.JpegImagePlugin.JpegImageFile'>

>>> isinstance(img, Image.Image)
True
You might expect to import from Pillow instead of from PIL. You did install Pillow, after all, not PIL. However, Pillow is a fork of the PIL library. Therefore, you’ll still need to use PIL when importing into your code.
You call the open() function to read the image from the file and .load() to read the image into memory so that the file can now be closed. You use a with statement to create a context manager to ensure the file is closed as soon as it’s no longer needed.
In this example, the object is a JPEG image-specific type that’s a subclass of the Image class, as you confirm with the call to isinstance(). Note that both the class and the module where the class is defined share the same name, Image. You can display the image using .show():
>>> img.show()
The .show() method saves the image as a temporary file and displays it using your operating system’s native software for dealing with images. When you run the code above, you’ll see the following image displayed:
On some systems, calling .show() will block the REPL until you close the image. This depends on the operating system and the default image viewing software that you’re using.
You’ll need to be familiar with three key properties when dealing with images in the Python Pillow library. You can explore these using the Image class attributes .format, .size, and .mode:
>>> img.format
'JPEG'

>>> img.size
(1920, 1273)

>>> img.mode
'RGB'
The format of an image shows what type of image you’re dealing with. In this case, the format of the image is 'JPEG'. The size shows the width and height of the image in pixels. The mode of this image is 'RGB'. You’ll learn more about modes shortly.
Often, you may need to crop and resize images. The Image class has two methods that you can use to perform these operations, .crop() and .resize():
>>> cropped_img = img.crop((300, 150, 700, 1000))
>>> cropped_img.size
(400, 850)

>>> cropped_img.show()

>>> low_res_img = cropped_img.resize(
...     (cropped_img.width // 4, cropped_img.height // 4)
... )
>>> low_res_img.show()
The argument to .crop() must be a 4-tuple that defines the left, upper, right, and bottom edges of the region that you wish to crop. The coordinate system used in Pillow assigns the coordinates (0, 0) to the pixel in the upper-left corner. This is the same coordinate system that’s usually used for two-dimensional arrays. The 4-tuple represents the following section of the image:
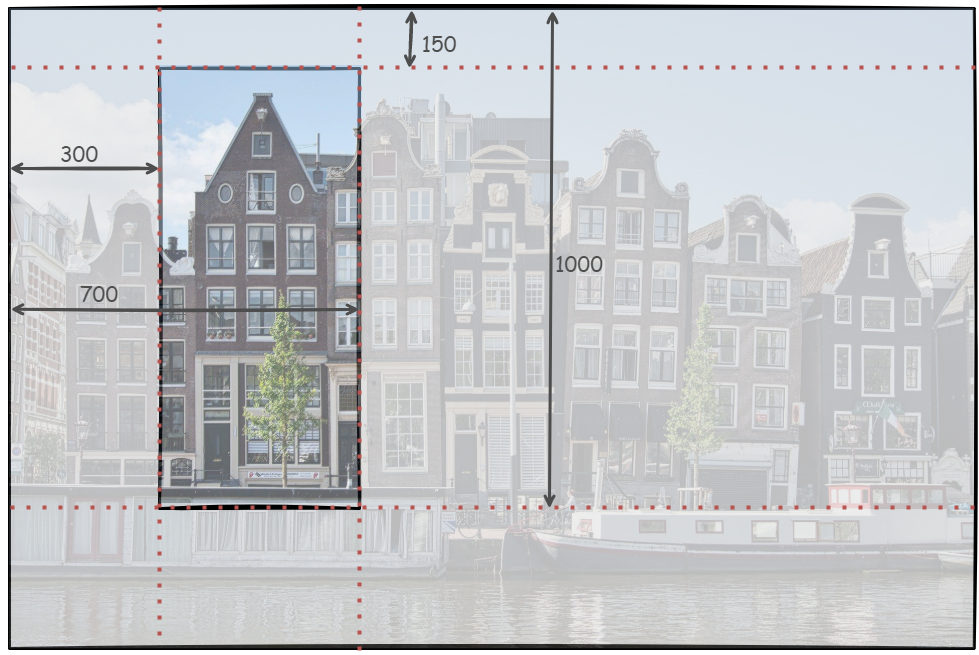
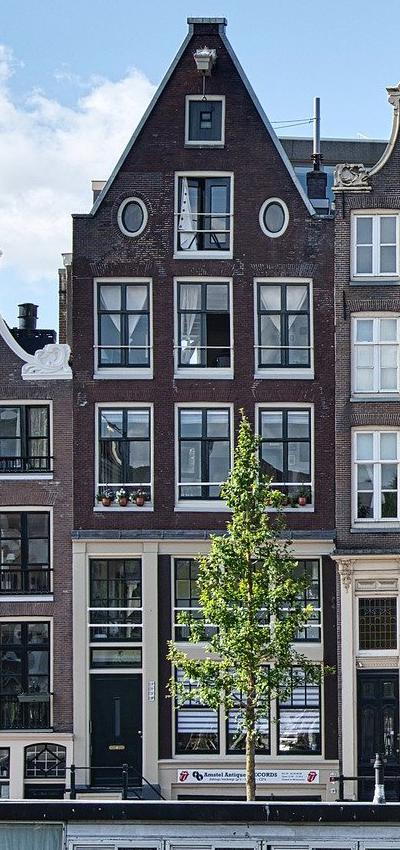
The new image that .crop() returns in the code above has a size of 400x850 pixels. The cropped image shows only one of the buildings from the original picture:
In the code above, you also change the resolution of the cropped image using .resize(), which needs a tuple as a required argument. The tuple that you use as an argument defines the new width and height of the image in pixels.
In the example above, you’re setting the new width and height to a quarter of their original values using the floor division operator (//) and the Image attributes .width and .height. The final call to show() displays the cropped and resized image:

There are additional optional parameters that you can use with .resize() to control how the image is resampled. Alternatively, you can achieve similar scaling using .reduce():
>>> low_res_img = cropped_img.reduce(4)
The argument determines the factor by which you scale the image down. If you prefer to set a maximum size rather than a scaling factor, then you can use .thumbnail(). The size of the thumbnail will be smaller than or equal to the size that you set.
Note: The .thumbnail() method changes the Image object in place and doesn’t return a new object. However, .crop(), .resize(), and .reduce() all return a new Image object. Not all methods in the Pillow library behave in the same way.
Once you’re happy with your returned image, you can save any of the Image objects to file using .save():
>>> cropped_img.save("cropped_image.jpg")
>>> low_res_img.save("low_resolution_cropped_image.png")
Once you call the method, it creates the image files in your project folder. In this example, one of the images is a JPEG image and the other is a PNG image. The extension that you use as a filname automatically determines the file format, or you can specify the format as an additional optional argument.
Basic Image Manipulation
You can manipulate the image beyond cropping and resizing. Another common requirement is to rotate or flip the image. You can use the .transpose() method for some transformations. Go ahead and carry on with the same REPL session that you started in the previous section:
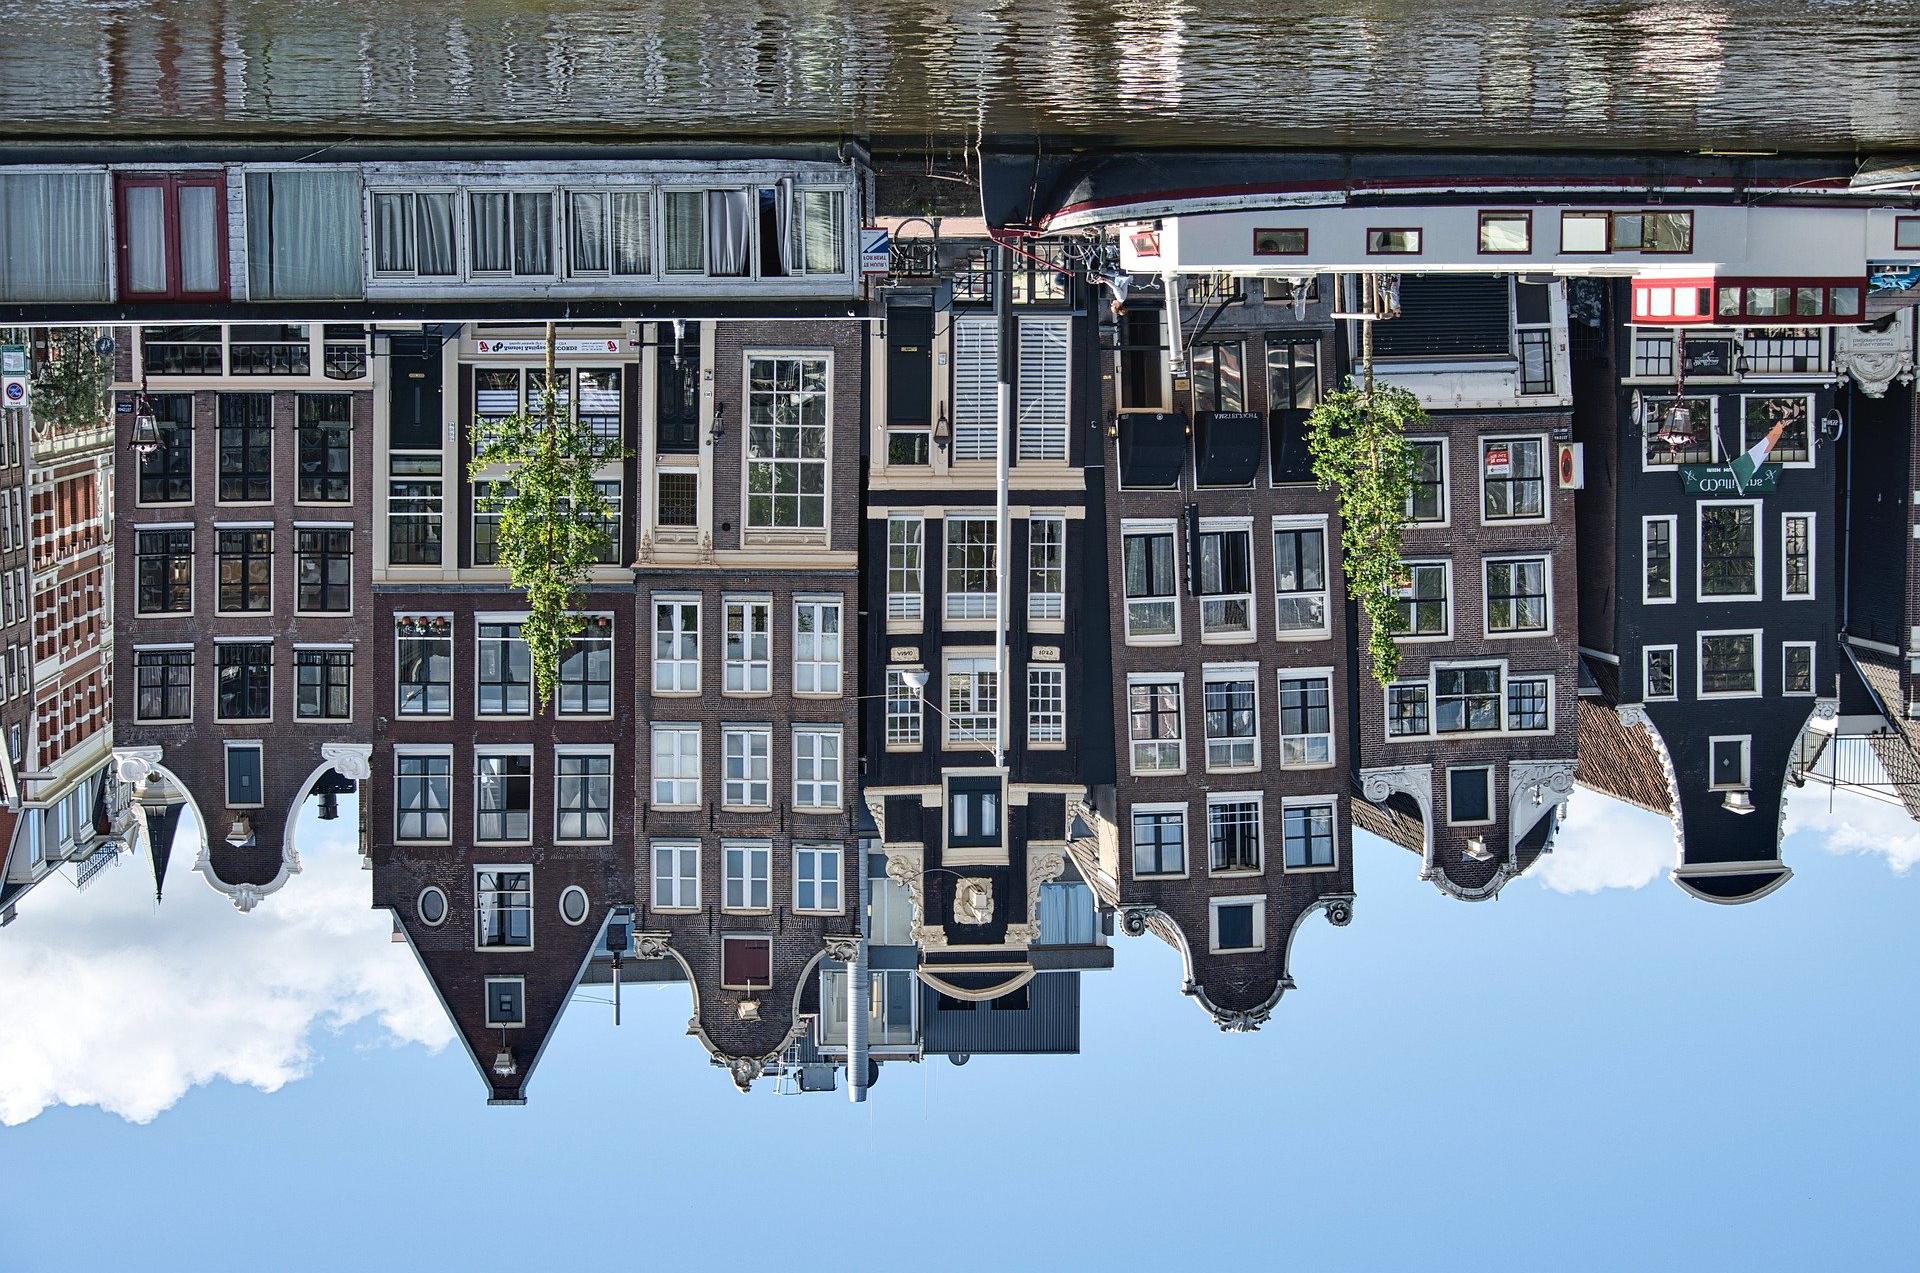
>>> converted_img = img.transpose(Image.FLIP_TOP_BOTTOM)
>>> converted_img.show()
This code displays the following image:
There are seven options that you can pass as arguments to .transpose():
Image.FLIP_LEFT_RIGHT: Flips the image left to right, resulting in a mirror imageImage.FLIP_TOP_BOTTOM: Flips the image top to bottomImage.ROTATE_90: Rotates the image by 90 degrees counterclockwiseImage.ROTATE_180: Rotates the image by 180 degreesImage.ROTATE_270: Rotates the image by 270 degrees counterclockwise, which is the same as 90 degrees clockwiseImage.TRANSPOSE: Transposes the rows and columns using the top-left pixel as the origin, with the top-left pixel being the same in the transposed image as in the original imageImage.TRANSVERSE: Transposes the rows and columns using the bottom-left pixel as the origin, with the bottom-left pixel being the one that remains fixed between the original and modified versions
All the rotation options above define rotations in steps of 90 degrees. If you need to rotate an image by another angle, then you can use .rotate():
>>> rotated_img = img.rotate(45)
>>> rotated_img.show()
This method call rotates the image by 45 degrees counterclockwise, giving the following image:
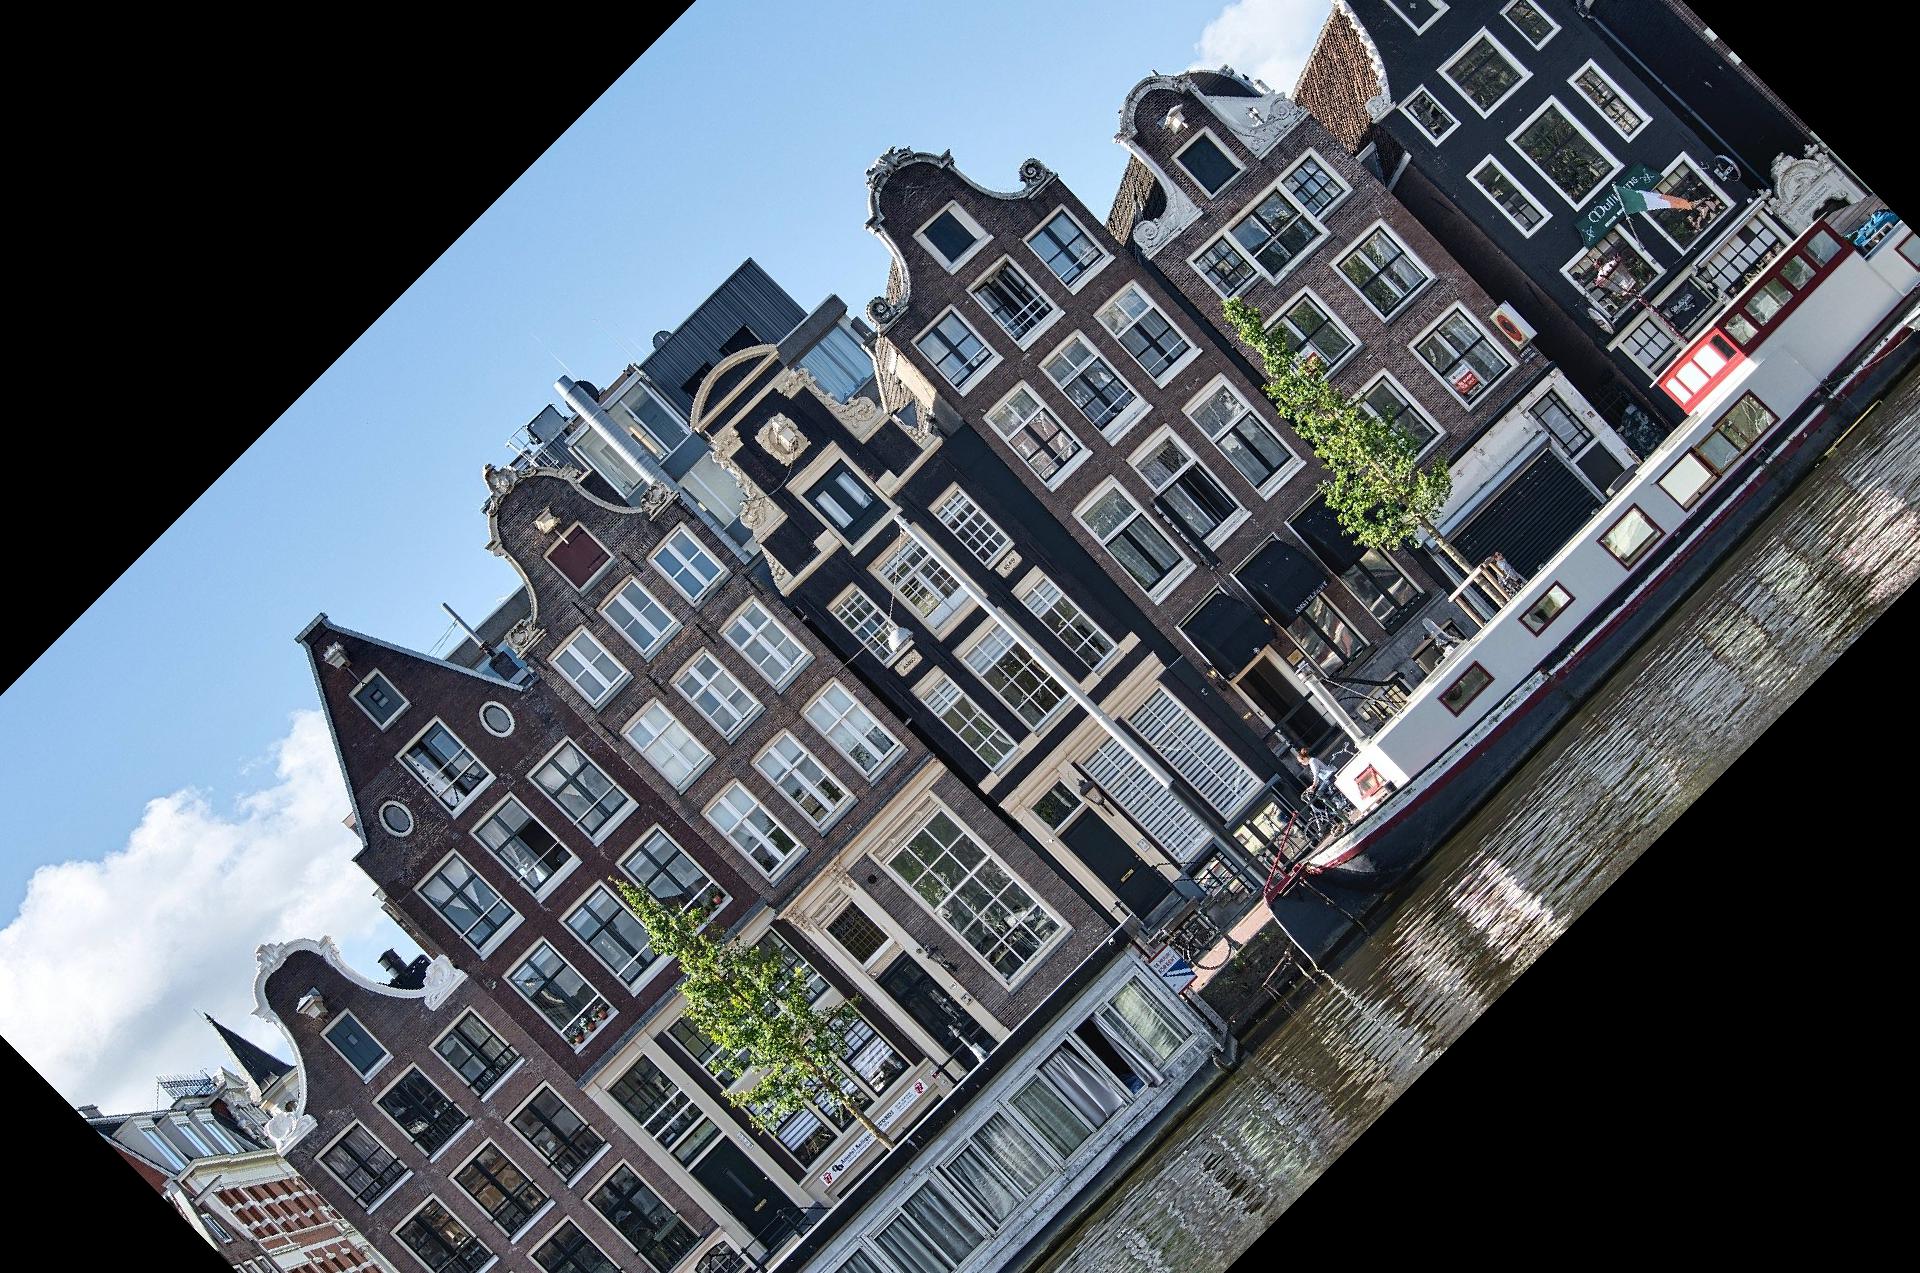
The Image object returned is the same size as the original Image. Therefore, the corners of the image are missing in this display. You can change this behavior using the expand named parameter:
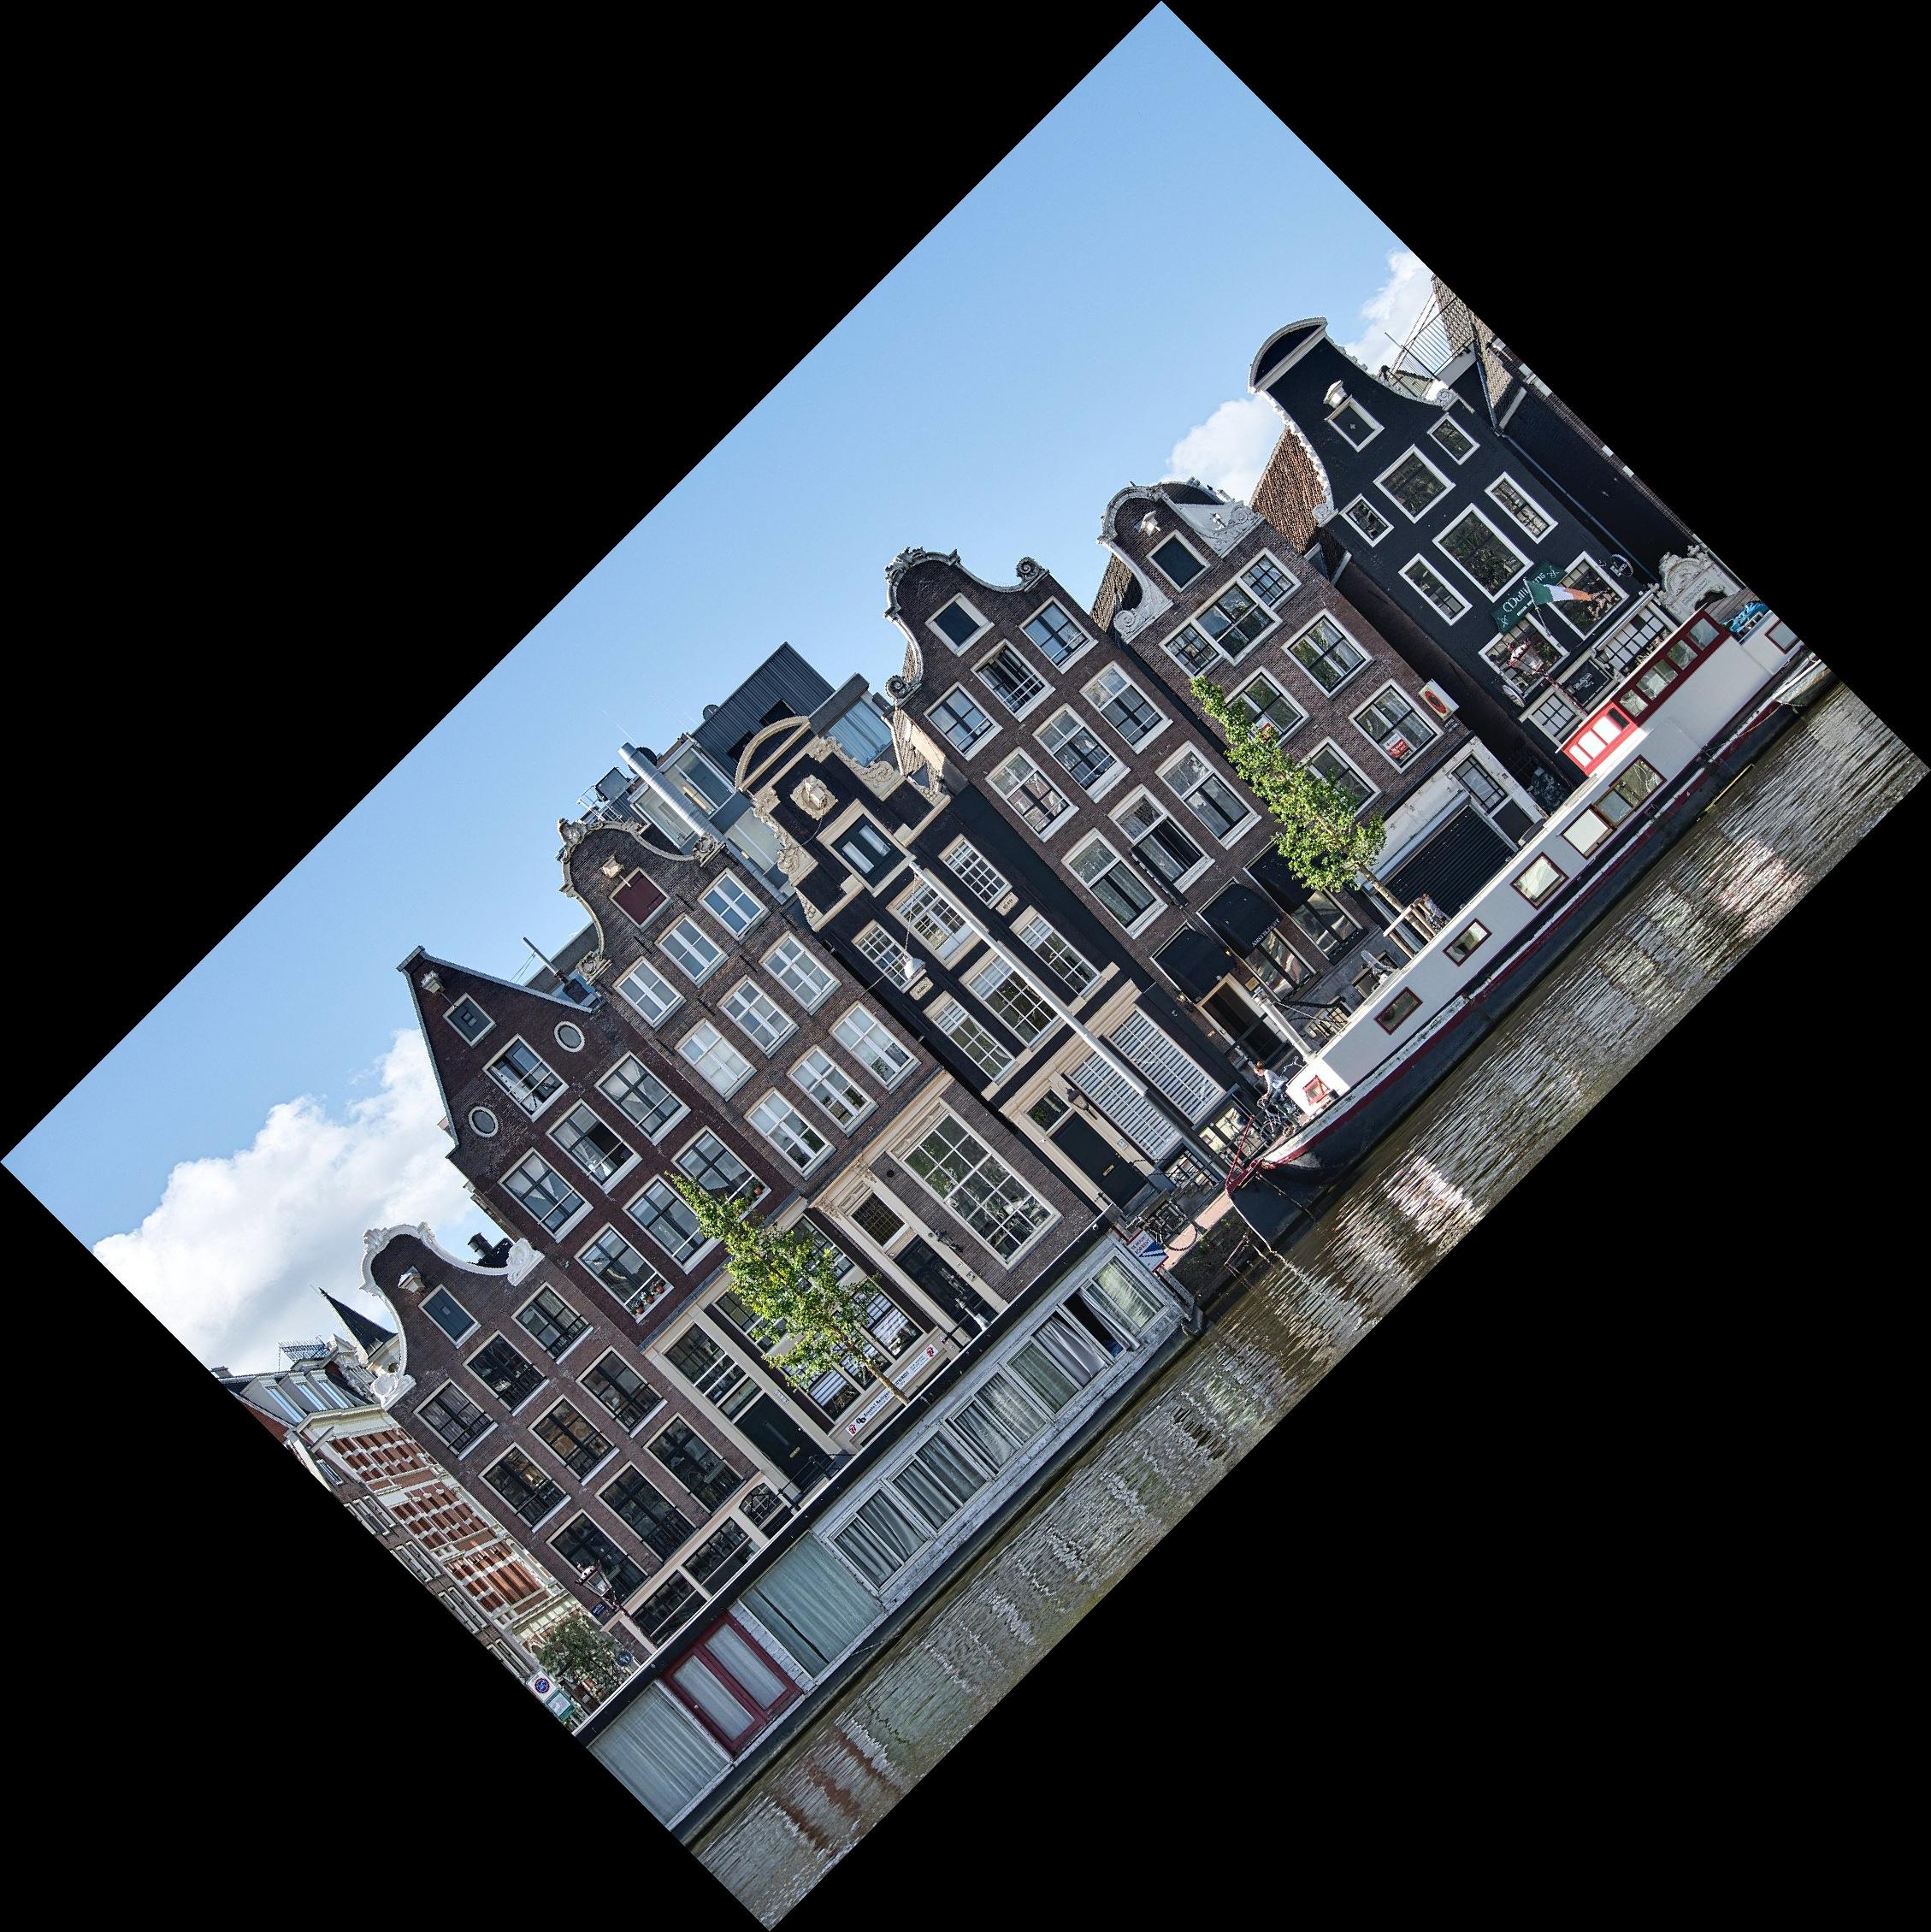
>>> rotated_img = img.rotate(45, expand=True)
>>> rotated_img.show()
This method returns a larger image that fully contains the rotated image:
You can customize the rotation further with additional optional parameters. You can now change the size and orientation of an image. In the next section, you’ll learn about different types of images in the Python Pillow library.
Bands and Modes of an Image in the Python Pillow Library
An image is a two-dimensional array of pixels, where each pixel corresponds to a color. Each pixel can be represented by one or more values. For example, in an RGB image, each pixel is represented by three values corresponding to the red, green, and blue values for that pixel.
Therefore, the Image object for an RBG image contains three bands, one for each color. An RGB image of size 100x100 pixels is represented by a 100x100x3 array of values.
RGBA images also include the alpha value, which contains information about the transparency for each pixel. An RGBA image has four bands, one for each of the colors and a fourth one containing the alpha values. Each band has the same dimensions as the image dimensions. Therefore, an RGBA image of size 100x100 pixels is represented by a 100x100x4 array of values.
The mode of an image describes what type of image you’re working with. Pillow supports most standard modes, including black-and-white (binary), grayscale, RGB, RGBA, and CMYK. You can see the full list of supported modes in the Pillow documentation on modes.
You can find out how many bands are in an Image object using the .getbands() method, and you can convert between modes using .convert(). Now you’ll use the image named strawberry.jpg (image credit) from the image repository for this tutorial:
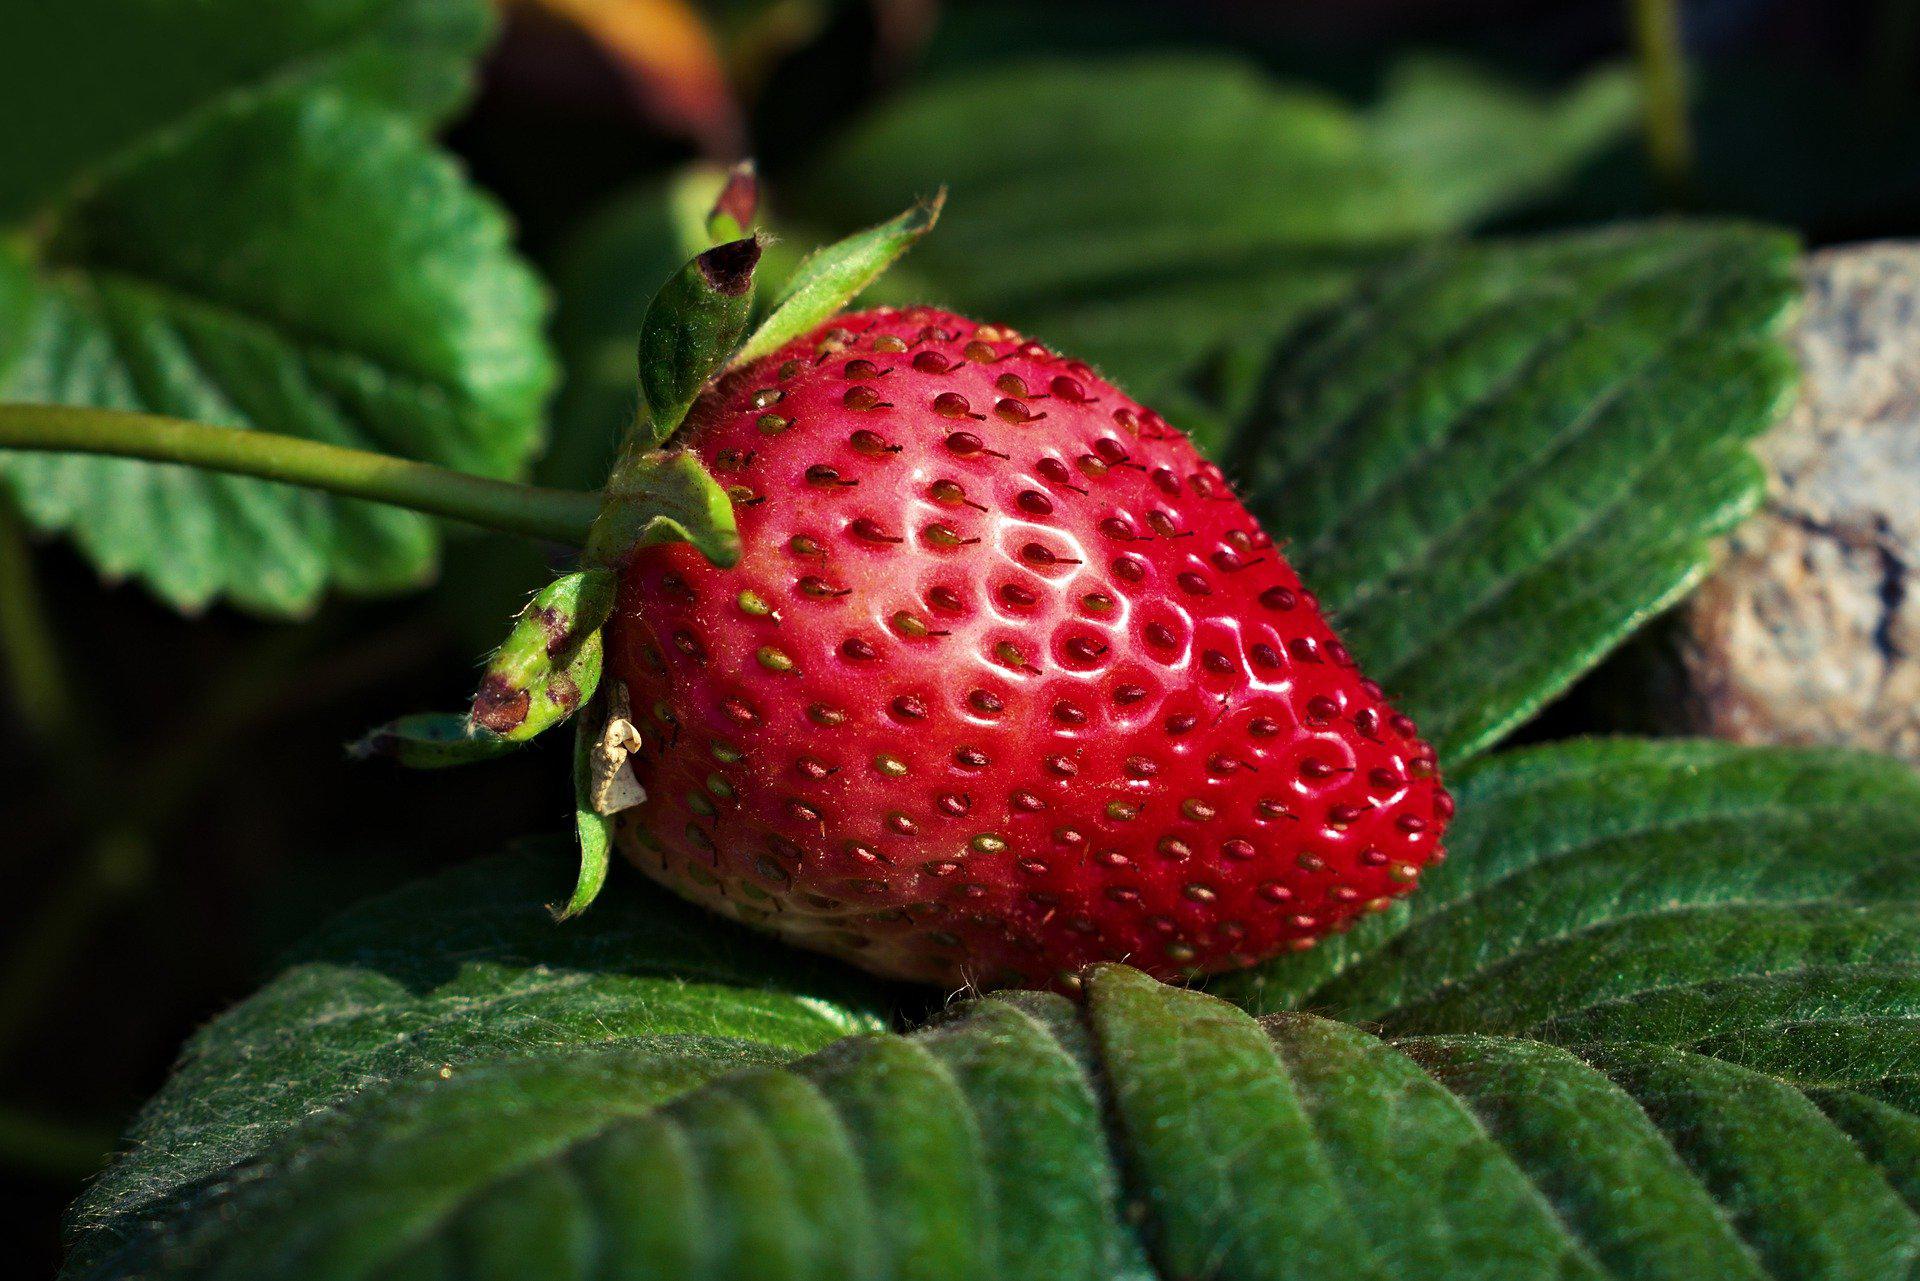
This image’s mode is also RGB. You can convert this image into other modes. This code uses the same REPL session that you started in the previous sections:
>>> filename = "strawberry.jpg"
>>> with Image.open(filename) as img:
...     img.load()
...

>>> cmyk_img = img.convert("CMYK")
>>> gray_img = img.convert("L")  # Grayscale

>>> cmyk_img.show()
>>> gray_img.show()

>>> img.getbands()
('R', 'G', 'B')
>>> cmyk_img.getbands()
('C', 'M', 'Y', 'K')
>>> gray_img.getbands()
('L',)
You call .convert() twice to convert the RGB image into a CMYK and a grayscale version. The CMYK image looks similar to the original image but is encoded using the mode that’s common for printed material rather than digital displays. The conversion to grayscale gives the following output:
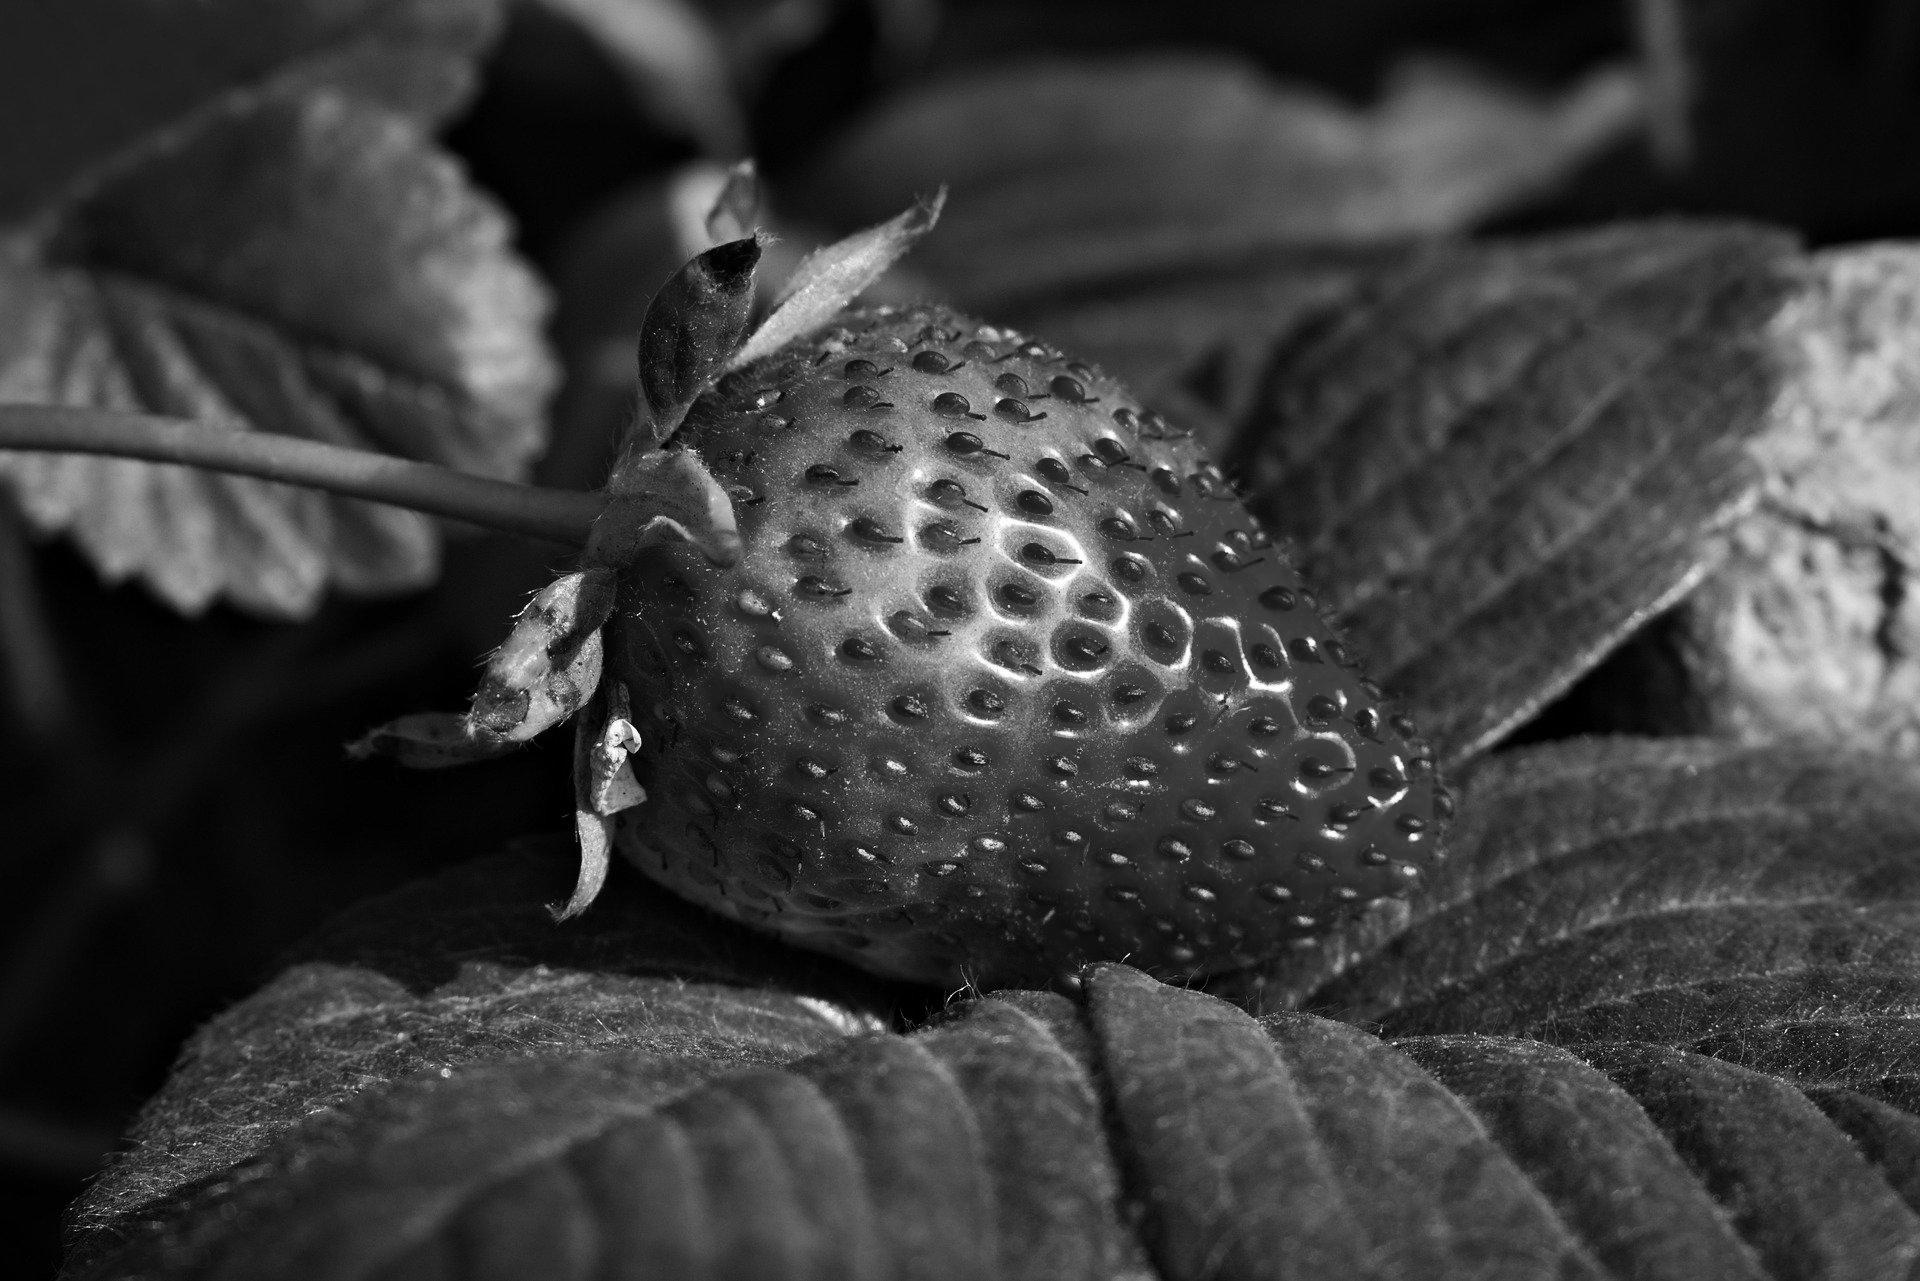
The outputs from the calls to .getbands() confirm that there are three bands in the RGB image, four bands in the CMYK image, and one band in the grayscale image.
You can separate an image into its bands using .split() and combine separate bands back into an Image object using merge(). When you use .split(), the method returns all the bands as separate Image objects. You can confirm this by displaying the string representation of one of the objects returned:
>>> red, green, blue = img.split()
>>> red
<PIL.Image.Image image mode=L size=1920x1281 at 0x7FDD80C9AFA0>
>>> red.mode
'L'
The mode of the object that .split() returns is 'L', indicating this is a grayscale image, or an image that only displays the luminance values of each pixel.
Now, you can create three new RGB images showing the red, green, and blue channels separately using merge(), which is a function in the Image module:
>>> zeroed_band = red.point(lambda _: 0)

>>> red_merge = Image.merge(
...     "RGB", (red, zeroed_band, zeroed_band)
... )

>>> green_merge = Image.merge(
...     "RGB", (zeroed_band, green, zeroed_band)
... )

>>> blue_merge = Image.merge(
...     "RGB", (zeroed_band, zeroed_band, blue)
... )

>>> red_merge.show()
>>> green_merge.show()
>>> blue_merge.show()
The first argument in merge() determines the mode of the image that you want to create. The second argument contains the individual bands that you want to merge into a single image.
The red band alone, stored in the variable red, is a grayscale image with mode L. To create the image showing only the red channel, you merge the red band from the original image with green and blue bands that only contain zeros. To create a band containing zeros everywhere, you use the .point() method.
This method needs a function as an argument. The function that you use determines how each point transforms. In this case, you use a lambda function to map each point to 0.
When you merge the red band with green and blue bands containing zeros, you get an RGB image called red_merge. Therefore, the RGB image that you create only has non-zero values in the red channel, but because it’s still an RGB image, it’ll display in color.
You also repeat a similar process to obtain green_merge and blue_merge, which contain RGB images with the green and blue channels from the original image. The code displays the following three images:
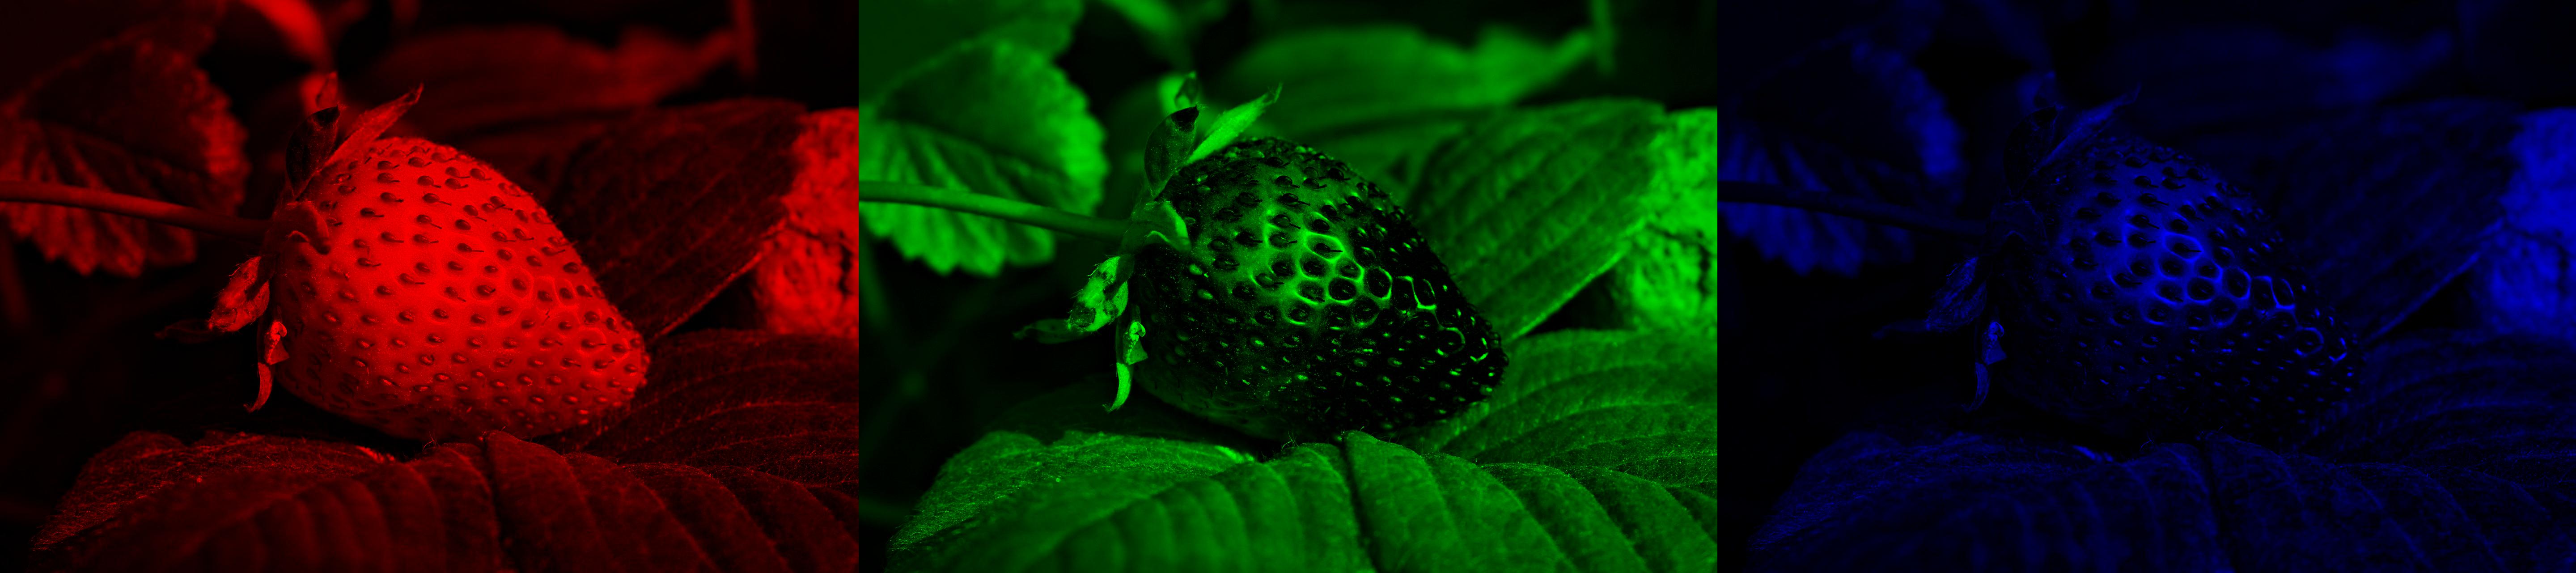
The red image contains a strong signal in the pixels that represent the strawberry, because these pixels are mostly red. The green and blue channels show these pixels as dark because they have small values. The exceptions are those pixels that represent the reflection of the light on the surface of the strawberry as these pixels are nearly white.
In this tutorial, when there are several images output in the code that need to be displayed next to one another to make comparisons easier, the images are displayed side by side rather than as separate images.
These side-by-side displays were created using Pillow itself. You can use the function tile(), shown below, to merge several images into a single display:
from PIL import Image

def tile(*images, vertical=False):
    width, height = images[0].width, images[0].height
    tiled_size = (
        (width, height * len(images))
        if vertical
        else (width * len(images), height)
    )
    tiled_img = Image.new(images[0].mode, tiled_size)
    row, col = 0, 0
    for image in images:
        tiled_img.paste(image, (row, col))
        if vertical:
            col += height
        else:
            row += width

    return tiled_img
The first parameter in tile() uses the unpacking operator (*) so that any number of objects of type PIL.Image can be used as input arguments. The keyword parameter vertical can be set to True if you want to tile the images vertically rather than horizontally. This function assumes that all images have the same size.
The overall size of the display is calculated from the size of the images and the number of images used. You then create a new Image object with the same mode as the original images and with the size of the overal display.
The for loop pastes the images that you input when you call the function into the final display. The function returns the final Image object containing all the images side by side.
The image in the main article showing the three color channels for the strawberry image was obtained by calling the tile() function as follows:
>>> strawberry_channels = tile(red_merge, green_merge, blue_merge)
This function was used to generate all the displays that show more than one image in this tutorial.
Image Processing Using Pillow in Python
You’ve learned how to crop and rotate images, resize them, and extract color bands from color images. However, none of the actions that you’ve taken so far have made any changes to the content of the image. In this section, you’ll learn about image processing features in the Python Pillow library. You’ll use the ImageFilter module in Pillow.
Image Filters Using Convolution Kernels
One of the methods that’s used in image processing is image convolution using kernels. The aim of this tutorial is not to give a detailed explanation of image processing theory. If you’re interested in the science of image processing, one of the best resources that you can use is Digital Image Processing by Gonzalez and Woods.
In this section, you’ll learn the basics of how you can use convolution kernels to perform image processing. But what’s a convolution kernel? A kernel is a matrix:

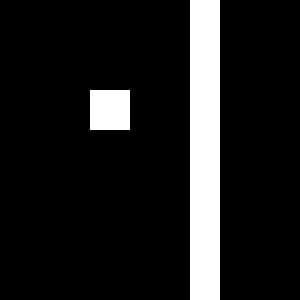
You can consider a simple image to understand the process of convolution using kernels. The image has a size of 30x30 pixels and contains a vertical line and a dot. The line is four pixels wide, and the dot consists of a 4x4 pixel square. The image below is enlarged for display purposes:
You can place the kernel anywhere on the image and use the location of the kernel’s central cell as a reference. The diagram below is a representation of the top-left portion of the image:

The elements in this diagram represent different aspects of the image and the kernel:
- The white squares represent pixels in the image that have a value of
0. - The red squares represent pixels in the image that have a value of
255. These make up the dot in the image shown above. - Each purple region represents the kernel. This kernel consists of a
3x3region, and each cell in the kernel has a value of1/9. The diagram shows the kernel in three different positions labeled 1, 2, and 3.
A new image can be created as a result of the convolution of the image with the kernel. You can understand the convolution process through the following steps:
- Locate kernel: Consider one of the kernel locations and look at the image pixels covered by the kernel’s nine cells.
- Multiply kernel and pixel values: Multiply the values in each of the kernel’s cells with the corresponding pixel values in the image. You’ll have nine values from the nine multiplications.
- Sum results of multiplications: Add those nine values together. The result will be the value of the pixel in the new image that has the same coordinates as the kernel’s center pixel.
- Repeat for all pixels: Repeat the process for every pixel in the image, moving the kernel each time so that the kernel’s central cell corresponds to a different image pixel each time.
You can see this process with the three kernel positions labeled 1, 2, and 3 in diagram above. Consider the kernel position labeled 1. The position of this kernel is (3, 2), which is the position of its central cell because it’s in the fourth row (index = 3) and the third column (index = 2). Each image pixel in the region covered by the kernel has a value of zero.
Therefore, all the multiplications from step 2 will be zero, and their addition will also be zero. The new image will have a value of zero at pixel (3, 2).
The scenario is different for the other kernel positions shown. Next, consider the kernel labeled 2, located at (4, 7). One of the image pixels overlapping this is not zero. The multiplication of this pixel value with the kernel value will give 255 x (1/9) = 28.33. The eight remaining multiplications are still zero because the image pixels are zero. Therefore, the value of the pixel at position (4, 7) in the new image will be 28.33.
The third kernel position illustrated above is at (8, 11). There are four non-zero image pixels overlapping with this kernel. Each one has a value of 255, so the multiplication result will again be 28.33 for each of those pixel positions. The overall result for this kernel position is 28.33 x 4 = 113.33. The new image will have this value at (8, 11).
The diagram and the discussion above only consider three kernel positions. The convolution process repeats this process for every possible kernel position in the image. This gives a value for each pixel position in the new image.
The result of the convolution is shown on the right in the following image, with the original image on the left:
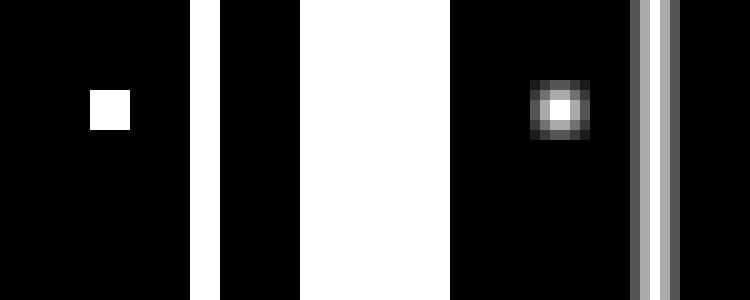
The kernel that you used is a box blur kernel. The factor of 1/9 is there so that the overall weighting of the kernel is 1. The result of the convolution is a blurred version of the original image. There are other kernels that perform different functions, including different blurring methods, edge detection, sharpening, and more.
The Python Pillow library has several built-in kernels and functions that’ll perform the convolution described above. You don’t need to understand the math of filtering through convolution to use these filters, but it always helps to know what’s happening behind the scenes when using these tools.
The next sections will look at the kernels and image filtering capabilities available in the ImageFilter module in Pillow.
Image Blurring, Sharpening, and Smoothing
You’ll return to using the image of the buildings that you used at the beginning of this tutorial. You can start a new REPL session for this section:
>>> from PIL import Image, ImageFilter
>>> filename = "buildings.jpg"
>>> with Image.open(filename) as img:
...     img.load()
...
In addition to Image, you also import the ImageFilter module from Pillow. You can use the .filter() method to apply filtering to the image. This method needs a convolution kernel as its argument, and you can use one of the several kernels available in the ImageFilter module in Pillow. The first set of filters that you’ll learn about deal with blurring, sharpening, and smoothing an image.
You can blur the image using the predefined ImageFilter.BLUR filter:
>>> blur_img = img.filter(ImageFilter.BLUR)
>>> blur_img.show()
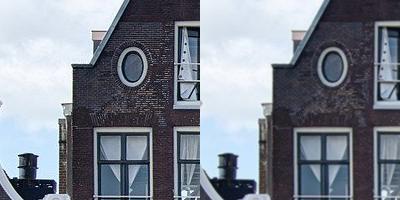
The displayed image is a blurred version of the original one. You can zoom in to observe the difference in more detail using .crop() and then display the images again using .show():
>>> img.crop((300, 300, 500, 500)).show()
>>> blur_img.crop((300, 300, 500, 500)).show()
The two cropped images show the difference between the two versions:

You can customize the type and amount of blurring that you need using ImageFilter.BoxBlur() or ImageFilter.GaussianBlur():
>>> img.filter(ImageFilter.BoxBlur(5)).show()
>>> img.filter(ImageFilter.BoxBlur(20)).show()
>>> img.filter(ImageFilter.GaussianBlur(20)).show()
You can see the three blurred images below, shown in the same order as in the code above:
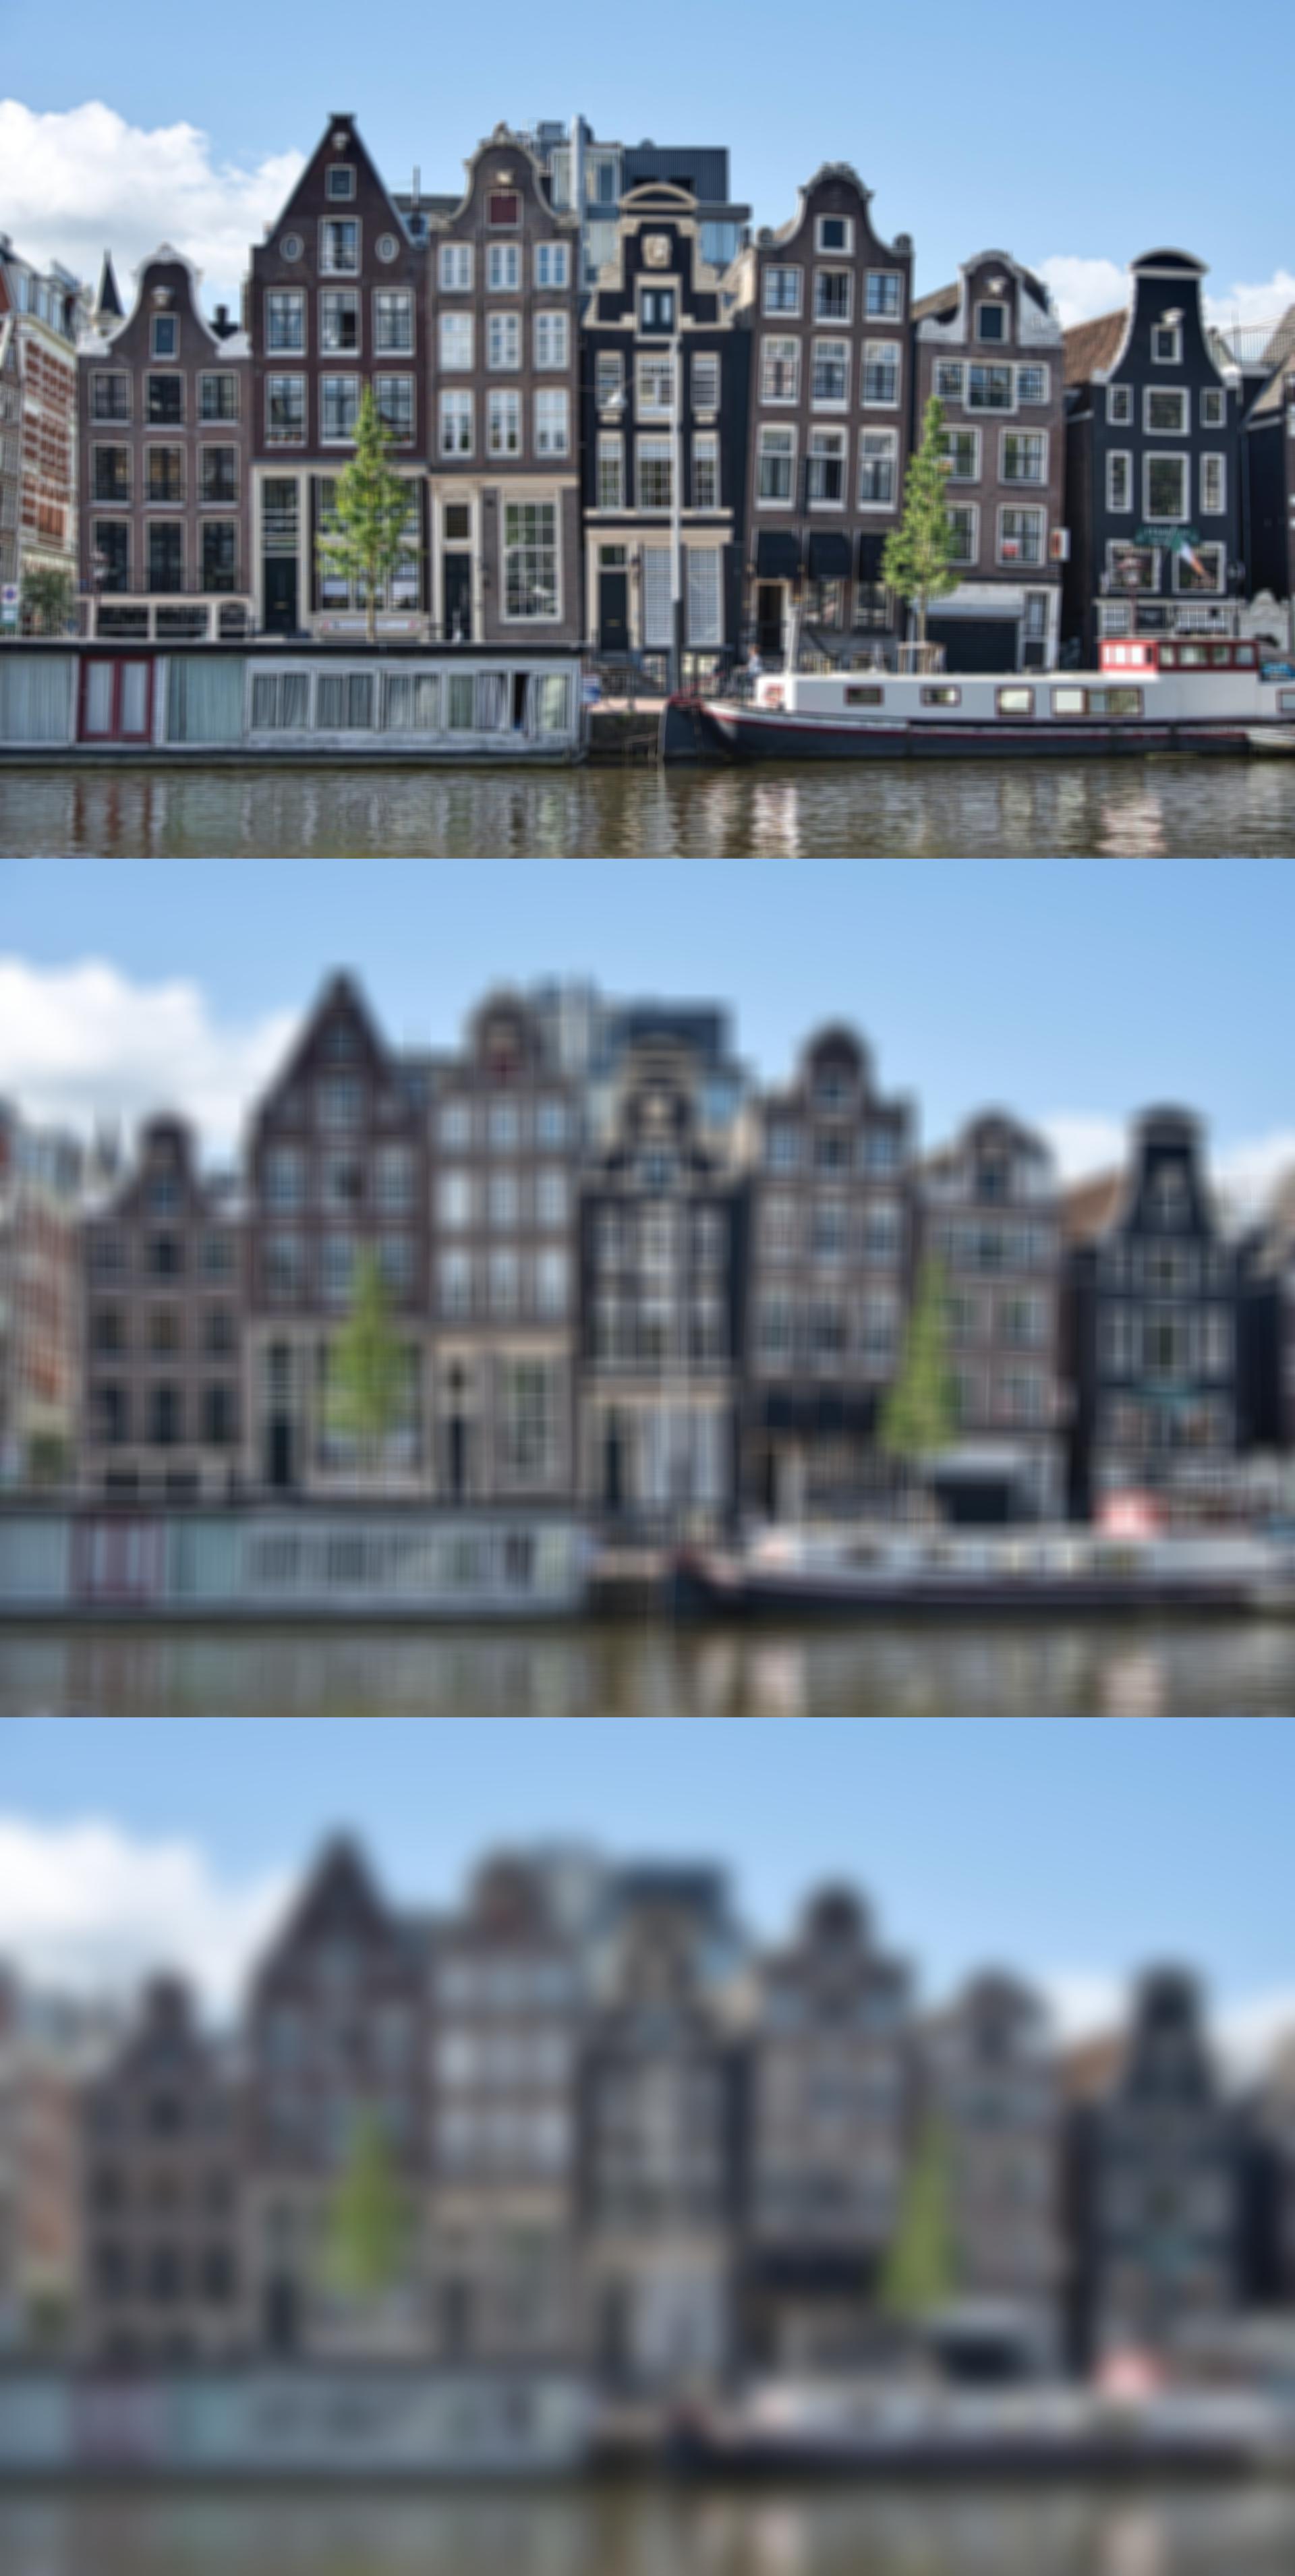
The .BoxBlur() filter is similar to the one described in the previous section introducing convolution kernels. The argument is the radius of the box blur filter. In the earlier section discussing kernels, the box blur filter that you used was a 3x3 filter. This means that it had a radius of 1, because the filter extends by one pixel from the center.
The blurred images show that the box blur filter with a radius of 20 produces an image that’s more blurred than the image generated by the box blur filter with radius 5.
You can also use the .GaussianBlur() filter, which uses a Gaussian blur kernel. The Gaussian kernel puts more weight on the pixels at the center of the kernel than those at the edges, and this leads to smoother blurring than what’s obtained with the box blur. For this reason, Gaussian blurring can give better results in many cases.
What if you want to sharpen an image? In that case, you can use the ImageFilter.SHARPEN filter and compare the result with the original image:
>>> sharp_img = img.filter(ImageFilter.SHARPEN)
>>> img.crop((300, 300, 500, 500)).show()
>>> sharp_img.crop((300, 300, 500, 500)).show()
You’re comparing a cropped version of both images showing a small portion of the building. The sharpened image is on the right:

Perhaps instead of sharpening an image, you need to smooth it. You can achieve this by passing ImageFilter.SMOOTH as an argument for .filter():
>>> smooth_img = img.filter(ImageFilter.SMOOTH)
>>> img.crop((300, 300, 500, 500)).show()
>>> smooth_img.crop((300, 300, 500, 500)).show()
Below, you can see the original image on the left and the smoothed image on the right:
You’ll see an application of the smooth filter in the next section, in which you’ll learn about more filters in the ImageFilter module. These filters act on the edges of objects in the image.
Edge Detection, Edge Enhancement, and Embossing
When you look at an image, it’s relatively easy to determine the edges of objects within that image. It’s also possible for an algorithm to detect edges automatically using edge detection kernels.
The ImageFilter module in Pillow has a predefined kernel to achieve this. In this section, you’ll use the image of the buildings again and convert it to grayscale before you apply the edge detection filter. You can carry on with the REPL session from the previous section:
>>> img_gray = img.convert("L")
>>> edges = img_gray.filter(ImageFilter.FIND_EDGES)
>>> edges.show()
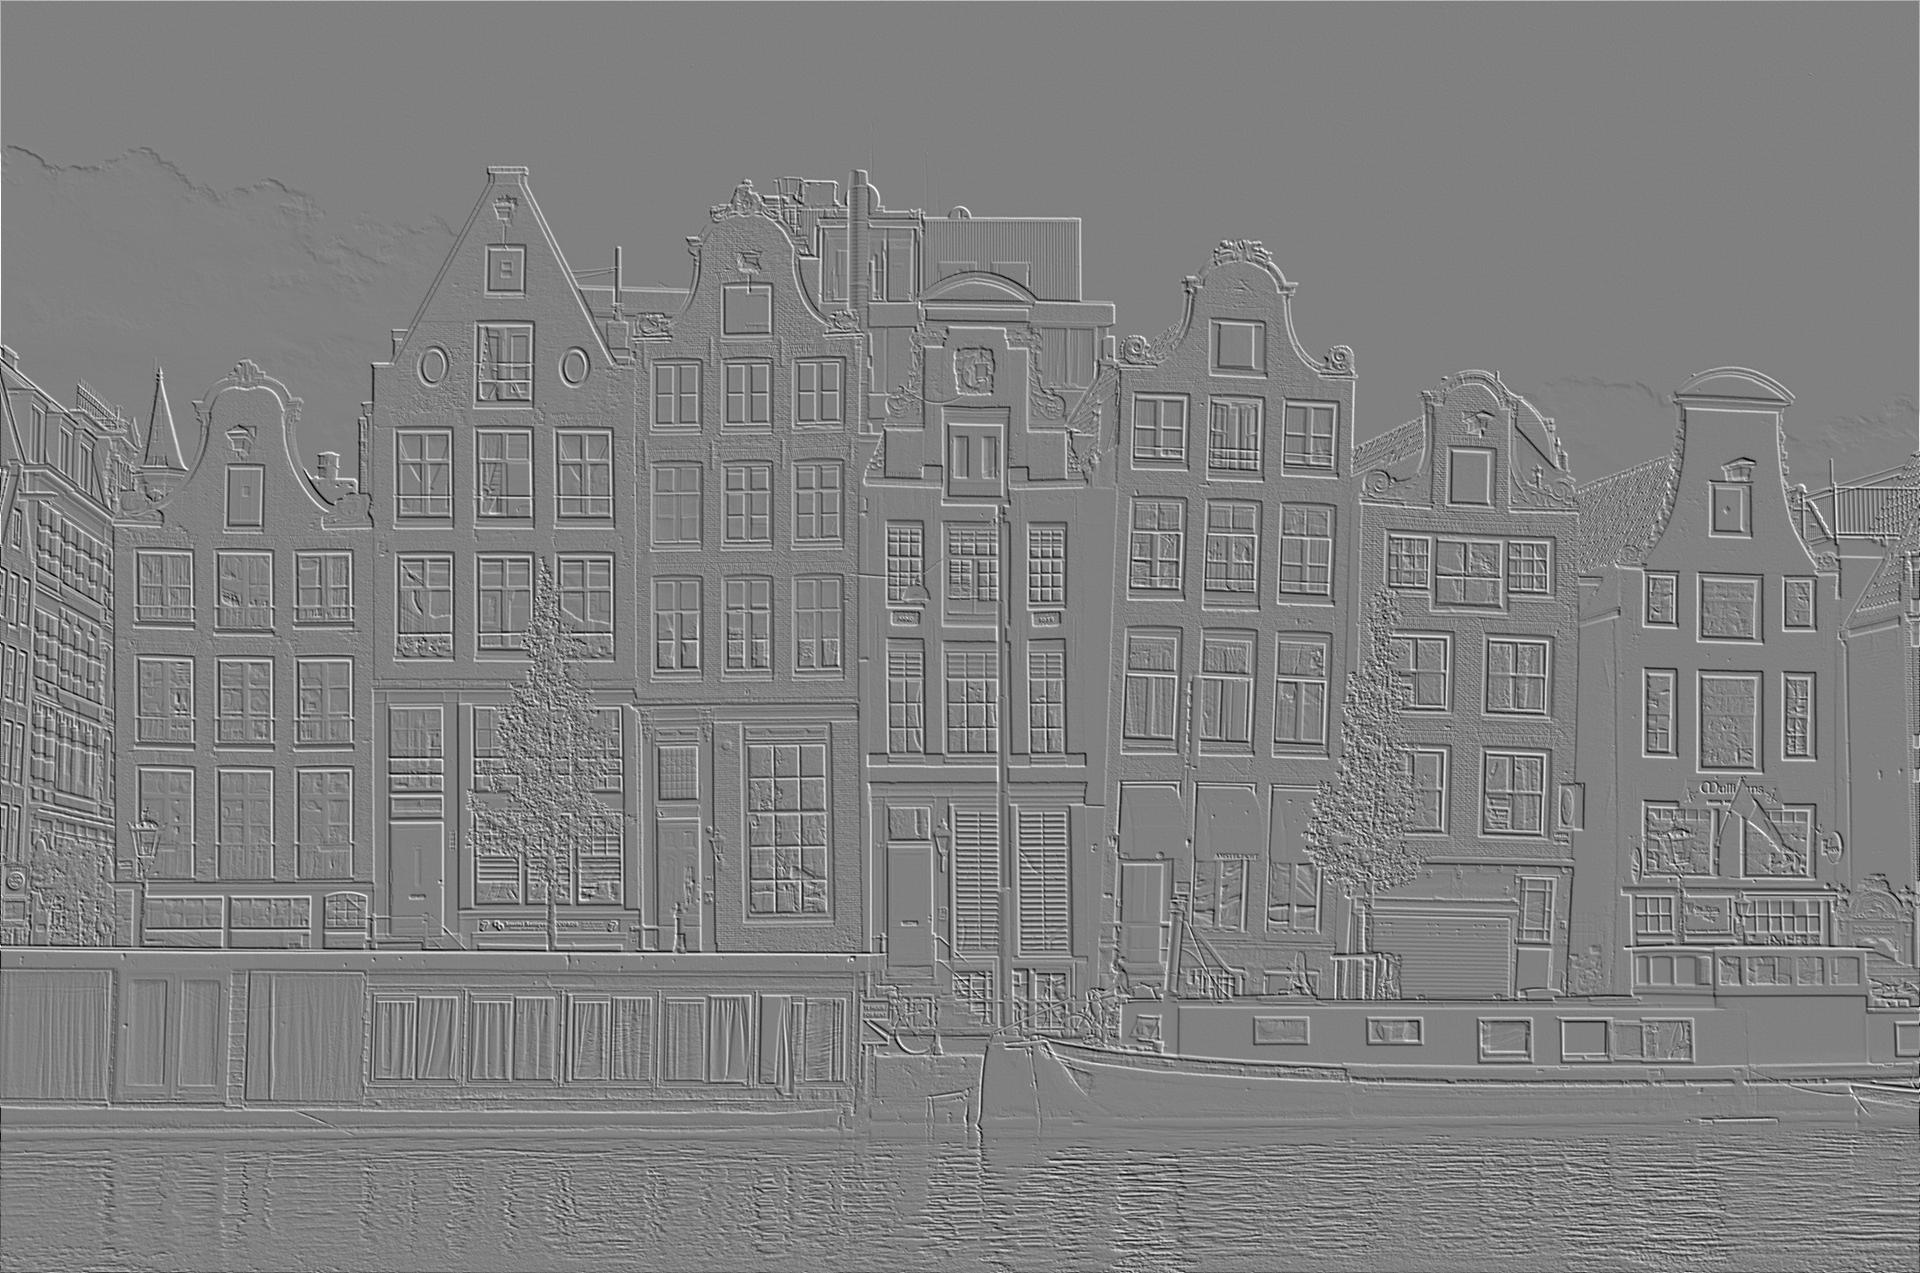
The result is an image showing the edges from the original image:

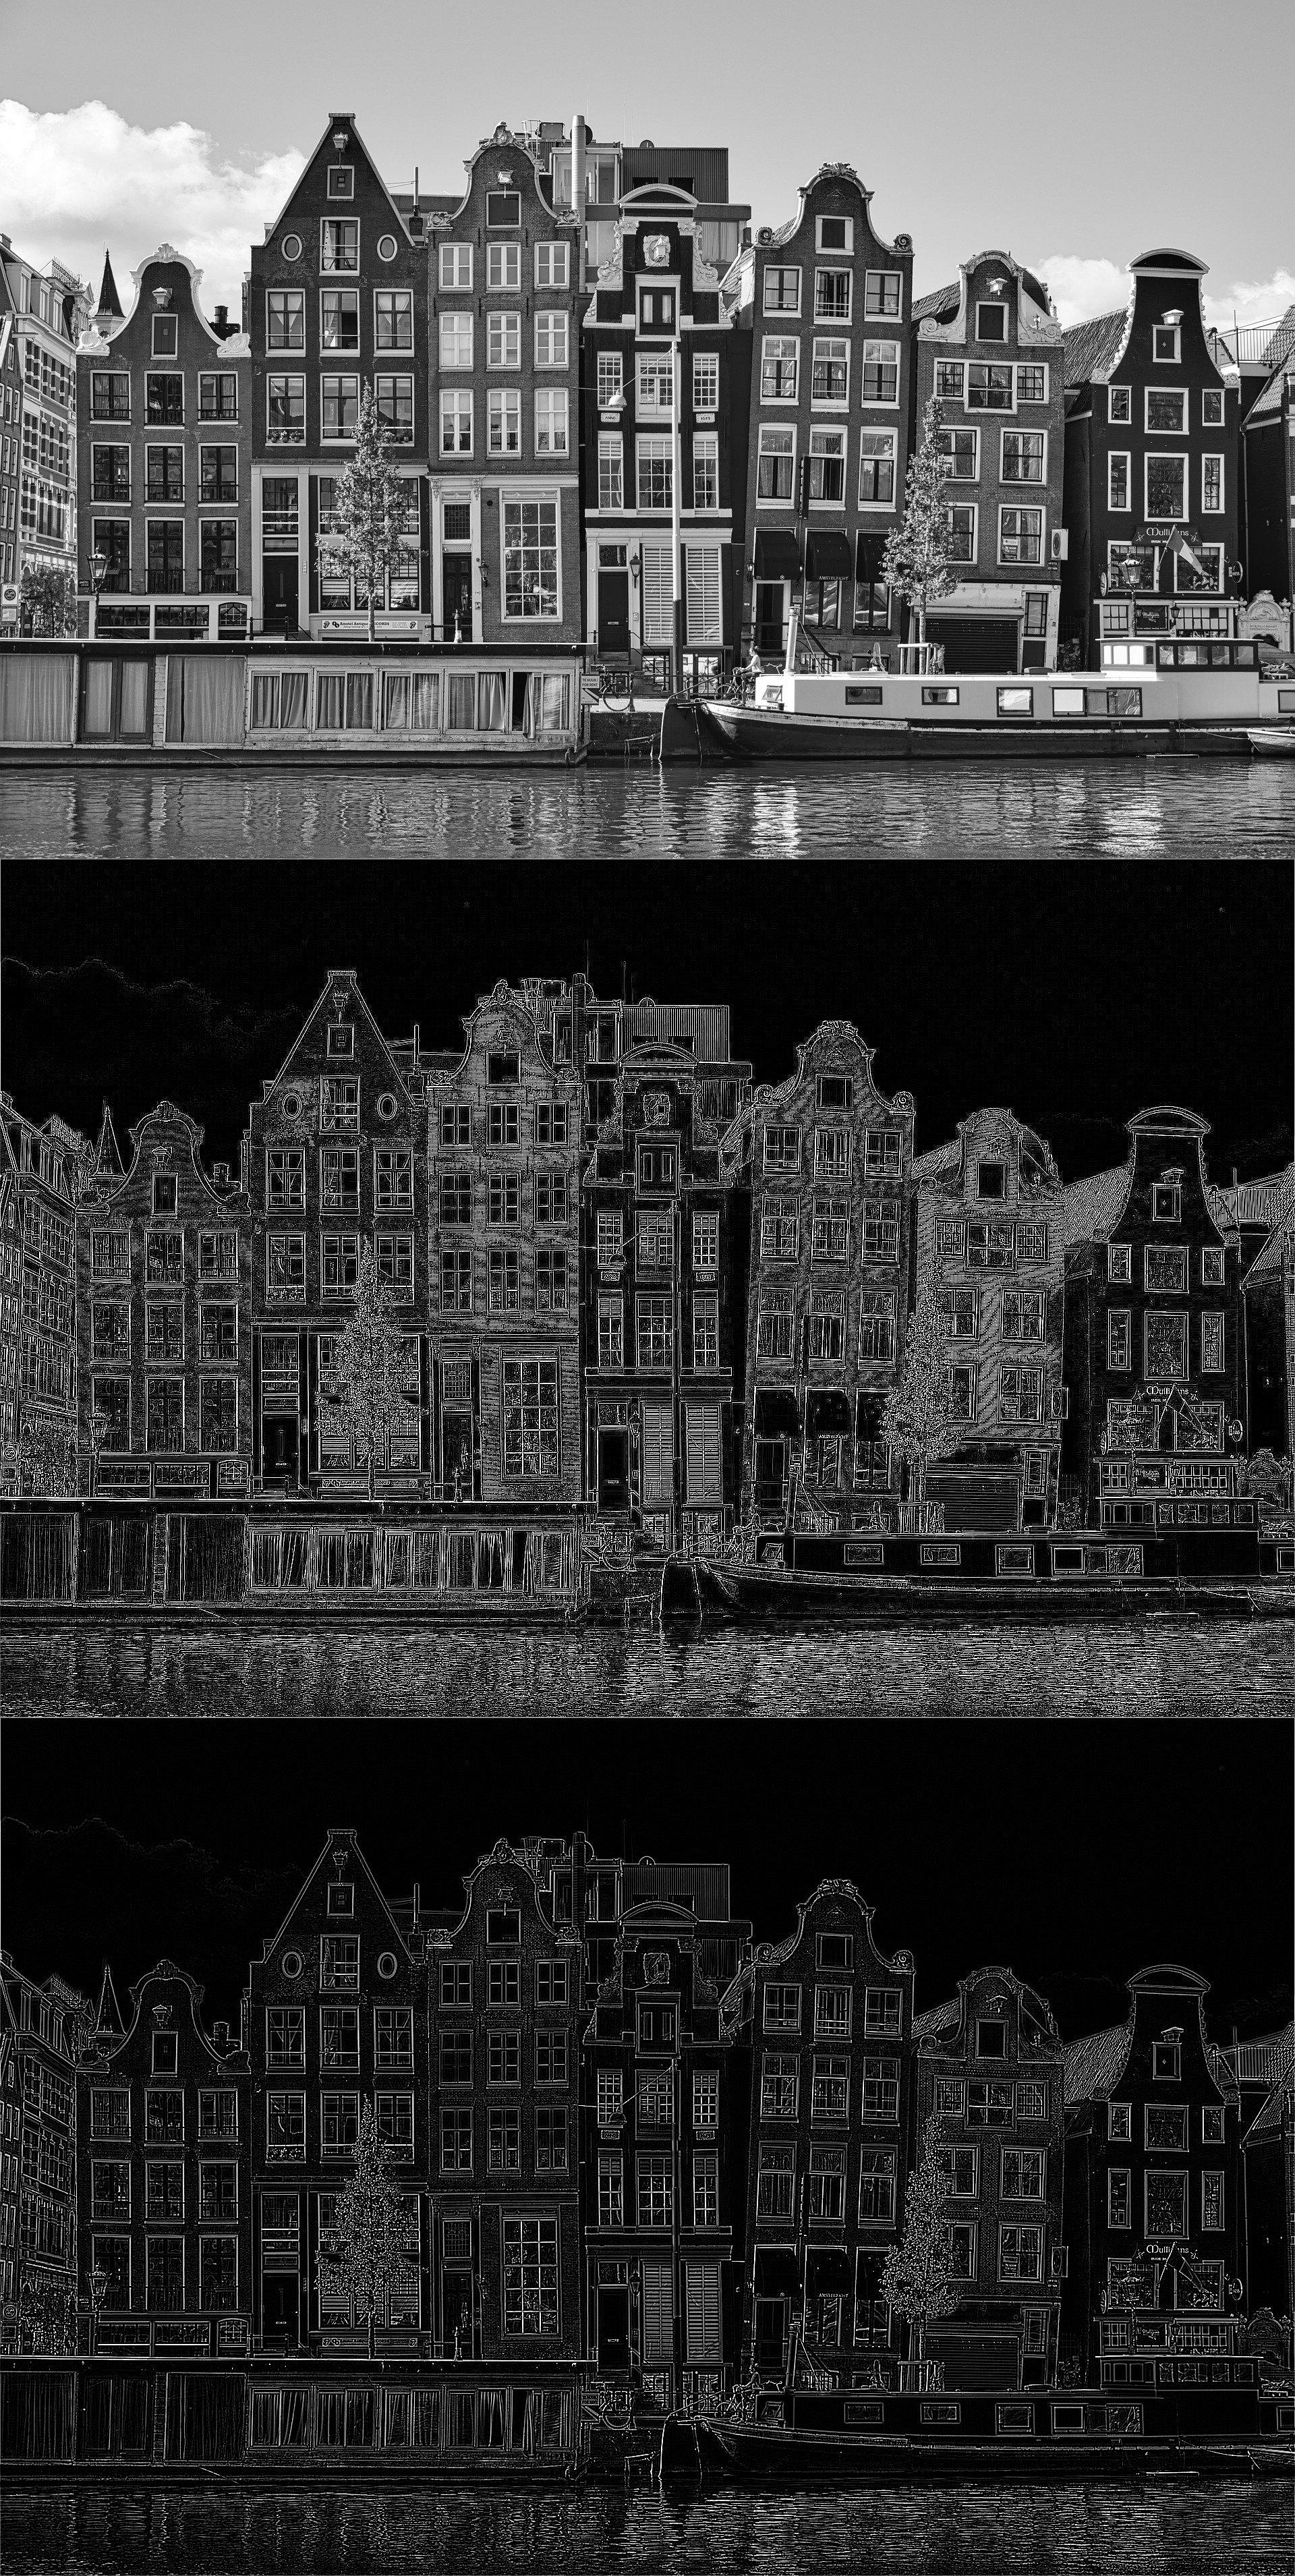
This filter identifies the edges in the image. You can obtain a better outcome by applying the ImageFilter.SMOOTH filter before finding the edges:
>>> img_gray_smooth = img_gray.filter(ImageFilter.SMOOTH)
>>> edges_smooth = img_gray_smooth.filter(ImageFilter.FIND_EDGES)
>>> edges_smooth.show()
You can see a comparison of the original grayscale image and the two edge detection results below. The version with smoothing before edge detection is shown at the bottom:
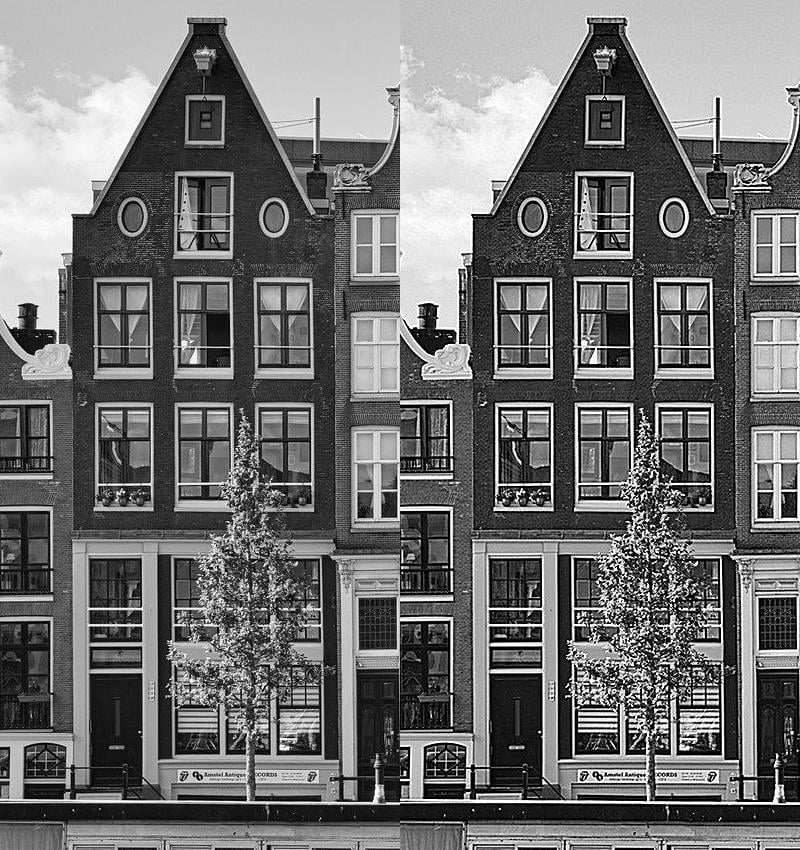
You can also enhance the edges of the original image with the ImageFilter.EDGE_ENHANCE filter:
>>> edge_enhance = img_gray_smooth.filter(ImageFilter.EDGE_ENHANCE)
>>> edge_enhance.show()
You used the smoothed version of the grayscale image to enhance the edges. A portion of the original grayscale image and the image with the edges enhanced are shown side by side below. The image with edge enhancement is on the right:
Another predefined filter in ImageFilter that deals with object edges is ImageFilter.EMBOSS. You can pass it as an argument to .filter() as you did with the other filters in this section:
>>> emboss = img_gray_smooth.filter(ImageFilter.EMBOSS)
>>> emboss.show()
You’re using the smoothed, grayscale version as a starting point for this filter. You can see the embossed image below, which shows a different effect using the edges in the image:
In this section, you’ve learned about several filters available in the ImageFilter module that you can apply to images. There are other filters that you can use to process images. You can see a list of all the filters available in the ImageFilter documentation.
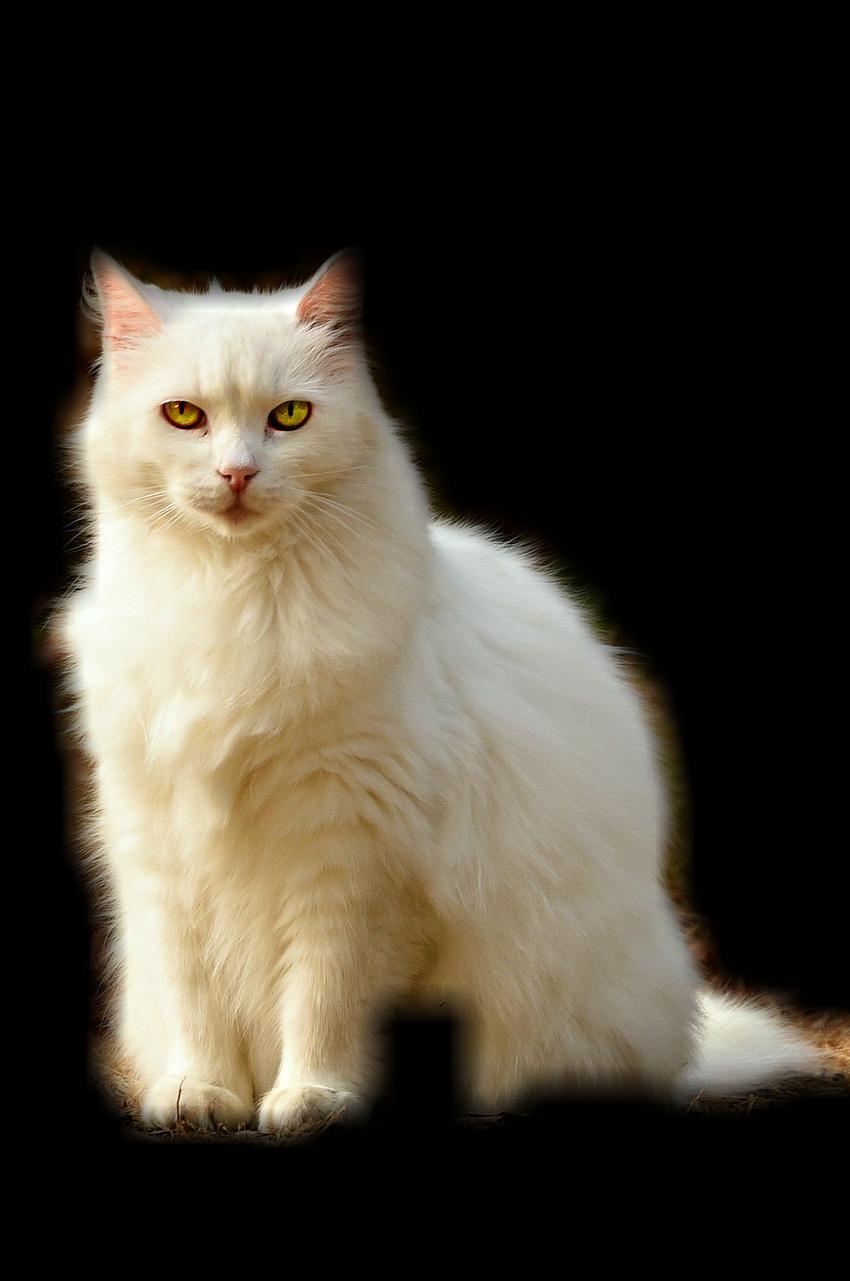
Image Segmentation and Superimposition: An Example
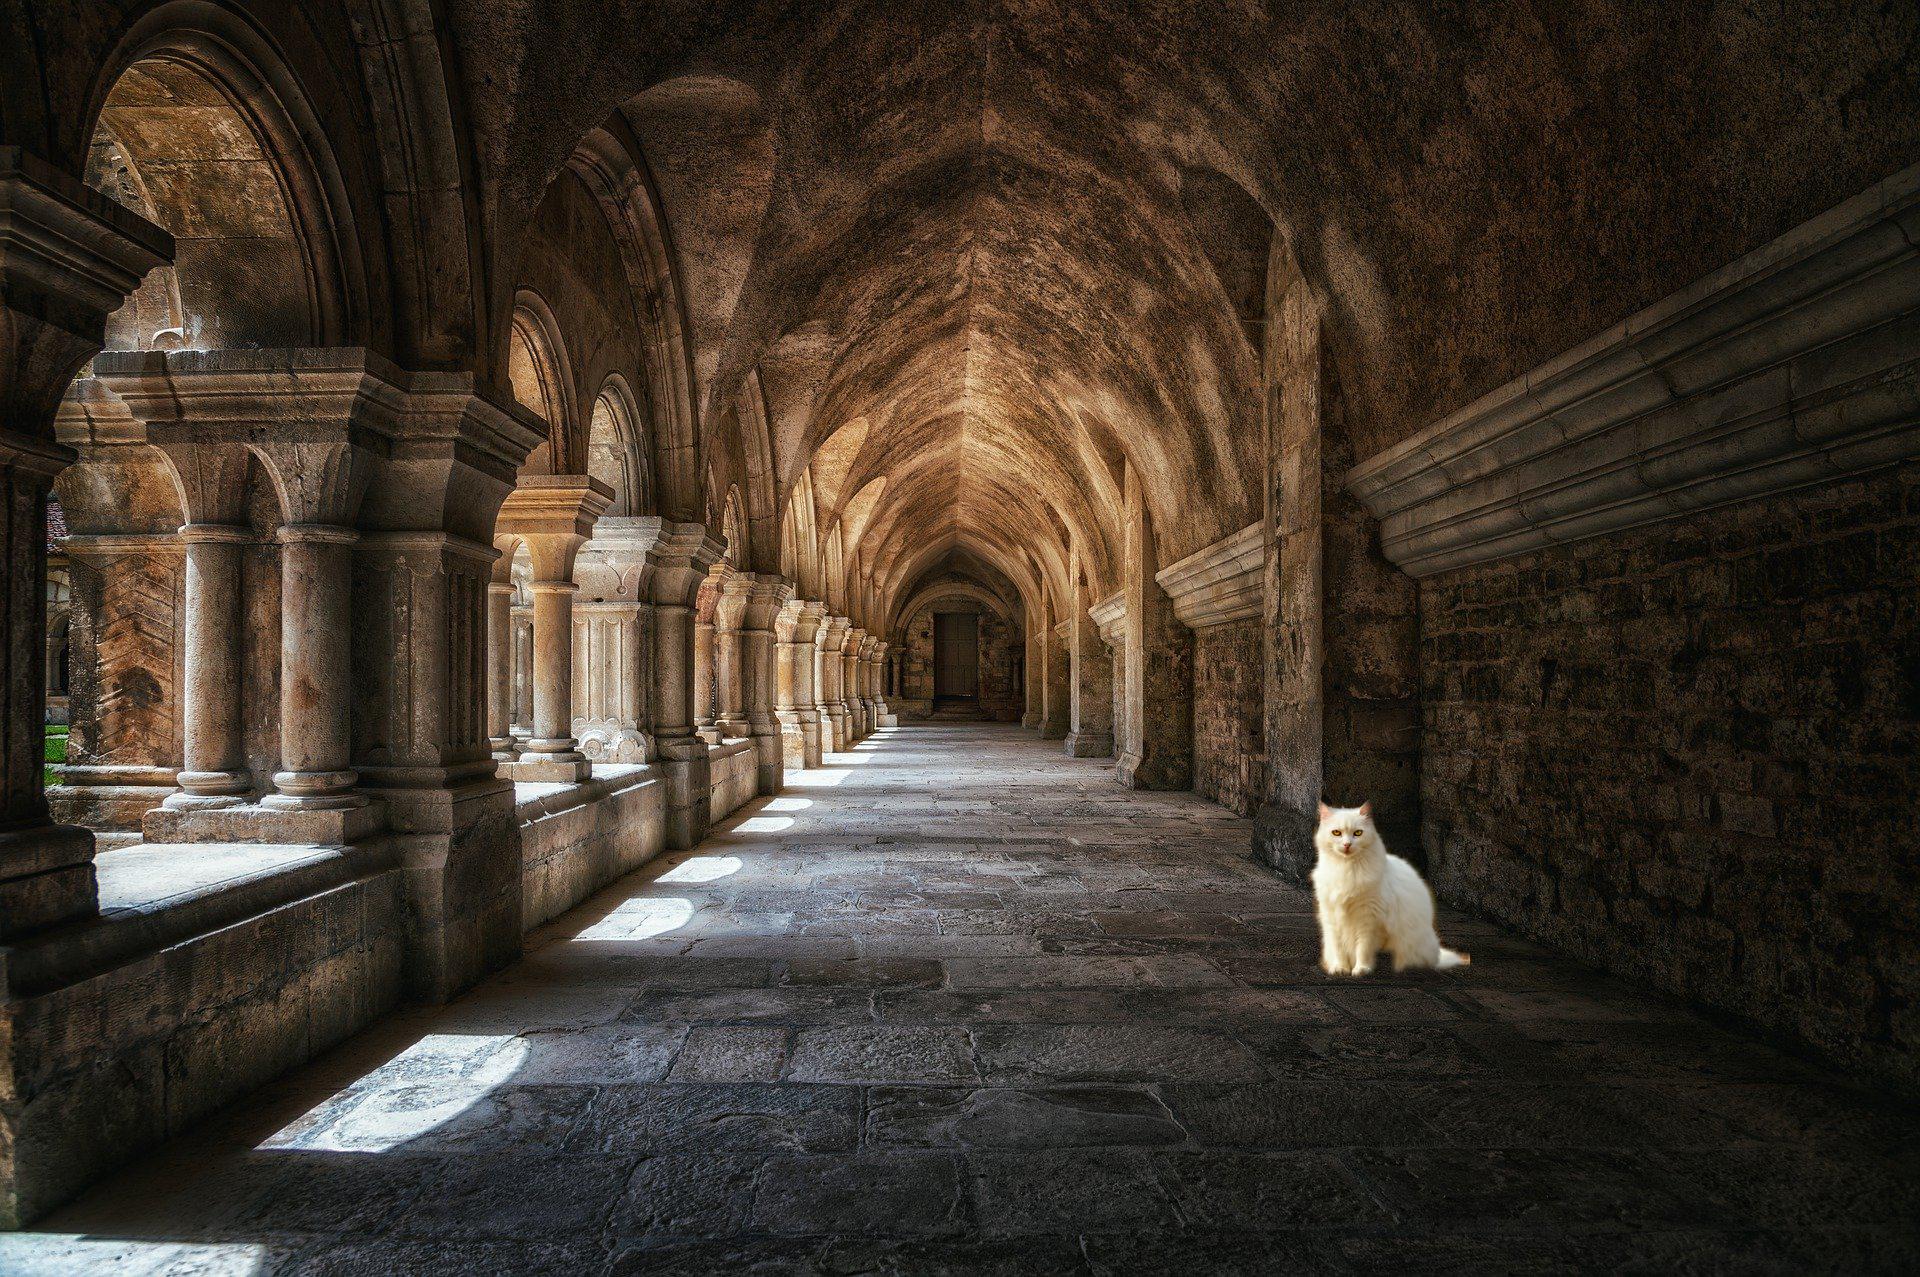
In this section, you’ll use the image files named cat.jpg (image credit) and monastery.jpg (image credit), which you can find in the image repository for this tutorial:
Get Images: Click here to get access to the images that you’ll manipulate and process with Pillow.
Here are the two images:
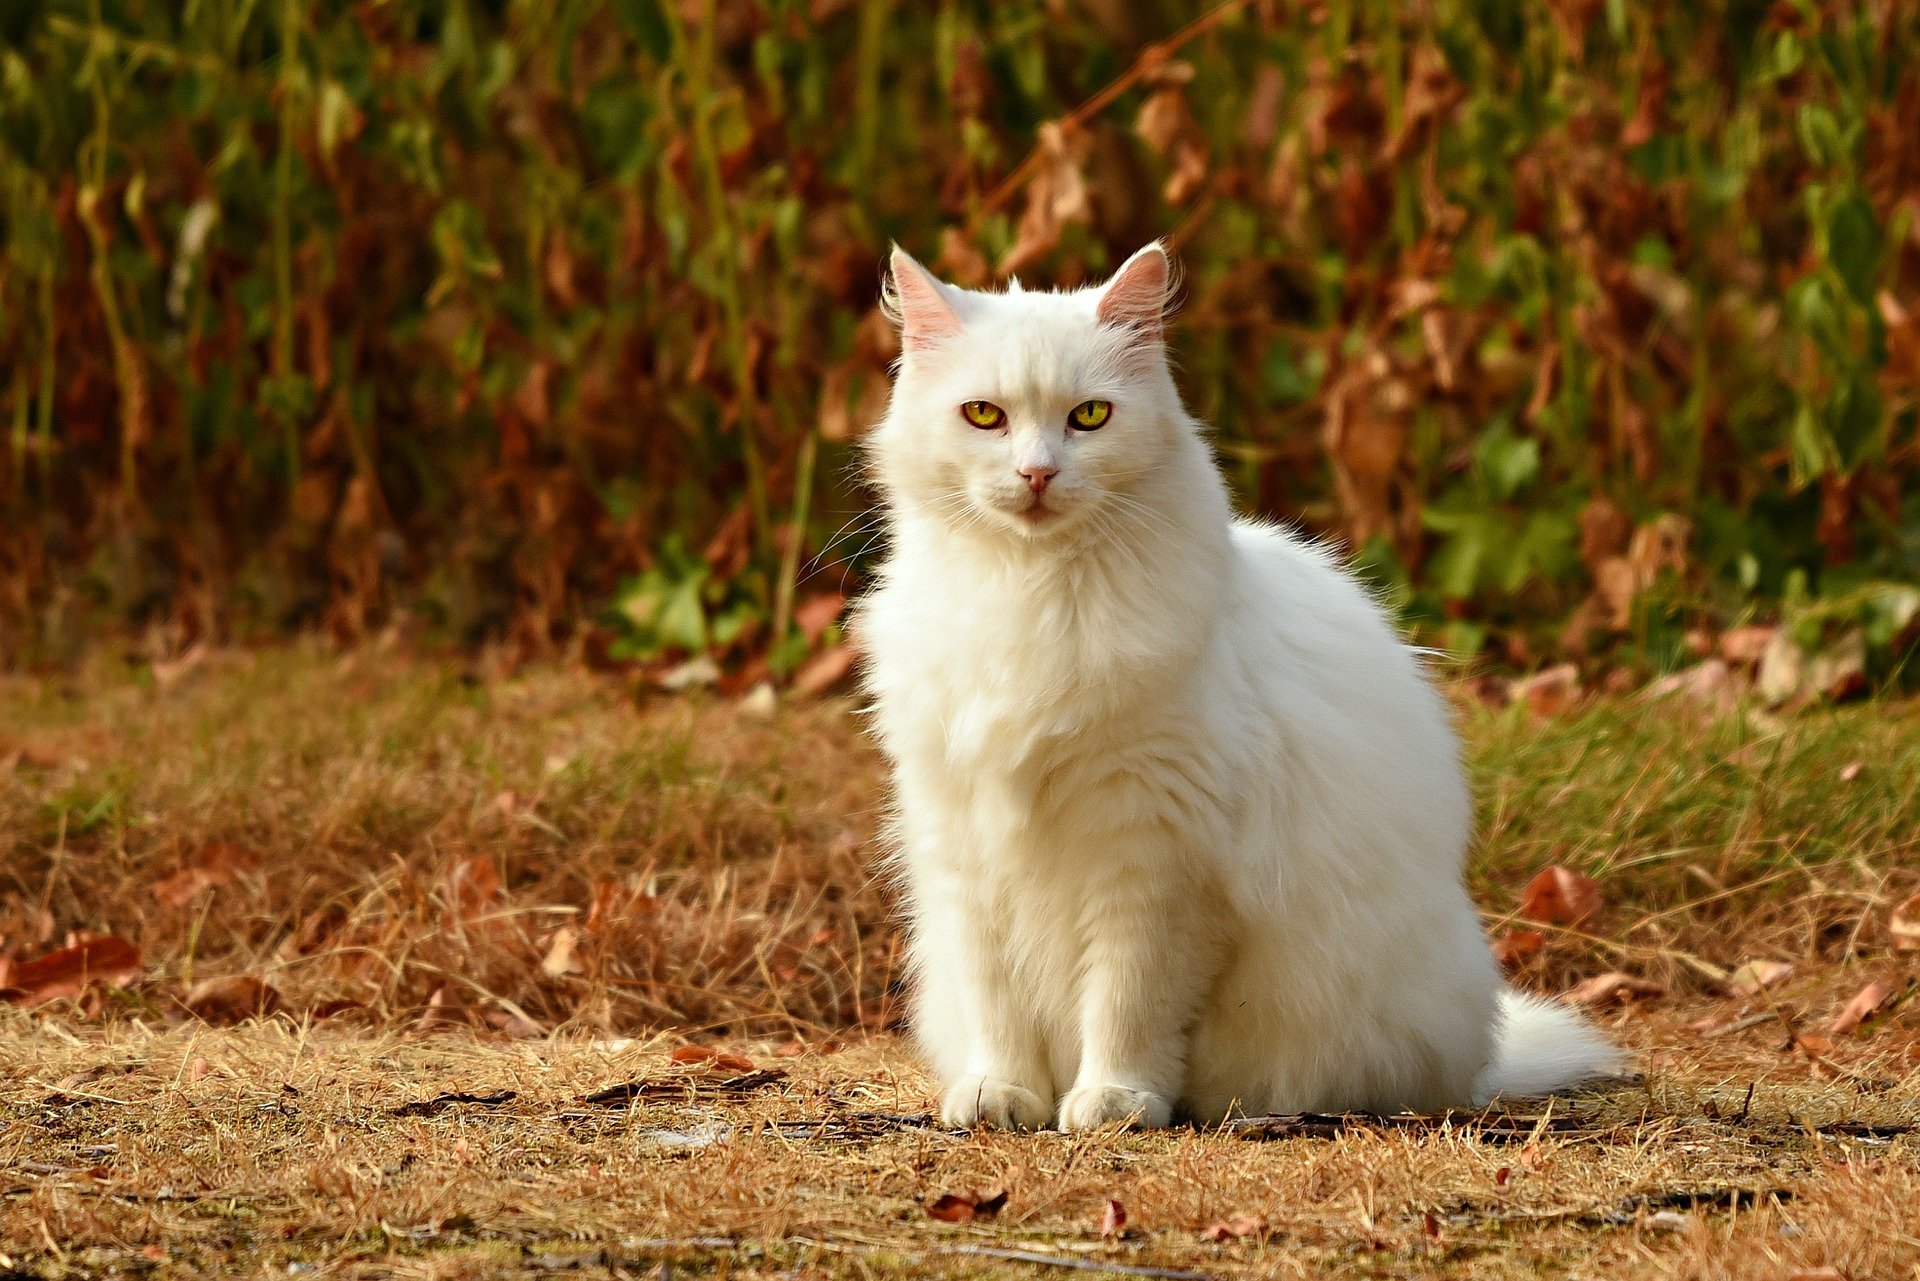
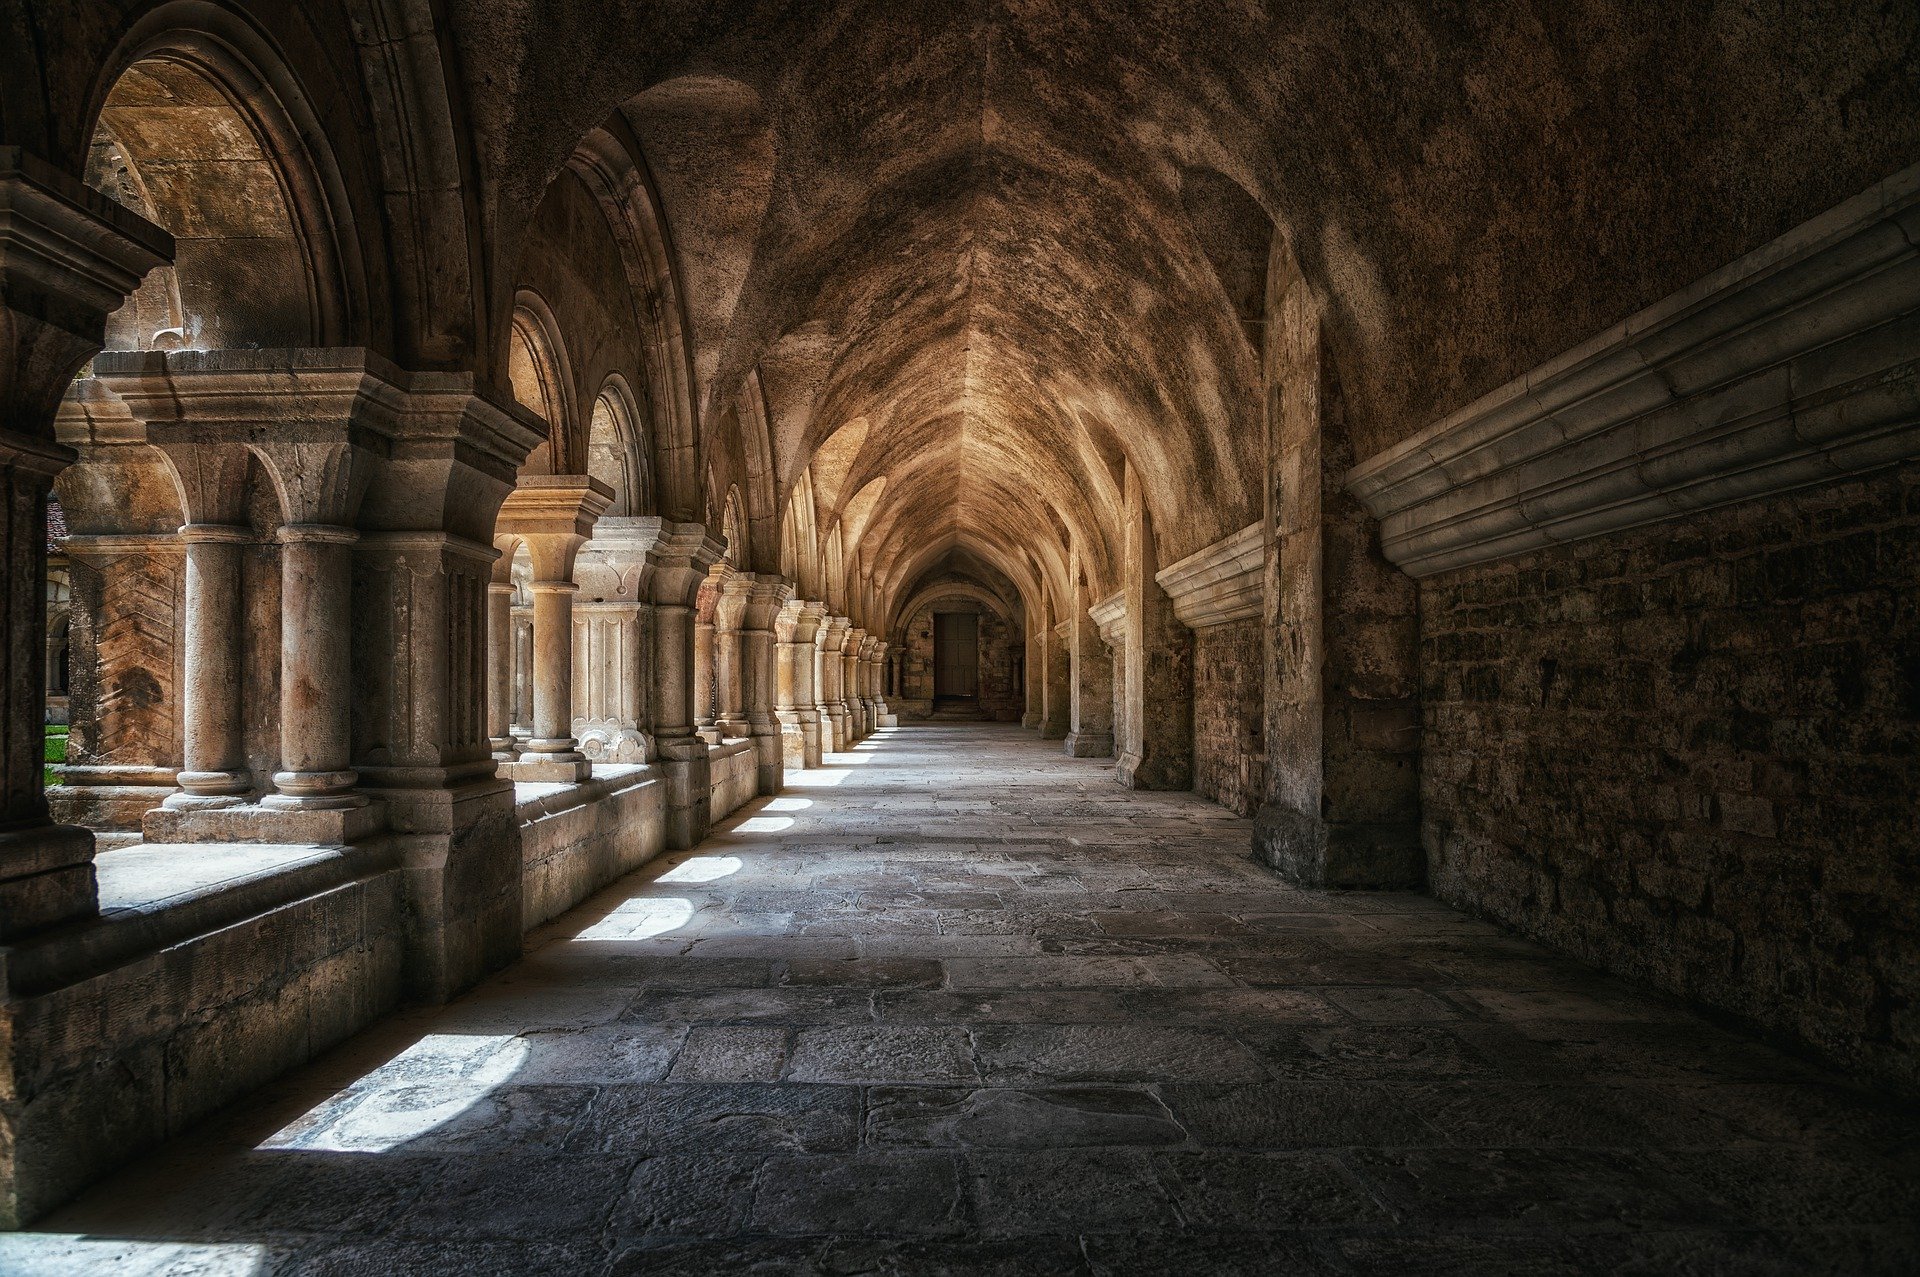
You can use the Python Pillow library to extract the cat from the first image and place it on the floor of the monastery courtyard. You’ll use a number of image processing techniques to achieve this.
Image Thresholding
You’ll start by working on cat.jpg. You’ll need to remove the picture of the cat from the background using image segmentation techniques. In this example, you’ll segment the image using thresholding techniques.
First, you can crop the image to a smaller one to remove some of the background. You can start a new REPL session for this project:
>>> from PIL import Image
>>> filename_cat = "cat.jpg"
>>> with Image.open(filename_cat) as img_cat:
... img_cat.load()
...
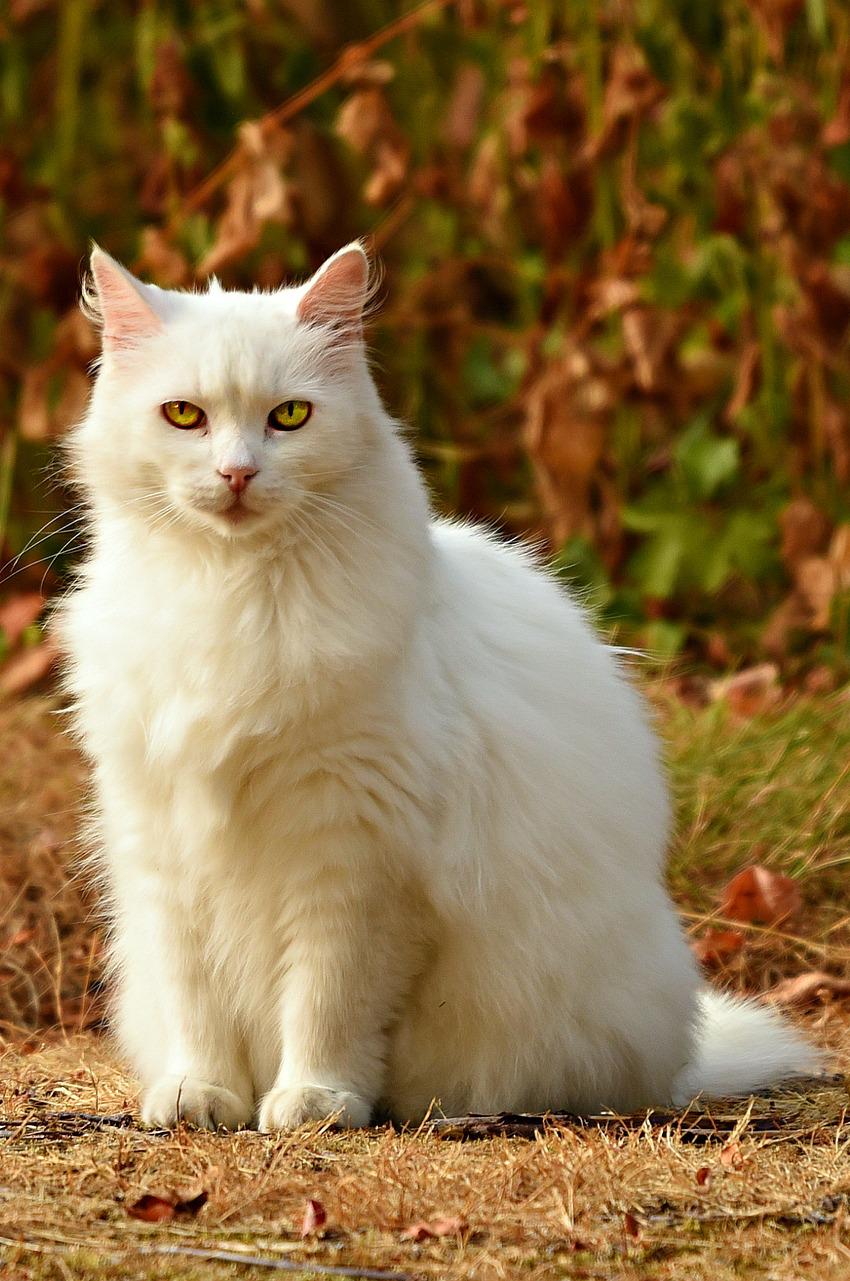
>>> img_cat = img_cat.crop((800, 0, 1650, 1281))
>>> img_cat.show()
The cropped image contains the cat and some of the background that’s too close to the cat for you to crop it:
Each pixel in a color image is represented digitally by three numbers corresponding to the red, green, and blue values of that pixel. Thresholding is the process of converting all the pixels to either the maximum or minimum value depending on whether they’re higher or lower than a certain number. It’s easier to do this on a grayscale image:
>>> img_cat_gray = img_cat.convert("L")
>>> img_cat_gray.show()
>>> threshold = 100
>>> img_cat_threshold = img_cat_gray.point(
...     lambda x: 255 if x > threshold else 0
... )
>>> img_cat_threshold.show()
You achieve thresholding by calling .point() to convert each pixel in the grayscale image into either 255 or 0. The conversion depends on whether the value in the grayscale image is greater or smaller than the threshold value. The threshold value in this example is 100.
The figure below shows the grayscale image and the result from the thresholding process:

In this example, all the points in the grayscale image that had a pixel value greater than 100 are converted to white, and all other pixels are changed to black. You can change the sensitivity of the thresholding process by varying the threshold value.
Thresholding can be used to segment images when the object to segment is distinct from the background. You can achieve better results with versions of the original image that have higher contrast. In this example, you can achieve higher contrast by thresholding the blue channel of the original image rather than the grayscale image, because the dominant colors in the background are brown and green colors, which have a weak blue component.
You can extract the red, green, and blue channels from the color image as you did earlier:
>>> red, green, blue = img_cat.split()
>>> red.show()
>>> green.show()
>>> blue.show()
The red, green, and blue channels are shown below, from left to right. All three are displayed as grayscale images:
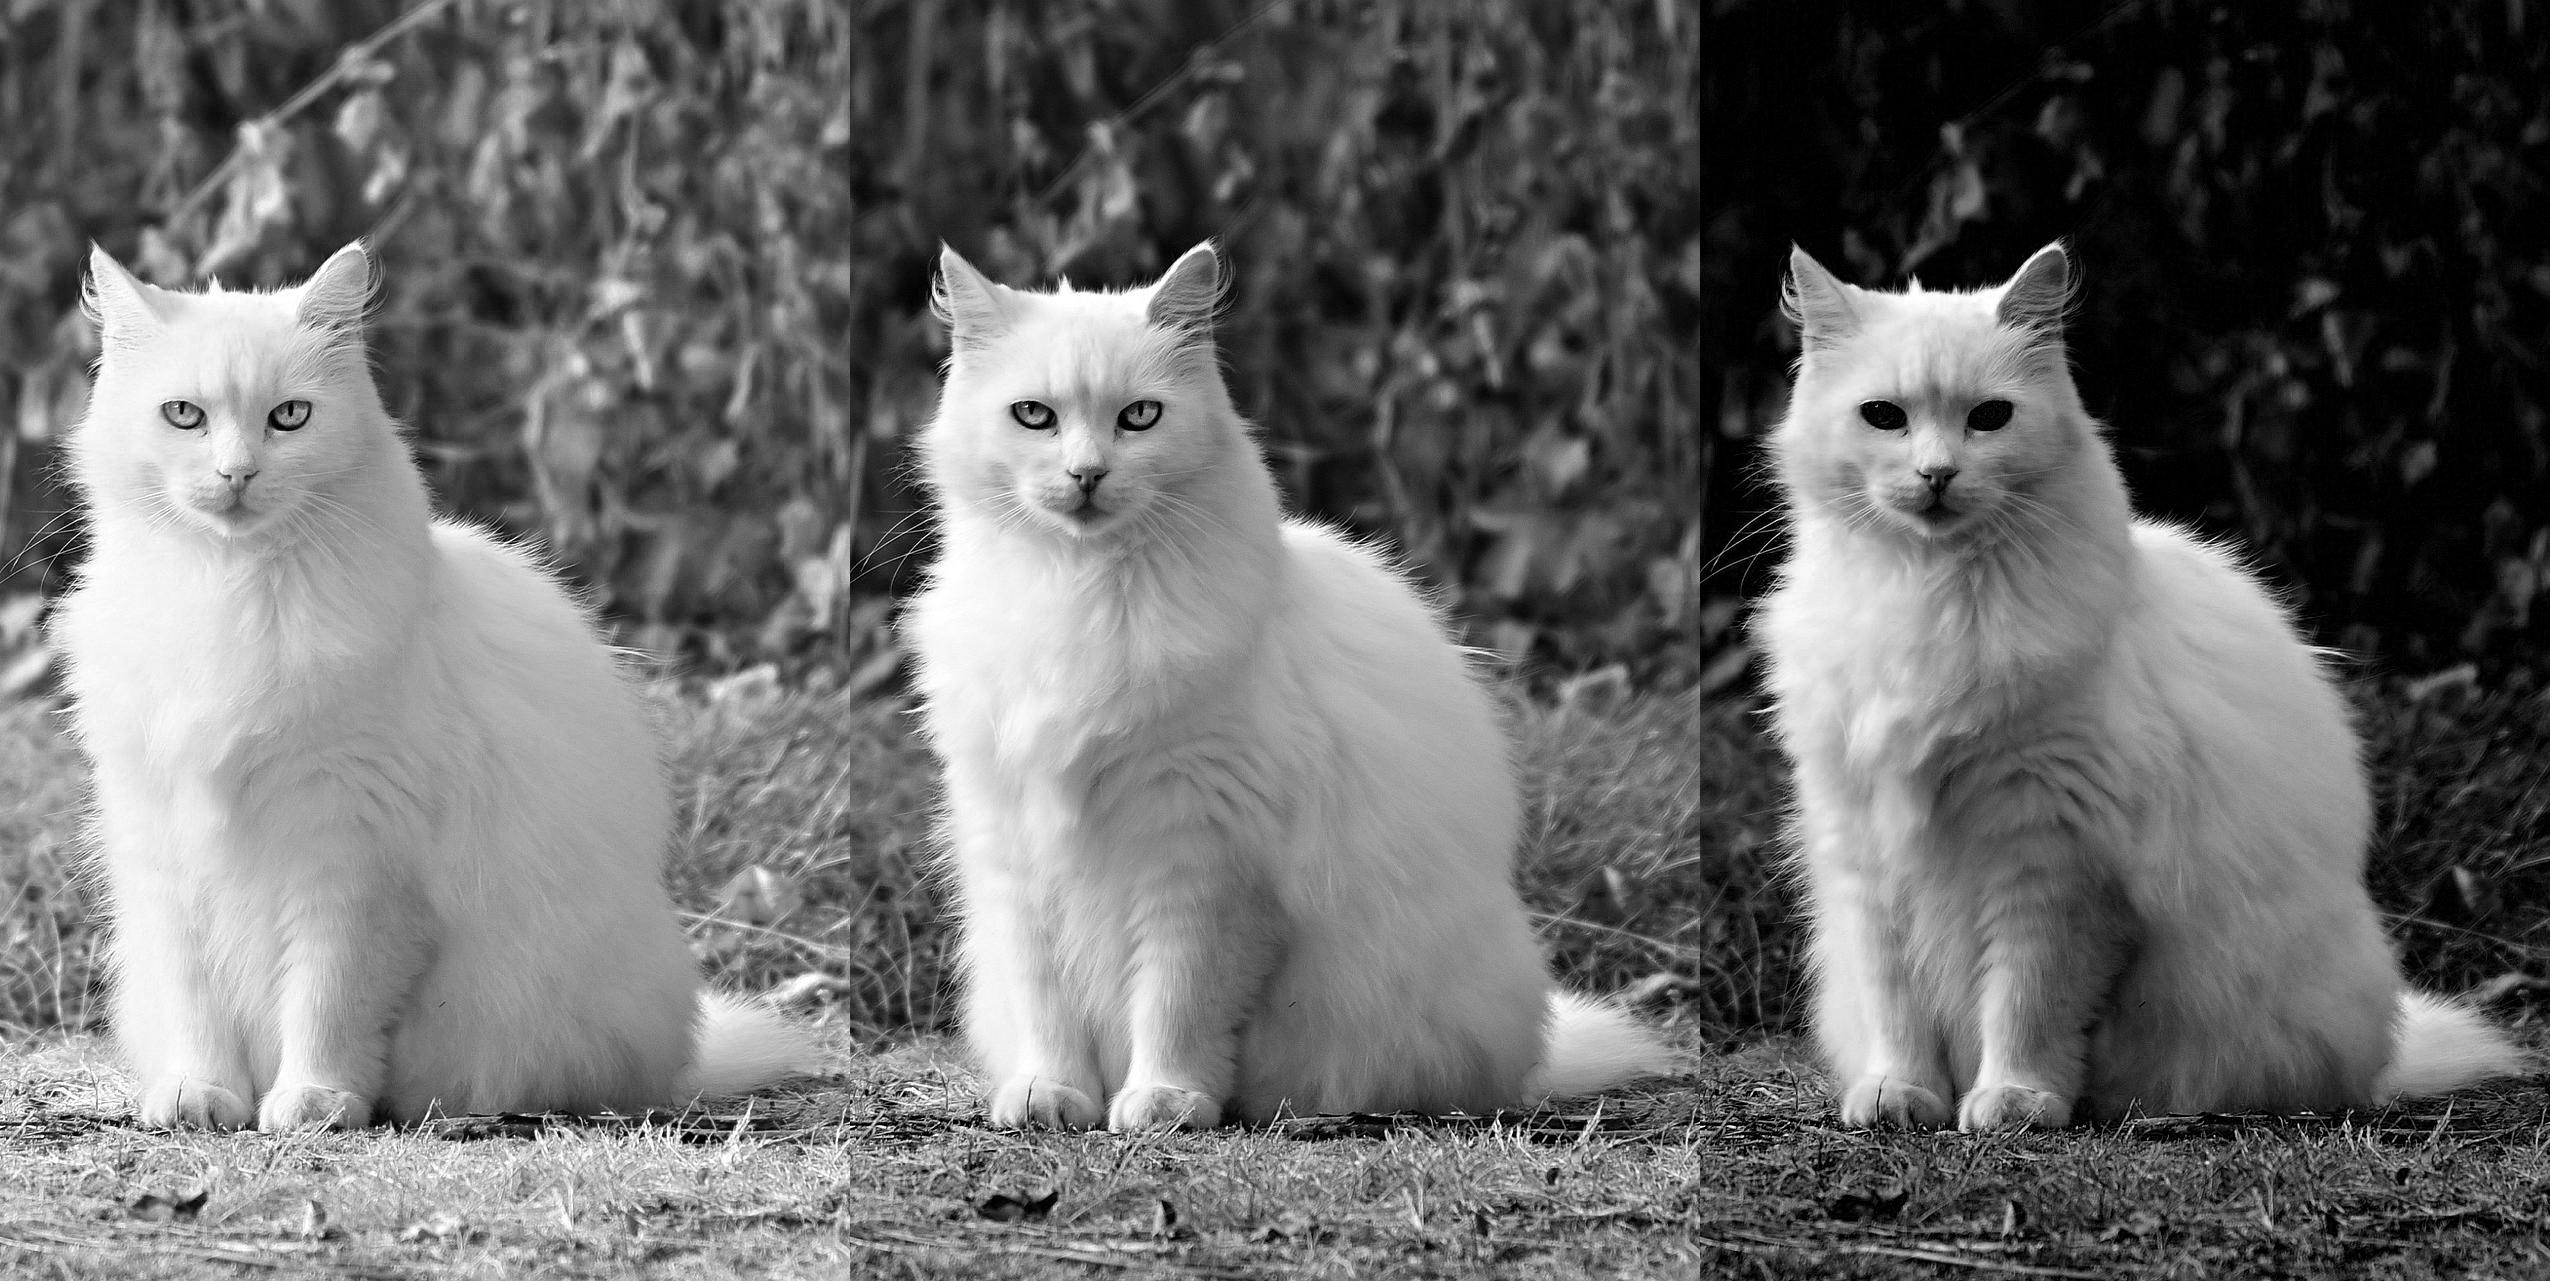
The blue channel has a higher contrast between the pixels representing the cat and those representing the background. You can use the blue channel image to threshold:
>>> threshold = 57
>>> img_cat_threshold = blue.point(lambda x: 255 if x > threshold else 0)
>>> img_cat_threshold = img_cat_threshold.convert("1")
>>> img_cat_threshold.show()
You use a threshold value of 57 in this example. You also convert the image into a binary mode using "1" as an argument to .convert(). The pixels in a binary image can only have the values of 0 or 1.
Note: When dealing with certain image formats, such as JPEG, that rely on lossy compression, the images may vary slightly depending on which JPEG decoders you’re using. Different operating systems often come with different default JPEG decoders. Therefore, the results that you get when processing images may vary depending on the operating system and JPEG decoder that you’re using.
You may need to slightly adjust the threshold value if your results do not match the ones shown in this tutorial.
The result of thresholding is the following:
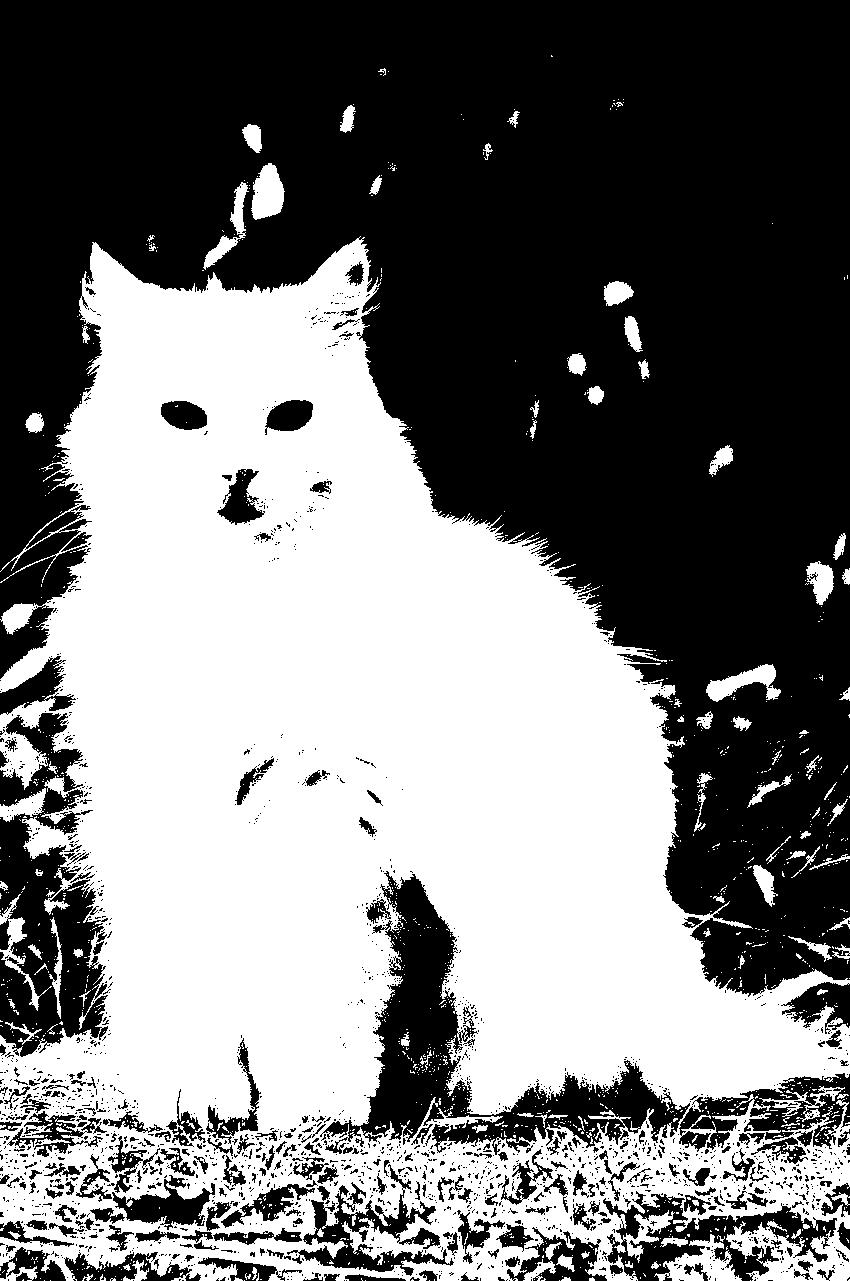
You can identify the cat in this black-and-white image. However, you’d like to have an image in which all the pixels that correspond to the cat are white and all other pixels are black. In this image, you still have black regions in the area which corresponds to the cat, such as where the eyes, nose and mouth are, and you also still have white pixels elsewhere in the image.
You can use the image processing techniques called erosion and dilation to create a better mask that represents the cat. You’ll learn about these two techniques in the next section.
Erosion and Dilation
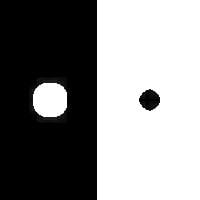
You can look at the image file called dot_and_hole.jpg, which you can download from the repository linked to this tutorial:
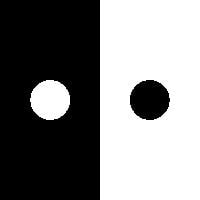
The left-hand side of this binary image shows a white dot on a black background, while the right-hand side shows a black hole in a solid white section.
Erosion is the process of removing white pixels from the boundaries in an image. You can achieve this in a binary image by using ImageFilter.MinFilter(3) as an argument for the .filter() method. This filter replaces the value of a pixel with the minimum value of the nine pixels in the 3x3 array centered around the pixel. In a binary image, this means that a pixel will have the value of zero if any of its neighboring pixels are zero.
You can see the effect of erosion by applying ImageFilter.MinFilter(3) several times to the dot_and_hole.jpg image. You should continue with the same REPL session as in the previous section:
>>> from PIL import ImageFilter
>>> filename = "dot_and_hole.jpg"

>>> with Image.open(filename) as img:
...     img.load()
...

>>> for _ in range(3):
...     img = img.filter(ImageFilter.MinFilter(3))
...

>>> img.show()
You’ve applied the filter three times using a for loop. This code gives the following output:
The dot has shrunk but the hole has grown as a result of erosion.
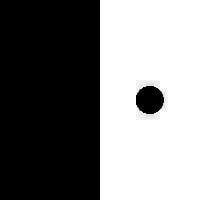
Dilation is the opposite process to erosion. White pixels are added to the boundaries in a binary image. You can achieve dilation by using ImageFilter.MaxFilter(3), which converts a pixel to white if any of its neighbors are white.
You can apply dilation to the same image containing a dot and a hole, which you can open and load again:
>>> with Image.open(filename) as img:
...     img.load()
...

>>> for _ in range(3):
...     img = img.filter(ImageFilter.MaxFilter(3))
...

>>> img.show()
The dot has now grown bigger, and the hole has shrunk:
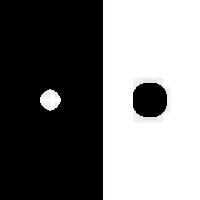
You can use erosion and dilation together to fill in holes and remove small objects from a binary image. Using the image with a dot and hole, you can perform ten erosion cycles to remove the dot, followed by ten dilation cycles to restore the hole to its original size:
>>> with Image.open(filename) as img:
...     img.load()
...

>>> for _ in range(10):
...     img = img.filter(ImageFilter.MinFilter(3))
...

>>> img.show()

>>> for _ in range(10):
...     img = img.filter(ImageFilter.MaxFilter(3))
...

>>> img.show()
You perform ten erosion cycles with the first for loop. The image at this stage is the following:
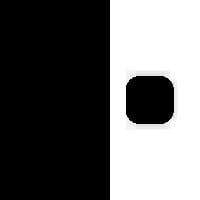
The dot has disappeared, and the hole is larger than it was in the original image. The second for loop performs ten dilation cycles, which return the hole to its original size:
However, the dot is no longer present in the image. The erosions and dilations have modified the image to keep the hole but remove the dot. The number of erosions and dilations needed depends on the image and what you want to achieve. Often, you’ll need to find the right combination through trial and error.
You can define functions to perform several cycles of erosion and dilation:
>>> def erode(cycles, image):
...     for _ in range(cycles):
...          image = image.filter(ImageFilter.MinFilter(3))
...     return image
...

>>> def dilate(cycles, image):
...     for _ in range(cycles):
...          image = image.filter(ImageFilter.MaxFilter(3))
...     return image
...
These functions make it easier to experiment with erosion and dilation for an image. You’ll use these functions in the next section as you continue working on placing the cat into the monastery.
Image Segmentation Using Thresholding
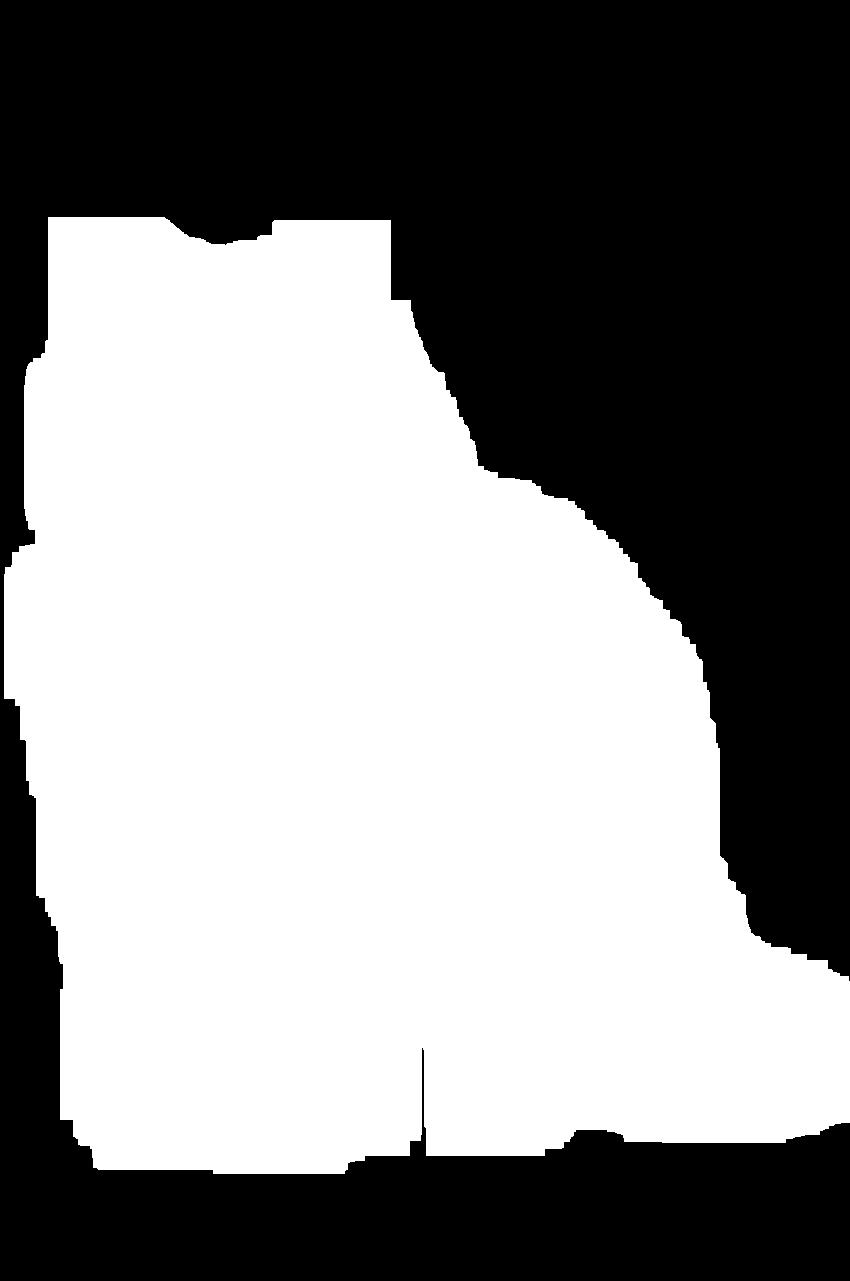
You can use a sequence of erosions and dilations on the threshold image that you obtained earlier to remove parts of the mask that don’t represent the cat and to fill in any gaps in the region containing the cat. Once you’ve experimented with erosion and dilation, you’ll be able to use educated guesses in a trial-and-error process to find the best combination of erosions and dilations to achieve the ideal mask.
Starting with the image img_cat_threshold, which you obtained earlier, you can start with a series of erosions to remove the white pixels that represent the background in the original image. You should continue working in the same REPL session as in the previous sections:
>>> step_1 = erode(12, img_cat_threshold)
>>> step_1.show()
The eroded threshold image no longer contains white pixels representing the background of the image:
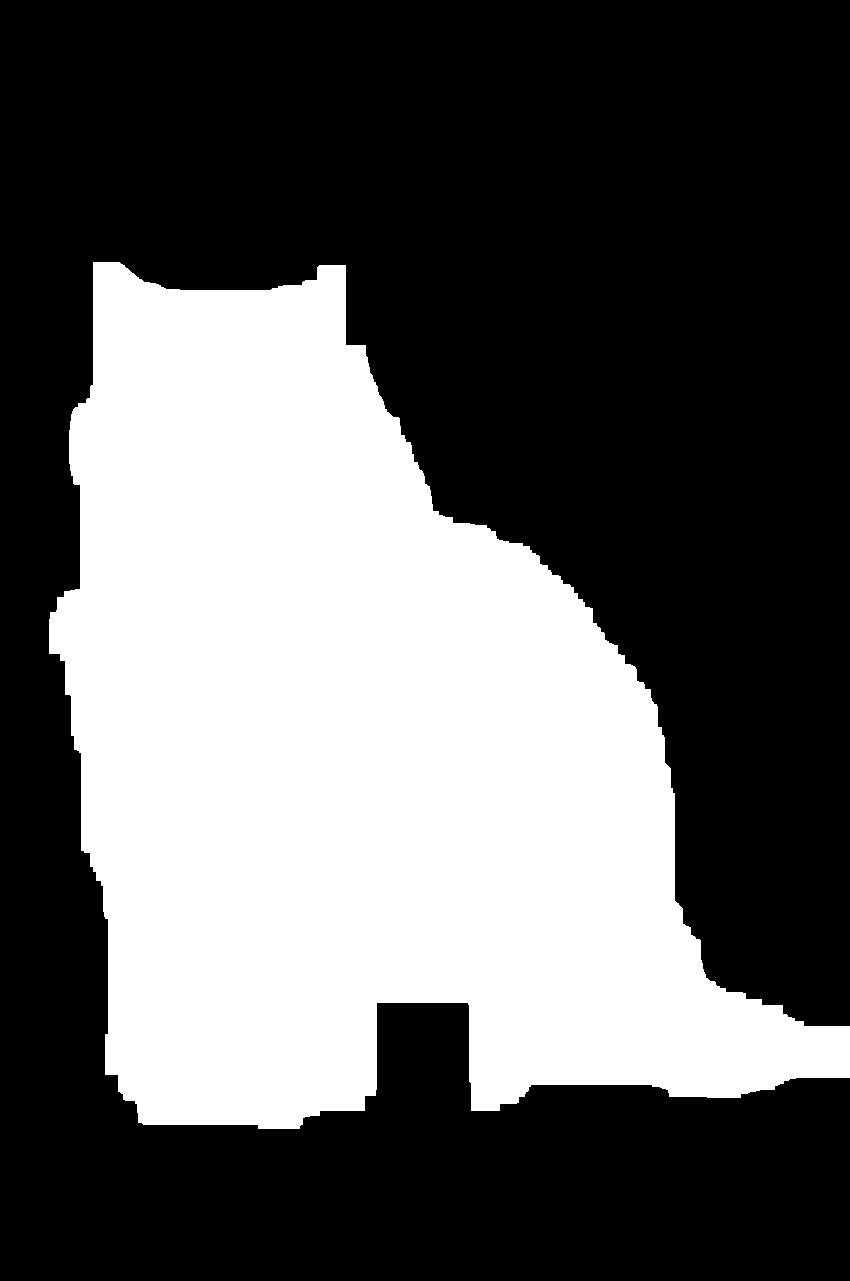
However, the remaining mask is smaller than the overall outline of the cat and has holes and gaps within it. You can perform dilations to fill the gaps:
>>> step_2 = dilate(58, step_1)
>>> step_2.show()
The fifty-eight cycles of dilation filled all the holes in the mask to give the following image:
However, this mask is too big. You can therefore finish the process with a series of erosions:
>>> cat_mask = erode(45, step_2)
>>> cat_mask.show()
The result is a mask that you can use to segment the image of the cat:
You can avoid the sharp edges of a binary mask by blurring this mask. You’ll have to convert it from a binary image into a grayscale image first:
>>> cat_mask = cat_mask.convert("L")
>>> cat_mask = cat_mask.filter(ImageFilter.BoxBlur(20))
>>> cat_mask.show()
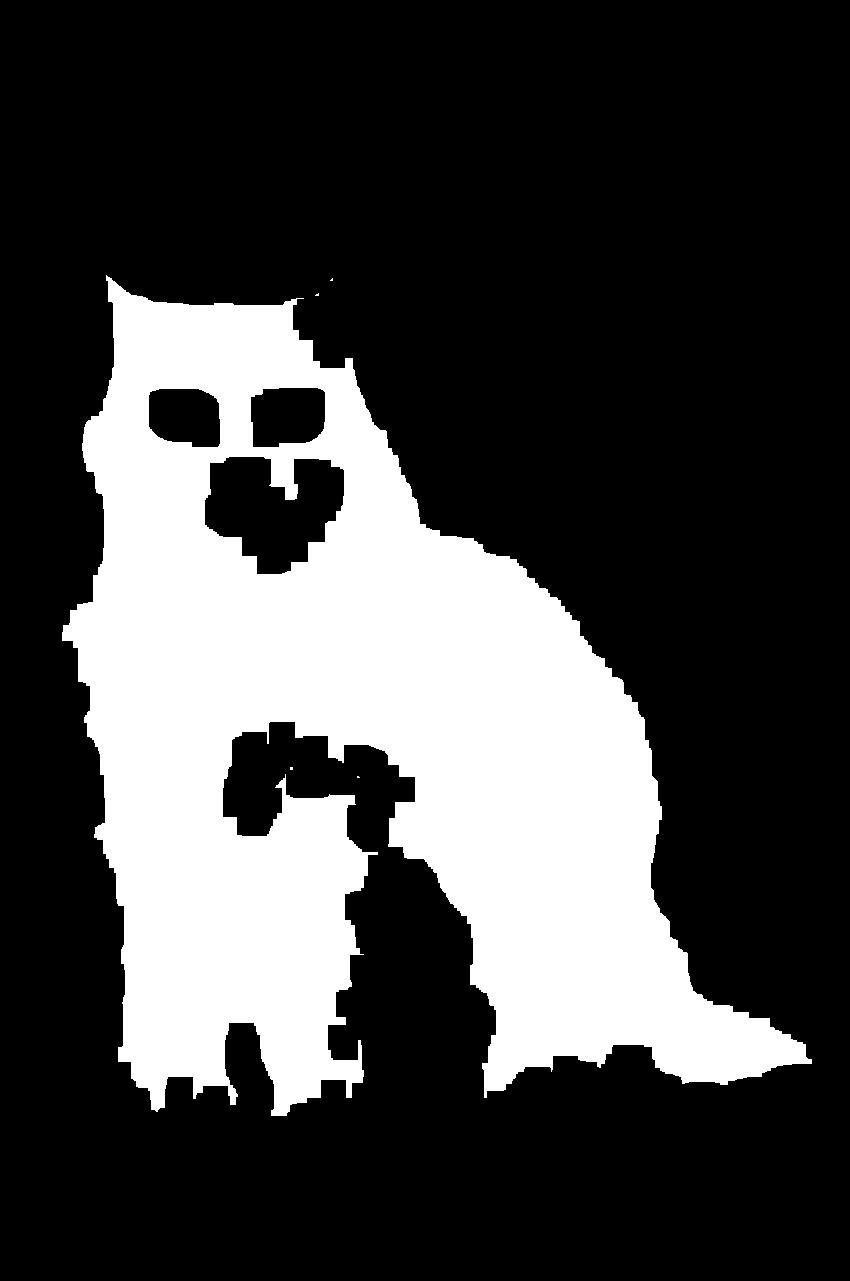
The BoxBlur() filter returns the following mask:
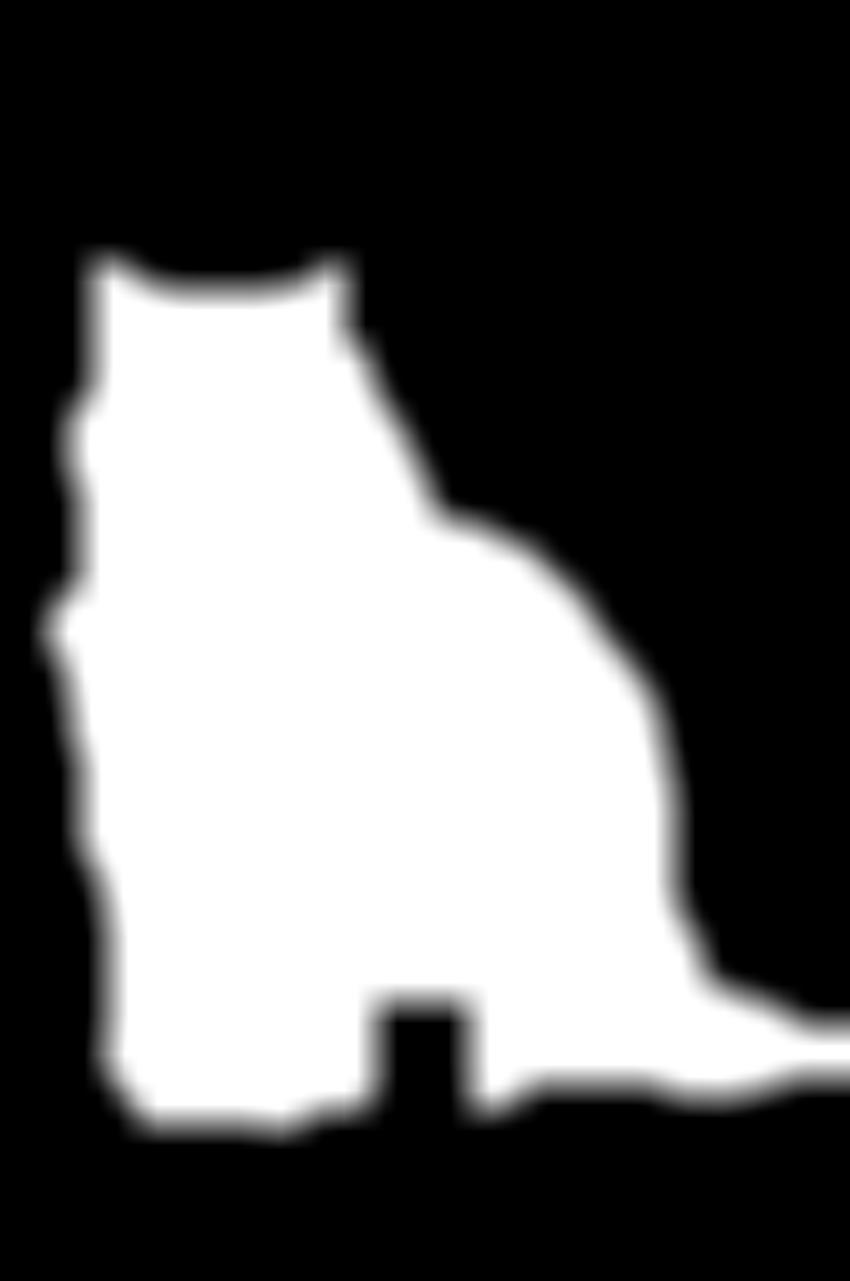
The mask now looks like a cat! Now you’re ready to extract the image of the cat from its background:
>>> blank = img_cat.point(lambda _: 0)
>>> cat_segmented = Image.composite(img_cat, blank, cat_mask)
>>> cat_segmented.show()
First, you create a blank image with the same size as img_cat. You create a new Image object from img_cat by using .point() and setting all values to zero. Next, you use the composite() function in PIL.Image to create an image made up from both img_cat and blank using cat_mask to determine which parts of each image are used. The composite image is shown below:
You’ve segmented the image of the cat and extracted the cat from its background.
Superimposition of Images Using Image.paste()
You can go a step further and paste the segmented image of the cat into the image of the monastery courtyard from the image repository for this tutorial:
>>> filename_monastery = "monastery.jpg"
>>> with Image.open(filename_monastery) as img_monastery:
...     img_monastery.load()

>>> img_monastery.paste(
...     img_cat.resize((img_cat.width // 5, img_cat.height // 5)),
...     (1300, 750),
...     cat_mask.resize((cat_mask.width // 5, cat_mask.height // 5)),
... )

>>> img_monastery.show()
You’ve used .paste() to paste an image onto another one. This method can be used with three arguments:
- The first argument is the image that you want to paste in. You’re resizing the image to one-fifth of its size using the integer division operator (
//). - The second argument is the location in the main image where you want to paste the second picture. The tuple includes the coordinates within the main image where you want to place the top-left corner of the image that you’re pasting in.
- The third argument provides the mask that you wish to use if you don’t want to paste the entire image.
You’ve used the mask that you obtained from the process of thresholding, erosion, and dilation to paste the cat without its background. The output is the following image:
You’ve segmented the cat from one image and placed it into another image to show the cat sitting quietly in the monastery courtyard rather than in the field where it was sitting in the original image.
Creation of A Watermark
Your final task in this example is to add the Real Python logo as a watermark to the image. You can get the image file with the Real Python logo from the repository accompanying this tutorial:
Get Images: Click here to get access to the images that you’ll manipulate and process with Pillow.
You should continue working in the same REPL session:
>>> logo = "realpython-logo.png"
>>> with Image.open(logo) as img_logo:
...     img_logo.load()
...

>>> img_logo = Image.open(logo)
>>> img_logo.show()
This is the full-size logo in color:
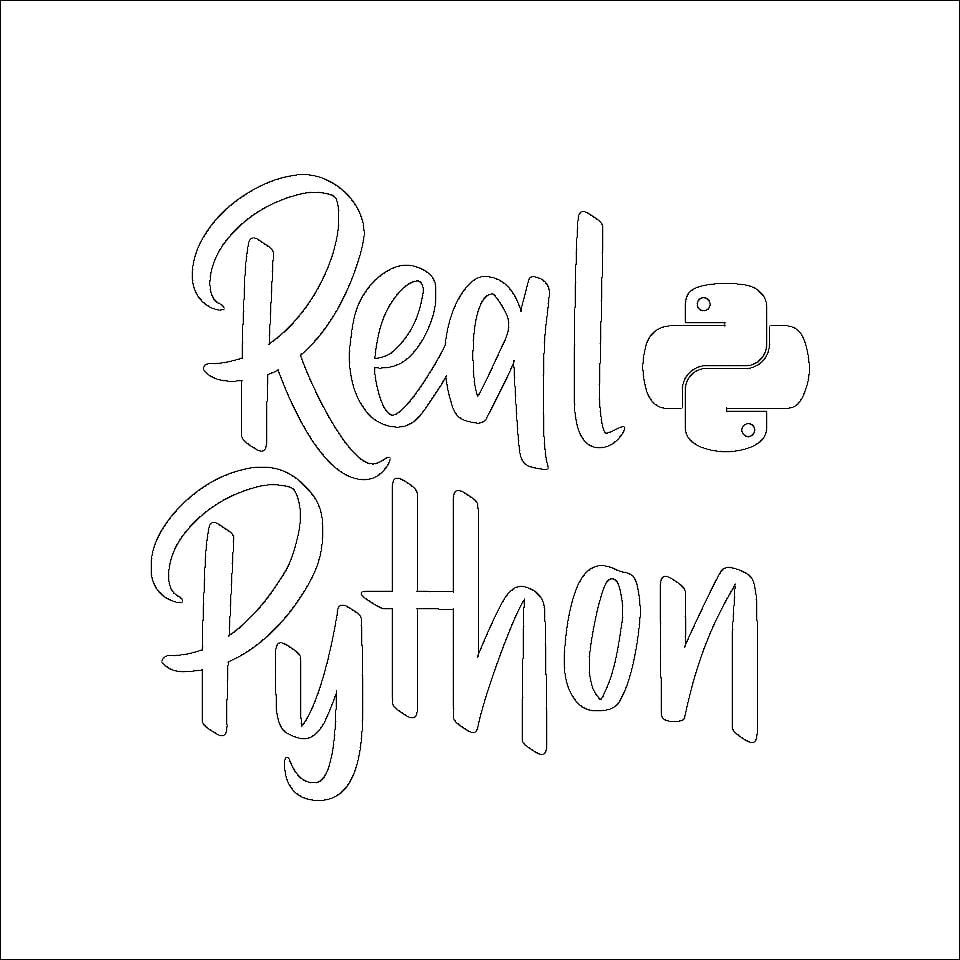
You can change the image to grayscale and threshold it using .point() to transform it into a black-and-white image. You also reduce its size and transform it into a contour image:
>>> img_logo = img_logo.convert("L")
>>> threshold = 50
>>> img_logo = img_logo.point(lambda x: 255 if x > threshold else 0)
>>> img_logo = img_logo.resize(
...     (img_logo.width // 2, img_logo.height // 2)
... )
>>> img_logo = img_logo.filter(ImageFilter.CONTOUR)
>>> img_logo.show()
The output shows the contour from the Real Python logo. The contour is ideal for using as a watermark on your image:
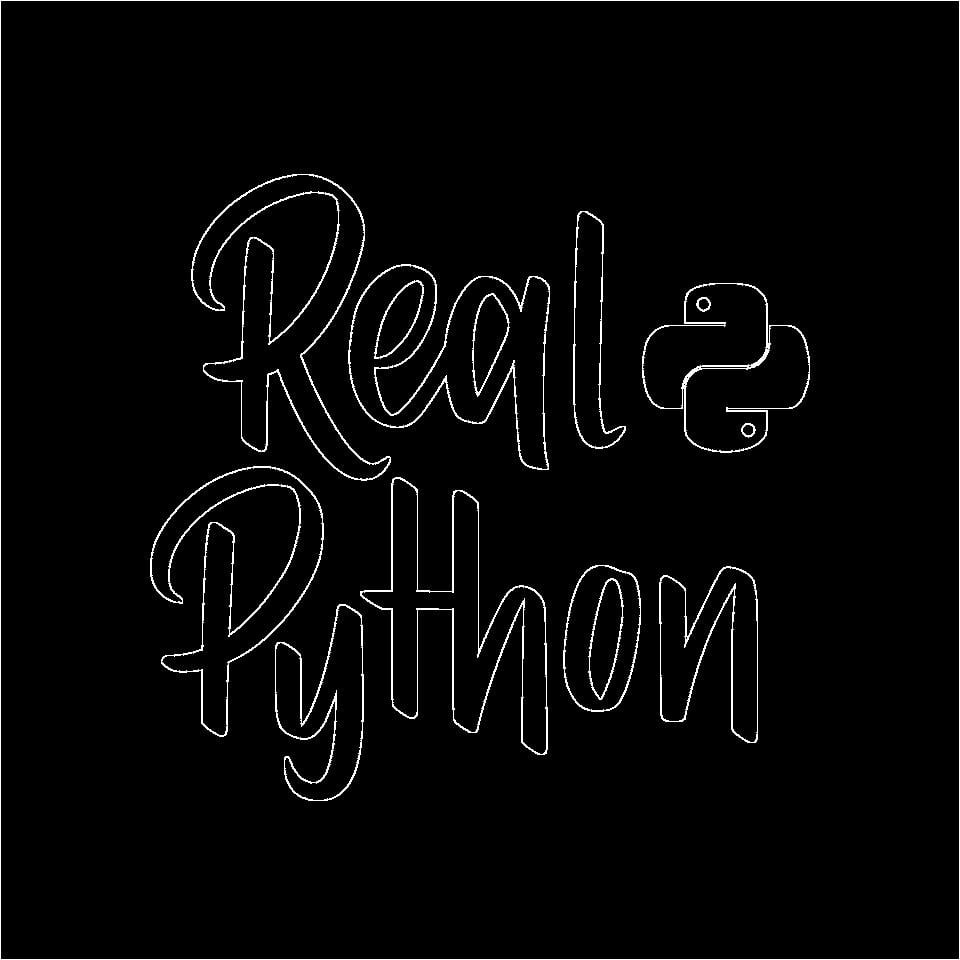
To use this as a watermark, you’ll need to reverse the colors so that the background is black and only the outline that you want to keep is white. You can achieve this using .point() again:
>>> img_logo = img_logo.point(lambda x: 0 if x == 255 else 255)
>>> img_logo.show()
You’ve converted the pixels that had a value of 255 and assigned them the value 0, converting them from white to black pixels. You set the remaining pixels to white. The reversed outline logo is shown below:
Your final step is to paste this outline onto the image of the cat sitting in the monastery courtyard. You can use .paste() again:
>>> img_monastery.paste(img_logo, (480, 160), img_logo)
>>> img_monastery.show()
The first argument in .paste() indicates the image that you wish to paste in, and the third argument represents the mask. In this case, you’re using the same image as a mask because the image is a binary image. The second argument provides the top-left coordinates of the region where you want to paste the image.
The image now includes a Real Python watermark:

The watermark has a rectangular outline, which is a result of the contour filter that you used earlier. If you prefer to remove this outline, you can crop the image using .crop(). This is an exercise that you can try on your own.
Image Manipulation With NumPy and Pillow
Pillow has an extensive selection of built-in functions and filters. However, there are times when you need to go further and manipulate images beyond the features that are already available in Pillow.
You can manipulate the image further with the help of NumPy. NumPy is a very popular Python library for dealing with numeric arrays, and it’s an ideal tool to use with Pillow. You can learn more about NumPy in NumPy Tutorial: Your First Steps Into Data Science in Python.
When you convert an image into a NumPy array, you can perform any transformations that you require directly on the pixels in the array. Once you’ve completed your processing in NumPy, you can convert the array back into an Image object using Pillow. You need to install NumPy for this section:
(venv) $ python -m pip install numpy
Now that you’ve installed NumPy, you’re ready to use Pillow and NumPy to spot the difference between two images.
Using NumPy to Subtract Images From Each Other
See if you can spot the differences between the following two images:
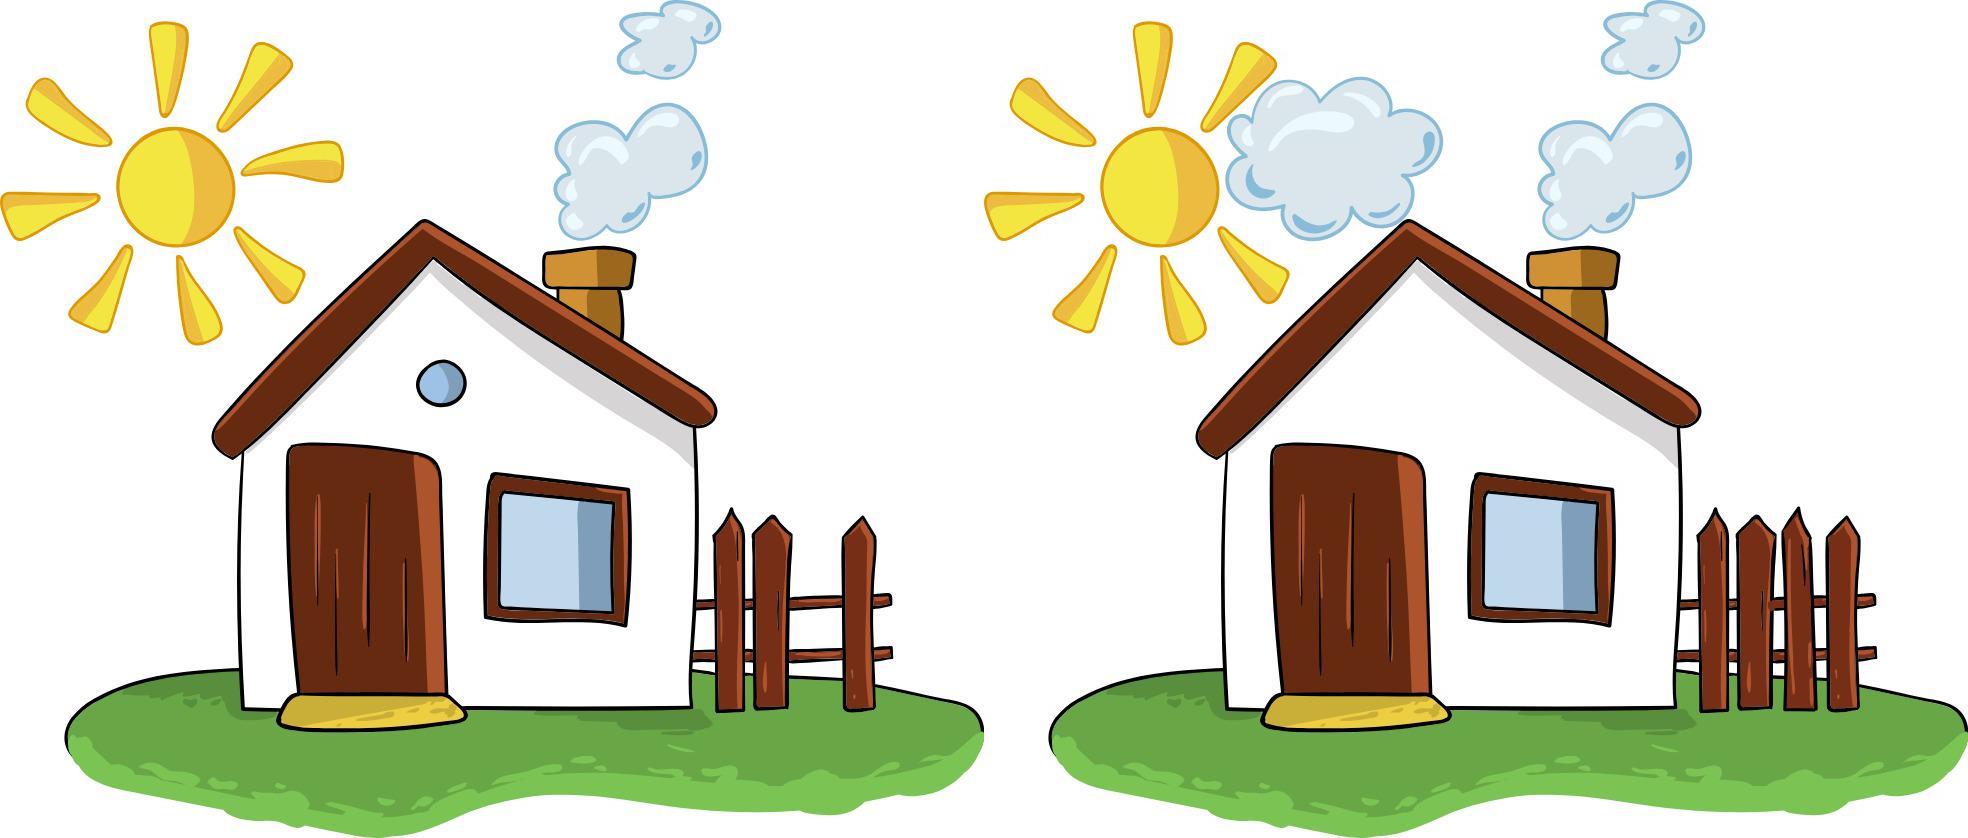
This isn’t a hard one! However, you decide to cheat and write a Python program to solve the puzzle for you. You can download the image files house_left.jpg and house_right.jpg (image credit) from the repository accompanying this tutorial:
Get Images: Click here to get access to the images that you’ll manipulate and process with Pillow.
Your first step is to read the images using Pillow and convert them to NumPy arrays:
>>> import numpy as np
>>> from PIL import Image

>>> with Image.open("house_left.jpg") as left:
...     left.load()
...
>>> with Image.open("house_right.jpg") as right:
...     right.load()
...

>>> left_array = np.asarray(left)
>>> right_array = np.asarray(right)

>>> type(left_array)
<class 'numpy.ndarray'>
>>> type(right_array)
<class 'numpy.ndarray'>
Since left_array and right_array are objects of type numpy.ndarray, you can manipulate them using all the tools that you have available in NumPy. You can subtract one array from the other to show the pixels that differ between the two images:
>>> difference_array =  right_array - left_array
>>> type(difference_array)
<class 'numpy.ndarray'>
When you subtract an array from another one of the same size, the result is another array with the same shape as the original arrays. You can convert this array into an image using Image.fromarray() in Pillow:
>>> difference = Image.fromarray(difference_array)
>>> difference.show()
The result of subtracting one NumPy array from another and converting into a Pillow Image is the difference image shown below:
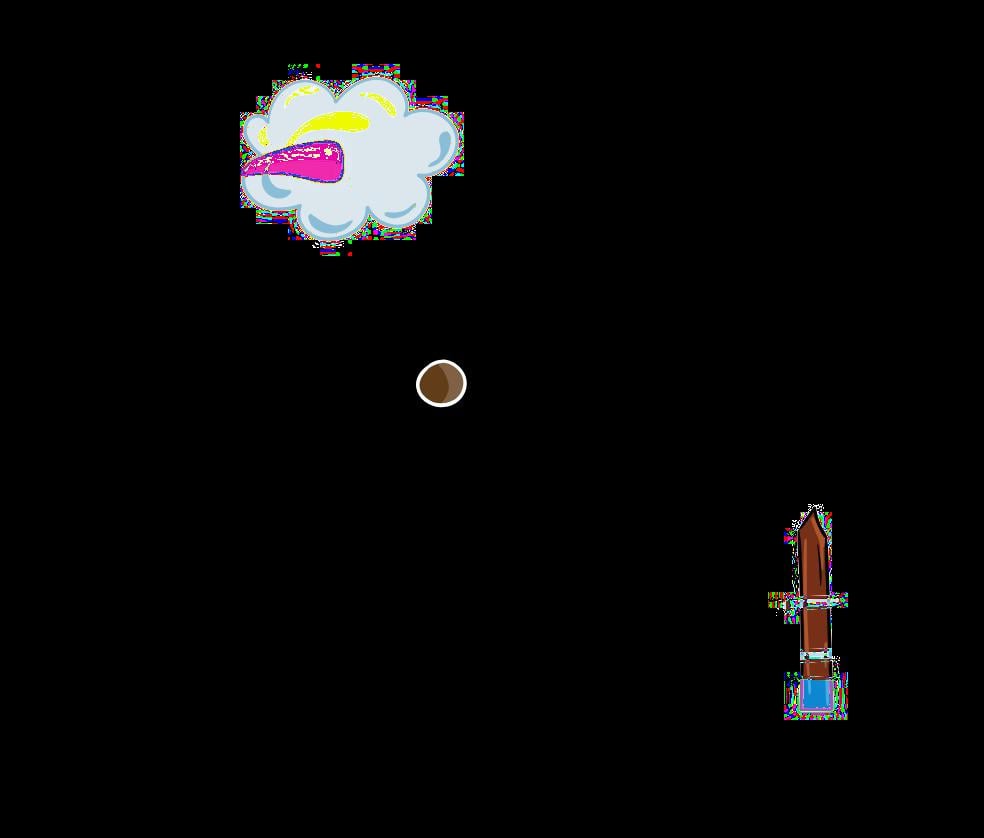
The difference image only shows three regions from the original image. These regions highlight the differences between the two images. You can also see some noise surrounding the cloud and the fence, which is due to small changes in the original JPEG compression in the region surrounding these items.
Using NumPy to Create Images
You can go further and create images from scratch using NumPy and Pillow. You can start by creating a grayscale image. In this example, you’ll create a simple image containing a square, but you can create more elaborate images in the same way:
>>> import numpy as np
>>> from PIL import Image

>>> square = np.zeros((600, 600))
>>> square[200:400, 200:400] = 255

>>> square_img = Image.fromarray(square)
>>> square_img
<PIL.Image.Image image mode=F size=600x600 at 0x7FC7D8541F70>

>>> square_img.show()
You create an array of size 600x600 containing zeros everywhere. Next, you set the value of a set of pixels at the center of the array to 255.
You can index NumPy arrays using both rows and columns. In this example, the first slice, 200:400, represents the rows 200 to 399. The second slice, 200:400, which follows the comma, represents the columns 200 to 399.
You can use Image.fromarray() to convert the NumPy array into an object of type Image. The output from the code above is shown below:
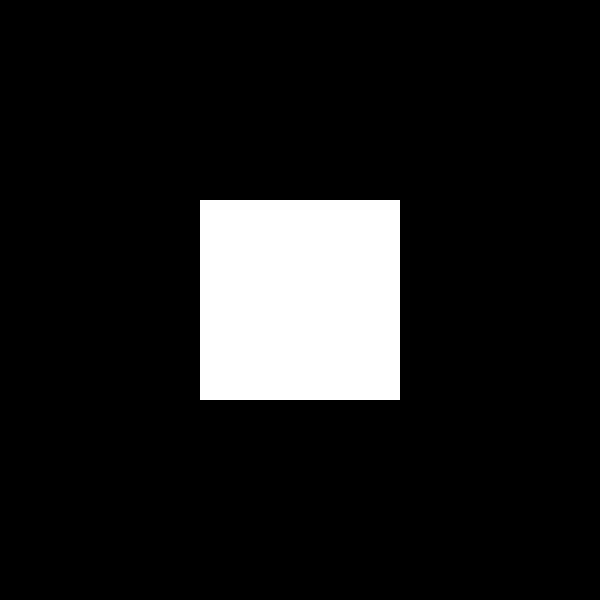
You’ve created a grayscale image containing a square. The mode of the image is inferred automatically when you use Image.fromarray(). In this case, mode "F" is used, which corresponds to an image with 32-bit floating-point pixels. You can convert this to a simpler grayscale image with 8-bit pixels if you wish:
>>> square_img = square_img.convert("L")
You can also go further and create a color image. You can repeat the process above to create three images, one corresponding to the red channel, another to the green, and a final one corresponding to the blue channel:
>>> red = np.zeros((600, 600))
>>> green = np.zeros((600, 600))
>>> blue = np.zeros((600, 600))
>>> red[150:350, 150:350] = 255
>>> green[200:400, 200:400] = 255
>>> blue[250:450, 250:450] = 255

>>> red_img = Image.fromarray(red).convert("L")
>>> green_img = Image.fromarray(green).convert("L")
>>> blue_img = Image.fromarray((blue)).convert("L")
You create an Image object from each NumPy array and convert the images to mode "L", which represents grayscale. Now, you can combine these three separate images into one RGB image using Image.merge():
>>> square_img = Image.merge("RGB", (red_img, green_img, blue_img))
>>> square_img
<PIL.Image.Image image mode=RGB size=600x600 at 0x7FC7C817B9D0>

>>> square_img.show()
The first argument in Image.merge() is the mode of the image output. The second argument is a sequence with the individual single-band images. This code creates the following image:
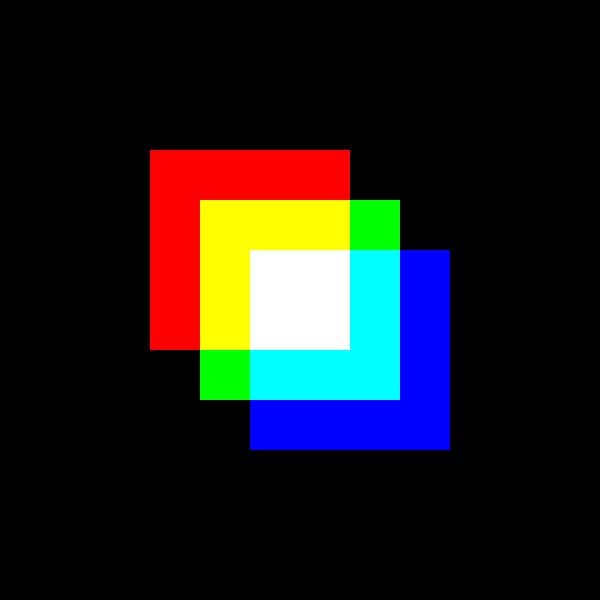
You’ve combined the separate bands into an RGB color image. In the next section, you’ll go a step further and create a GIF animation using NumPy and Pillow.
Creating Animations
In the previous section, you created a color image containing three overlapping squares of different colors. In this section, you’ll create an animation showing those three squares merging into a single white square. You’ll create several versions of the images containing three squares, and the location of the squares will vary slightly between successive images:
>>> import numpy as np
>>> from PIL import Image

>>> square_animation = []
>>> for offset in range(0, 100, 2):
...     red = np.zeros((600, 600))
...     green = np.zeros((600, 600))
...     blue = np.zeros((600, 600))
...     red[101 + offset : 301 + offset, 101 + offset : 301 + offset] = 255
...     green[200:400, 200:400] = 255
...     blue[299 - offset : 499 - offset, 299 - offset : 499 - offset] = 255
...     red_img = Image.fromarray(red).convert("L")
...     green_img = Image.fromarray(green).convert("L")
...     blue_img = Image.fromarray((blue)).convert("L")
...     square_animation.append(
...         Image.merge(
...             "RGB",
...             (red_img, green_img, blue_img)
...         )
...     )
...
You create an empty list called square_animation, which you’ll use to store the various images that you generate. Within the for loop, you create NumPy arrays for the red, green, and blue channels, as you did in the previous section. The array containing the green layer is always the same and represents a square in the center of the image.
The red square starts in a position displaced to the top-left of the center. In each successive frame, the red square moves closer to the center until it reaches the center in the final iteration of the loop. The blue square is initially shifted toward the bottom-right then moves towards the center with each iteration.
Note that in this example, you’re iterating over range(0, 100, 2), which means that the variable offset increases in steps of two.
You learned earlier that you can save an Image object to file using Image.save(). You can use the same function to save to a GIF file that includes a sequence of images. You call Image.save() on the first image in the sequence, which is the first image that you stored in the list square_animation:
>>> square_animation[0].save(
...     "animation.gif", save_all=True, append_images=square_animation[1:]
... )
The first argument in .save() is the filename for the file that you want to save. The extension in the filename tells .save() what file format it needs to output. You also include two keyword arguments in .save():
save_all=Trueensures that all the images in the sequence are saved, and not just the first one.append_images=square_animation[1:]allows you to append the remaining images in the sequence to the GIF file.
This code saves animation.gif to file, and you can then open the GIF file with any image software. The GIF should loop by default, but on some systems you’ll need to add the keyword argument loop=0 to .save() to make sure the GIF loops. The animation that you get is the following one:
The three squares with different colors merge into a single white square. Can you create your own animation using different shapes and different colors?
Conclusion
You’ve learned how to use Pillow to deal with images and perform image processing. If you’ve enjoyed working with images, you may want to dive headlong into the world of image processing. There’s a lot more to learn about the theory and practice of image processing. A good starting point is Digital Image Processing by Gonzalez and Woods, which is the classic textbook in this field.
Pillow isn’t the only library that you can use in Python for image processing. If your aim is to perform some basic processing, then the techniques that you learned in this tutorial may be all you need. If you want to go deeper into more advanced image processing techniques, such as for machine learning and computer vision applications, then you can use Pillow as a stepping stone to other libraries such as OpenCV and scikit-image.
In this tutorial, you’ve learned how to:
- Read images with Pillow
- Perform basic image manipulation operations
- Use Pillow for image processing
- Use NumPy with Pillow for further processing
- Create animations using Pillow
Now, look through the images in the image folder on your computer and pick a few that you can read in as images using Pillow, decide how you’d like to process these images, and then perform some image processing on them. Have fun!
Watch Now This tutorial has a related video course created by the Real Python team. Watch it together with the written tutorial to deepen your understanding: Process Images Using the Pillow Library and Python


