Visual Studio Code, or VS Code for short, is a free and open source code editor by Microsoft. You can use VS Code as a lightweight code editor to make quick changes, or you can configure it as an integrated development environment (IDE) through the use of third-party extensions. In this tutorial, you’re going to look at how to get the most out of VS Code for Python development.
During this tutorial, you’ll learn how you can configure, extend, and optimize VS Code for a more effective and productive Python development environment. After finishing this tutorial, you’ll have a variety of tools to help you be more productive using VS Code. It can be a powerful tool for rapid Python development.
In this tutorial, you’ll learn how to:
- Customize your user interface
- Run and monitor Python tests
- Lint and format your code automatically
- Leverage type annotations and Pylance to write code faster with higher accuracy
- Configure and utilize both local and remote debugging
- Set up data science tools
As usual, this tutorial is full of links, tips, and tricks to help you on your way.
If you haven’t already installed Visual Studio Code or the Python extension, you’ll need both for this tutorial. If you’re just getting started with VS Code, you might want to check out Jon Fincher’s tutorial on Python development in Visual Studio Code before continuing with this one.
Free Bonus: 5 Thoughts On Python Mastery, a free course for Python developers that shows you the roadmap and the mindset you’ll need to take your Python skills to the next level.
Mastering the Visual Studio Code User Interface
By default, VS Code’s user interface is designed for everyone—whether you’re writing C++, doing front-end development with JavaScript and CSS, or using data science tools like Jupyter Notebooks. In this first section, you’ll explore how to tailor VS Code to support how you work.
Keyboard Shortcuts
For almost everything that you do in VS Code, you can do it directly from the keyboard. You can map all activities in VS Code, whether they’re built-in or provided via extensions, to a keyboard shortcut.
A small subset of built-in commands is already mapped in Keyboard Shortcuts. If you want to learn these default shortcuts, print out the PDF for Windows, macOS, or Linux and pin it next to your monitor.
As a Python developer, a lot of the commands you’ll use in Visual Studio Code are provided from extensions, similar to the Python extension that you already installed. These don’t come with shortcuts mapped by default, but you can configure them using VS Code’s Keyboard Shortcuts editor.
Using the Keyboard Shortcuts Editor
Open the Keyboard Shortcuts editor by going to File → Preferences → Keyboard Shortcuts or Code → Preferences → Keyboard Shortcuts on macOS:
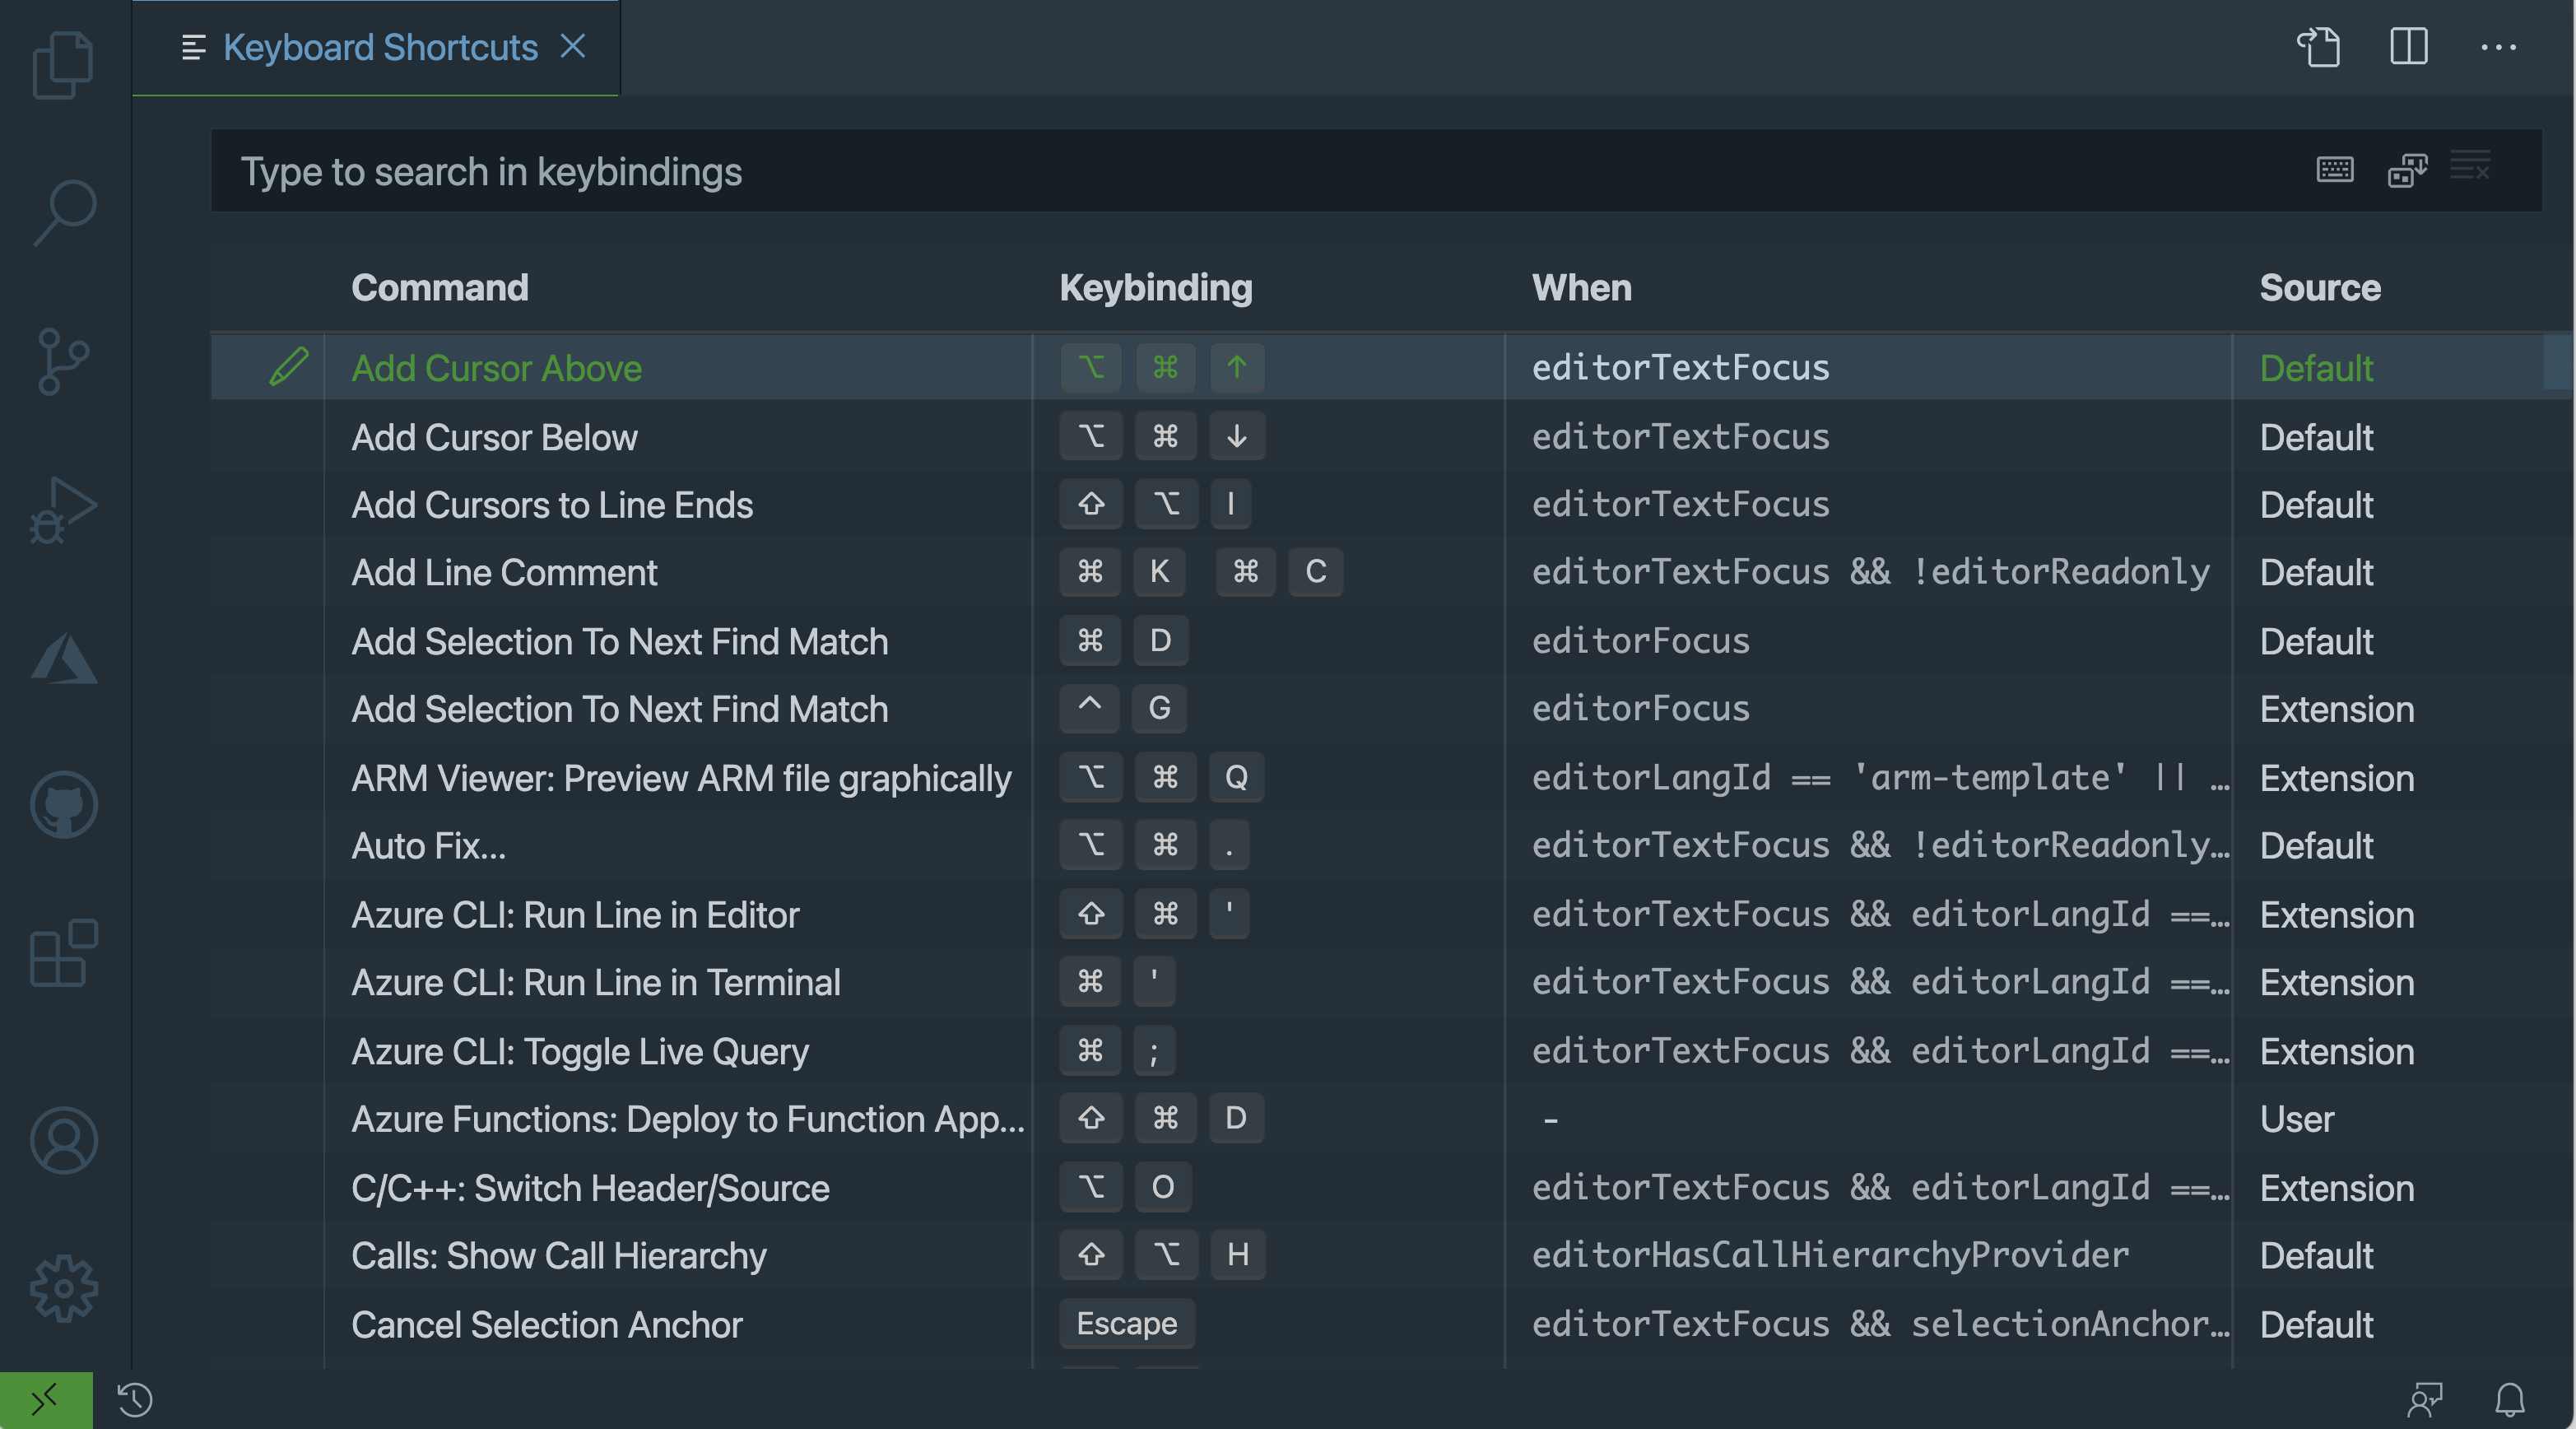
In this editor, you can see a list of all the existing shortcuts along with their details:
- Command: The command or action to be run
- Keybinding: The sequence of keys to press to trigger this command, with a blank indicating that there’s no mapping
- When: Conditions that need to be met for this keybinding to work, with a minus sign (
-) indicating that there are no requirements - Source: Where this binding was configured, either defined by Default, User, or Extension, the last one indicating that you provided it by installing a keymap extension
To override an existing binding, right-click on the existing action and click Change Keybinding. To assign a keybinding to a command that has no binding, double-click on it. If the key sequence you press is already assigned to something else, VS Code will warn you with a link to see which commands are mapped to this keybinding.
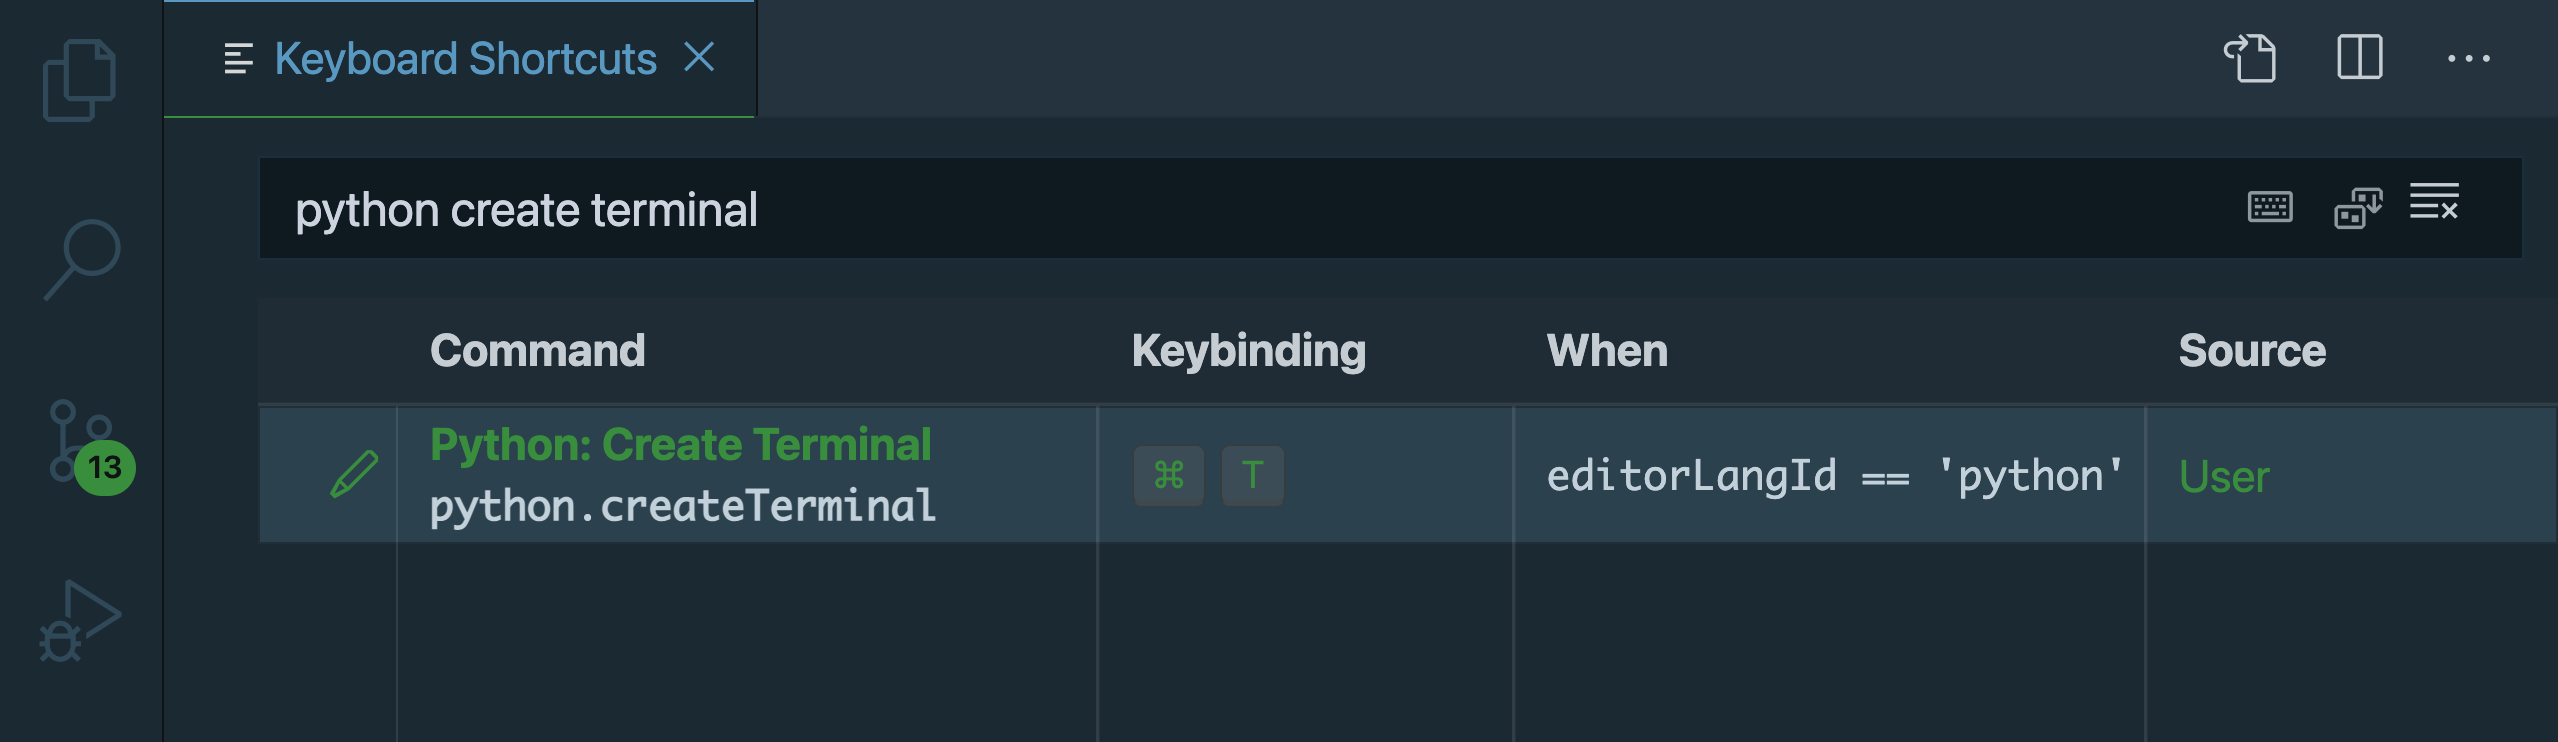
As an example, type python create terminal in the search box at the top. If no results come up, make sure you have the Python extension installed. Press Enter to assign a keybinding, like Ctrl+Alt+T, and then hit Enter again.
To assign that shortcut to only work when you’re editing Python code, right-click on the shortcut and select Change When Expression. Enter the expression editorLangId == 'python':
There are more conditional operators to choose from if you need something more specific. Here are some examples to get you started:
- Use
resourceFilename == '__init__.py'when the file you’re editing is__init__.py - Use
editorLangId == 'python'when working with Python. If needed, you can also replace'python'with another language identifier. - Use
editorHasSelectionfor when you’re inside the editor.
Once you’ve configured this extension, open up a Python file in the editor to try it out by pressing your newly assigned keyboard shortcut Ctrl+Alt+T to open up a Python terminal.
Setting Up Keyboard Shortcuts for Commands From the Command Palette
You’ll refer to the Command Palette many times in this tutorial. Most of the functionality in VS Code is accessible through the UI from context menus, but you won’t find everything there. Anything that can be done in the core editor or via an extension is available in the Command Palette. You can get to the Command Palette by pressing one of these keyboard shortcuts:
- macOS: F1 or Cmd+Shift+P
- Windows or Linux: F1 or Ctrl+Shift+P
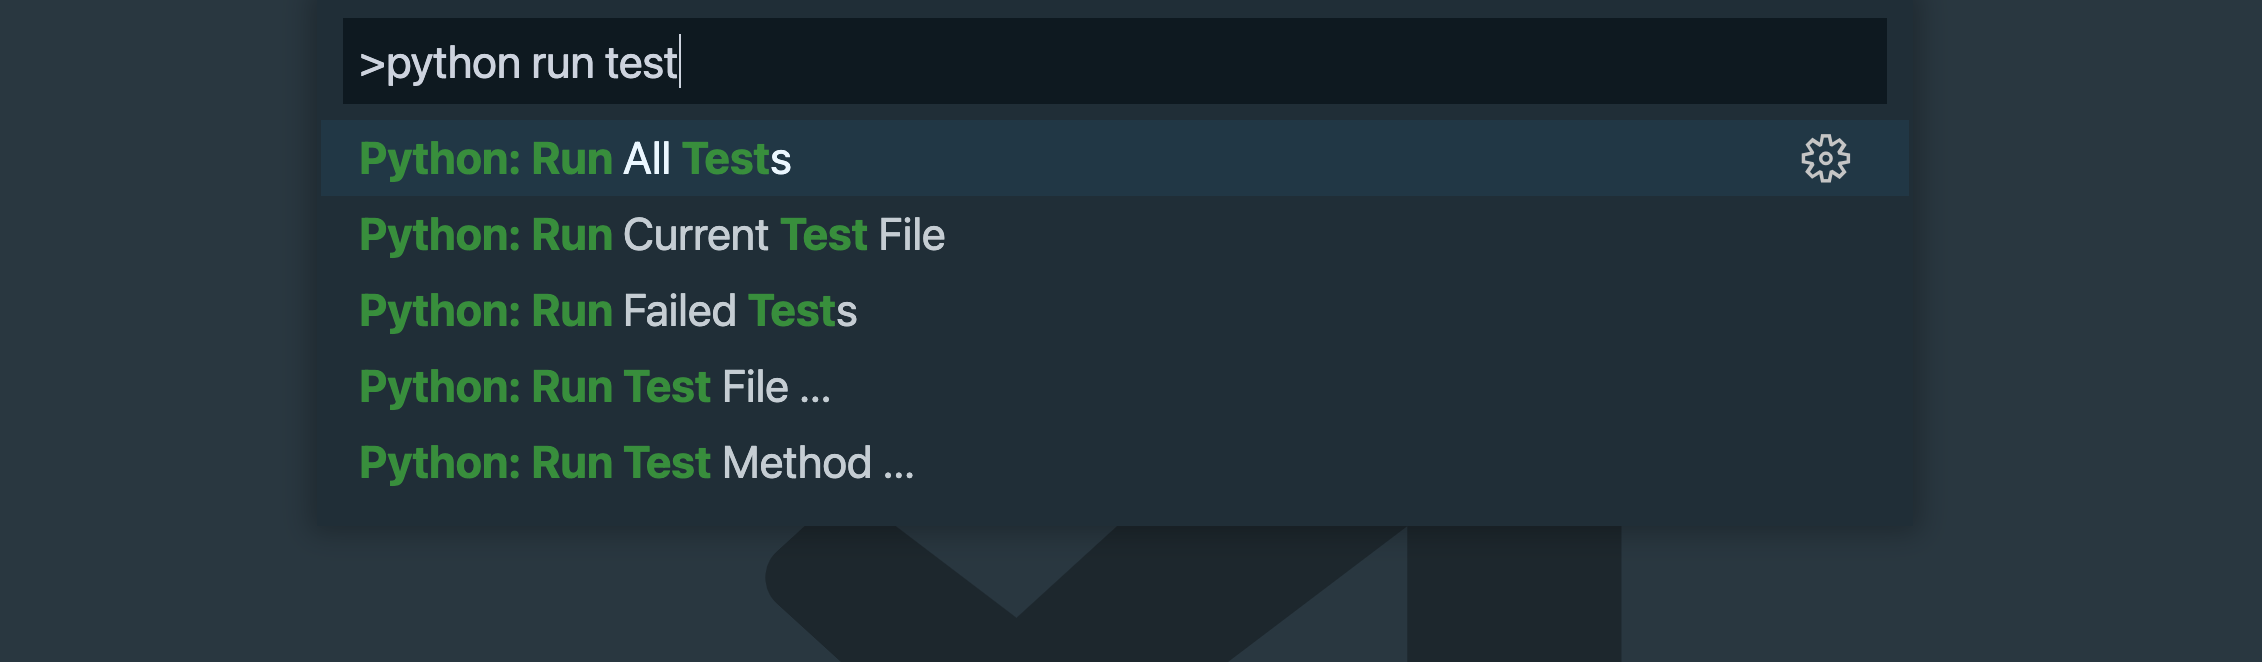
To run a command, type its descriptive name, like Python: Run All Tests. Once the Command Palette is up and the command you want is at the top of the menu, click the cog on the right to assign a keyboard shortcut:
Once you’ve started using the Command Palette regularly, you may find that there are five to ten commands you run really often. Assign some shortcuts to those commands to save yourself a few extra keystrokes.
Installing Keyboard Mappings From Other Editors
If you’ve been working in another editor or IDE for some time, you may have your usual keyboard shortcuts committed to muscle memory.
You’ll find helpful keyboard mappings in extensions for Vim, IntelliJ and PyCharm, Sublime Text, Notepad++, Emacs, and Atom.
If your previous editor isn’t on this list, you may find that someone else has created a mapping extension for you. Keymaps is a helpful category on the VS Code extension marketplace.
Once you’ve installed a keymap extension, you may also find additional options to customize it beyond the defaults. For example, you can use the Vim keymap extension to configure Vim features such as whether to start in insert mode.
Customizing the User Interface
The first things you should do when jumping into the driving seat of a car are to adjust the seat, adjust the rear-view mirror, and set the steering column to the right height. Code editors are no different. They come with a default layout that works okay for everyone but not especially well for anyone. You don’t want to stretch to reach the pedals. Let’s set up your VS Code environment to suit you and make it look great on the way.
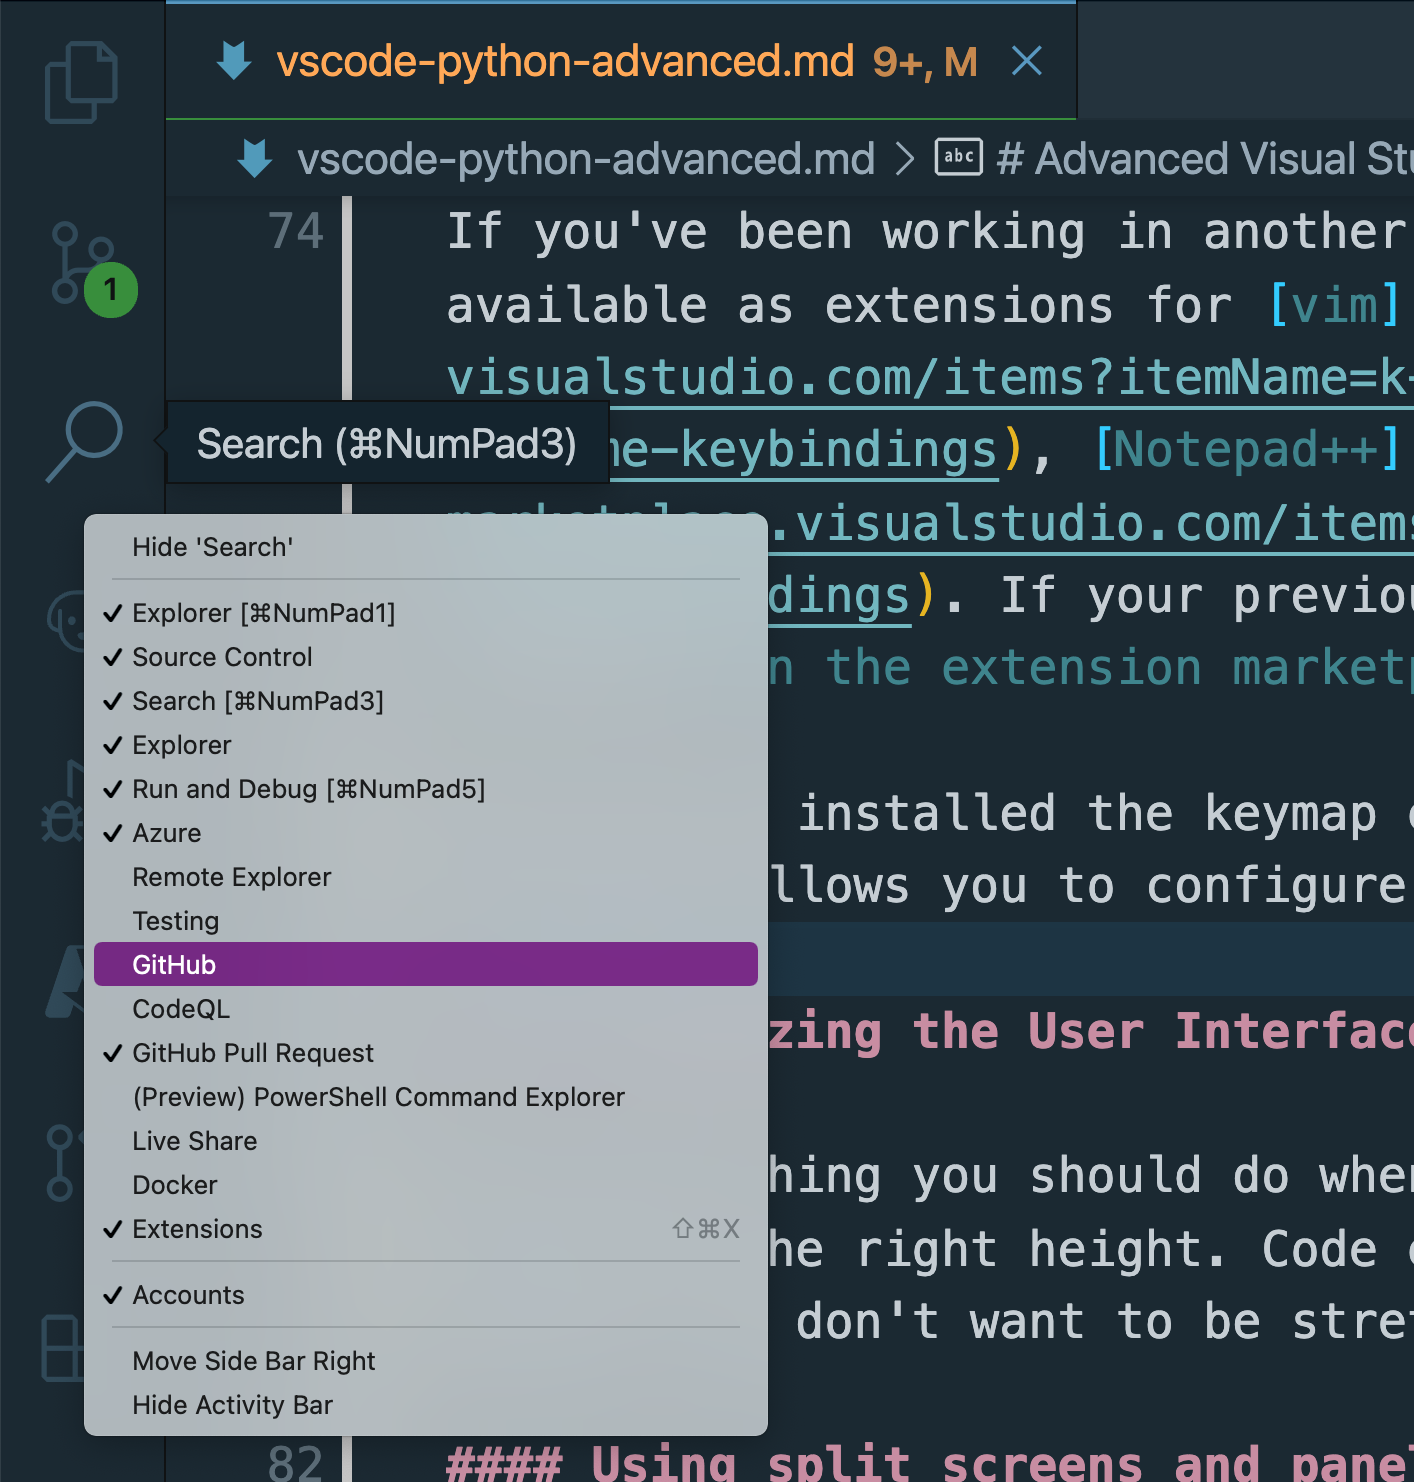
First, the Activity Bar on the left-hand side of VS Code is the main navigation tool to switch between the Explorer view used to see your files, the Source Control view, the Search view, the Run and Debug view, and the Extensions view. You’re not limited to these options. Many extensions come with views that are hidden by default. Right-click on the Activity Bar to control which views you see:
You can also use this menu to hide any views that you never use. Keep in mind that you’re not limited to the views on the list. If there are some panels within a main view—for example, you can find some additional panels nested inside the Explorer view—you can drag them to the Activity Bar to create a permanent shortcut:
Use this feature for views that you use all the time.
Using Split Screens
Python’s style guide, PEP 8, leans toward short line lengths. For wide screens, this leaves a lot of unused screen space.
When you find yourself needing to switch between two or more files, use the split panel functionality to show many editor regions at once. You can access this functionality through the Command Palette with the command View: Split Editor.
Alternatively, you can use the associated keyboard shortcut:
- macOS: Cmd+\
- Windows or Linux: Ctrl+\
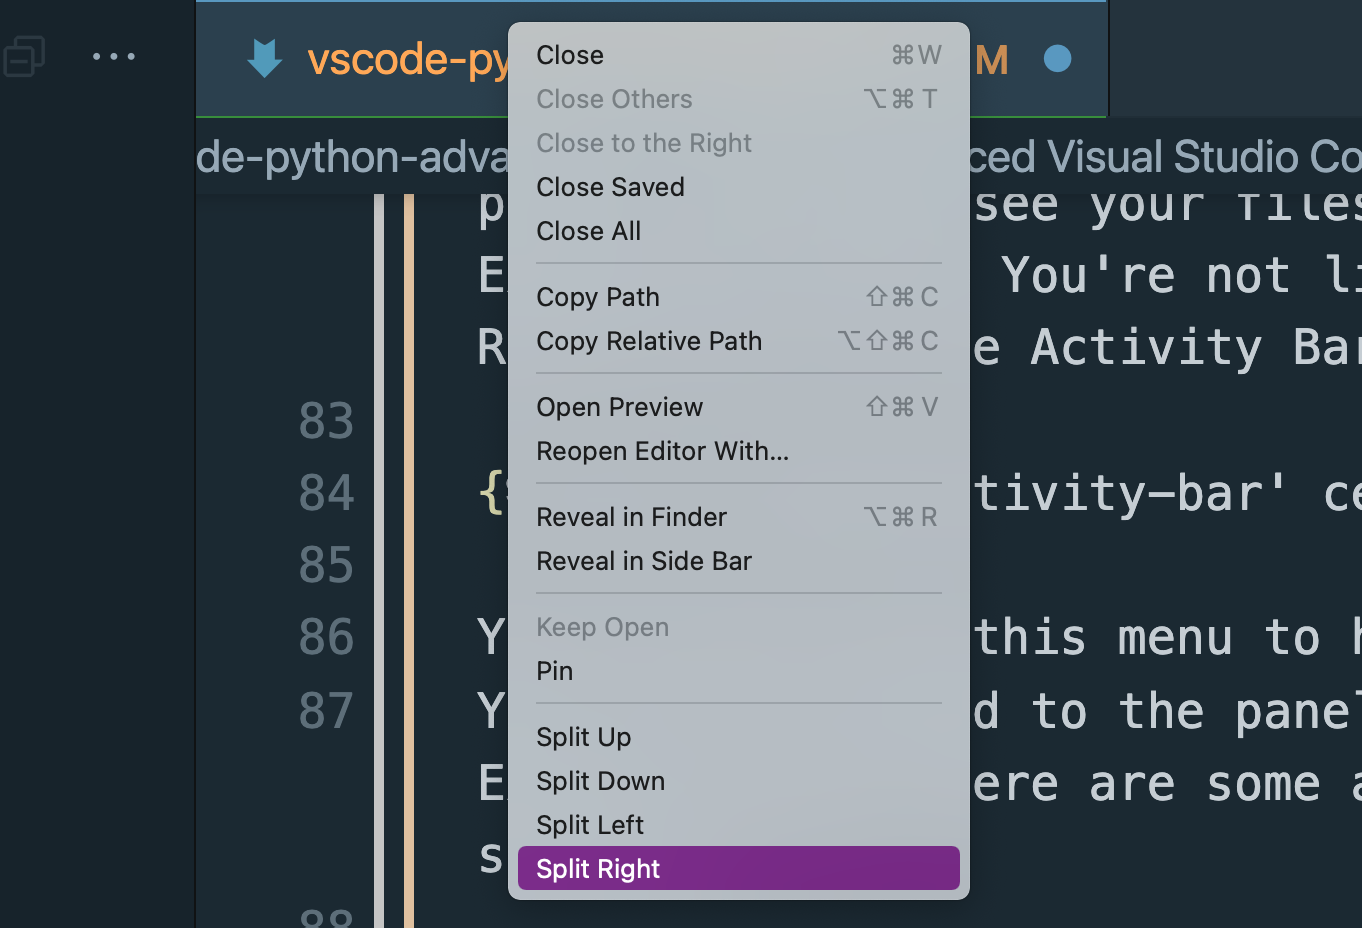
You can also open the split editor functionality by going to View → Editor Layout or by right-clicking on a file’s tab:
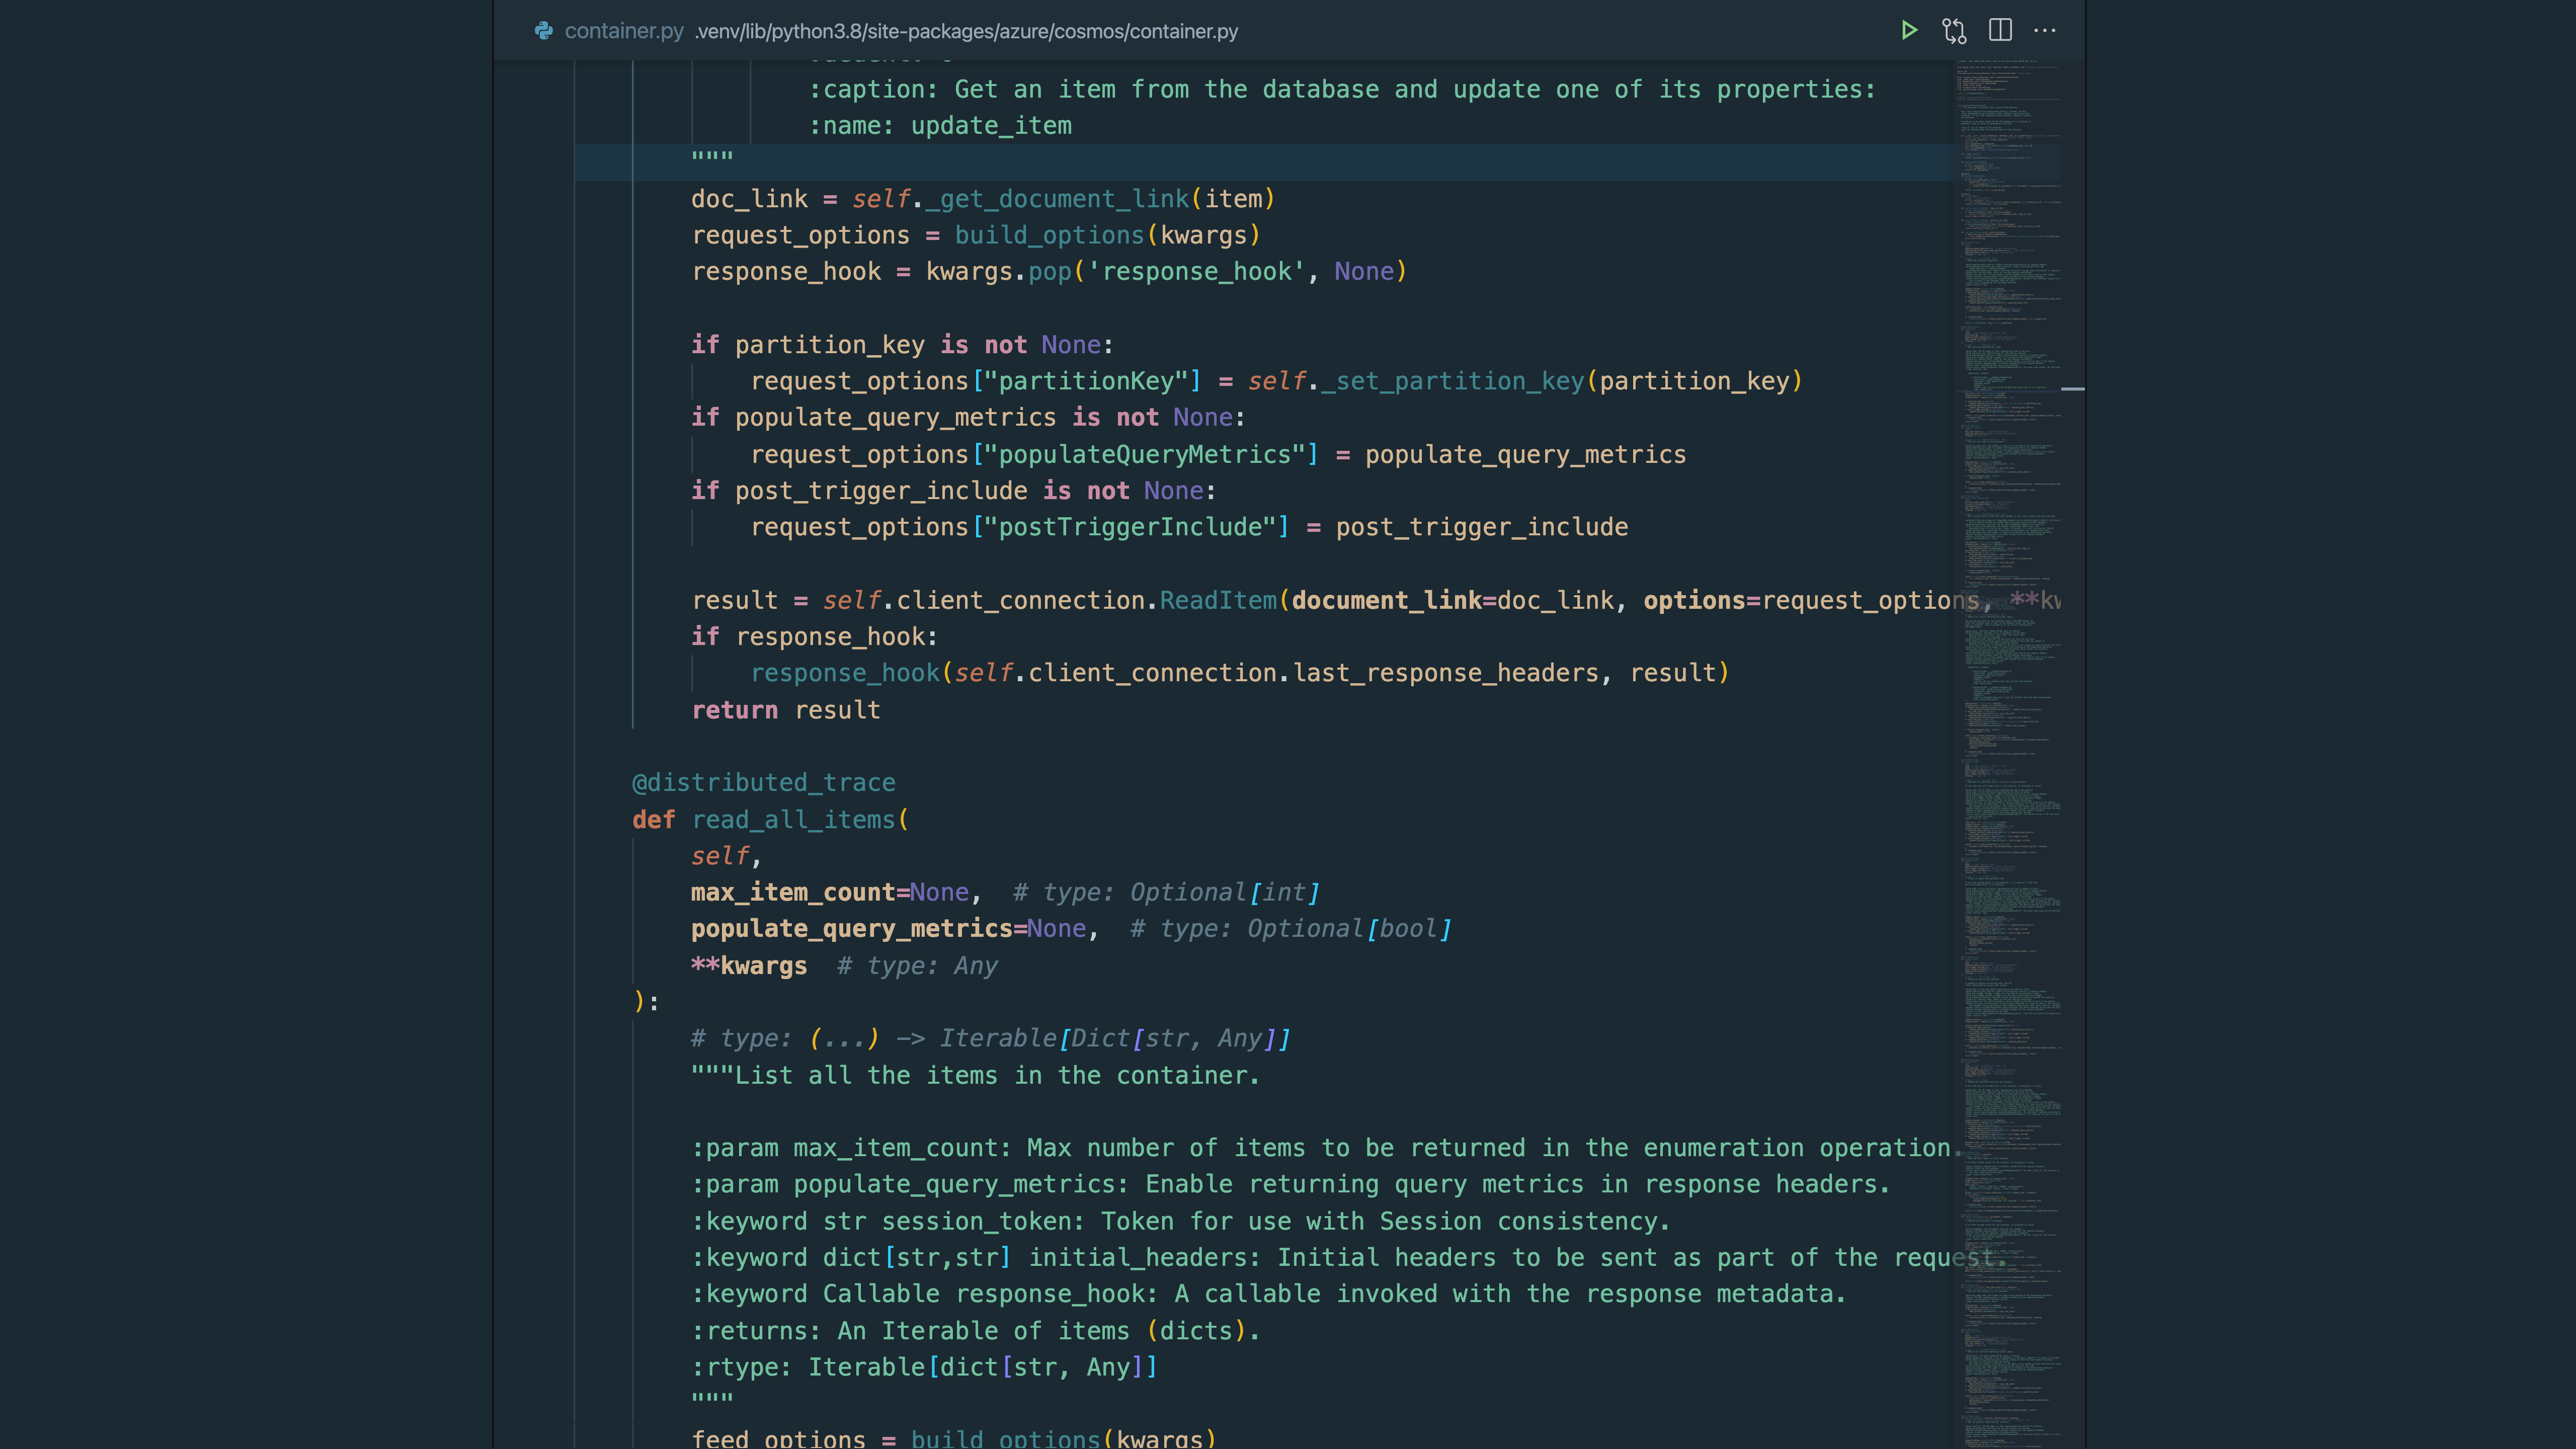
This setup is really useful when writing unit tests with your test code on the left and the module you’re testing on the right.
Some file types, like Markdown, have a preview region that you can use instead. Use the Markdown: Open Preview to the Side command to open the preview editor.
Using Zen Mode for Focused Work
If you need your absolute focus on a single file or task in VS Code, then use Zen Mode by going to View → Appearance → Zen Mode to show a full-screen window with just the editor:
This feature is especially useful for blocking out noisy distractions and notifications so that you can just focus on getting your current task done.
Theming
VS Code has a huge library of themes in the VS Code Marketplace. Some of the most popular themes out there are Material Theme, Winter is Coming, Dracula, Noctis, and Monokai Pro.
Let’s focus on the Material Theme as it comes with a broad set of color schemes to suit many tastes. You can install the extension from the Extensions view. Once installed, you can select a color theme by running Preferences: Color Theme in the Command Palette.
The Material Theme looks best with a custom icon theme. Icon themes are separate extensions from the color themes, so you have to install a second extension. Search for pkief.material-icon-theme in the Extensions view to find the most popular Material icon pack for the theme. After installing this, VS Code will prompt you to switch your icon pack.
This is the Material Theme with the Palenight color theme and the Material icon pack:
You can change the icon theme at any time from the Command Palette by using the command Preferences: File Icon Theme and then selecting one of the icon themes from the list.
Installing a Better Programming Font
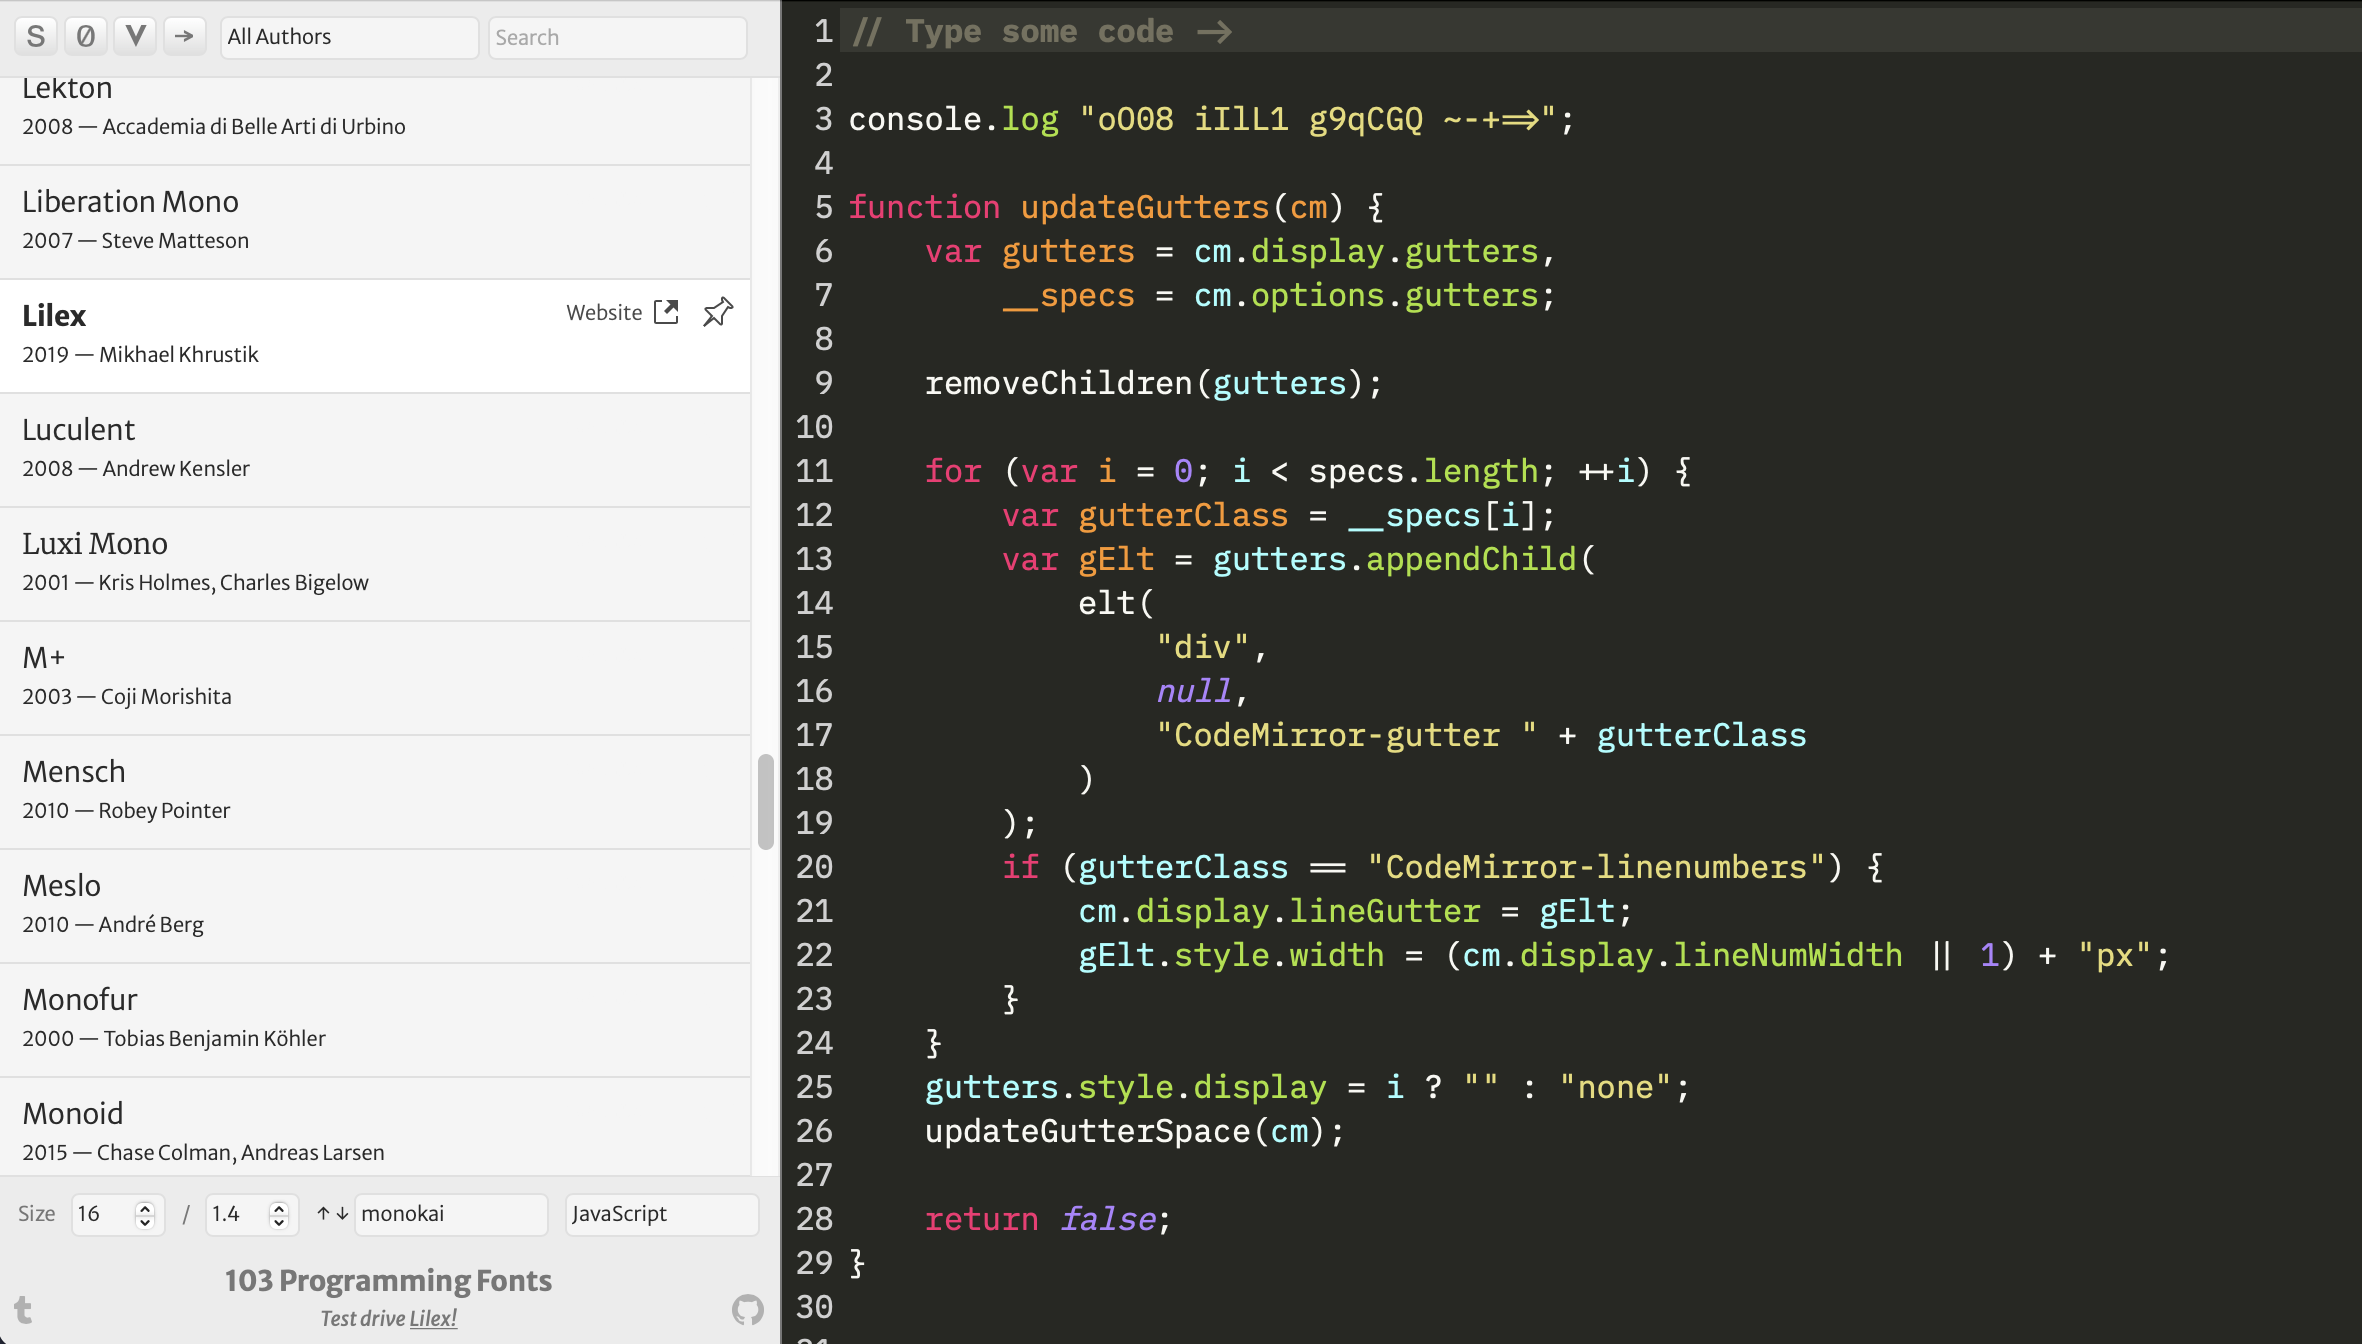
Programming fonts are a special group of typefaces, typically with fixed-width characters called monospace. There’s a long list of available fonts to browse at ProgrammingFonts.org:
Once you’ve selected a font, go to Nerd Fonts to download it and install the font on your operating system. The downloads at Nerd Fonts are copies of the monospace fonts with support for glyphs, otherwise known as icons, which you can use inside the terminal prompt.
After installing your selected font, you need to change the editor.fontFamily setting to the name of the new font. You can do that by navigating to Code → Preferences → Settings and then selecting Text Editor → Font in the navigation dropdown. You can change the font your editor will use by adding the name of your new font in the first field of the Font Family setting.
Setting Up Your Terminal
You’ll spend much of your Python development time inside a shell terminal. You can use a separate application, like iTerm2 or Windows Terminal, but VS Code already has a powerful built-in terminal window.
Because VS Code does need a bit of configuration to make it as powerful as a dedicated terminal application, you’ll set that up now.
Changing the Default Shell Provider
You can reconfigure the terminal window to have multiple profiles. These profiles form the dropdown list when you spawn a new terminal.
VS Code allows you to configure multiple terminal profiles. You can’t edit terminal profiles in the settings UI, so you need to use the Preferences: Open Settings (JSON) command in the Command Palette to open the settings.json file. You’ll notice that key-value pairs make up the settings file. Each key represents the configuration setting for VS Code or one of its extensions.
There are three terminal profile settings, which have the following names:
| Operating System | Terminal Profile Settings |
|---|---|
| Windows | terminal.integrated.profiles.windows |
| Linux | terminal.integrated.profiles.linux |
| macOS | terminal.integrated.profiles.osx |
Once you type in the name, the editor autocompletes the default profiles into the JSON file.
Note that there’s no Python REPL profile in the default settings. You can add a profile with the key "python3-repl" to the integrated profiles JSON file so that VS Code makes it available as a profile option and drops you straight onto the REPL prompt:
"python3-repl": {
    "path": "python3",
    "args": ["-q"]
}
The -q flag is a Python command-line flag to stop the version header from showing. You can add any extra Python command-line flags to "args".
Once configured, your profiles should look something like this, depending on your OS:
"terminal.integrated.profiles.osx": {
    "bash": {
        "path": "bash",
        "icon": "terminal-bash",
    },
    "zsh": {
        "path": "zsh"
    },
    "pwsh": {
        "path": "pwsh",
        "icon": "terminal-powershell",
    },
    "python3-repl": {
        "path": "python3",
        "args": ["-q"]
    }
},
VS Code has two launch modes for terminals: integrated and external. Once you’ve configured the profiles, you can set the default profile for your integrated terminal by setting the value for "terminal.integrated.defaultProfile.osx":
"terminal.integrated.defaultProfile.osx": "zsh",
If something gets launched in an external terminal, it will use the default shell of your operating system. If you prefer a different terminal app, like iTerm 2 for macOS or Windows Terminal for Windows, you can change the default external terminal as well:
"terminal.external.osxExec": "iTerm.app",
With this setting for macOS, for example, you’re saying that VS Code should bring up the iTerm app every time it launches an external terminal window.
There are even more settings you can change in regards to terminals in VS Code. For example, you can make VS Code activate your virtual environment automatically when you bring up a new terminal window, and you can customize the look and feel of your terminal by adding custom prompts. You’ll explore how to do both in this tutorial.
Virtual Environment Activation in the Terminal
Virtual environments are very important for managing multiple dependencies across Python projects. Visual Studio Code will activate any Python virtual environment once the interpreter is selected. If you already have a virtual environment, run Python: Select Interpreter from the Command Palette to select the Python interpreter virtual environment.
If you don’t have one, then create one inside the terminal. VS Code can automatically pick it up if the virtual environment path is named .venv/, env/, or venv/.
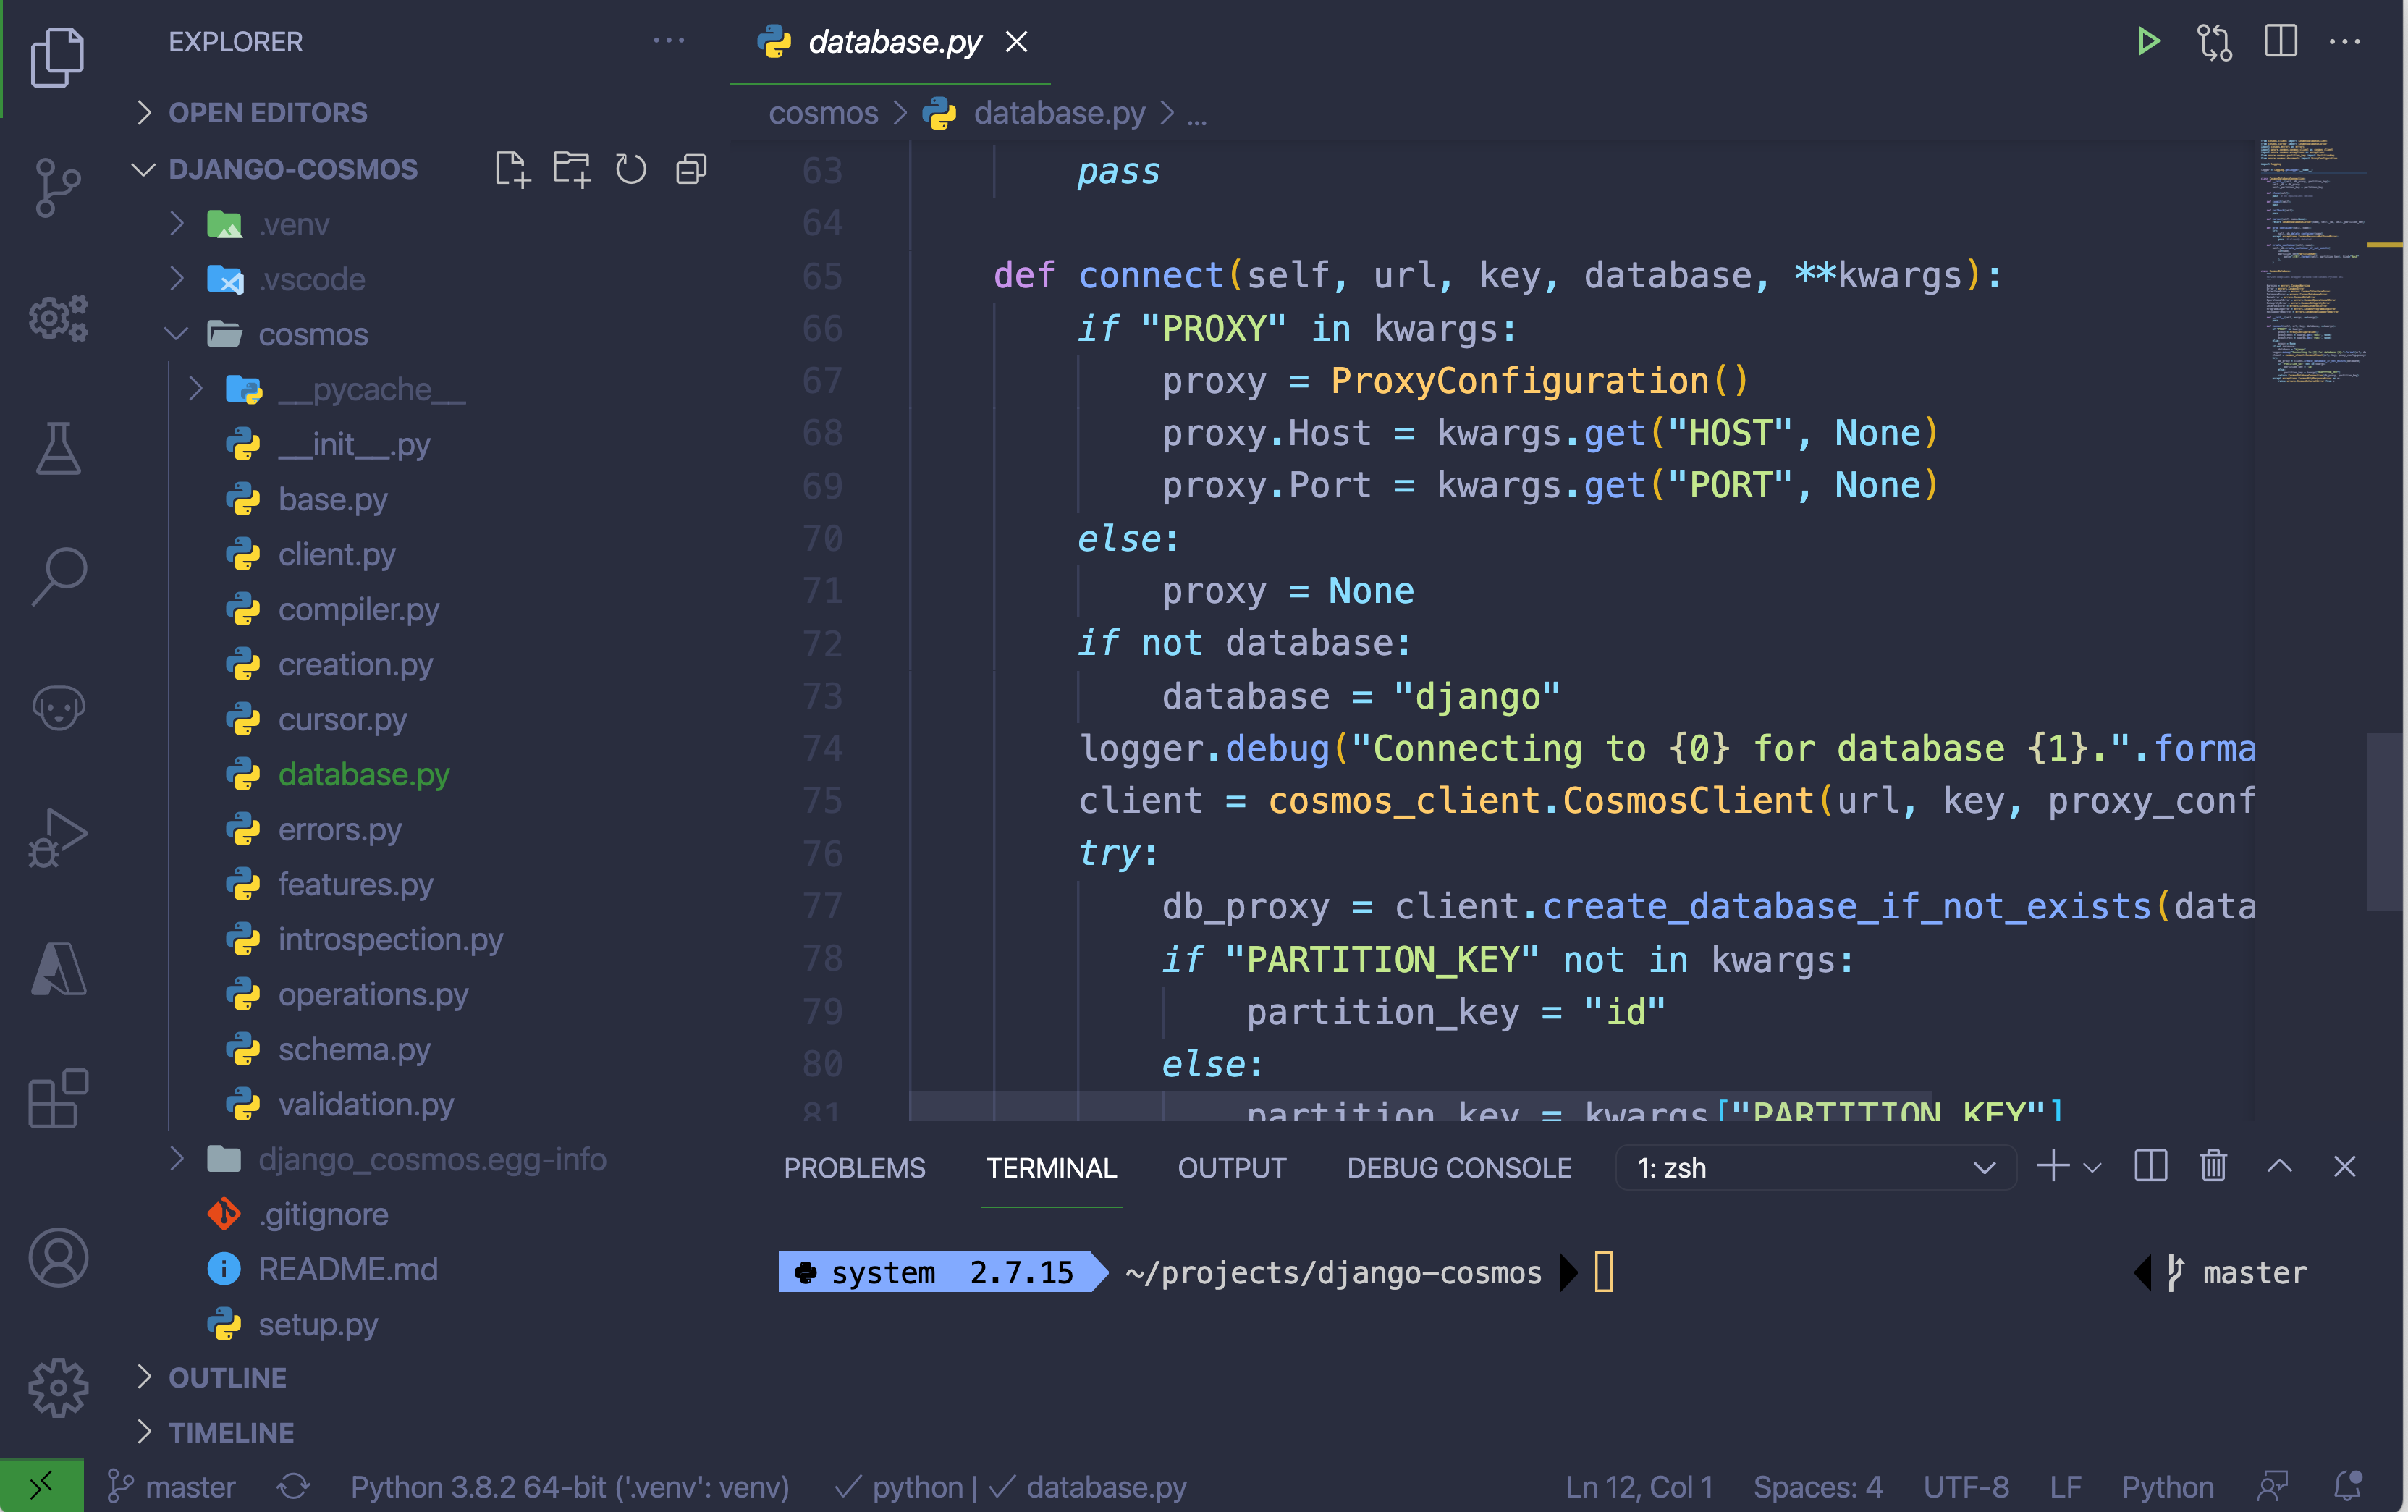
After you set the interpreter, you’ll automatically activate the virtual environment when you start a new terminal window inside VS Code:
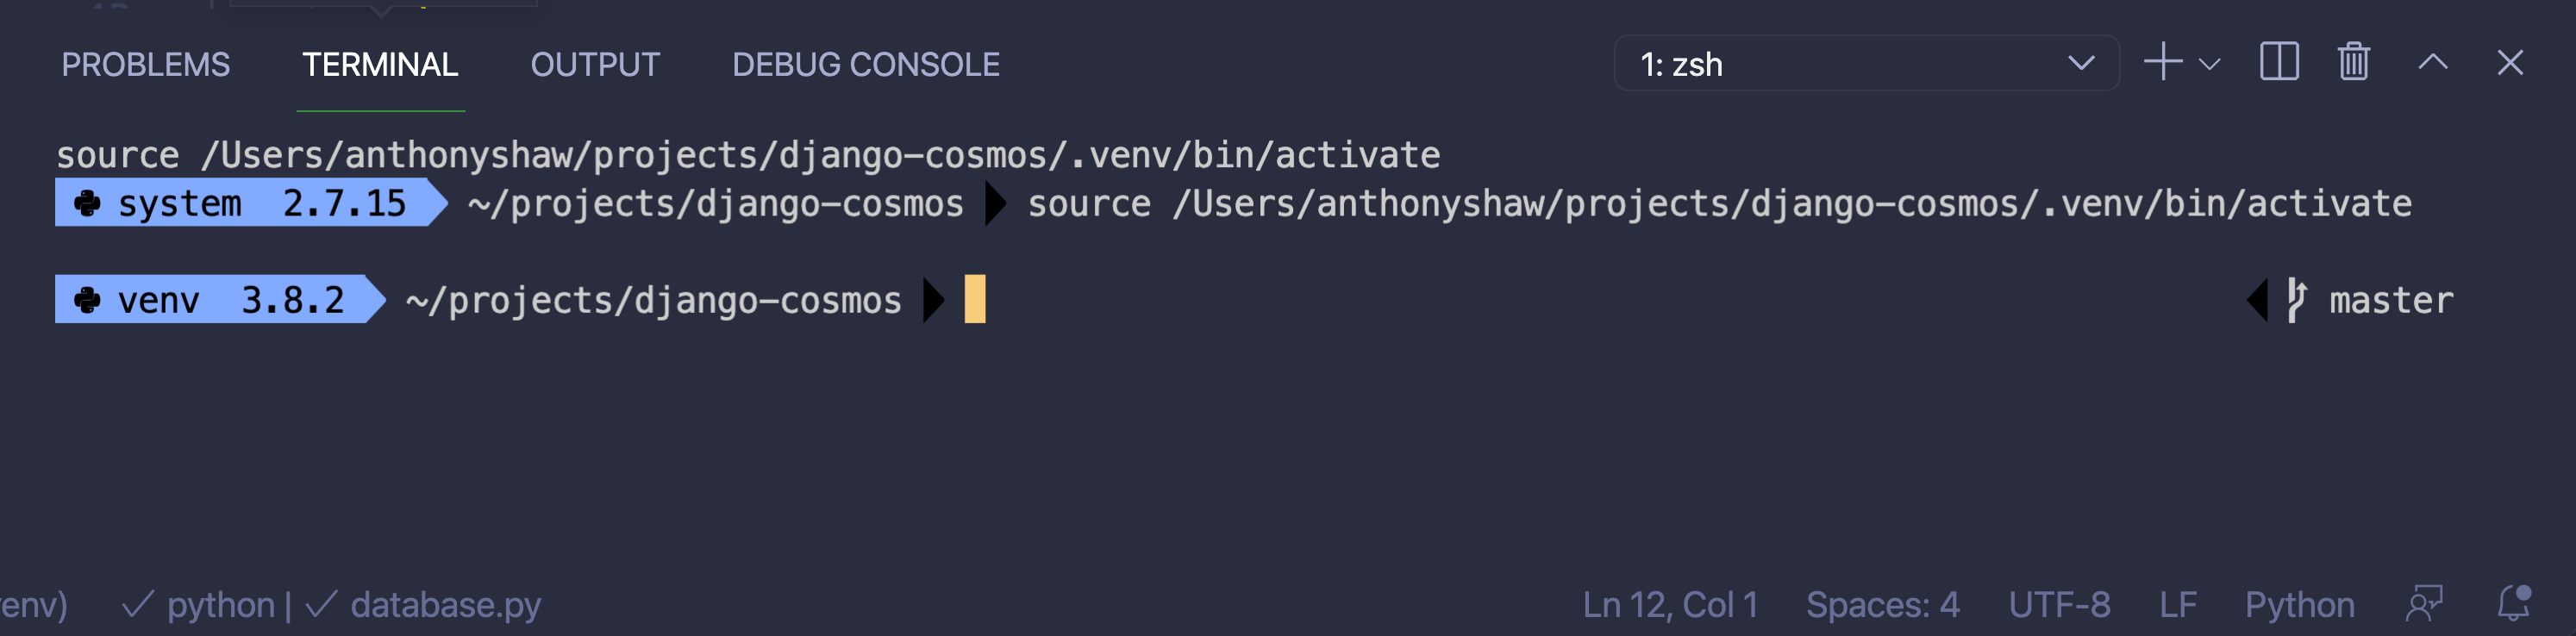
If you already had a terminal open, you can destroy it by clicking the garbage can icon.
Any commands you run inside the terminal, such as python -m pip install, will be for the activated virtual environment.
In the above screenshot, you can see a custom command prompt that uses the Oh My Posh prompt toolkit. In the next section, you’ll install and configure Oh My Posh. Oh My Posh is optional, especially if you already have a custom command prompt installed.
Installing Oh My Posh
Oh My Posh is one of many libraries for customizing the command prompt of your terminal. It works across Linux, macOS, and Windows. It also works with all shells like Bash, Zsh, Fish, and PowerShell. You can install Oh My Posh to spice up your terminal.
If you’re on macOS and using Bash, run the following commands to install Oh My Posh:
$ brew tap jandedobbeleer/oh-my-posh
$ brew install oh-my-posh
$ curl https://github.com/JanDeDobbeleer/oh-my-posh/raw/main/themes/tonybaloney.omp.json -sLo ~/.mytheme.omp.json
$ echo "eval \"\$(oh-my-posh --init --shell bash --config ~/.mytheme.omp.json)\"" >> ~/.profile
$ . ~/.profile
If you’re on macOS and using Zsh, run the following commands to install Oh My Posh:
$ brew tap jandedobbeleer/oh-my-posh
$ brew install oh-my-posh
$ curl https://github.com/JanDeDobbeleer/oh-my-posh/raw/main/themes/tonybaloney.omp.json -sLo ~/.mytheme.omp.json
$ echo "eval \"\$(oh-my-posh --init --shell zsh --config ~/.mytheme.omp.json)\"" >> ~/.zprofile
$ . ~/.zprofile
If you’re on Windows and using PowerShell, run the following commands to install Oh My Posh:
PS C:\> Install-Module oh-my-posh -Scope CurrentUser
PS C:\> Add-Content $PROFILE "`nSet-PoshPrompt -Theme tonybaloney"
Finally, if you’re on Linux and using Bash, run the following commands to install Oh My Posh:
$ sudo wget https://github.com/JanDeDobbeleer/oh-my-posh/releases/latest/download/posh-linux-amd64 -O /usr/local/bin/oh-my-posh
$ sudo chmod +x /usr/local/bin/oh-my-posh
$ curl https://github.com/JanDeDobbeleer/oh-my-posh/raw/main/themes/tonybaloney.omp.json -sLo ~/.mytheme.omp.json
$ echo "eval \"\$(oh-my-posh --init --shell bash --config ~/.mytheme.omp.json)\"" >> ~/.bashrc
$ . ~/.bashrc
When you open up a new terminal in VS Code, you’ll get this prompt:

The components on the terminal are the folder, Git branch, and Python version. Check out the list of themes for some other options.
Note: If you’re using a custom terminal prompt like Oh My Posh or Oh My Zsh, you have to select one of the installed Nerd Fonts for the glyphs to render correctly in VS Code.
By default, the terminal will use the same font face that you configured for the editor, editor.fontFamily. You can override this by defining a different font family for the terminal.integrated.fontFamily identifier. You’ll also need to update any external terminal applications you use.
Team Settings vs Personal Settings
VS Code has two levels of settings:
- User settings, which apply to all projects
- Workspace settings, which only apply to that workspace
If a setting is declared in both, the workspace setting will override the user setting.
The workspace configuration for VS Code and all of its extensions live within a .vscode/ directory in the workspace root.
It’s a good idea to put your project-agnostic settings into your user settings and your project-specific settings into .vscode/. By separating your personal user settings from your project settings, you and any other developers working on the project can be more effective.
Global User Settings for Python
By default, the Python extension for Visual Studio Code has a very basic configuration. Many features like linting, formatting, and security checks are disabled because you need to install third-party tools like Black, Pylint, and Bandit to use them.
You can install these tools and make them available to every virtual environment by using either pipx or pip install --user. pipx is preferable over pip install --user because it’ll create and maintain a virtual environment for that package, keeping your global site packages smaller and reducing the risk of packaging conflicts.
Once you’ve installed pipx, you can install the common tools:
$ pipx install pylint && \
  pipx install black && \
  pipx install poetry && \
  pipx install pipenv && \
  pipx install bandit && \
  pipx install mypy && \
  pipx install flake8
Alternatively, use python3 -m pip install --user to install the common tools:
$ python3 -m pip install --user pylint black poetry pipenv bandit mypy flake8
Once you’ve installed the base tools, open the user settings from the Command Palette with Preferences: Open Settings (JSON). Add settings for the preferences you want to apply to all projects:
 1"python.pipenvPath": "${env:HOME}/.local/bin/pipenv",
 2"python.poetryPath": "${env:HOME}/.local/bin/poetry",
 3"python.condaPath": "${env:HOME}/.local/bin/conda",
 4"python.linting.enabled": true,
 5"python.linting.banditPath": "${env:HOME}/.local/bin/bandit",
 6"python.linting.banditEnabled": true,
 7"python.linting.pylintPath": "${env:HOME}/.local/bin/pylint",
 8"python.linting.mypyPath": "${env:HOME}/.local/bin/mypy",
 9"python.linting.flake8Path": "${env:HOME}/.local/bin/flake8",
10"python.formatting.blackPath": "${env:HOME}/.local/bin/black",
With these settings, you’ve managed to accomplish a couple of things that’ll be useful for your development workflow across many projects:
- Lines 1 to 3 enable package discovery for projects enabled with
pipenv,poetry, andconda. - Line 4 enables Python linting.
- Lines 5 to 6 enable and set the path to
bandit. - Lines 7 to 10 enable Python formatting and set the path to a globally-installed instance of
pylint,mypy,flake8, andblack.
In each absolute path, you can automatically substitute your home folder by using the macro ${env:HOME}.
Workspace Settings
Outside of the user settings, you can use the .vscode/ directory inside the workspace to configure some project-specific settings:
- Which commands to run to execute the project
- How to test and debug the project
- Which linter and formatter to use and any project-specific parameters
The following files hold the VS Code preferences:
| File | Purpose |
|---|---|
settings.json |
VS Code settings |
launch.json |
Profiles to execute your project from the Run and Debug menu |
tasks.json |
Any additional tasks to execute, such as build steps |
Most of VS Code’s settings, as well as the settings for your extensions, are in these three files.
In the workspace preferences, the following predefined variables are supported:
| Predefined Variable | Meaning | |
|---|---|---|
${env.VARIABLE} |
Any environment variable | |
${workspaceFolder} |
The path of the folder opened in VS Code | |
${workspaceFolderBasename} |
The name of the folder opened in VS Code without any slashes (/) |
|
${file} |
The currently opened file | |
${fileWorkspaceFolder} |
The currently opened file’s workspace folder | |
${relativeFile} |
The currently opened file relative to workspaceFolder |
|
${cwd} |
The task runner’s current working directory on startup | |
${execPath} |
The path to the running VS Code executable | |
${pathSeparator} |
The character used by the operating system to separate components in file paths, for example, forward slash (/) or backslash (\) |
Using these variables will keep the project settings agnostic to the environment, so you can commit them into Git.
As an example of working with these settings, if you want to use Black as the default code formatter for this project, you can create the file .vscode/settings.json with this configuration:
{
    "python.formatting.provider": "black",
}
Anyone who checks out this project will now automatically use Black as the formatter for Python files. You’ll see how this setting influences the autoformatting options in the section about setting format and lint on save.
Using the Settings Sync Extension
If you use VS Code across multiple computers, you can enable the automatic synchronization of Settings, Keyboard Shortcuts, User Snippets, Extensions, and UI State. If you haven’t used Settings Sync before, you’ll need to enable it:
- Run
Settings Sync: Turn Onin your Command Palette. - Follow the setup steps as prompted by VS Code. You can authenticate with GitHub.
- Once the setup is done, run
Settings Sync: Configurefrom the Command Palette. - Select what you want to sync.
Once Settings Sync is configured on all the computers you have VS Code installed on, you can see the state for each synced setting by running Settings Sync: Show Synced Data from the Command Palette, where they’ll show up under Synced Machines:
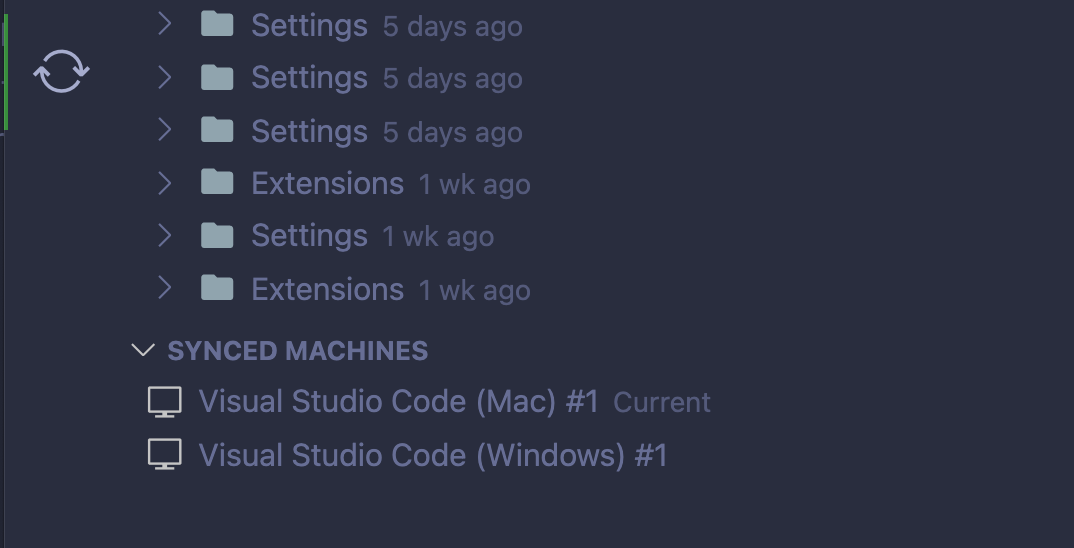
This view shows you the last synced time for each of the settings and which machines are in sync.
Linting and Formatting
All languages in Visual Studio Code can be formatted using one of the automated formatters, and the Python extension also supports linters. Linters and formatters perform different tasks:
- A formatter will change how your code looks but not how it works.
- A linter will warn you about your code’s compliance to standards on style, type adherence, security, and a range of best practices.
The Python extension supports many third-party linters, and they often perform different jobs. For example, Bandit is a linter for security bugs and Flake8 is a linter for style guide compliance.
The Python extension also comes with language server tooling, which performs analysis by loading the interfaces—methods, functions, classes—from your code and the libraries you use.
At the time of writing this tutorial, the latest and greatest language server extension for Python on Visual Studio Code is Pylance.
Setting Up Pylance
Pylance is an extension that works alongside Python in Visual Studio Code to provide deeper language support and introspection of Python code. Pylance will provide auto-completions, automated module imports, better code navigation, type checking, and tons more.
To get Pylance, go to the Extensions menu on the side bar and search Pylance (ms-python.vscode-pylance).
Note: Pylance is now bundled with the Python extension, so you might already have it installed.
Once you have Pylance installed, there are two default configuration settings you may want to change in your user settings to get the most out of the extension.
The first setting to change is the type checking mode, which you can use to specify the level of type checking analysis performed:
"python.analysis.typeCheckingMode": "basic"
By default, the type checking mode is set to "off".
The other options are "basic" or "strict". With "basic", rules unrelated to type checking and rules for basic type checking are run. If the mode is set to "strict", it will run all type checking rules at the highest severity of error. Set this to "basic" for a balance between strict and disabled.
The other default setting is python.analysis.diagnosticMode. By default, Pylance will inspect currently open files only. Changing this setting to workspace will inspect all Python files in the workspace, giving you a list of errors and warnings inside the Explorer view:
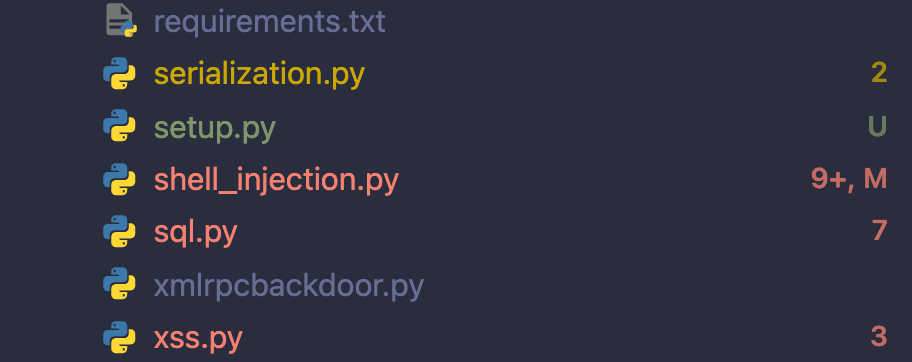
You should only set python.analysis.diagnosticMode to "workspace" if you have some RAM to spare as it will consume more resources.
Pylance is most effective when it has information about the types used as the arguments to methods and functions as well as the return types.
For external libraries, Pylance will use typeshed to infer the return types and argument types. Pylance also comes with type stubs and intelligence for some of the most popular data-science libraries, like pandas, Matplotlib, scikit-learn, and NumPy. If you’re working with pandas, Pylance will give you information and examples for common functions and patterns:
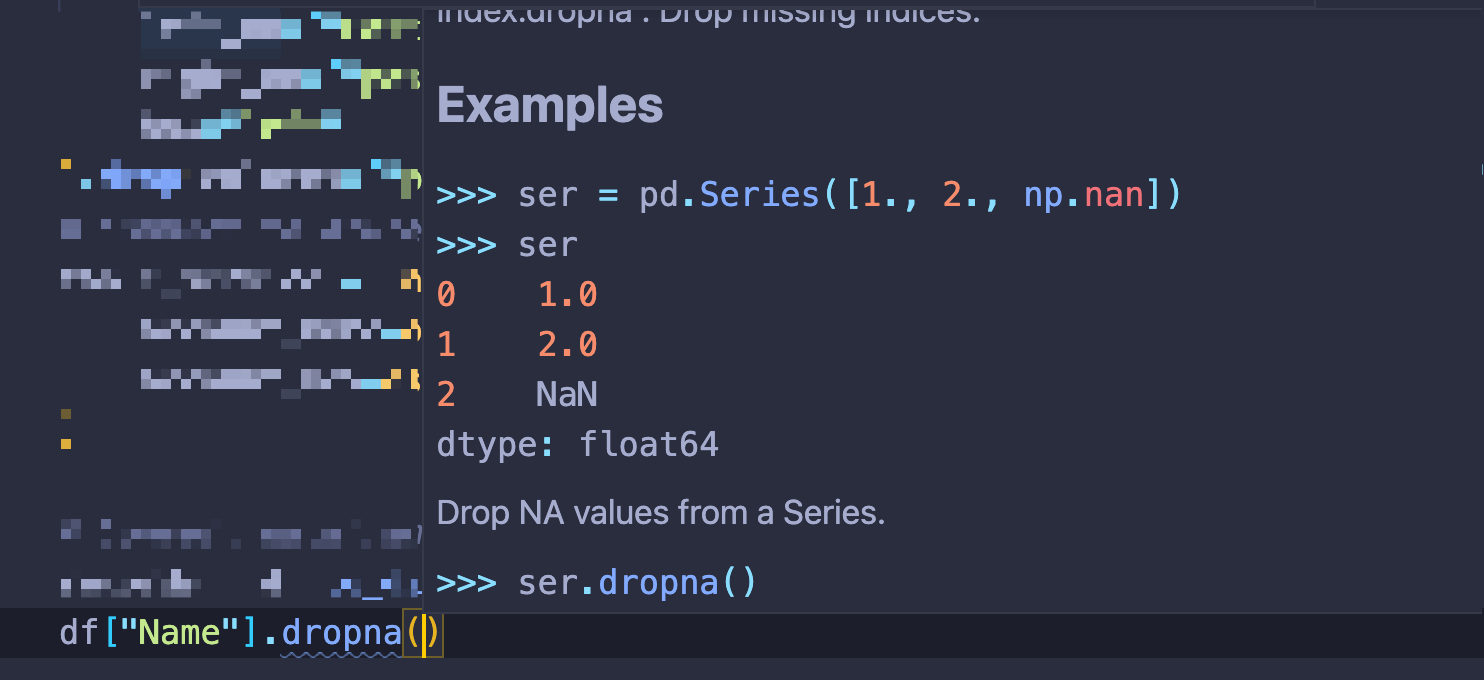
For libraries that don’t have type stubs on typeshed, Pylance will do its best to guess what the types are. Otherwise, you can add your own type stubs.
Setting Format and Lint on Save
Format Document is an action that applies formatting to any document in VS Code. For the Python extension, this action executes "python.formatting.provider", which can be set to any of the supported auto-formatters: "autopep8", "black", or "yapf".
Once you have configured the formatter in settings.json, you can set the formatter to run automatically whenever a file is saved. In the VS Code config, you can configure editor settings to only apply to certain file types by putting them in a "[<file_type>]" group:
...
"[python]": {
    "editor.formatOnSave": true,
},
Along with the execution of the formatter, you can also have the import statements organized both alphabetically and by splitting standard library modules, external modules, and package imports into groups with the following configuration:
"[python]": {
    ...
    "editor.codeActionsOnSave": {"source.organizeImports": true},
},
Unlike formatting, linting is specific to the Python extension. To enable linting, choose a linter by running Python: Select Linter on the Command Palette. You can also enable one or more linters in your settings. For example, to enable the Bandit and Pylint linters, edit your settings.json:
...
"python.linting.enabled": true,
"python.linting.banditEnabled": true,
"python.linting.pylintEnabled": true,
To run the enabled linters whenever a file is saved, add the following setting to settings.json:
...
"python.linting.lintOnSave": true,
You might find it helpful to have more than one linter enabled. Keep in mind that Pylance already provides many of the insights you would get from pylint, so you likely don’t need to enable both pylint and Pylance. In contrast, Flake8 provides stylistic feedback that Pylance doesn’t cover, so you can use those two together.
Testing Your Python Code in Visual Studio Code
Python offers plenty of tools to test your code. The Python extension for VS Code supports the most popular test frameworks, unittest and pytest.
Configuring Test Integration
To enable testing support for Python, run the Python: Configure Tests command from the Command Palette. VS Code will prompt you to select from one of the supported test frameworks and to specify which folder contains your tests.
This wizard adds the configuration options to .vscode/settings.json:
"python.testing.pytestEnabled": true,
"python.testing.pytestArgs": [
    "tests"
],
You can edit python.testing.<framework>Args with your preferred test framework to add any additional command-line flags. The example above shows configuration options for pytest.
If you have more complex settings for pytest, put those in pytest.ini instead of the VS Code settings. That way, you’ll keep the configuration consistent with any automated testing or CI/CD tooling.
Executing Tests
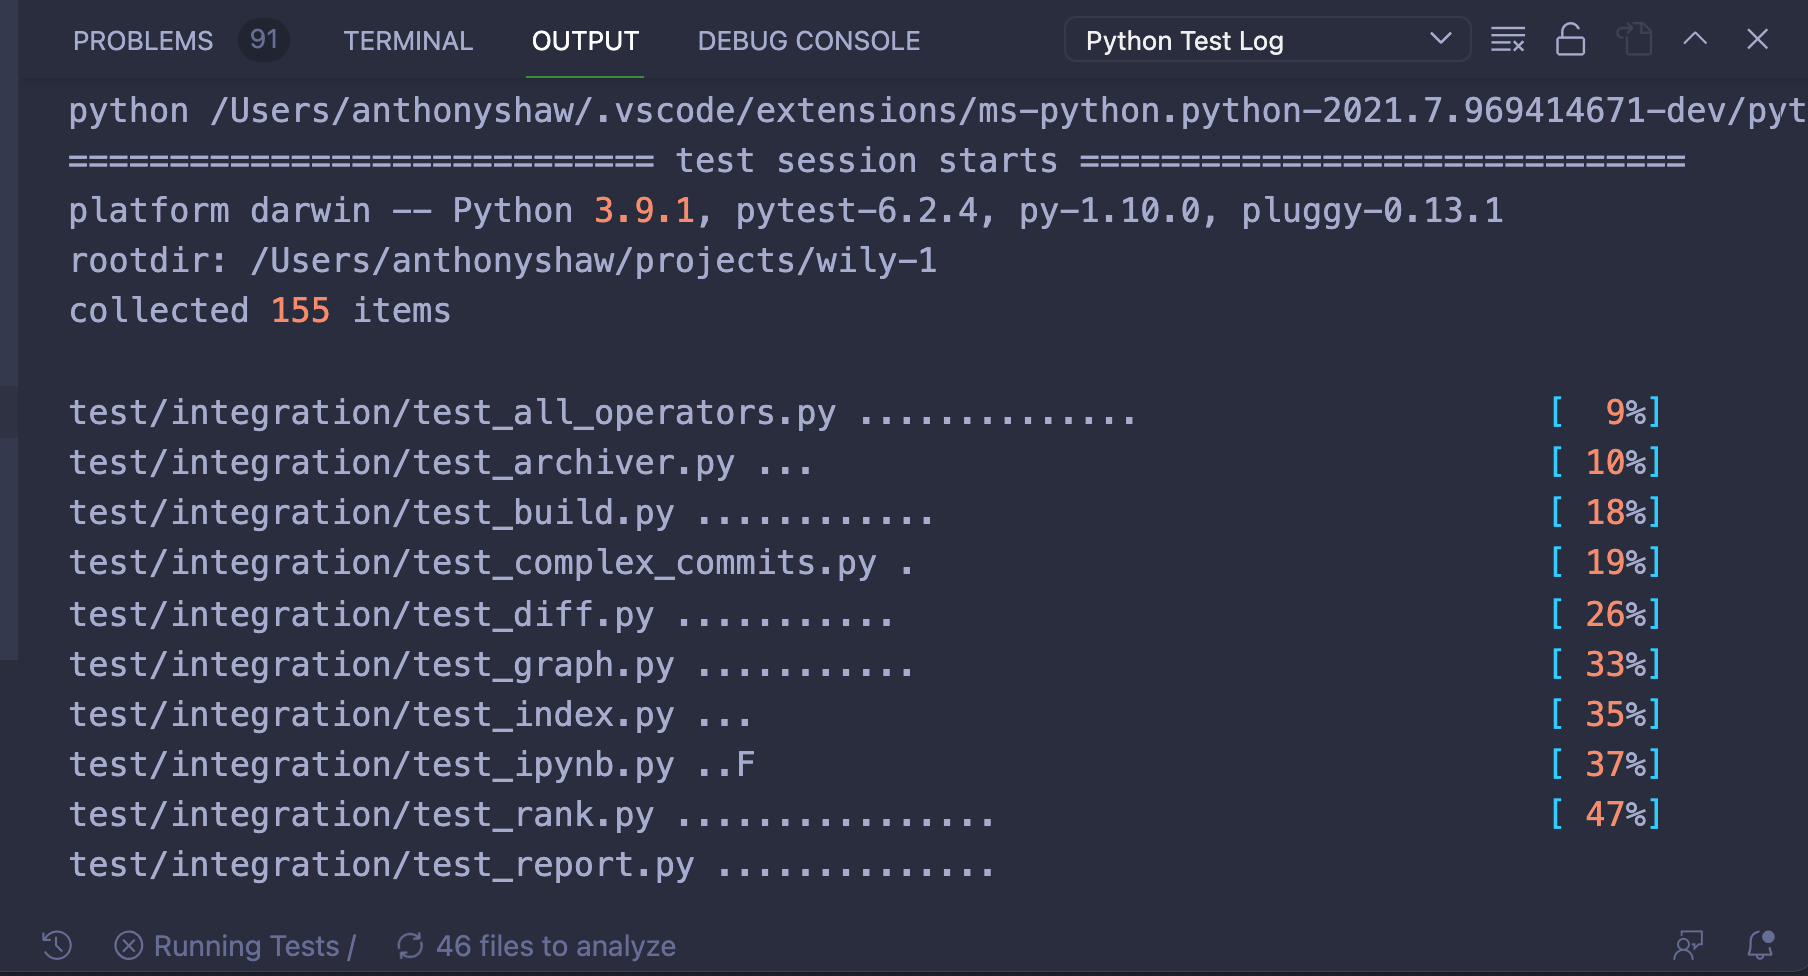
Once you’ve configured the test framework and arguments for the test runner, you can execute your tests by running the Python: Run All Tests command from the Command Palette. This will start the test runner with the configured arguments and put the test output into the Python Test Log output panel:
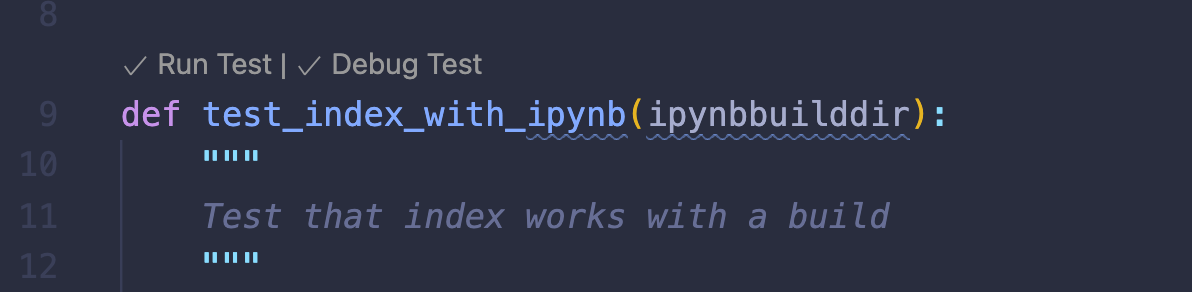
Once test discovery has completed, each test case will have an inline option to execute or debug that case:
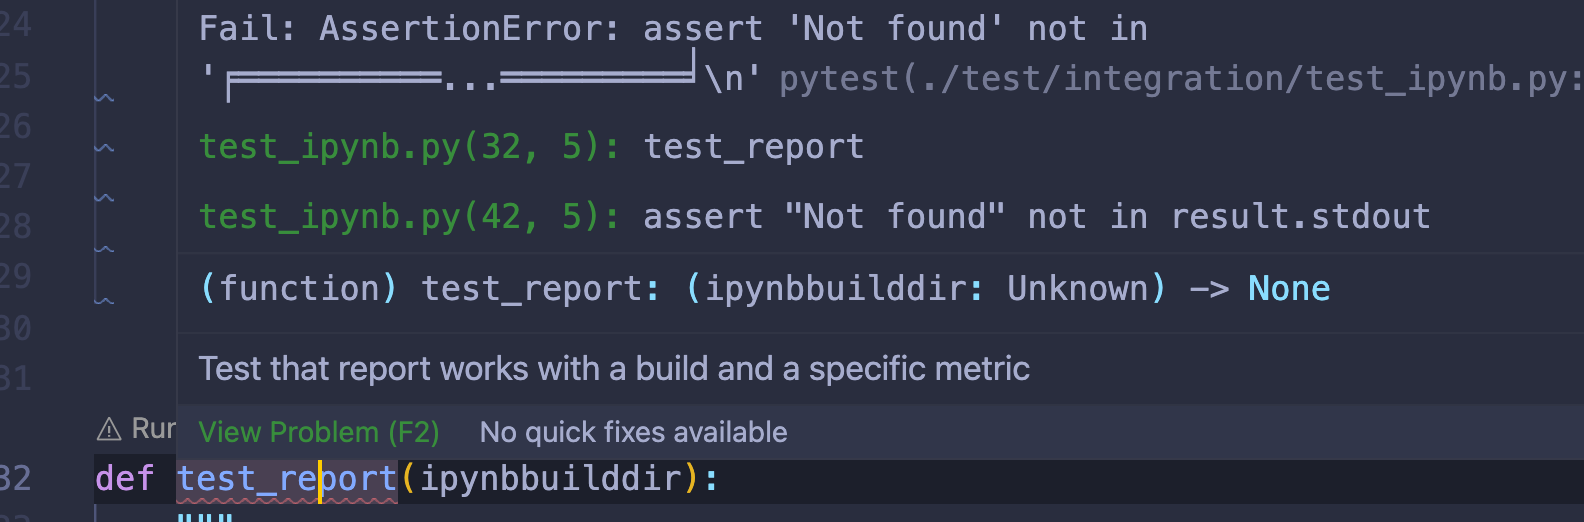
Failed tests will be marked as having an error. You can see the failure from the test runner in both the Python Test Log panel and by hovering over the failed test case in your code:
If you’re running tests often, you can improve your testing experience in VS Code with the testing explorer.
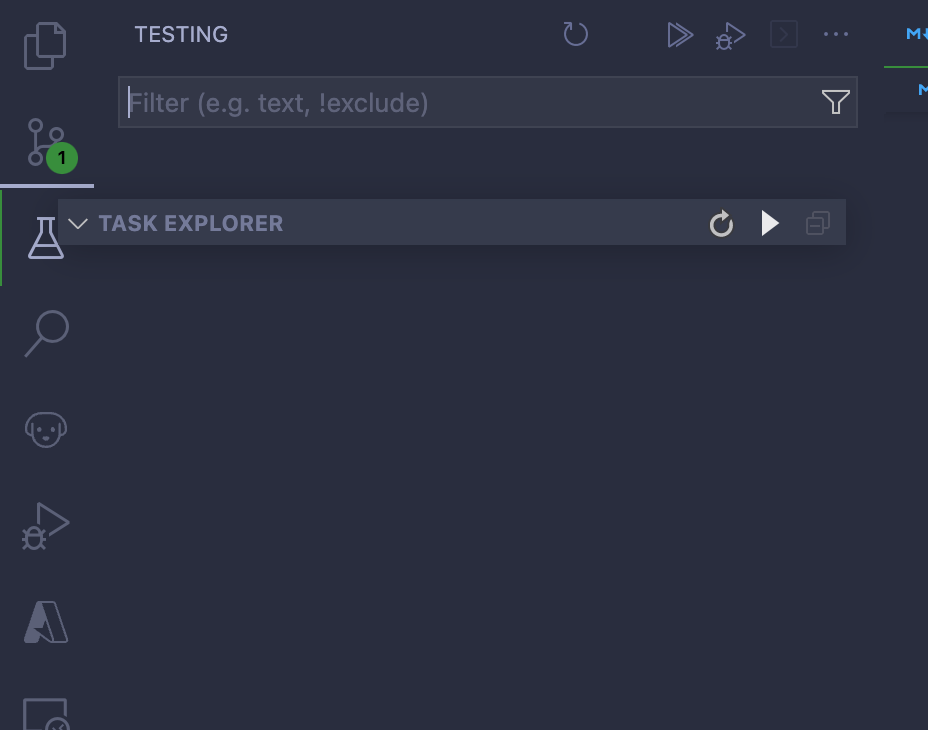
To enable the testing panel, right-click the side bar and make sure that Testing is checked. The testing panel shows all the tests that the Python extension discovered and provides you with many features:
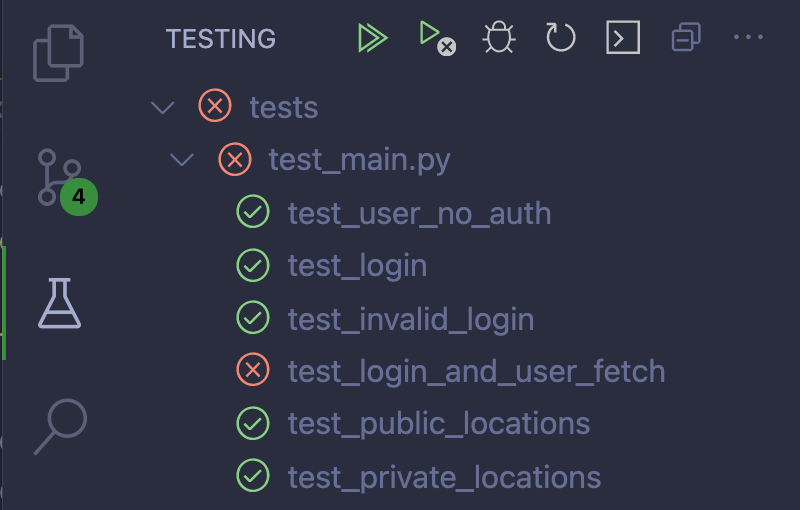
You have a visual representation of the test suite grouping and which tests failed. You also have menu buttons that let you run and debug tests.
VS Code’s test system is powerful, but a lot of the functionality is disabled by default to keep it a lightweight editor. Beyond testing, there are other tasks you might want to run regularly from inside VS Code. This is where the tasks system comes in.
Using the Visual Studio Code Tasks System
Visual Studio Code supports compiled languages like Go, Rust, and C++, as well as interpreted languages like Python and Ruby. VS Code has a flexible system for executing configured tasks that the user defines, like building and compiling the code.
Python code doesn’t normally need to be compiled ahead of time because the Python interpreter does this for you. Instead, you can use the tasks system to have pre-configured tasks that you would otherwise run at the command line, such as:
- Building a wheel or source distribution
- Running tasks in frameworks like Django
- Compiling Python C extensions
VS Code tasks are commands or executables that you can run on demand using the Command Palette. There are two built-in default tasks:
- The build task
- The test task
Note that you can use tasks for anything that you might otherwise execute over the command line. You’re not restricted to build and test activities.
Using Tasks to Compile Wheels
If you have a setup.py file to build a package for distribution on PyPI, you can use the tasks system to automate building the source (Python) and binary (compiled Python) distribution packages.
Tasks are defined in a .vscode/tasks.json file. To try it out, create .vscode/tasks.json and copy this configuration:
 1{
 2  "version": "2.0.0",
 3  "tasks": [
 4    {
 5      "type": "shell",
 6      "command": "${command:python.interpreterPath}",
 7      "args": ["setup.py", "bdist_wheel", "sdist"],
 8      "isBackground": true,
 9      "options": {"cwd": "${workspaceFolder}"},
10      "label": "Build Wheel",
11      "group": {
12        "kind": "build",
13        "isDefault": true
14      }
15    }
16  ]
17}
There are a few things to note in this example, so you’ll look at the most important configurations line by line:
- Line 5: The task type is
shell, which specifies that this should run under your configured shell. - Line 6: The command is
${command:python.interpreterPath}, which is a built-in variable of the Python interpreter for this environment. That includes any activated virtual environment. - Line 9: The option
"options": {"cwd": "${workspaceFolder}"}specifies that this should run at the root of the project. You can change this to a subfolder if you need to. - Lines 11 to 13: The
"group"is set as"build", and this task will be your default task because you set"isDefault"totrue. This means that this task will run as the default build task.
To execute the default build task, you can run Tasks: Run Build Task from the Command Palette or use the built-in keyboard shortcut, Cmd+F9 or Ctrl+F9. Under the Terminal tab, you can find the output of the build command called whatever you specified in "label":

You’re not limited to build scripts. The task system is a great solution to Django and Flask’s management commands.
Using Tasks for Django
Are you working with a Django application, and do you want to automate running manage.py from the command line? You can create a task using the shell type. That way, you can execute manage.py with the Django sub-command you wish to run, along with any arguments:
{
  "version": "2.0.0",
  "tasks": [
    {
      "type": "shell",
      "command": "${command:python.interpreterPath}",
      "args": ["manage.py", "makemigrations"],
      "isBackground": true,
      "options": {"cwd": "${workspaceFolder}"},
      "label": "Make Migrations"
    }
  ]
}
To run this task, use the Tasks: Run Task command in the Command Palette and choose the Make Migrations task from the list.
You can copy this snippet and paste it for any Django commands you run on a regular basis, like collectstatic.
Chaining Tasks
If you have multiple tasks that should run in sequence or a task that depends on another task, you can configure task dependencies in tasks.json.
Expanding on the setup.py example, if you want to first build a source distribution of your package, you can add the following task to tasks.json:
...
{
  "type": "shell",
  "command": "${command:python.interpreterPath}",
  "args": ["setup.py", "sdist"],
  "isBackground": true,
  "options": {"cwd": "${workspaceFolder}"},
  "label": "Build Source",
}
Within the default build task, you can then add a property dependsOn along with a list of the task labels that need to run first:
{
  "version": "2.0.0",
  "tasks": [
    {
      "type": "shell",
      "command": "${command:python.interpreterPath}",
      "args": ["setup.py", "bdist_wheel"],
      "isBackground": true,
      "options": {"cwd": "${workspaceFolder}"},
      "label": "Build Wheel",
      "group": {
        "kind": "build",
        "isDefault": true
      },
      "dependsOn": ["Build Source"]
    }
  ]
}
The next time you run this task, it will run all dependent tasks first.
If you have multiple tasks that this task depends on and they can be run in parallel, add "dependsOrder": "parallel" to the task configuration.
Using Tasks to Run Tox
Now you’ll explore tox, which is a tool that aims to automate and standardize testing in Python. The Python extension for Visual Studio Code doesn’t come with tox integration. Instead, you can use the tasks system to set tox as the default test task.
Tip: If you want to get started quickly with tox, then install tox with pip and run the tox-quickstart command:
$ python -m pip install tox
$ tox-quickstart
This will prompt you through the steps of creating a tox configuration file.
To automate running tox with your tox configuration, add the following task to tasks.json:
{
  "type": "shell",
  "command": "tox",
  "args": [],
  "isBackground": false,
  "options": {"cwd": "${workspaceFolder}"},
  "label": "Run tox",
  "group": {
      "kind": "test",
      "isDefault": true
  }
}
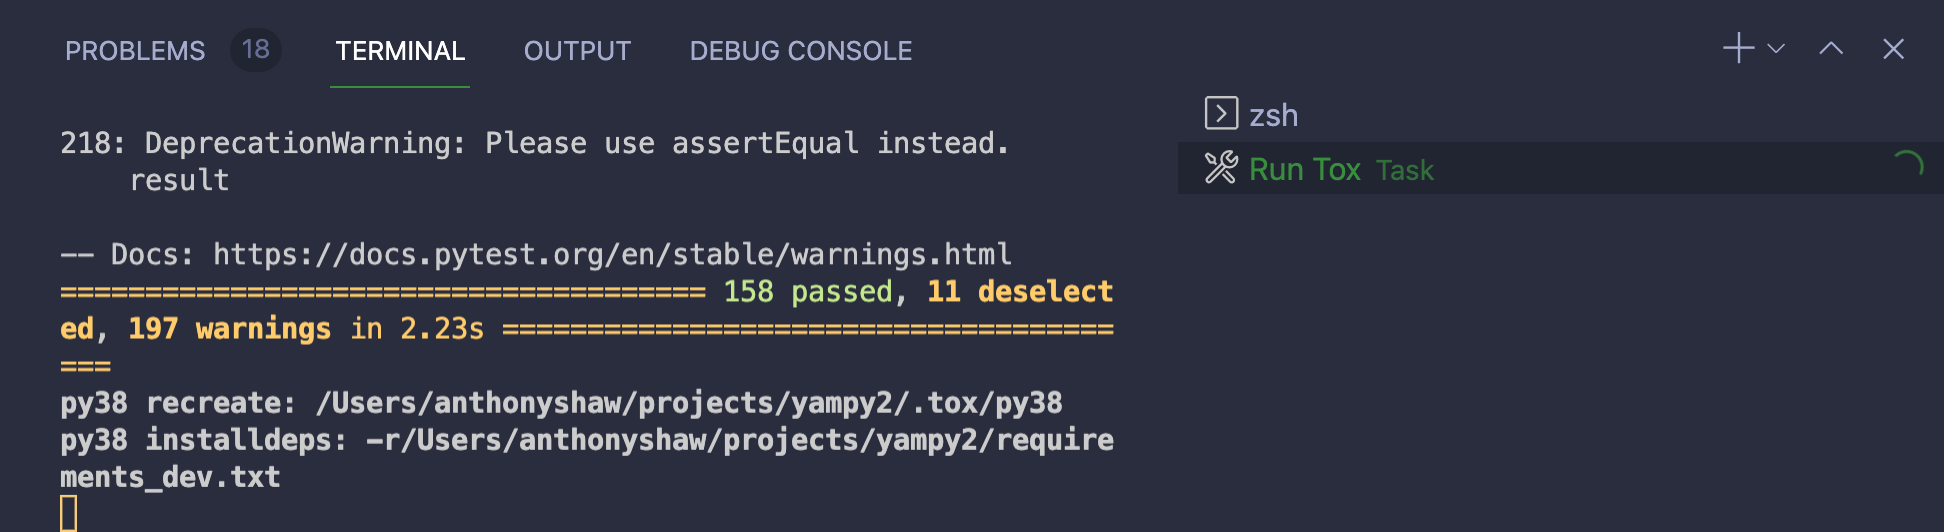
You can run this task using Tasks: Run Test Task from the Command Palette, and the task will execute tox with the output within the Terminal tab:
If you have a few tasks and need to run them often, it’s time to explore a great extension that adds some shortcuts in the UI for running configured tasks.
Using the Task Explorer Extension
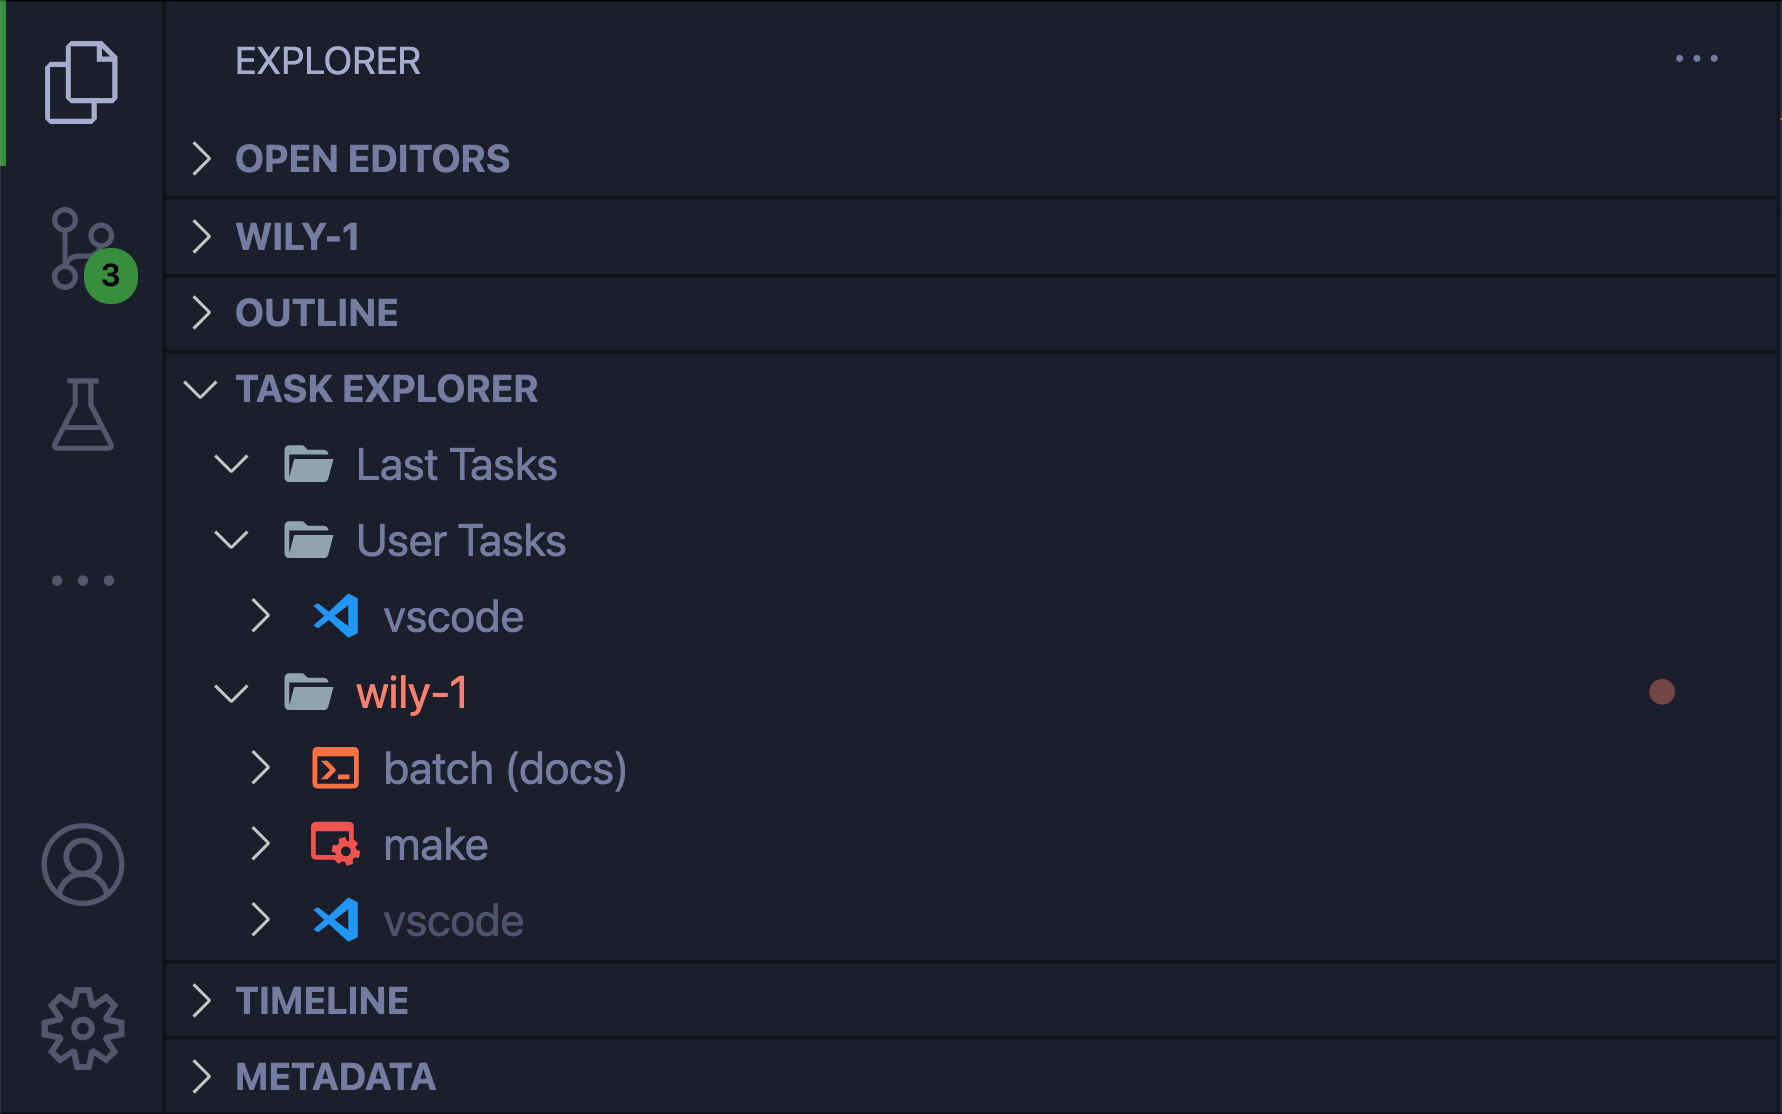
The Task Explorer extension (spmeesseman.vscode-taskexplorer) adds simple UI controls to run your pre-configured tasks. Once installed, Task Explorer will be a panel within the Explorer view. It scans your project to auto-discover tasks for npm, make, gulp, and many other build tools. You can find your tasks under the vscode group:
Click the arrow next to any task to execute it, and click the refresh icon at the top if you change your task’s configuration.
Debugging Your Python Scripts in Visual Studio Code
The Python extension for Visual Studio Code comes bundled with a powerful debugger that supports local and remote debugging.
The simplest way to run and debug a simple Python script is going to the Run → Start Debugging menu and choosing Python File from the selection. This will execute the current file using the configured Python interpreter.
You can set breakpoints anywhere in the code by clicking in the gutter to the left of the line number. When breakpoints are hit as the code executes, the code will pause and wait for instruction:
The debugger adds a menu of controls: Continue, Step Over, Step Into, Step Out, Restart, and Stop Execution:

On the left panel, you can perform common debugging actions, such as exploring local and global variables and Python’s call stack. You can also set watches, which you’ll learn more about in the next section.
Setting Watches
Watches are expressions that persist between debugging sessions. When you stop execution and start debugging again, you’ll keep any watches from your last session.
You can add a variable to the Watch panel from the Variables panel by right-clicking a variable and selecting Add to Watch.
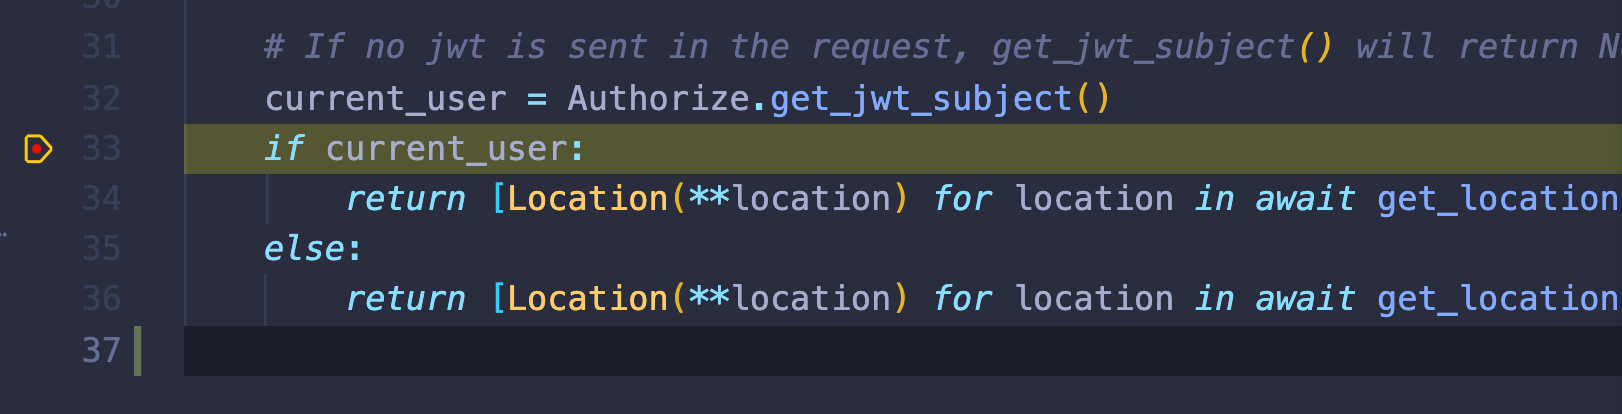
You can also add any Python expression to the Watch list by clicking the + icon. Expressions can contain:
- Small Python expressions, such as
x == 3 - Function calls, such as
var.upper() - Comparisons
You’ll get the current result of each expression in real time whenever a breakpoint is hit. VS Code will also update the value of each watch while you step through your debugging session:
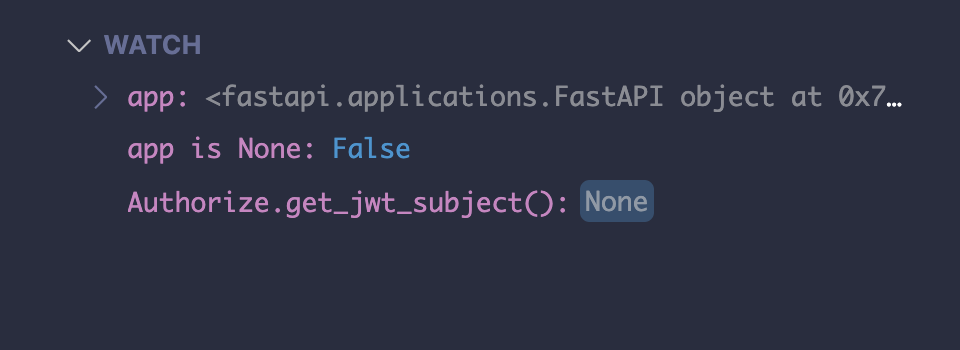
You can expand complex types like dictionaries and objects using the arrow on the left.
So far, you’ve seen the debugger for a single Python file, but many Python applications are modules or require special commands to start.
Configuring a Launch File
VS Code has a configuration file for launch profiles, .vscode/launch.json. The Python debugger for VS Code can start any launch configuration and attach the debugger to it.
Note: To see the expected result of the upcoming configuration, you need to have a working FastAPI project set up and the async web server uvicorn installed in the Python environment you’re using.
For an example of working with launch profiles in VS Code, you’ll explore how to use the ASGI server uvicorn to start a FastAPI application. Normally, you might just use the command line:
$ python -m uvicorn example_app.main:app
Instead, you could set up an equivalent launch configuration in launch.json:
{
  "configurations": [
    {
      "name": "Python: FastAPI",
      "type": "python",
      "request": "launch",
      "module": "uvicorn",
      "cwd": "${workspaceFolder}",
      "args": [
          "example_app.main:app"
      ],
    }
  ]
}
Here, you set "type" in the configuration to "python", which tells VS Code to use the Python debugger. You also set "module" to specify the Python module to run, which in this case is "uvicorn". You can provide any number of arguments under "args". If your application requires environment variables, you can also set those using the env parameter.
Once you’ve added this configuration, you should find your new launch configuration ready to start under the Run and Debug panel:
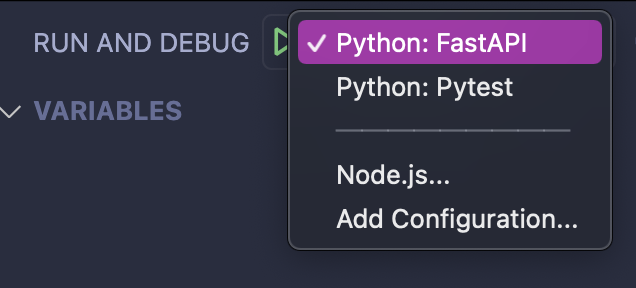
Whatever you configured as the first launch configuration will run when you press F5 or select Run → Start Debugging from the top menu.
If VS Code doesn’t automatically select the right Python environment for you, then you can also declare an explicit path to the appropriate Python interpreter as an option in your .vscode/launch.json file:
 1{
 2  "configurations": [
 3    {
 4      "name": "Python: FastAPI",
 5      "type": "python",
 6      "python": "${workspaceFolder}/venv/bin/python",
 7      "request": "launch",
 8      "module": "uvicorn",
 9      "cwd": "${workspaceFolder}",
10      "args": [
11          "example_app.main:app"
12      ],
13    }
14  ]
15}
You can add the path to your Python interpreter as a new entry with the name "python". In this example, the interpreter is located in a Python virtual environment named venv that you created at the root of your workspace folder. If there’s a different Python interpreter you’d like to use, you can define the path to it by editing the path shown in line 6 to fit your setup.
Mastering Remote Development
VS Code supports three remote development profiles:
- Containers
- Remote Hosts over SSH
- Windows Subsystem for Linux (WSL)
All three options are provided by the Remote Development extension pack (ms-vscode-remote.vscode-remote-extensionpack). You need to install this extension pack for the remote debugging features to display in VS Code.
Remote Development With Containers
You need to install the Docker runtime on your machine to use remote debugging for containers. If you don’t already have Docker installed, you can download it from the Docker website.
Once Docker is running, go to the Remote Explorer tab on the left navigation menu. Change the Remote Explorer dropdown to Containers, and you’ll see a view with panels:
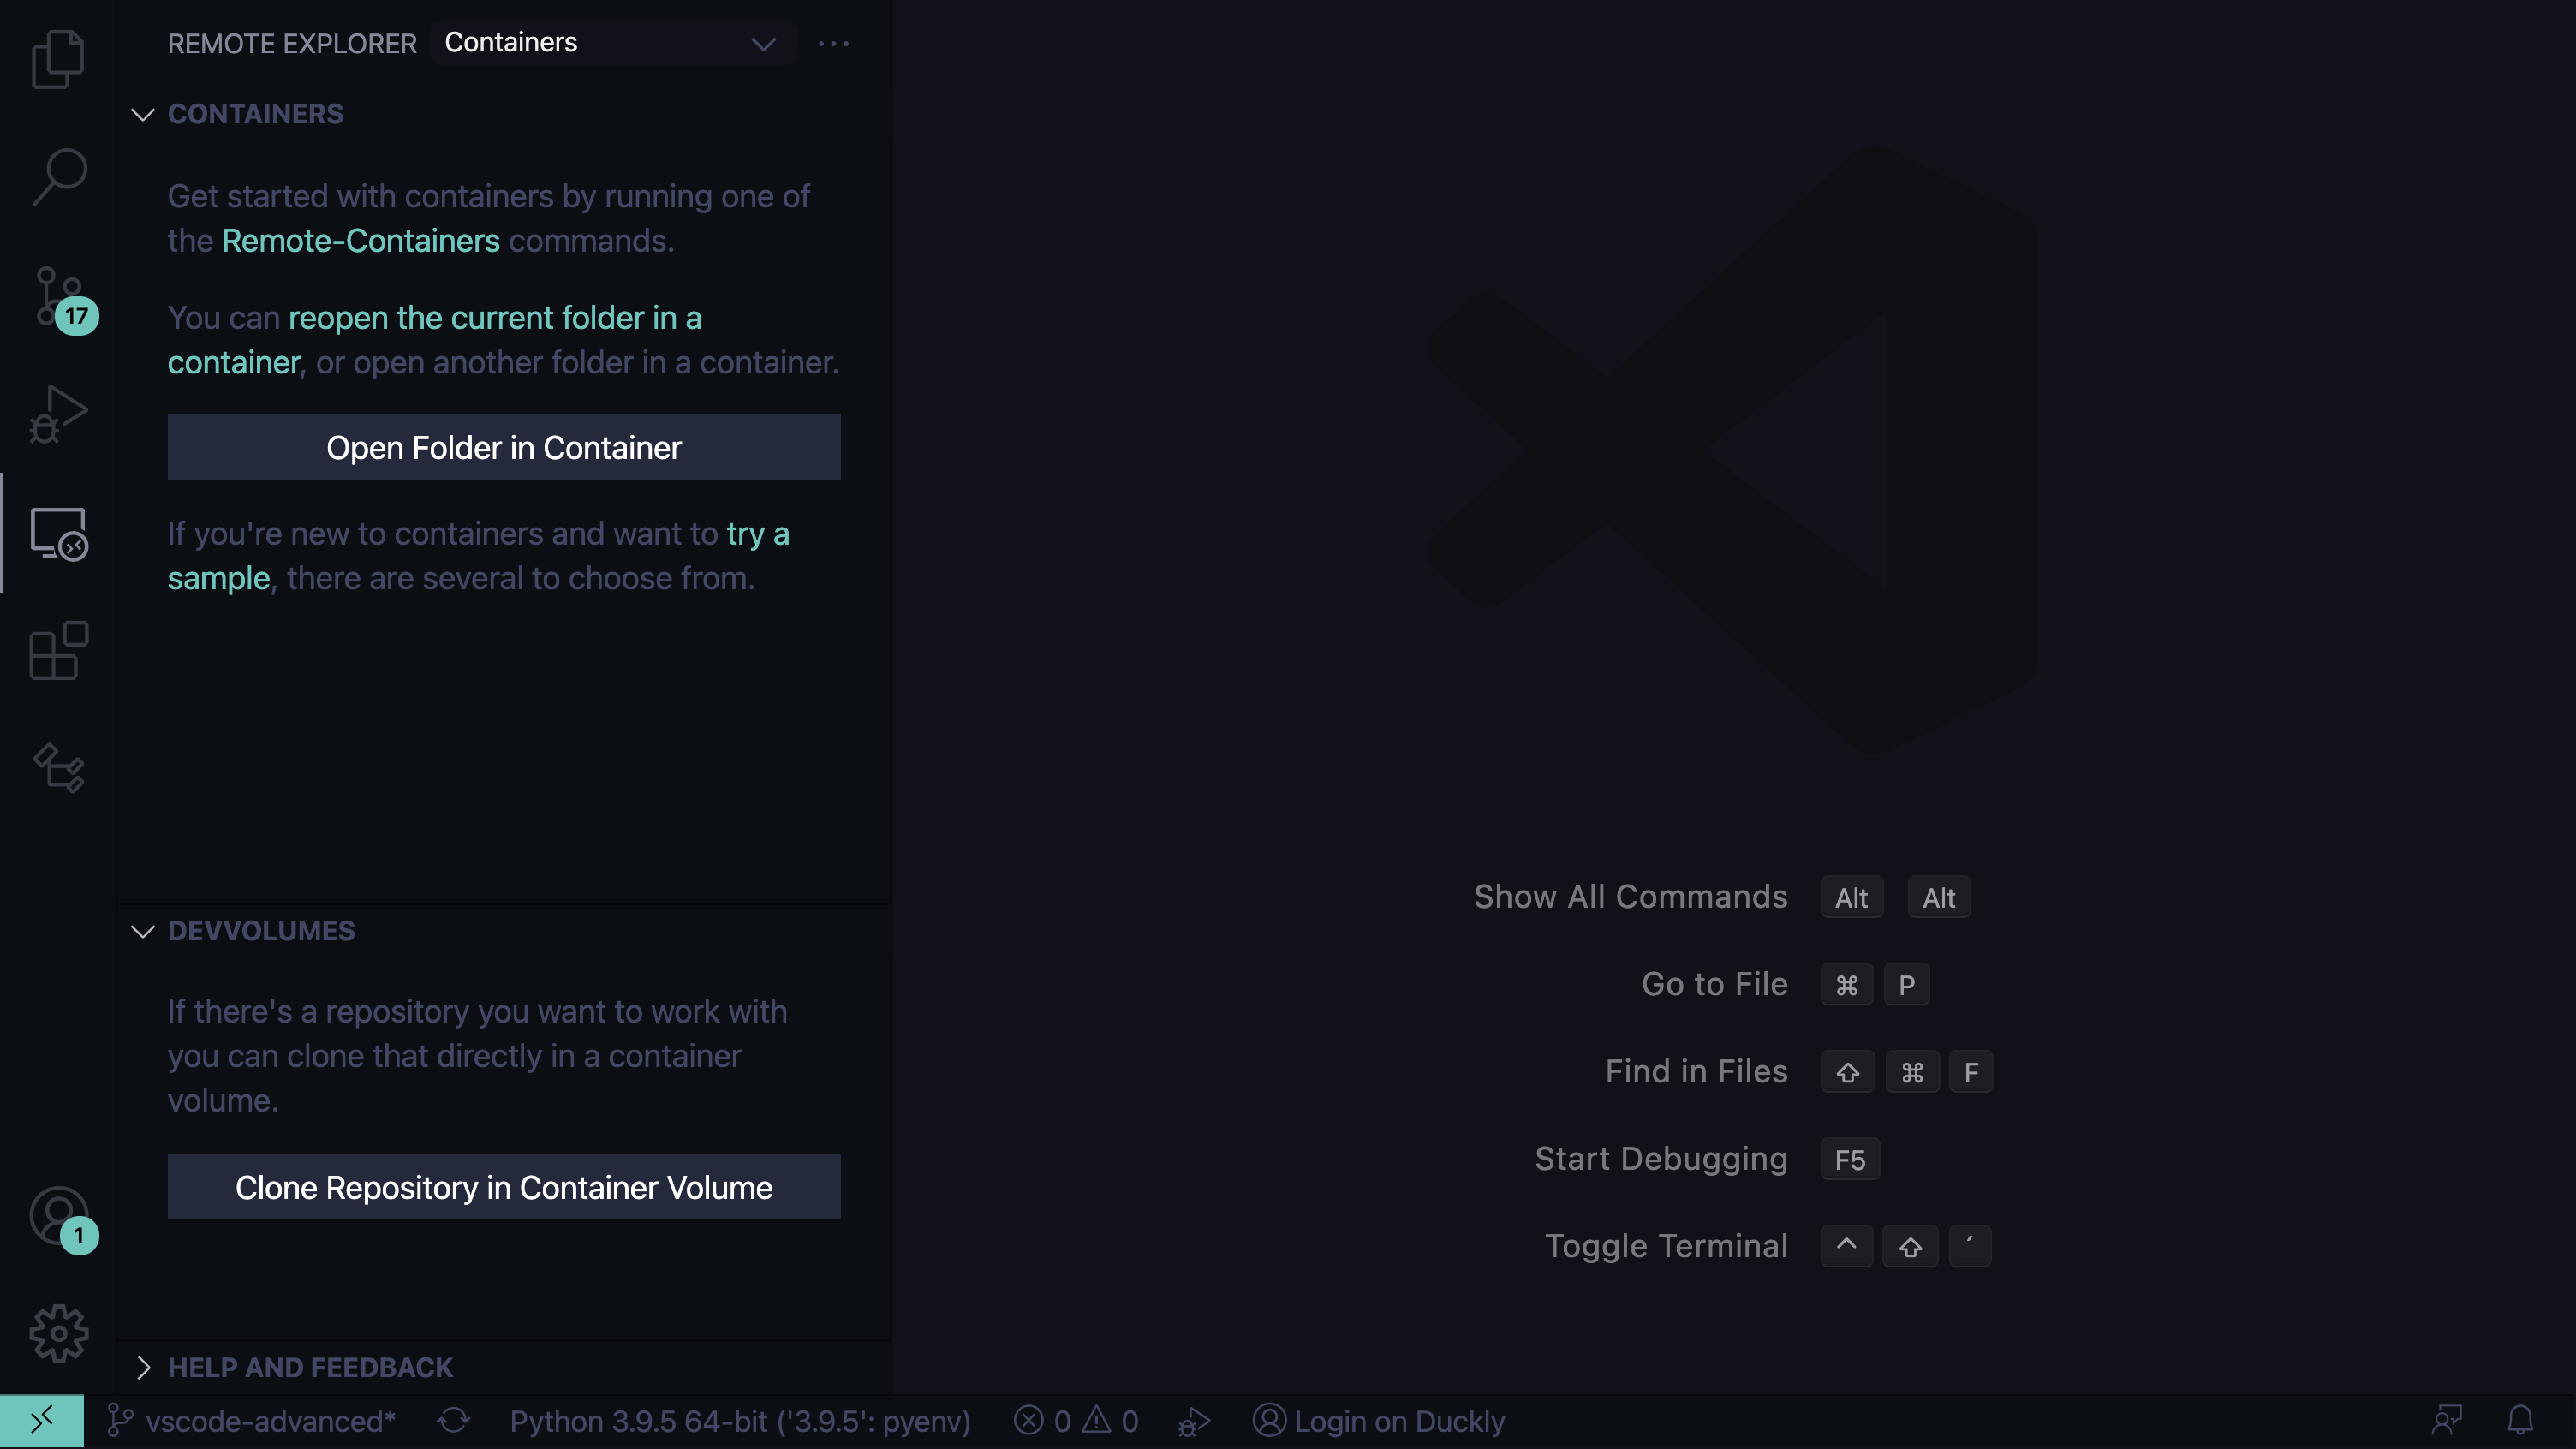
These panels aren’t populated if you have a fresh Docker install.
If you already have Docker images installed and running, the three panels might be populated:
- Containers: A navigation panel to show the development containers within this workspace or links to some quick-start steps
- The name of your container (if running): The attributes and volume mounts of the running container
- DevVolumes: A list of dev volumes you can edit and mount to modify code
For example, if you installed the Try Out Development Container: Python by following the steps outlined in VS Code’s containers tutorial, your VS Code Remote Explorer tab will show the name of the running container across the panels mentioned earlier:
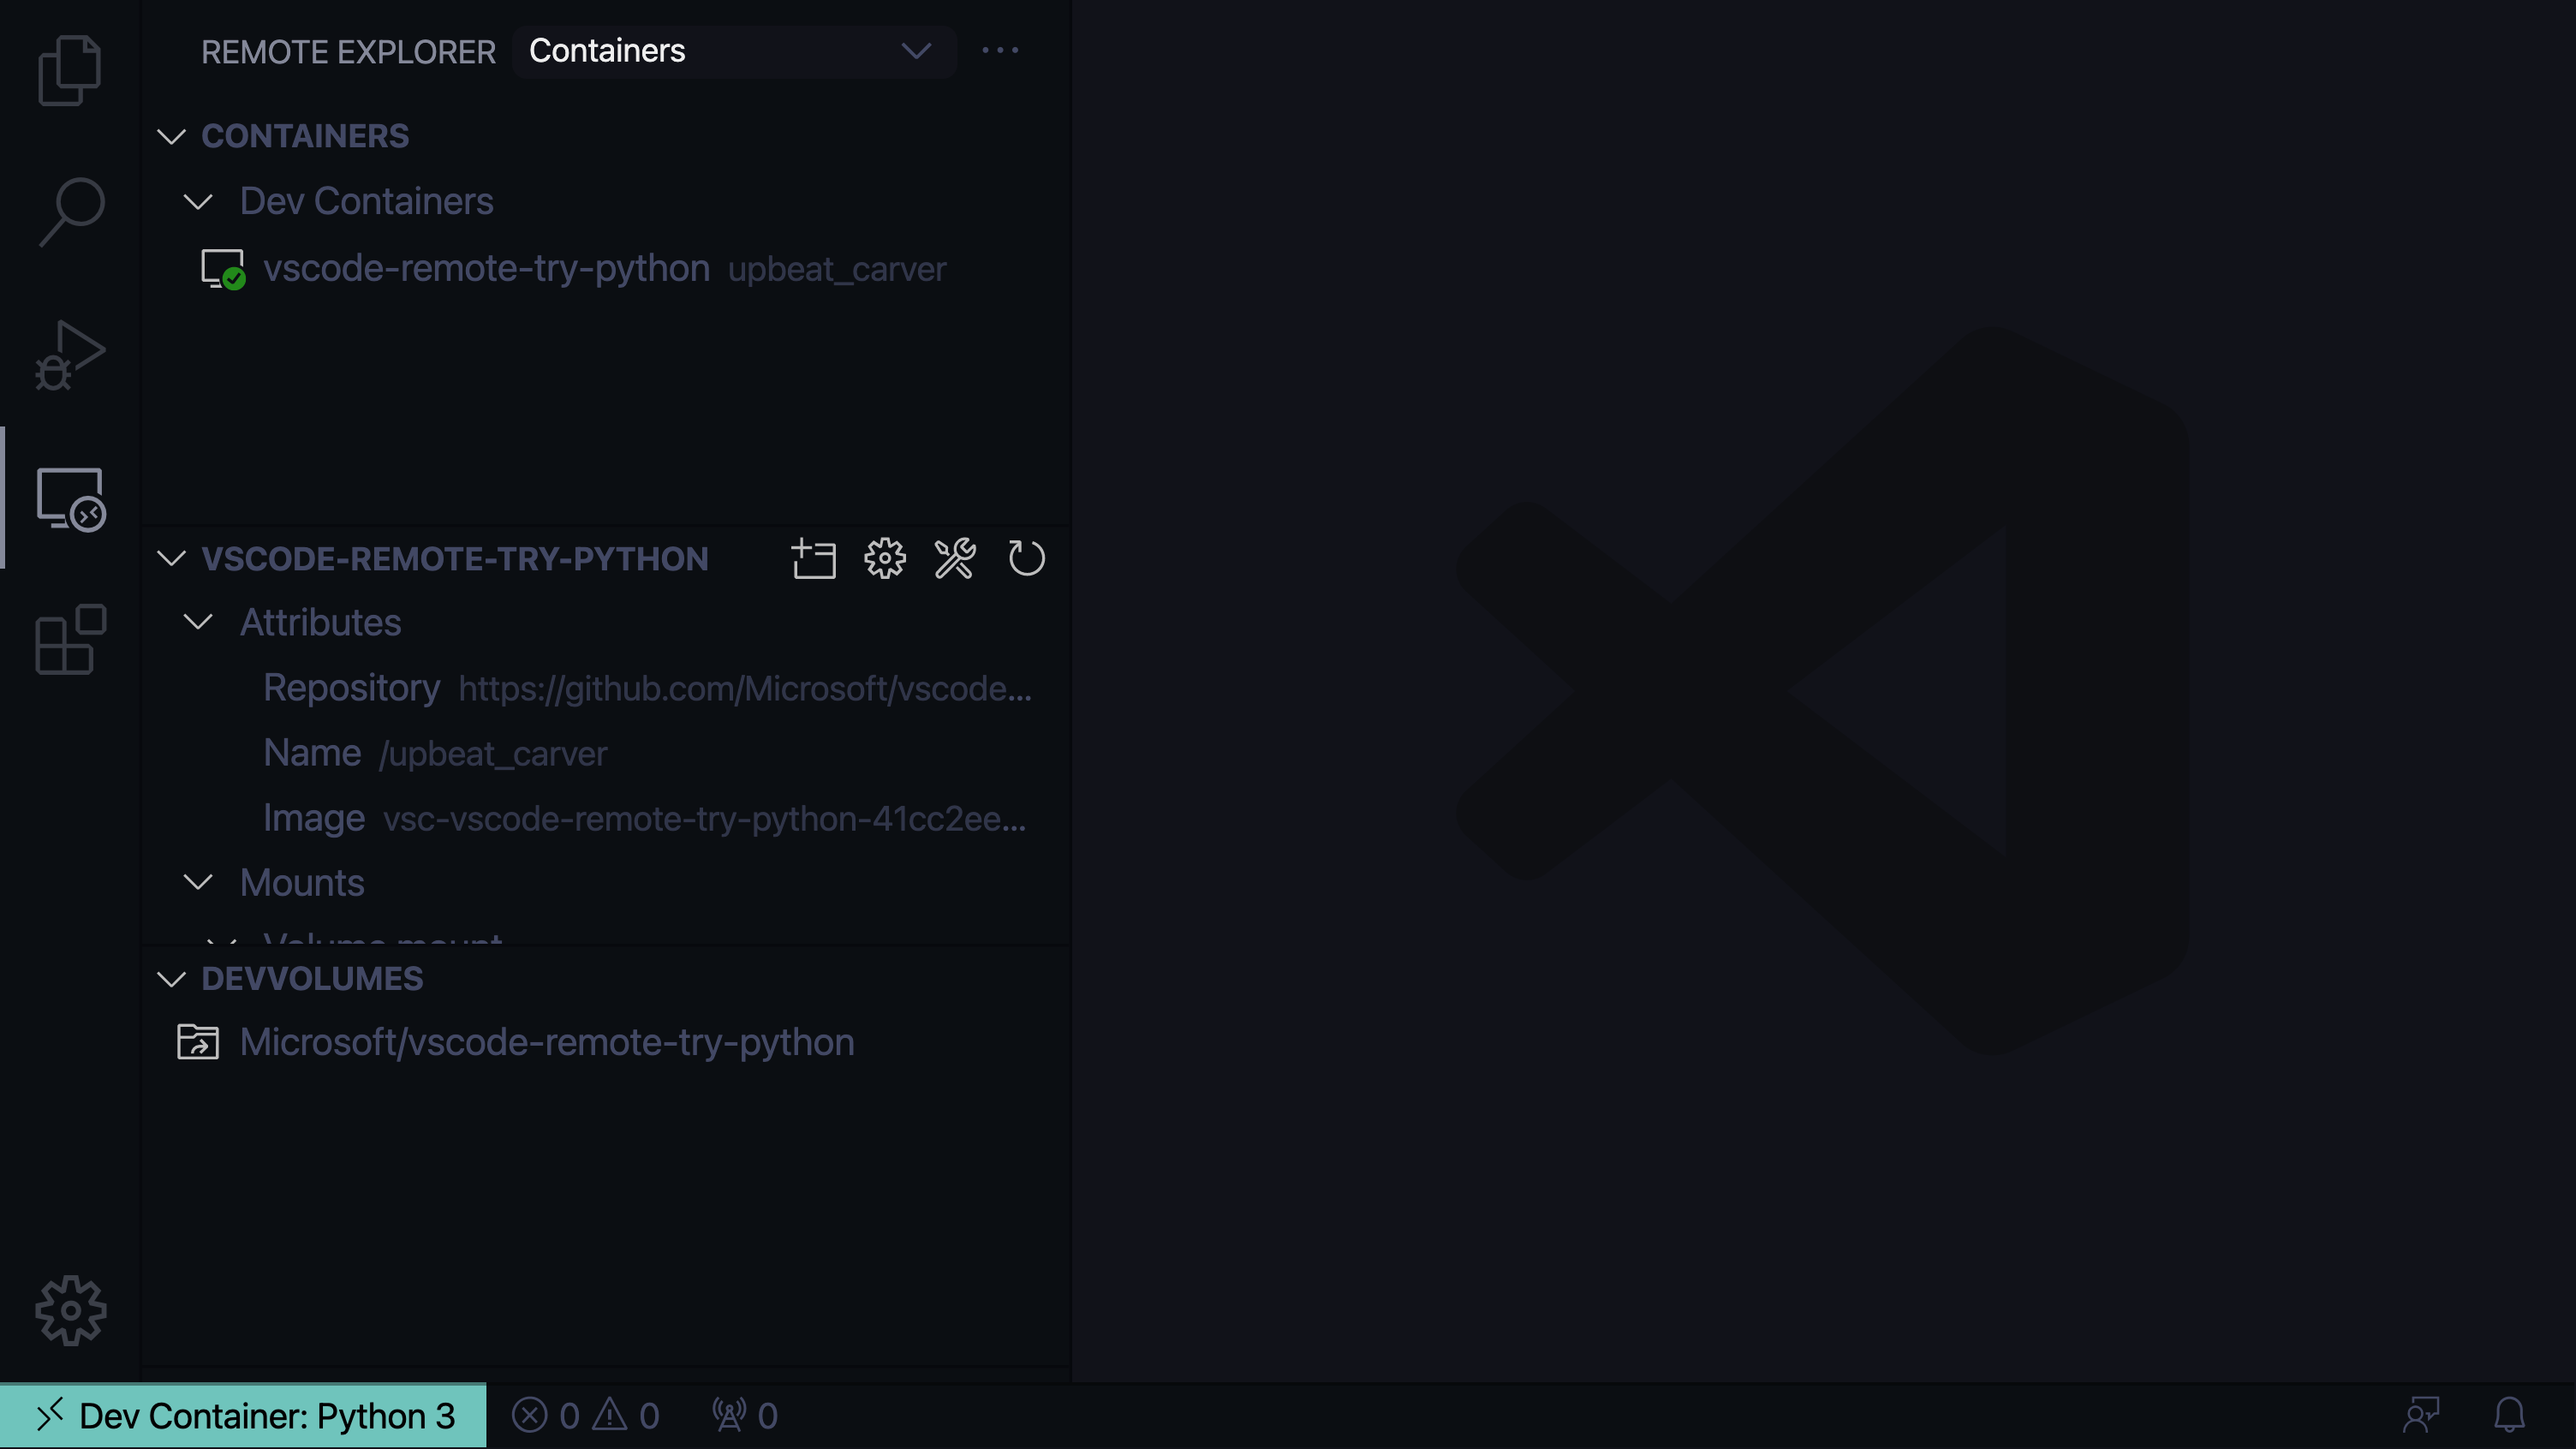
Use these panels as a quick way of managing any Docker containers that your project depends on.
In general, there are three primary ways of running the Remote Containers extension:
- Attach to an existing running container to make quick changes
- Create a
.devcontainer/devcontainer.jsonfile and open the workspace as a remote container - Run the
Remote-Containers: Reopen in Containercommand and select the Python 3 image
Creating a .devcontainer/devcontainer.json file has significant benefits over simply opening a container:
- Dev containers support GitHub Codespaces
- Dev containers support the launch profiles and task configurations shown in this tutorial
If you’re planning on working within containers and VS Code a lot, spending the extra time to create a development container will pay off.
Note: You can learn how to create a development container in more detail by reading through the official VS Code documentation.
A quick way to get started using a dev container is by creating it from your current workspace:
- Run the
Remote-Containers: Reopen in Containercommand from the Command Palette. - Select Python 3 and then select the required version of Python.
- Accept the default suggested version of Node.js.
VS Code will then port your existing workspace and create a .devcontainer/devcontainer.json configuration based upon a generic Dockerfile for Python.
Dev containers have two required files:
.devcontainer/devcontainer.json, which specifies all the VS Code requirements, such as which extensions are needed and what settings to useDockerfile, which specifies what commands will build the environment
In the default setup, Dockerfile is inside the .devcontainer/ directory. If your project already has a Dockerfile, you can reuse that by changing the path in .devcontainer/devcontainer.json.
You’ll use the defaults inside .devcontainer/devcontainer.json to specify:
- The path to a
Dockerfile - A name for the container
- The VS Code settings to apply
- Any required VS Code extensions to install
- Any post-create commands you want to run, like
python -m pip install <package>, for example
If your application requires additional packages from PyPI, change .devcontainer/devcontainer.json and uncomment the line specifying "postCreateCommand":
{
  ...
  // Use 'postCreateCommand' to run commands after the Container is created.
  "postCreateCommand": "python3 -m pip install -r requirements.txt",
}
You can also add options for port forwarding if you’re developing an application that provides network services, like a web app. For the full list of options, you can go through the devcontainer.json reference.
After making changes to either the Dockerfile or the devcontainer specification, rebuild the container from the Remote Explorer by right-clicking the running container and selecting Rebuild Container:
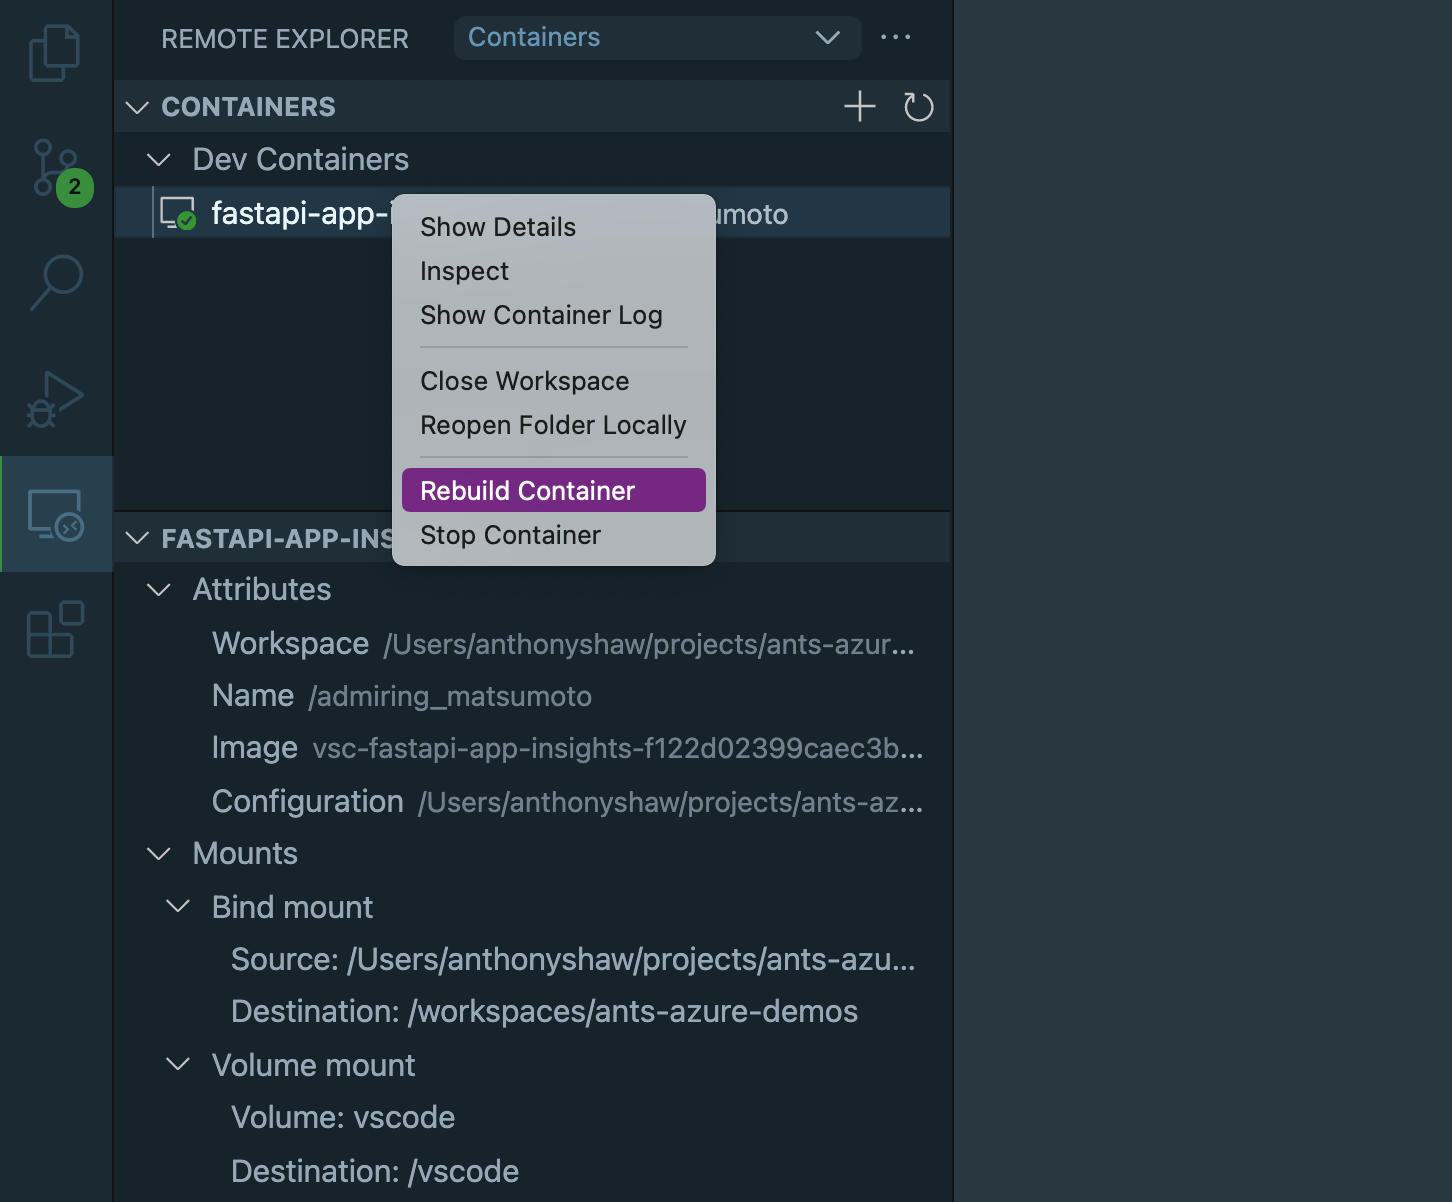
By doing this, you’ll rebuild the Docker container with any changes to the configuration and Dockerfile.
Beyond the functionality of the Remote Development extension pack’s extension for remote debugging, there’s a Docker extension for VS Code. You’ll cover this extension at the end of the tutorial and find even more features.
Remote Development With SSH
By running Remote-SSH: Open SSH Configuration File in the Command Palette, you can open up the local SSH configuration file. This is a standard SSH config file for you to list hosts, ports, and paths to private keys. The IdentityFile option defaults to ~/.ssh/id_rsa, so the best way to authenticate is a private and public key pair.
Here’s an example configuration of two hosts:
Host 192.168.86.30
  HostName 192.168.86.30
  User development
  IdentityFile ~/path/to/rsa

Host Test-Box
  HostName localhost
  User vagrant
  Port 2222
Once you save the configuration file, the Remote Explorer tab will list those SSH hosts under the SSH Targets dropdown option:
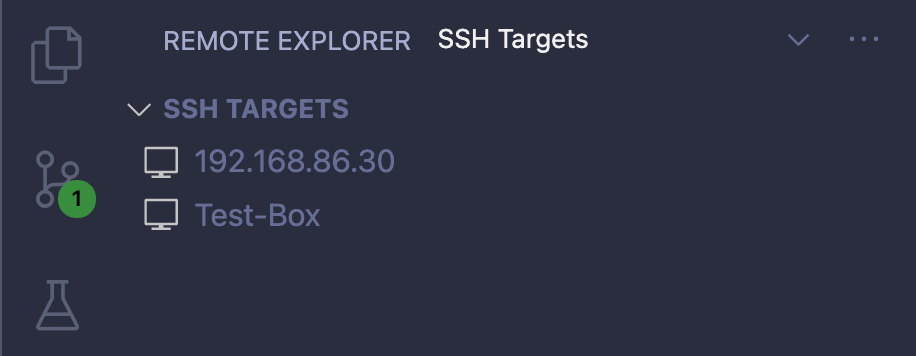
To connect to that server, click on Connect to Host in New Window, which is the icon to the right of any host. This will open a new VS Code window with the remote host.
Once connected, click Open Folder under the Explorer view. VS Code will show you a special folder navigation menu that displays the available folders on the remote host. Navigate to the folder where your code is located, and you can start a new workspace under that directory:
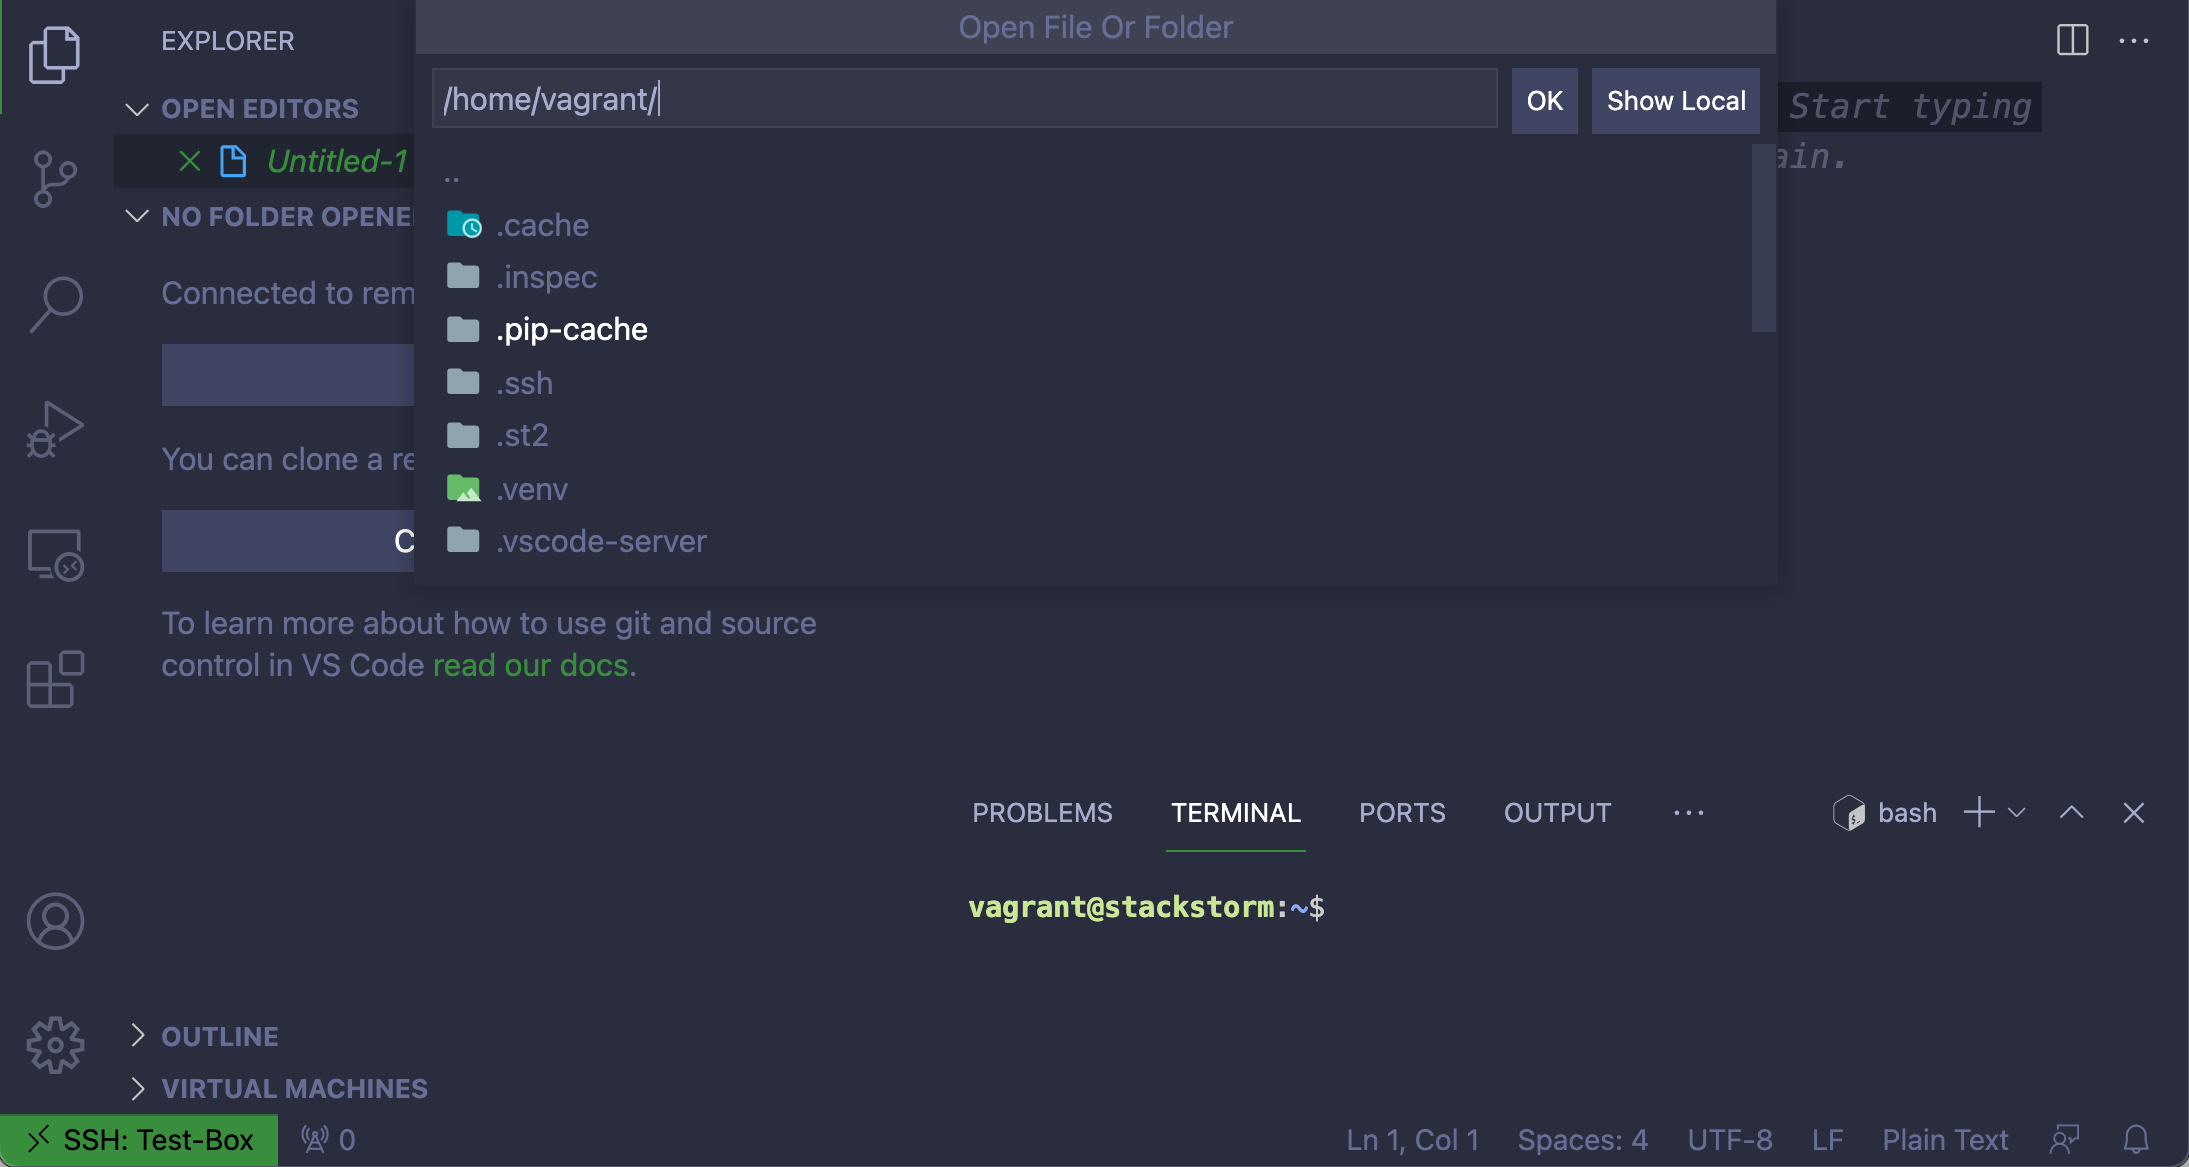
In this remote workspace, you can edit and save any files live on the remote server. The Terminal tab is automatically set as the SSH terminal for the remote host if you need to run any additional commands.
Remote Development With WSL
Windows Subsystem for Linux, or WSL, is a component for Microsoft Windows that enables users to run any number of Linux distros on their Windows OS without the need for a separate hypervisor.
VS Code supports WSL as a remote target, so you can run VS Code for Windows and develop for Linux under WSL.
Using WSL with VS Code first requires that WSL is installed. Once WSL is installed, you need to have at least one distro available.
The easiest way to install WSL on the latest version of Windows 10 is to open a command prompt and run:
C:\> wsl --install
The --install command performs the following actions:
- Enables the optional WSL and Virtual Machine Platform components
- Downloads and installs the latest Linux Kernel
- Sets WSL 2 as the default
- Downloads and installs a Linux distribution, possibly requiring a reboot of your machine
Once you’ve successfully set up WSL on your computer, you also need to install the Remote - WSL (ms-vscode-remote.remote-wsl) extension for VS Code. After that, you’re ready to use WSL in Visual Studio Code.
If you already have code in WSL, run Remote-WSL: Open Folder in WSL from the Command Palette in VS Code. Select the target directory for your code in the Linux subsystem.
If your code was checked out in Windows, run Remote-WSL: Reopen Folder in WSL from the Command Palette.
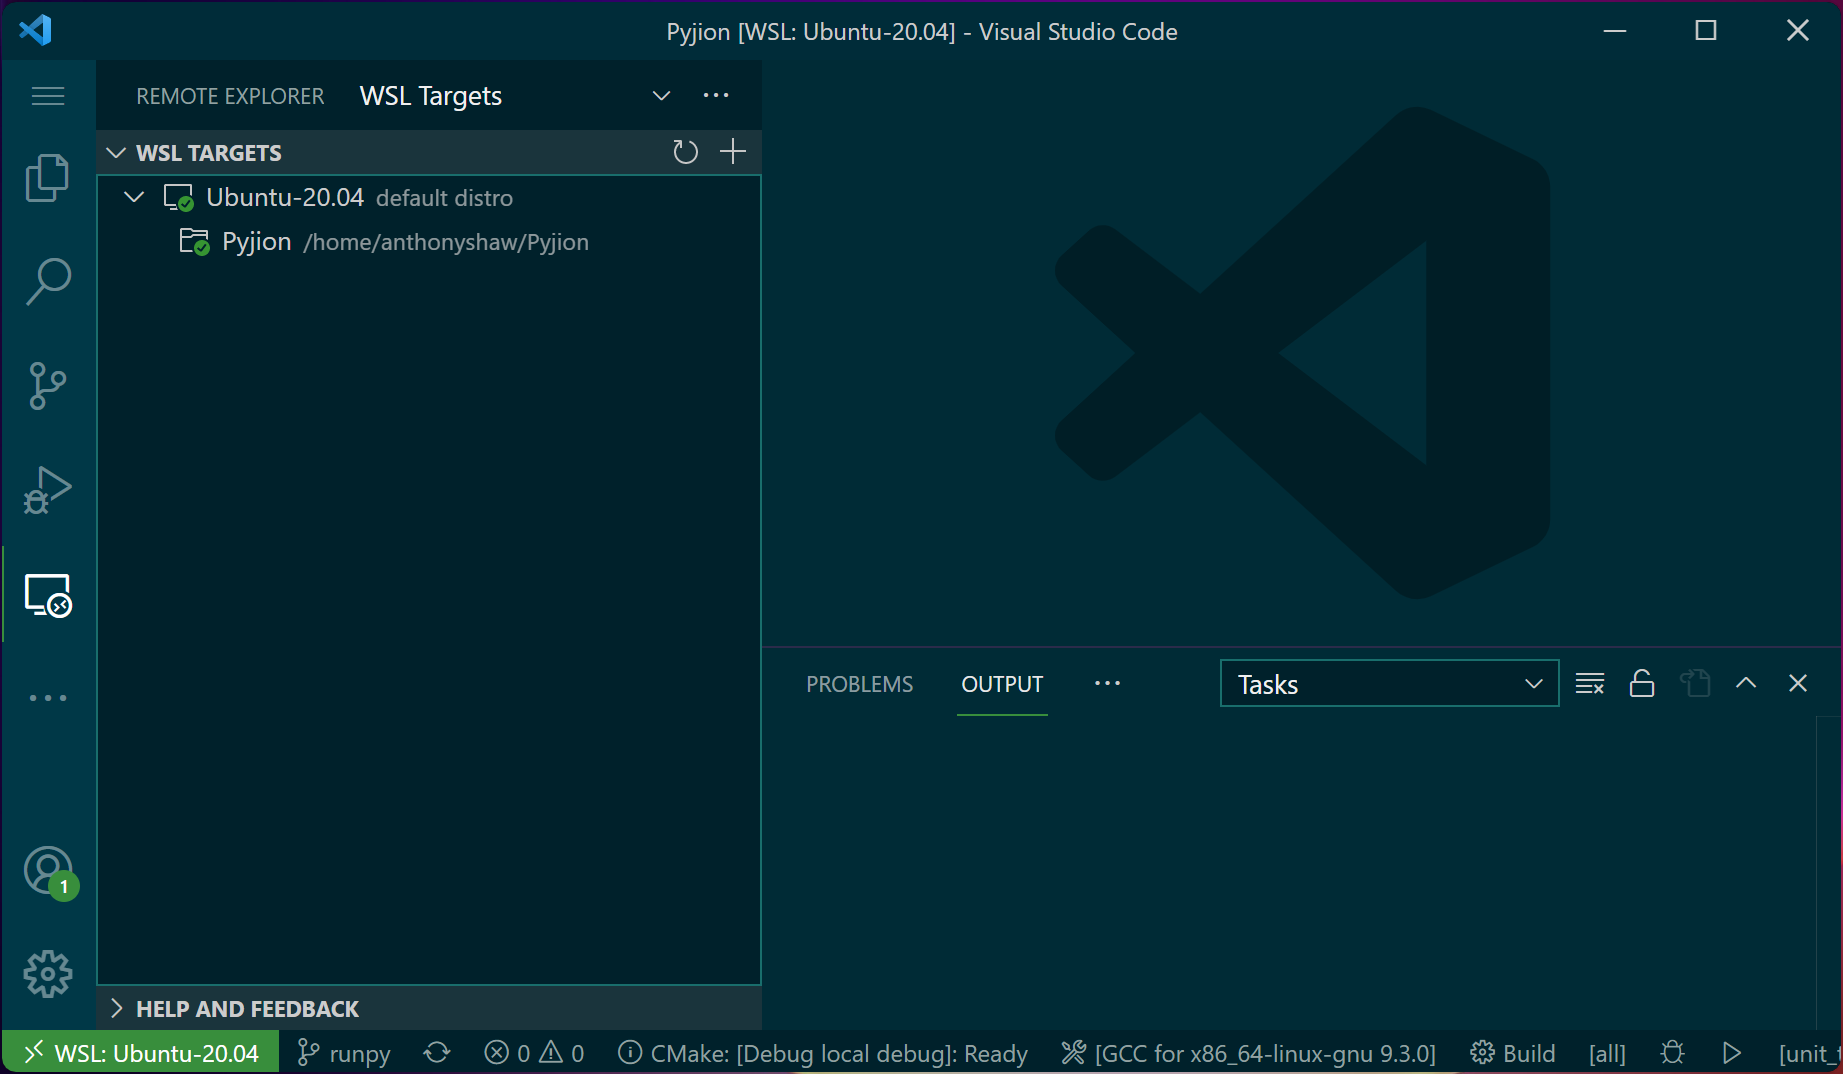
The Remote Explorer will remember your configured WSL targets and let you reopen them quickly from the WSL Targets dropdown in the Remote Explorer view:
If you want a reproducible environment, consider creating a Dockerfile instead of working directly on the WSL host.
Working With Data Science Tools
VS Code is great for working on Python for application development and web development. It also has a powerful set of extensions and tools for working with data science projects.
So far, you’ve mostly covered the Python extension for VS Code. There’s also the Jupyter Notebooks extension, which integrates the IPython kernel and a notebook editor into VS Code.
Installing the Jupyter Notebook Extension
To get started with Jupyter Notebooks on VS Code, you’ll need the Jupyter Extension (ms-toolsai.jupyter).
Note: Jupyter Notebooks support is now bundled with the Python extension, so don’t be surprised if you already have it installed.
Jupyter Notebooks supports pip as the package manager, as well as conda from the Anaconda distribution.
Data science libraries for Python often require compiled modules written in C and C++. You should use conda as the package manager if you’re using a lot of third-party packages because the Anaconda distribution has resolved the build dependencies on your behalf, making it easier to install packages.
Getting Started With Jupyter Notebooks in VS Code
For this example, you’ll open a series of Jupyter Notebooks on wave transformations. Download the repo’s .zip/ folder and unzip it, or clone the GitHub repo and open it with VS Code. The steps described further down will also work with any other workspace containing .ipynb notebook files.
Note: The rest of this section uses the conda package manager. You’ll need to have Anaconda installed if you want to use the commands shown in this section.
In VS Code, you can use any existing conda environment. Instead of installing packages into the base environment, you can create a conda environment specifically for VS Code from your terminal:
$ conda create --name vscode python=3.8
After you’ve created the conda environment named vscode, you can install some common dependencies into it:
$ conda install -n vscode -y numpy scipy pandas matplotlib ipython ipykernel ipympl
Once you’ve installed the dependencies, run the Python: Select Interpreter command from the VS Code Command Palette and search for vscode to select the new conda environment:
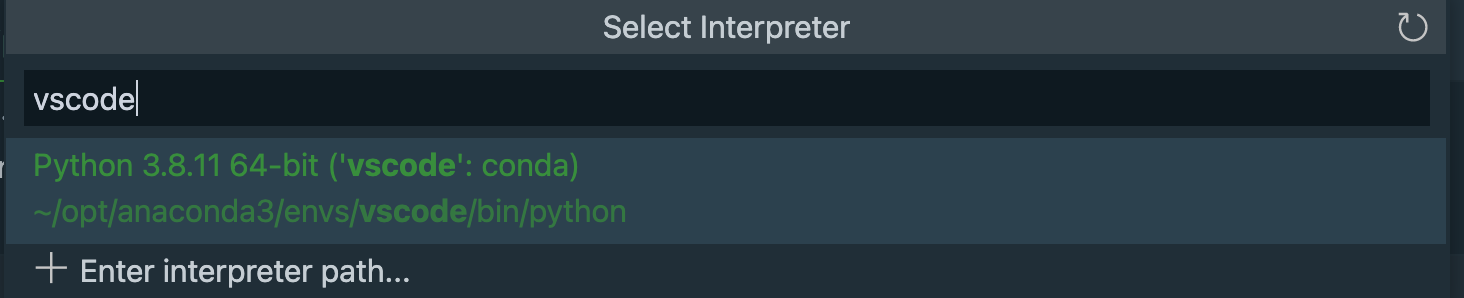
This selection will set your VS Code to use the Python interpreter from your conda environment, vscode.
Note: If the conda environment is not available in the list, you may need to reload the window by running the Developer: Reload Window command from the Command Palette.
Once selected, open a notebook in VS Code and click the Select Kernel button on the right or run the Notebook: Select Notebook Kernel command from the Command Palette. Type vscode to select the newly created conda environment with the dependencies installed:

Selecting your new conda environment as the kernel for your notebook will give your notebook access to all the dependencies that you installed in that environment. It’s necessary for executing the code cells.
Once the kernel is selected, you can run any or all of the cells and see the output of the operations displayed right inside VS Code:

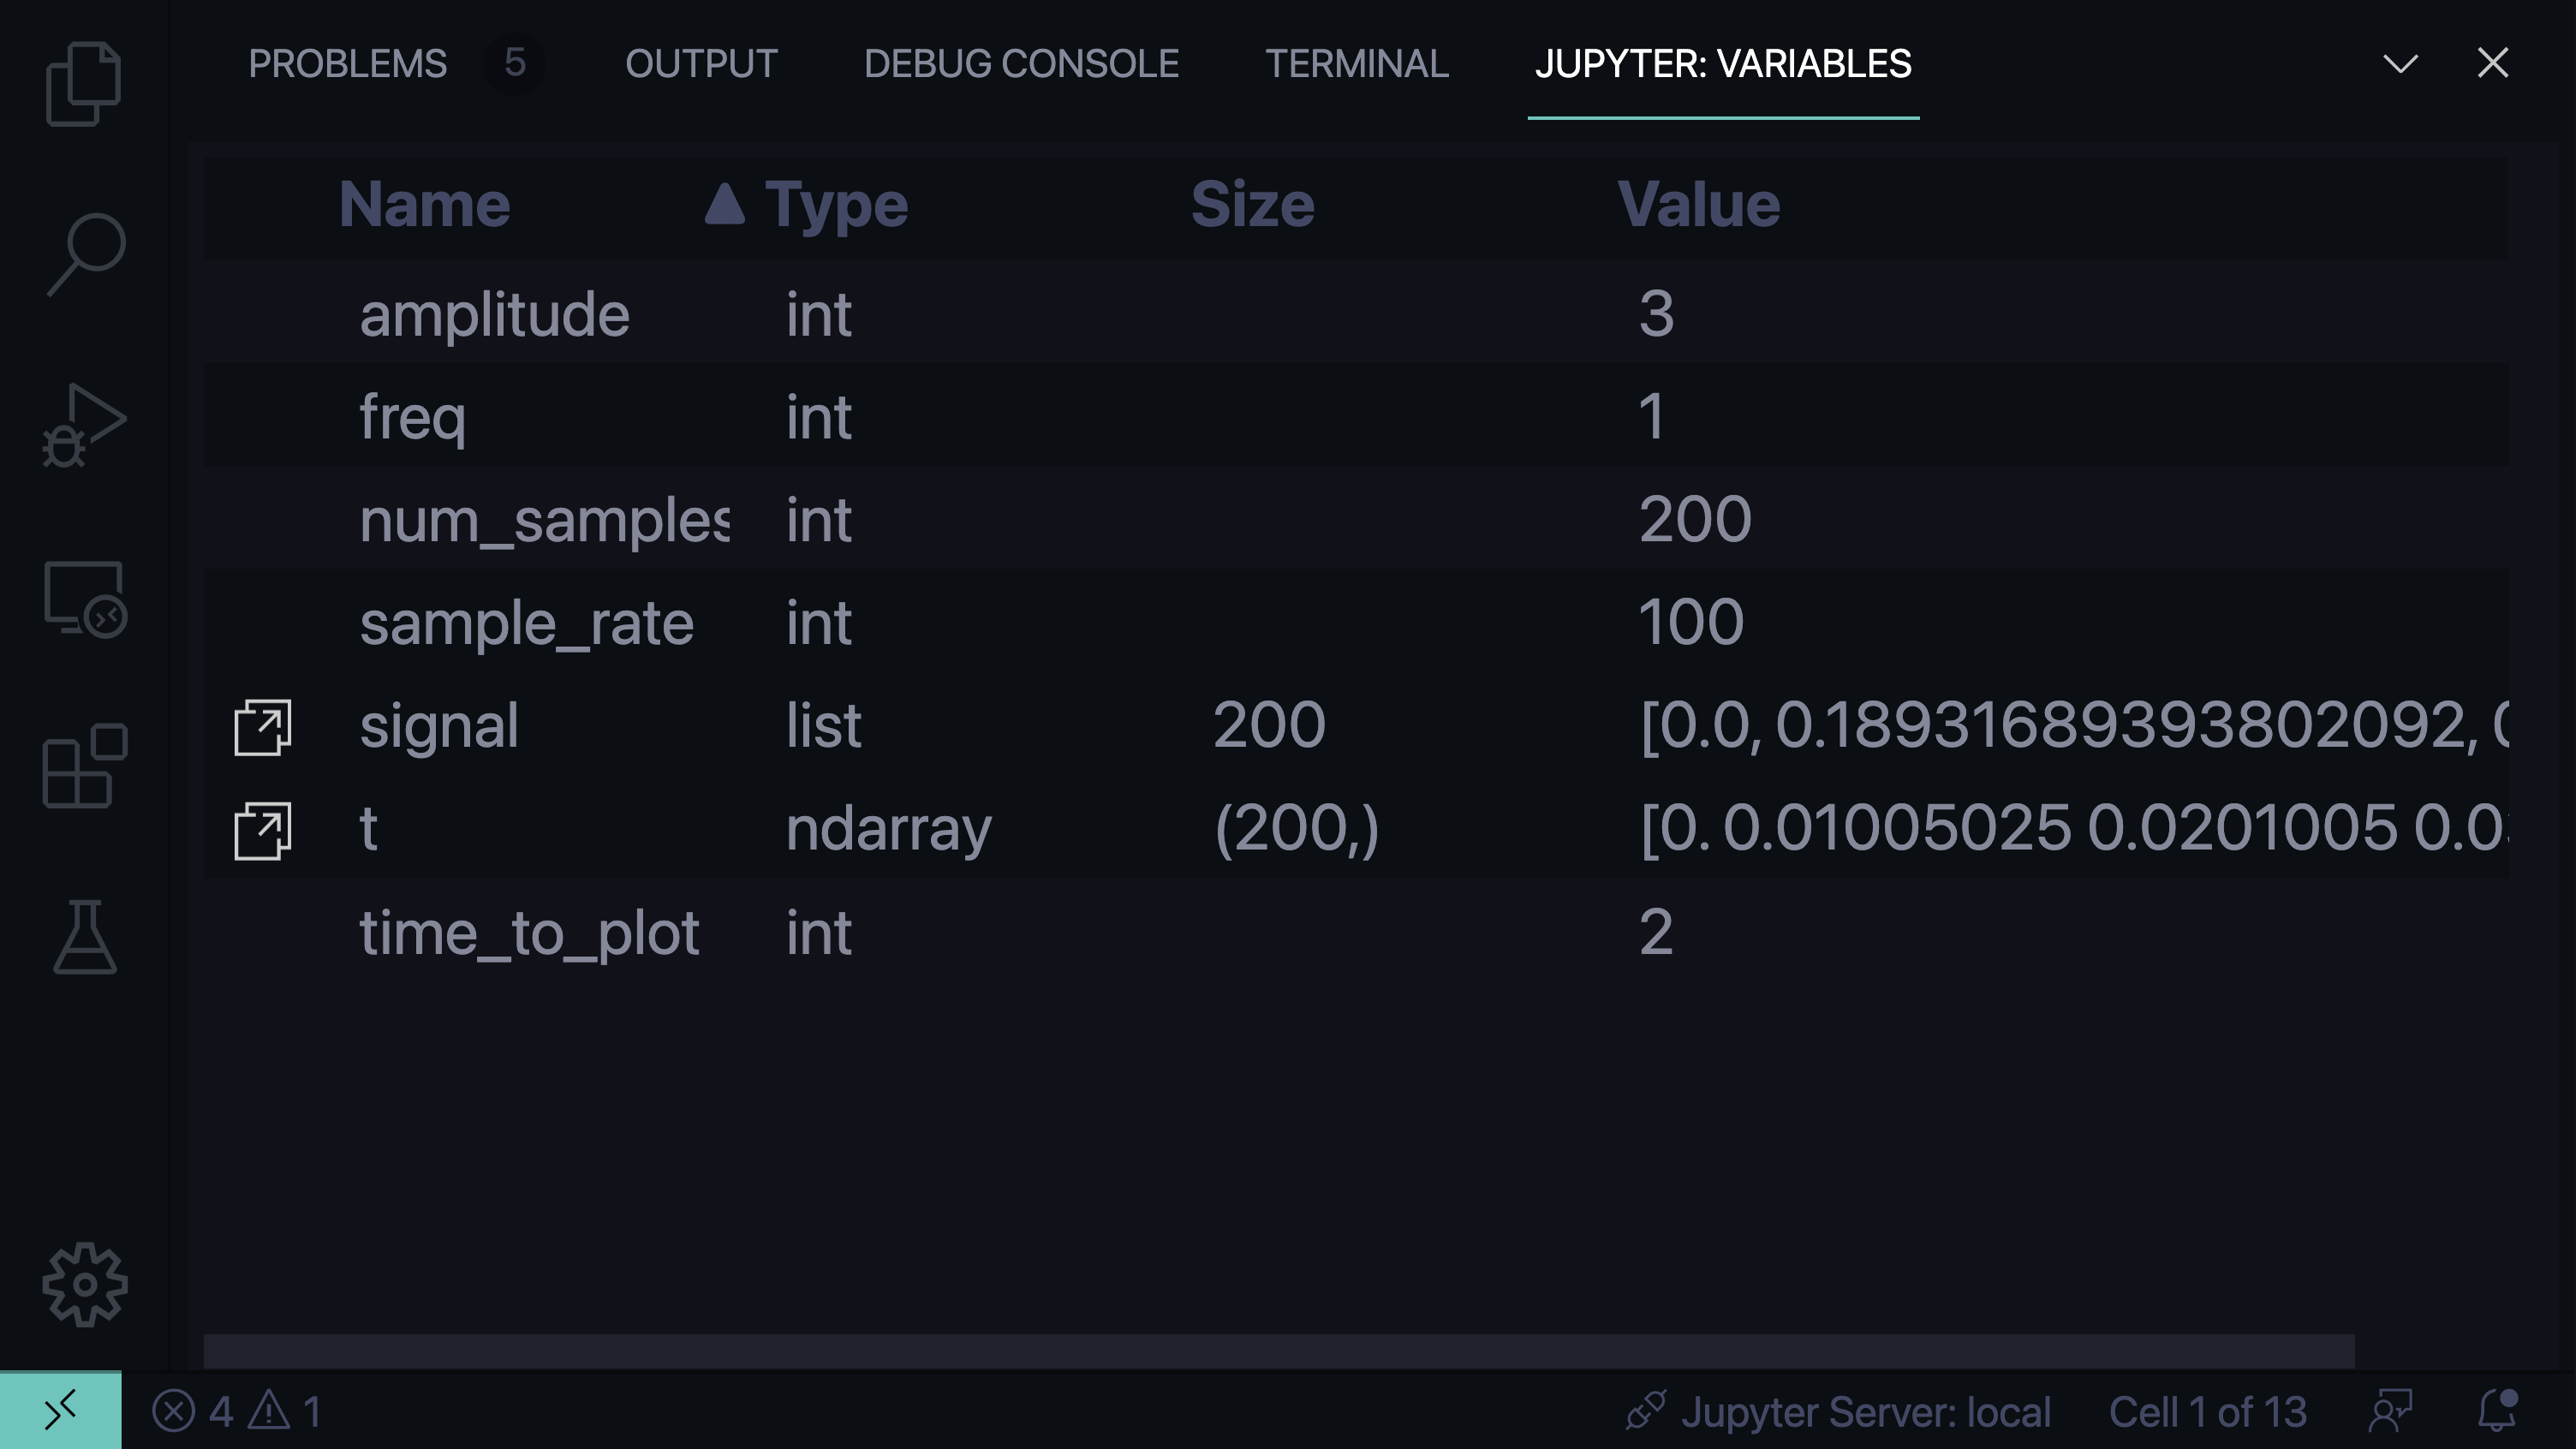
Once the notebook has executed, the Jupyter Extension will make any of the intermediate variables such as lists, NumPy arrays, and pandas DataFrames available in the Jupyter: Variables view:
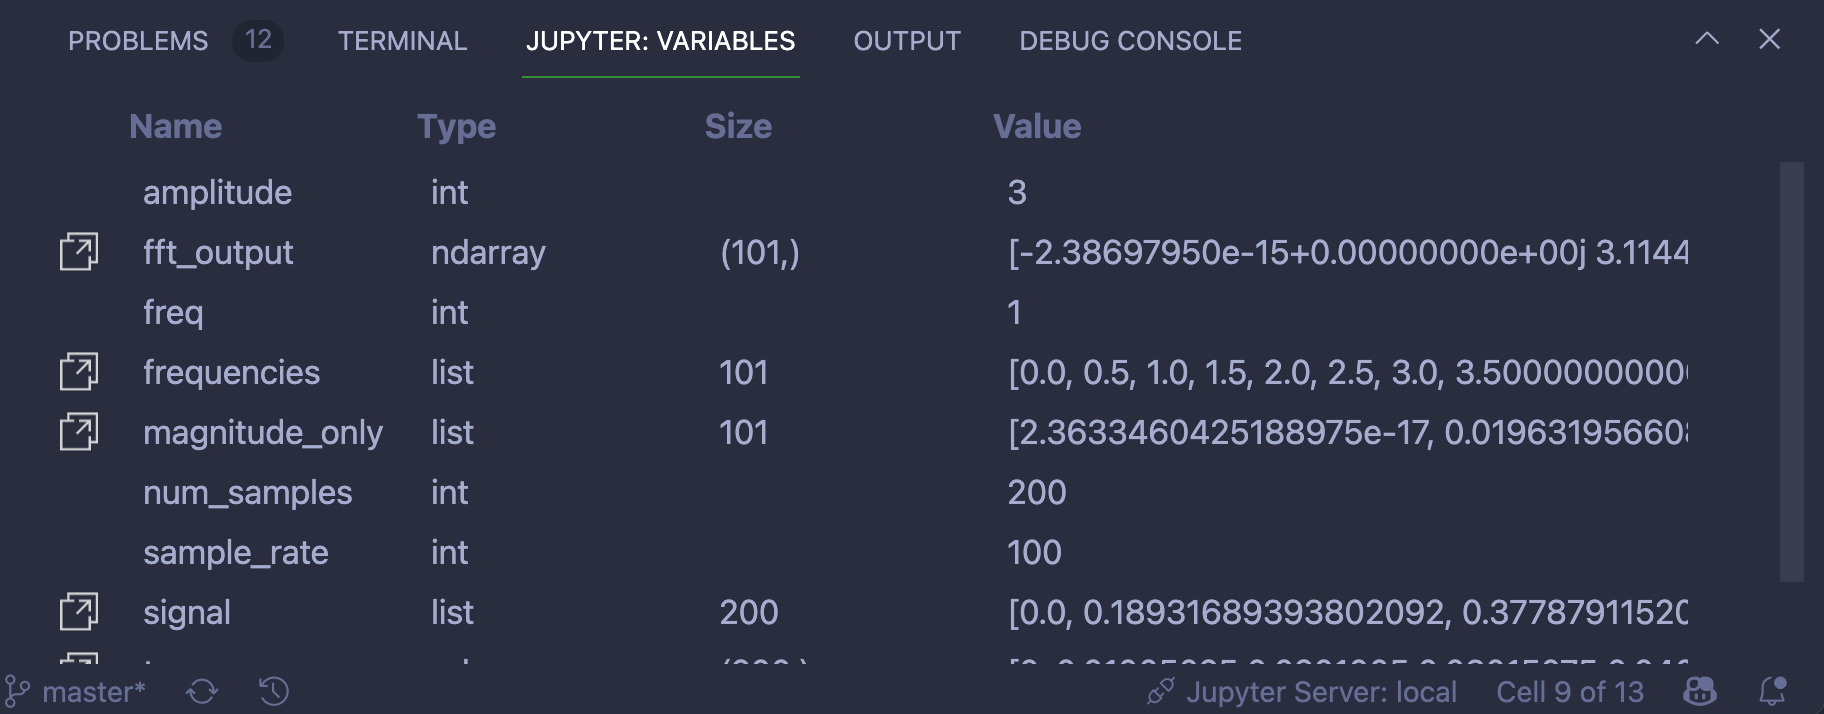
You can bring this view into focus by clicking the Variables button at the top of the notebook or by running the Jupyter: Focus on Variables View command.
For the more complex variables, choose the icon to open the data in the data viewer.
Using the Data Viewer
The Jupyter Extension comes with a data viewer designed for viewing and filtering 2D arrays, such as lists, NumPy’s ndarray, and pandas DataFrames:
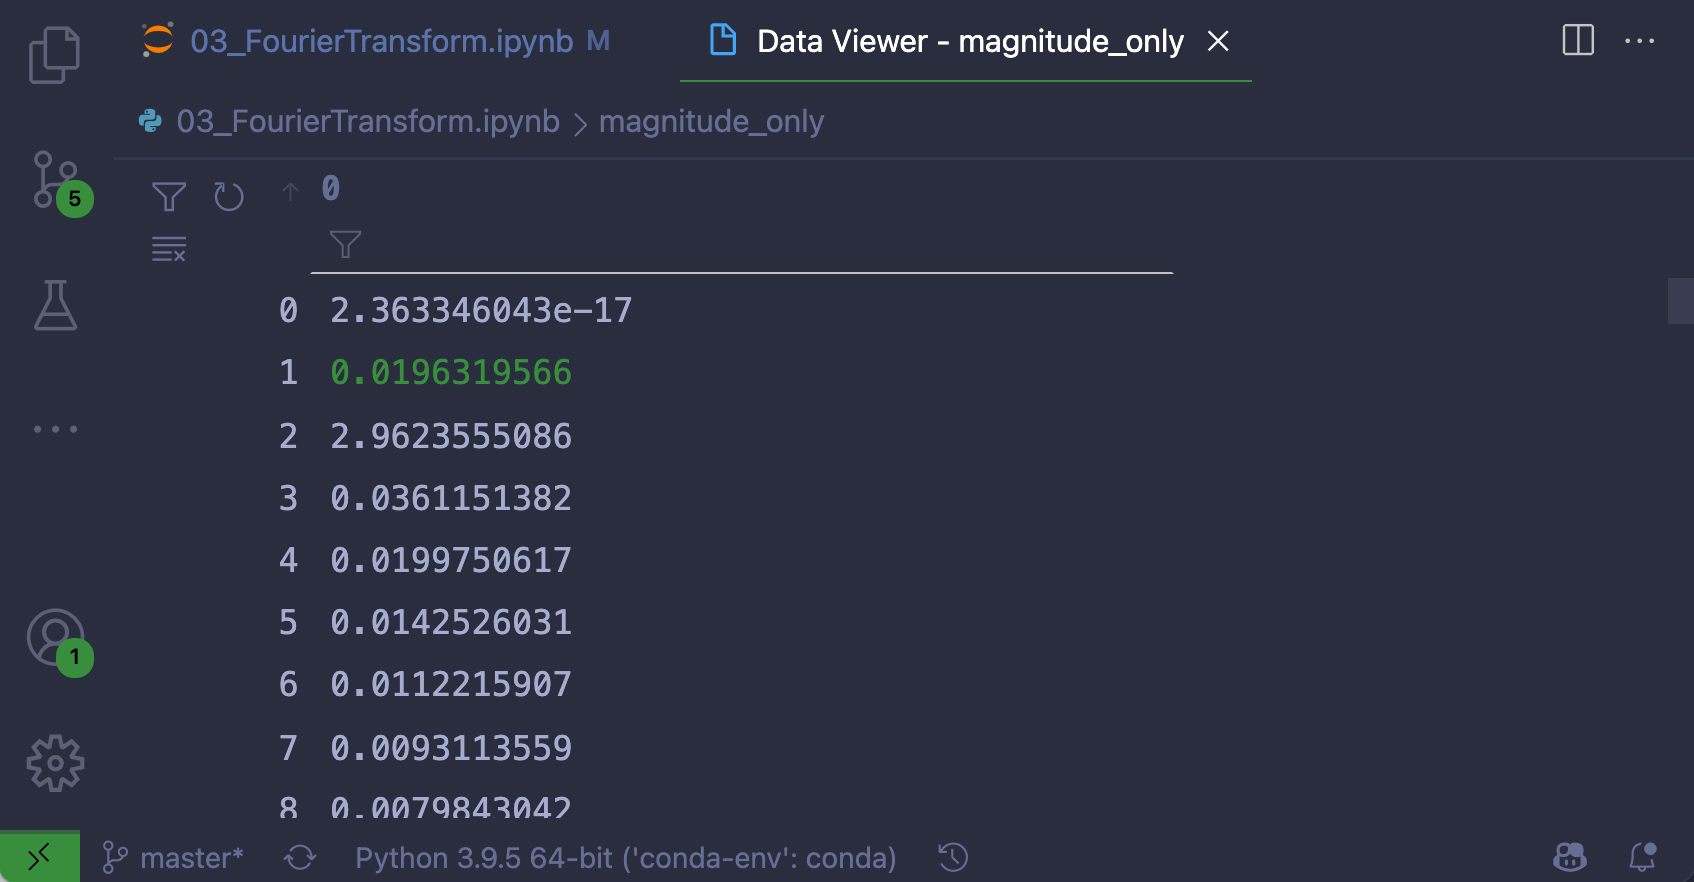
To access the data viewer, you can expand complex variables inside the variables view by clicking on Show variable in data viewer. This option is represented by an icon shown on the left of a row that represents a complex variable:
The data viewer supports inline filtering and paging for large data sets. If you’re plotting large data sets in Matplotlib, the Jupyter Extension supports Matplotlib widgets instead of SVG rendering.
Using the Rainbow CSV Extension
If you work with CSV or TSV input data, there’s a useful extension called Rainbow CSV (mechatroner.rainbow-csv) that enables you to open and visualize CSV files in VS Code:
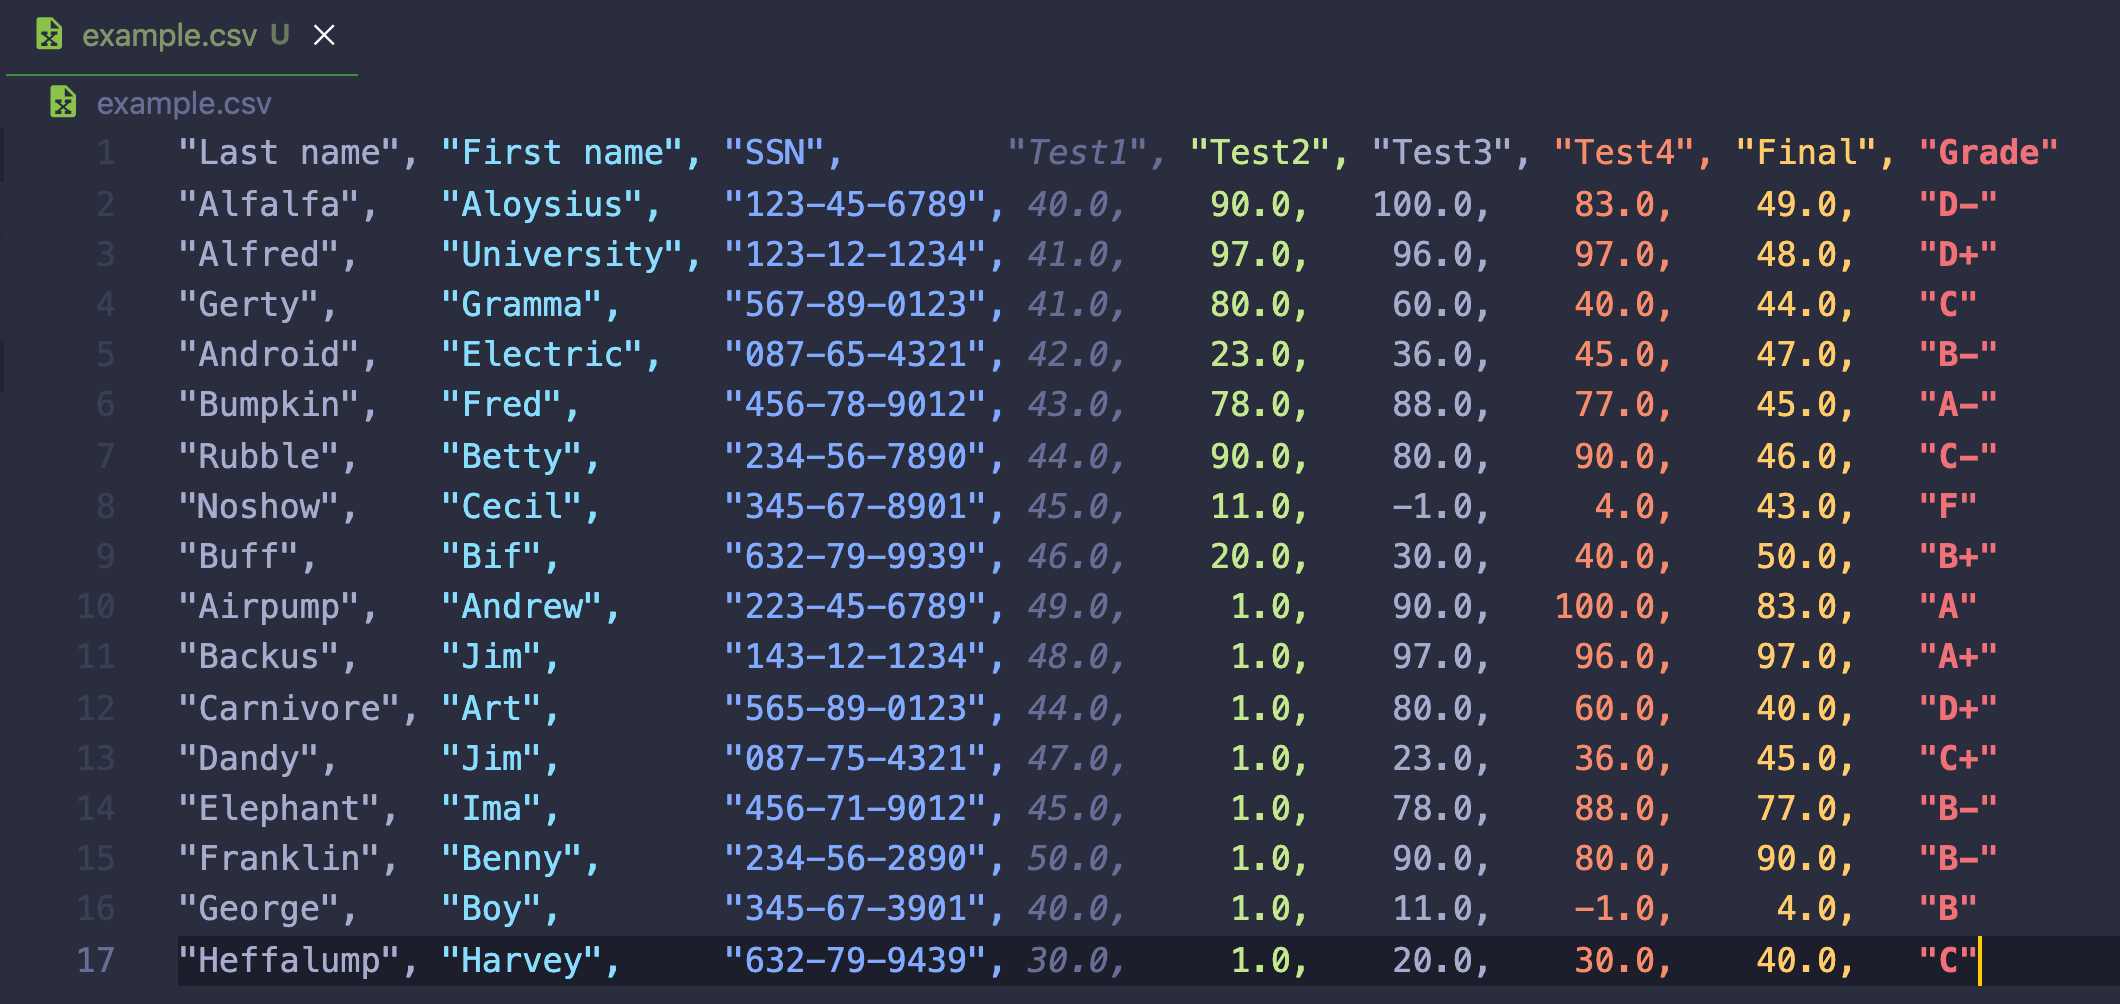
Each column is colorized, giving you a quick way to spot missing commas. You can also align all columns by running the Rainbow CSV: Align CSV Columns command from the Command Palette.
Note: If you’re looking for an example CSV file to try this extension, you can pick a CSV file for download from the official statistics page of the New Zealand government.
The Rainbow CSV extension also comes with a Rainbow Query Language (RBQL) query tool that lets you write RBQL queries on the CSV data to create filtered data sets:
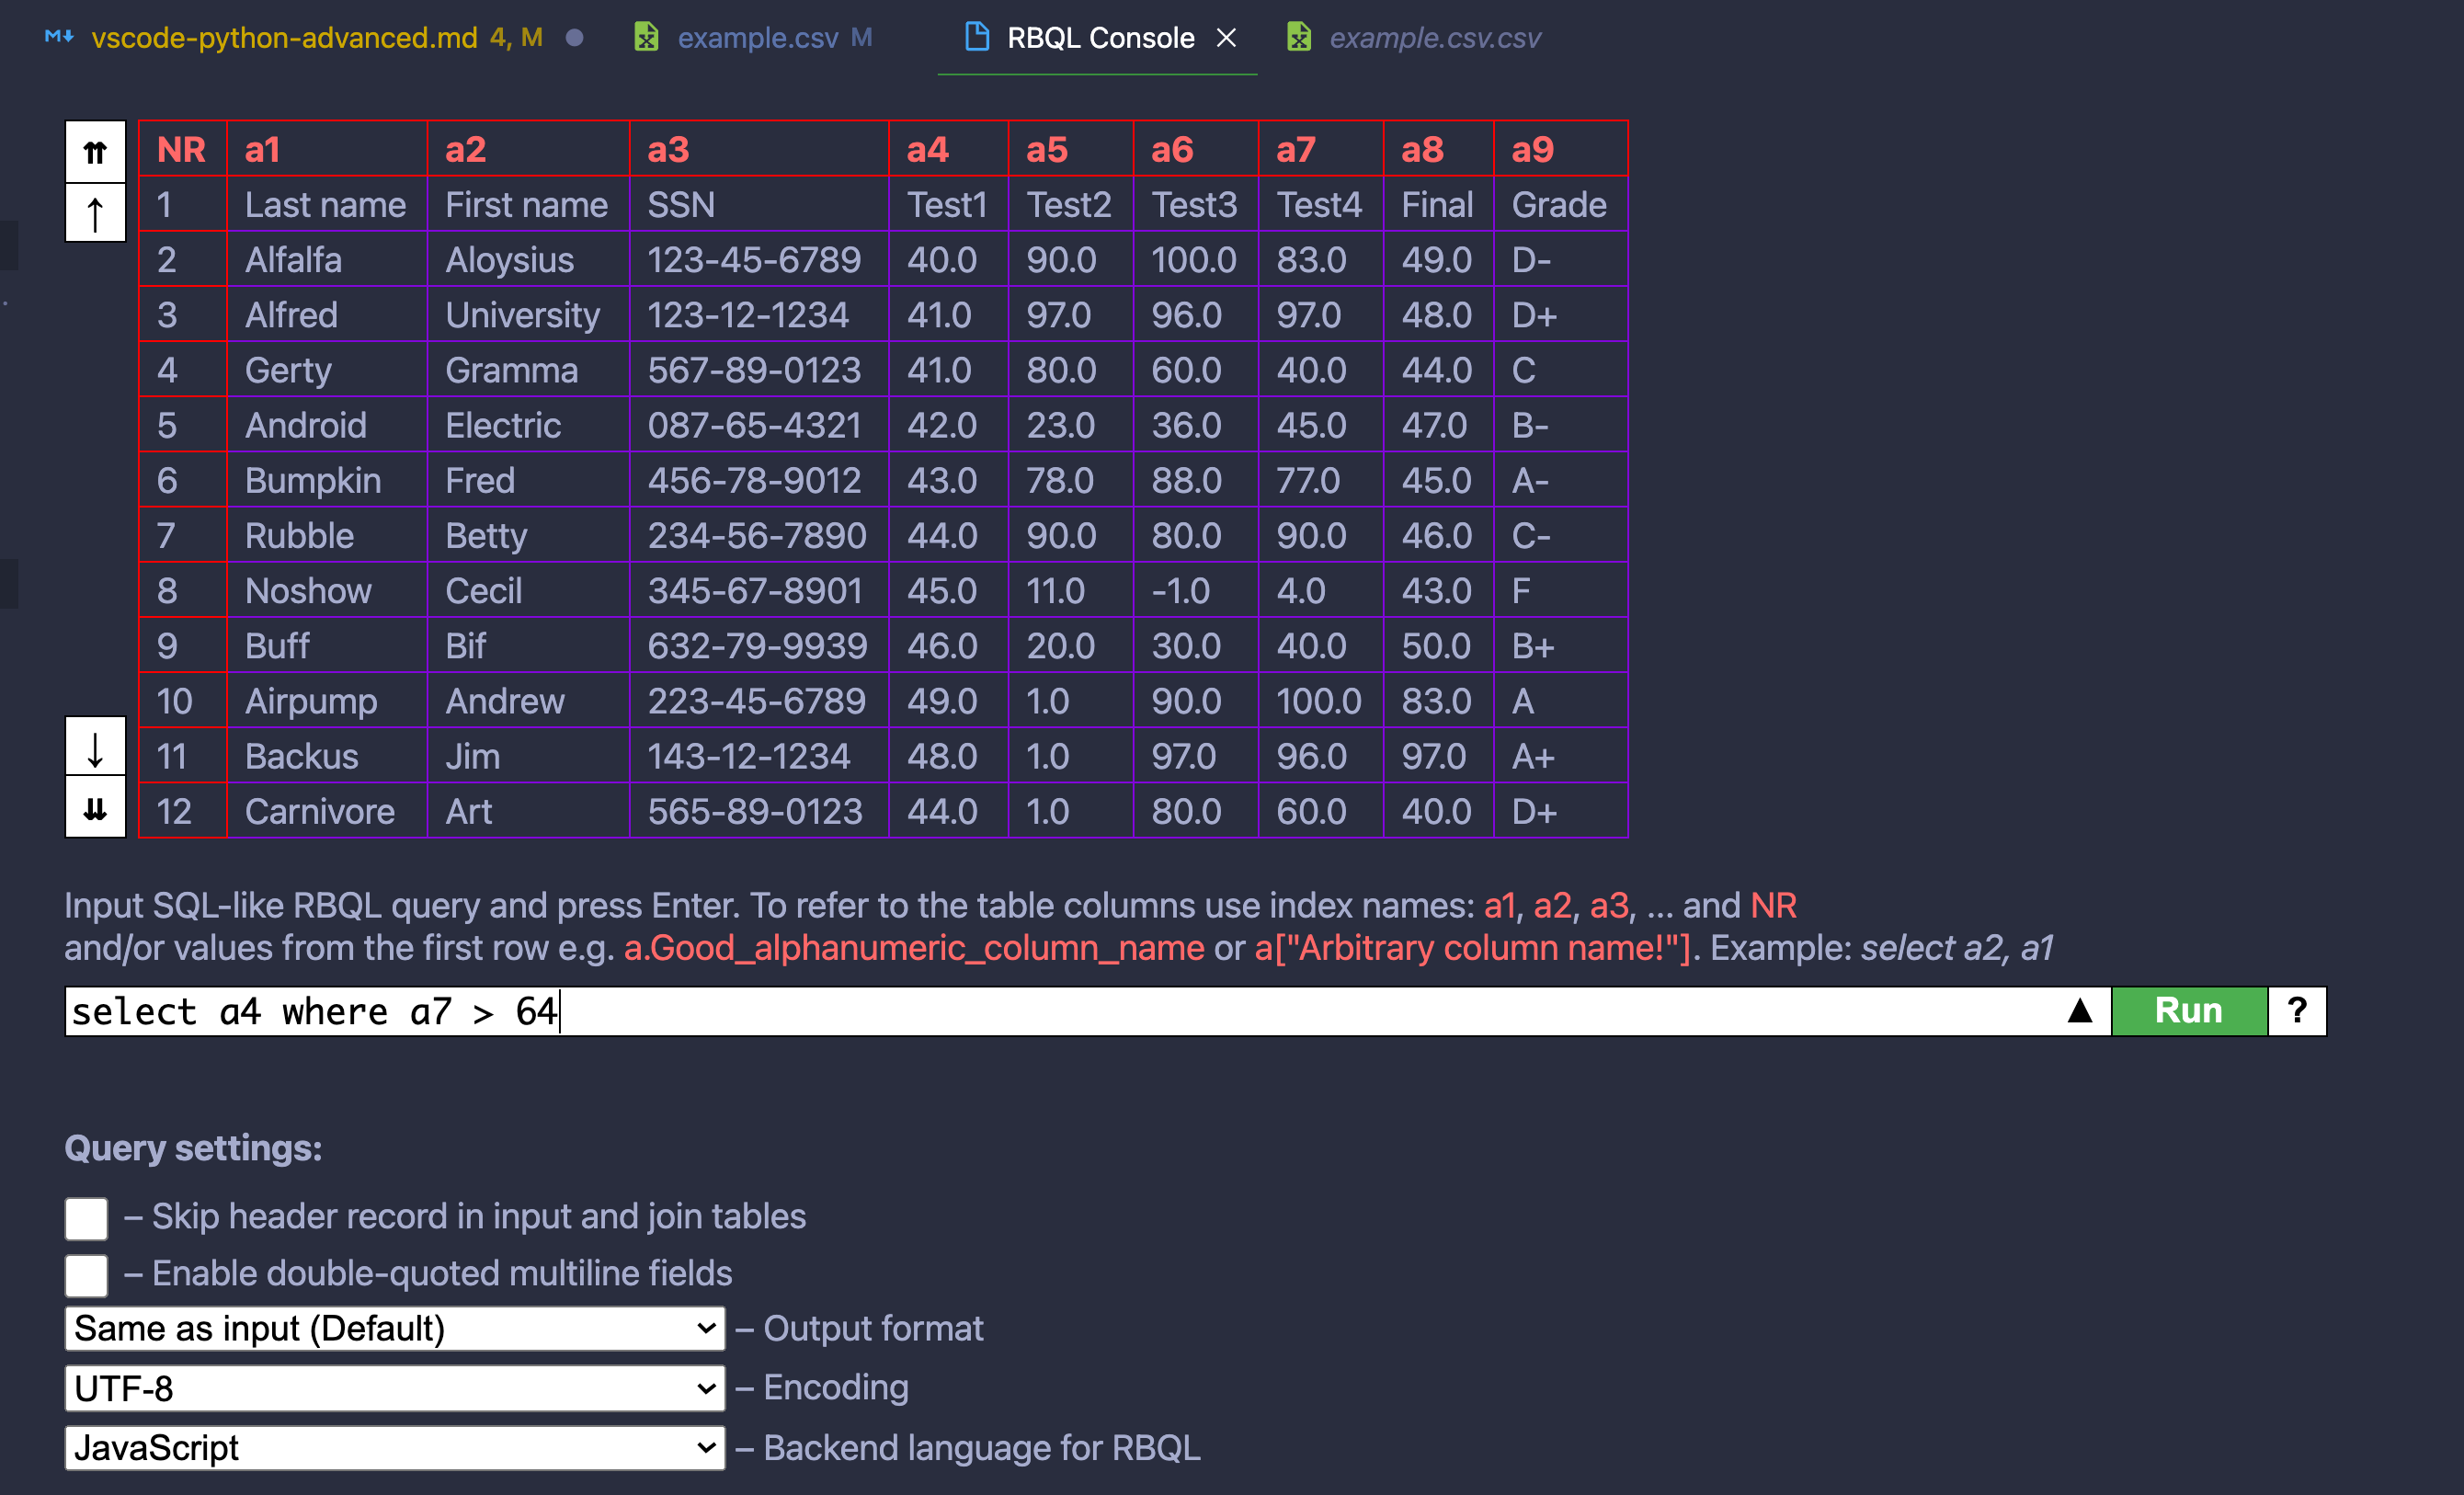
You can access the RBQL console by running Rainbow CSV: RBQL in the Command Palette. After executing a query, you’ll see the results in a new tab as a temporary CSV file that you can save and use for further data analysis work.
Throughout this tutorial, you’ve installed a couple of useful extensions for VS Code. There are a lot of useful extensions available. In the final section of this tutorial, you’ll learn about some extra extensions you haven’t covered so far that you might also want to try out.
Adding Bonus Extensions to Visual Studio Code
The VS Code Marketplace has thousands of extensions. The selection of extensions covers anything from language support, themes, spell checkers, and even mini-games.
In this tutorial so far, you’ve covered a number of extensions that make Python development in Visual Studio Code more powerful. These last four extensions are optional—but could make your life easier.
Code Spell Checker
Code Spell Checker (streetsidesoftware.code-spell-checker) is a spell checker that inspects variable names, text inside strings, and Python docstrings:
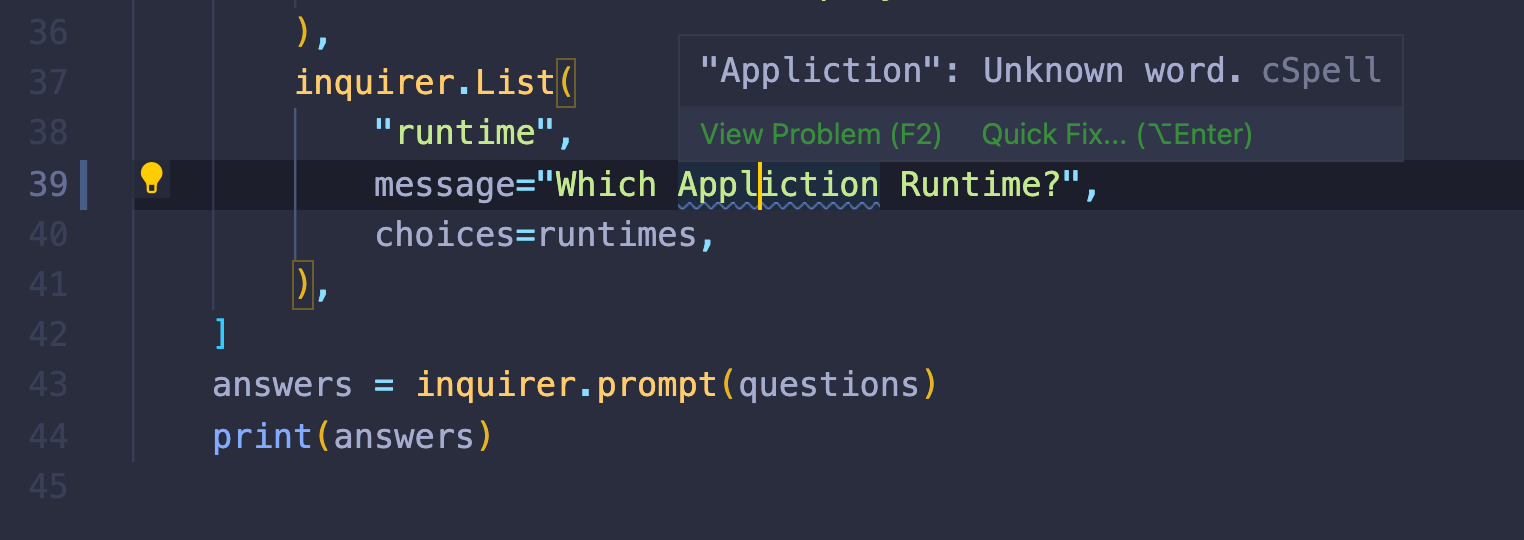
The Code Spell Checker extension will highlight any suspected misspellings. You can either correct the spelling from the dictionary or add the word to a user or workspace dictionary.
The workspace dictionary will live inside the workspace folder, so you can check it into Git. The user dictionary is persisted across all your projects. If there are lots of keywords and phrases you use often, you can add them to the user dictionary.
Docker
The Docker extension (ms-azuretools.vscode-docker) makes it easy to create, manage, and debug containerized applications:
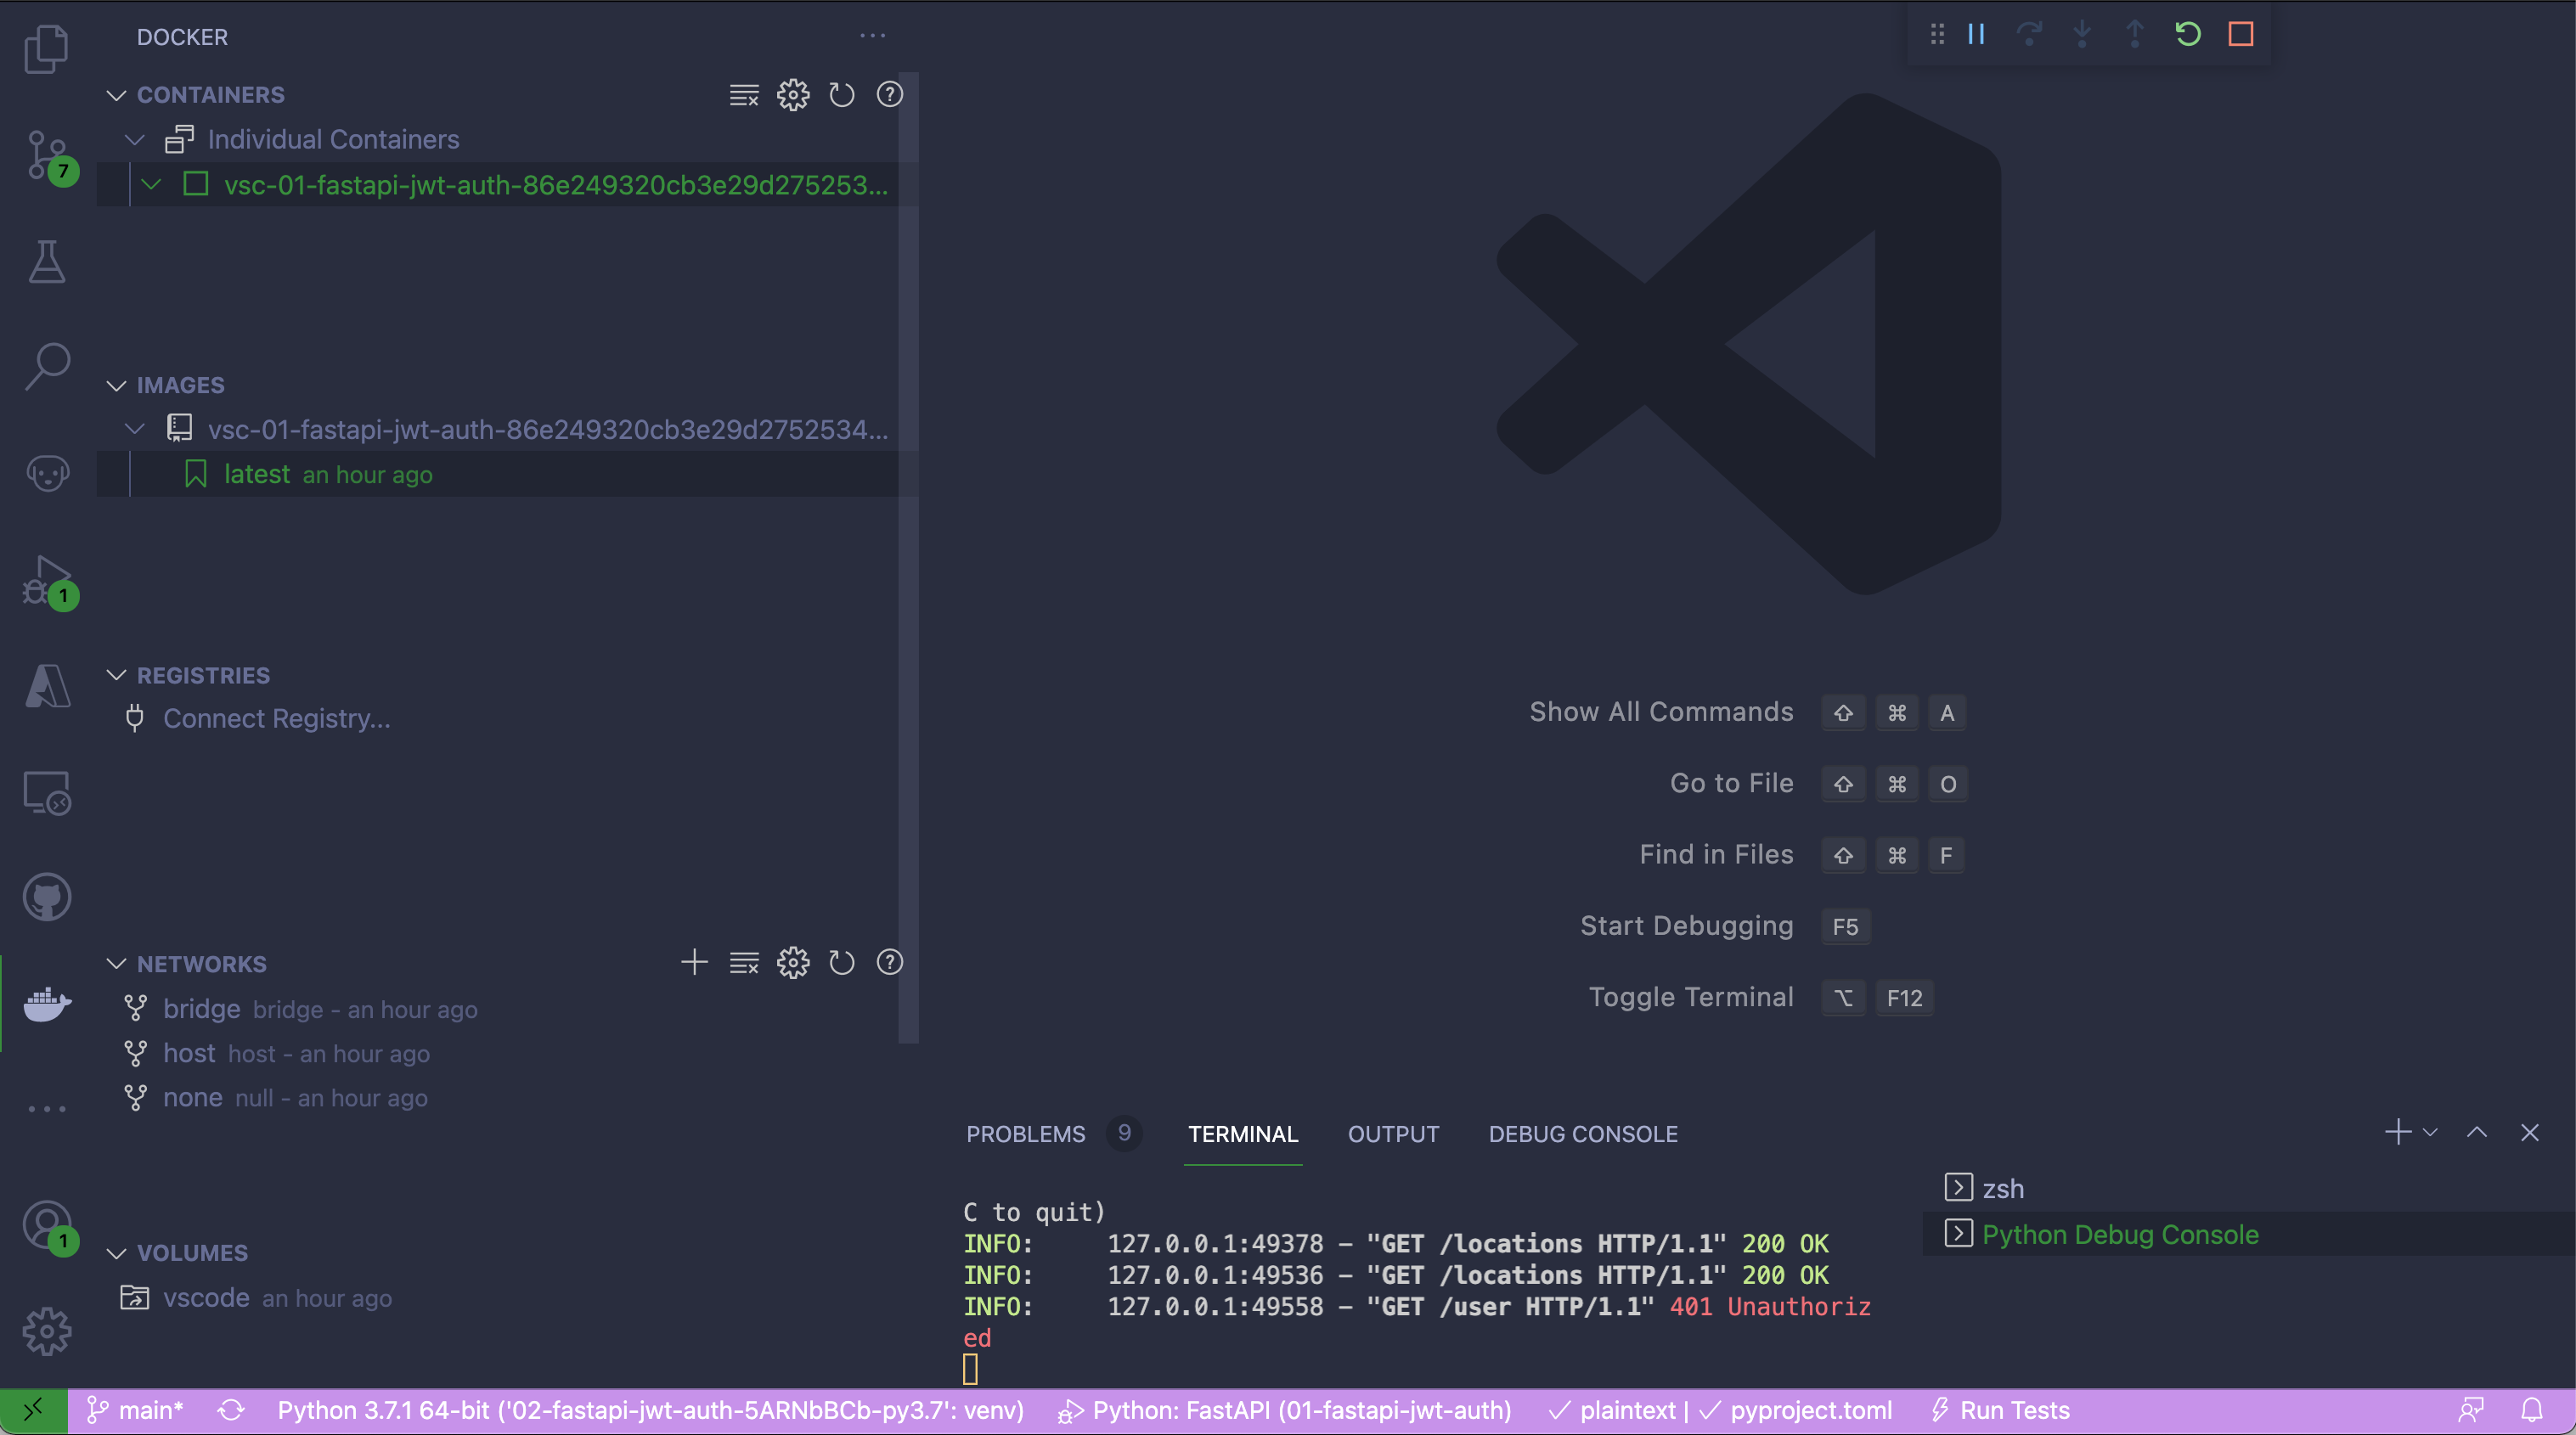
The Docker extension goes beyond the Remote - Containers extension that you covered earlier. It gives you a UI to manage images, networks, container registries, volumes, and containers.
Thunder Client
Thunder Client (rangav.vscode-thunder-client) is an HTTP client and UI for VS Code designed to aid testing of REST APIs. If you’re developing and testing APIs in frameworks like Flask, FastAPI, or Django Rest Framework, you may already use a tool like Postman or curl to test your application.
Inside Thunder Client, you can create HTTP requests and send them to your API, manipulate headers, and set payloads of text, XML, and JSON:
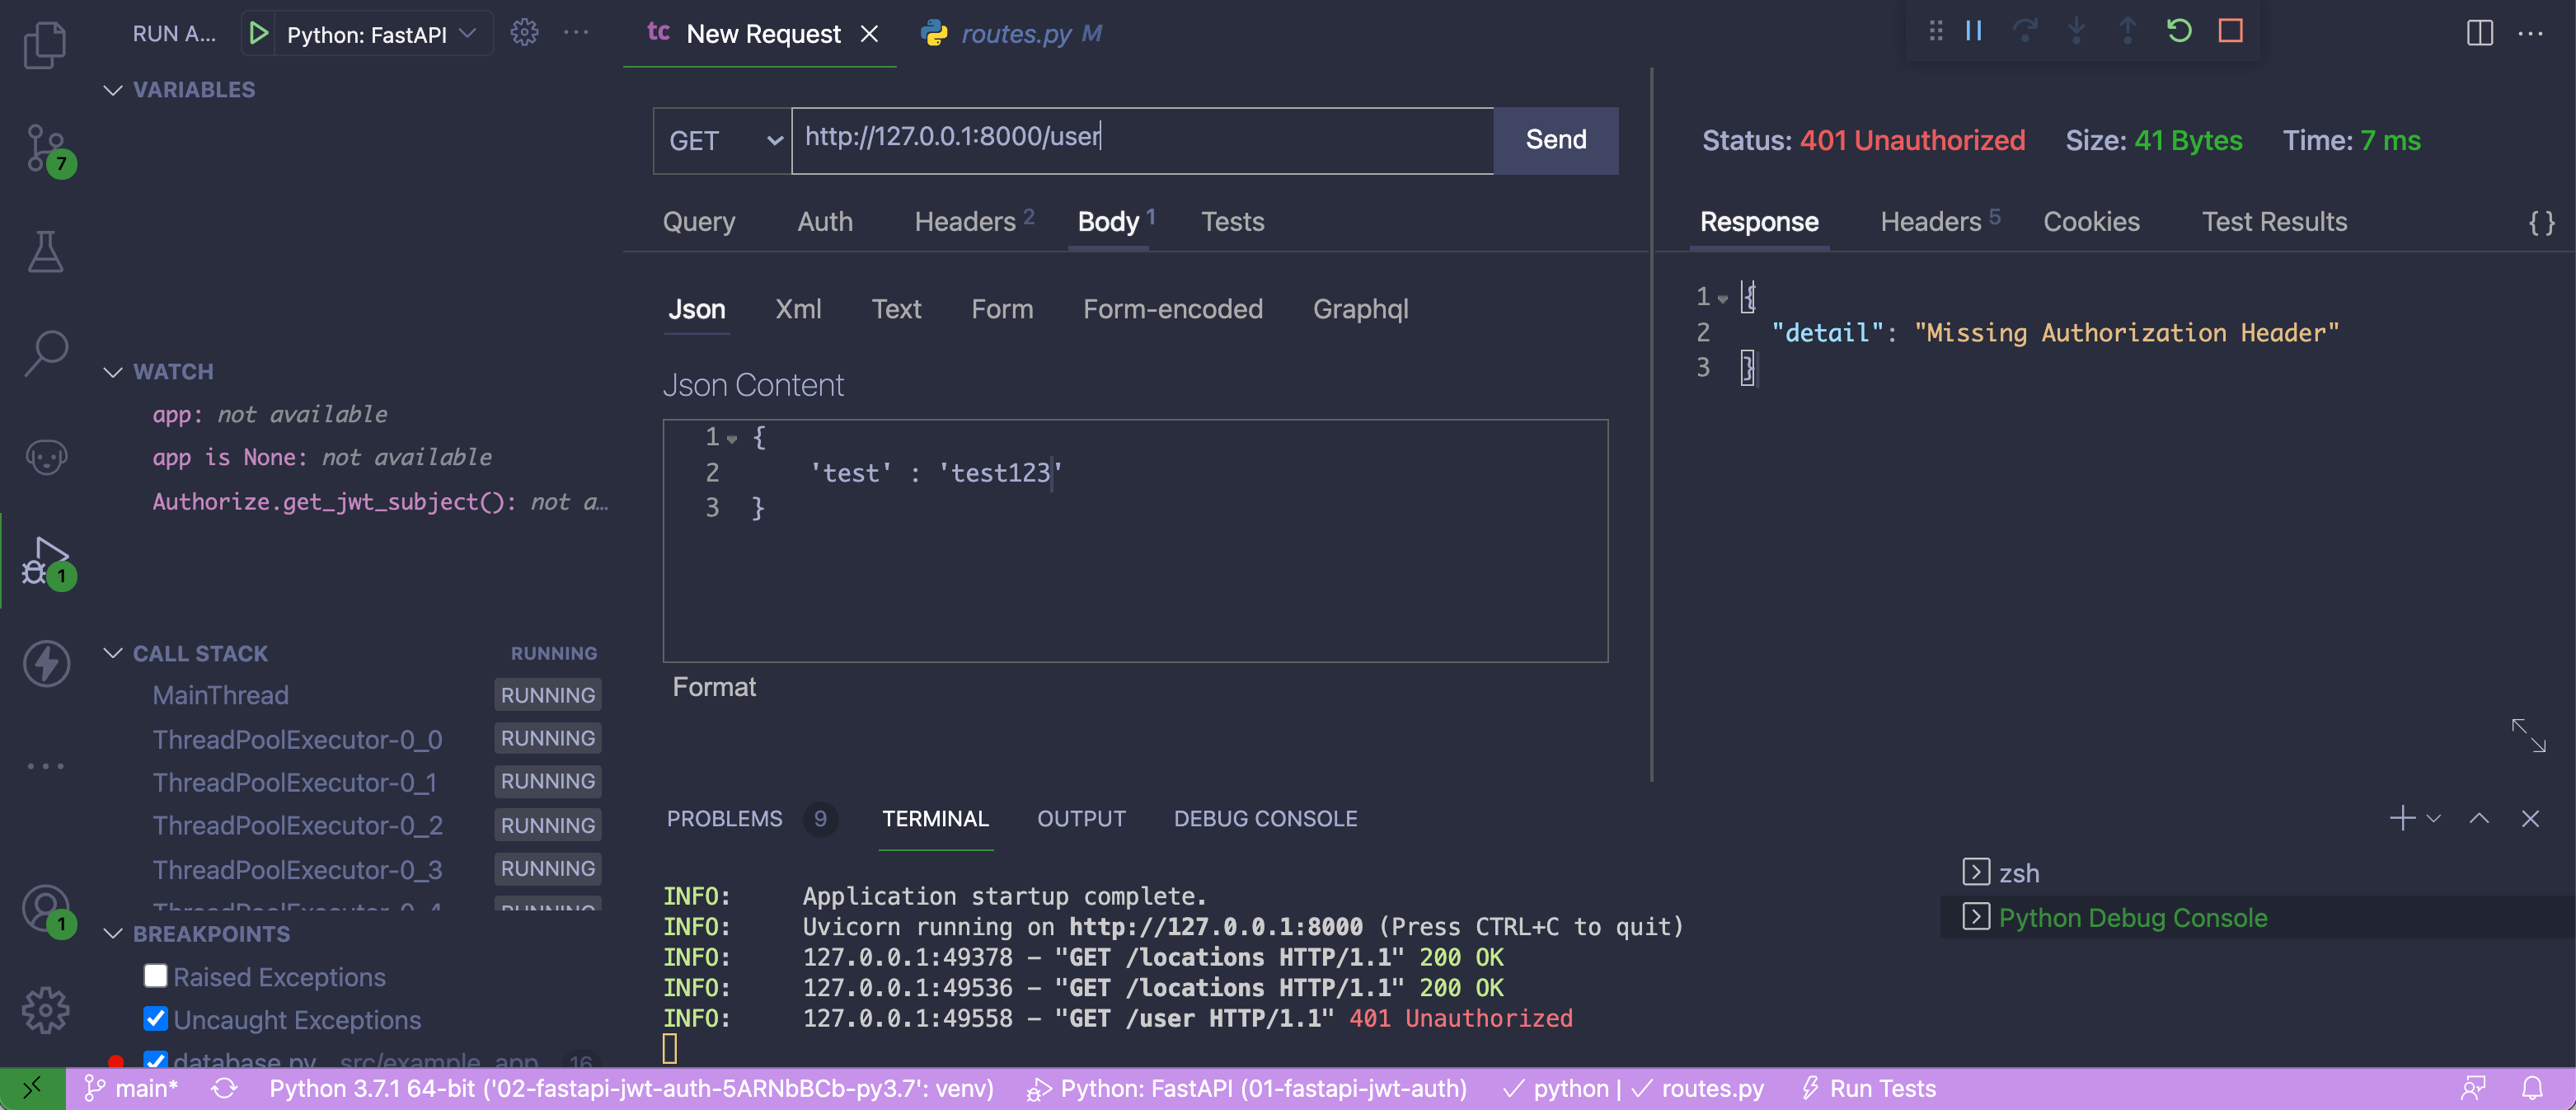
Thunder Client is a great alternative to Postman or curl, and since you can use it right inside of VS Code, you can avoid switching between applications when testing and developing your REST APIs.
VS Code Pets
VS Code Pets (tonybaloney.vscode-pets) is a fun extension that puts one or many small pets in your VS Code window:
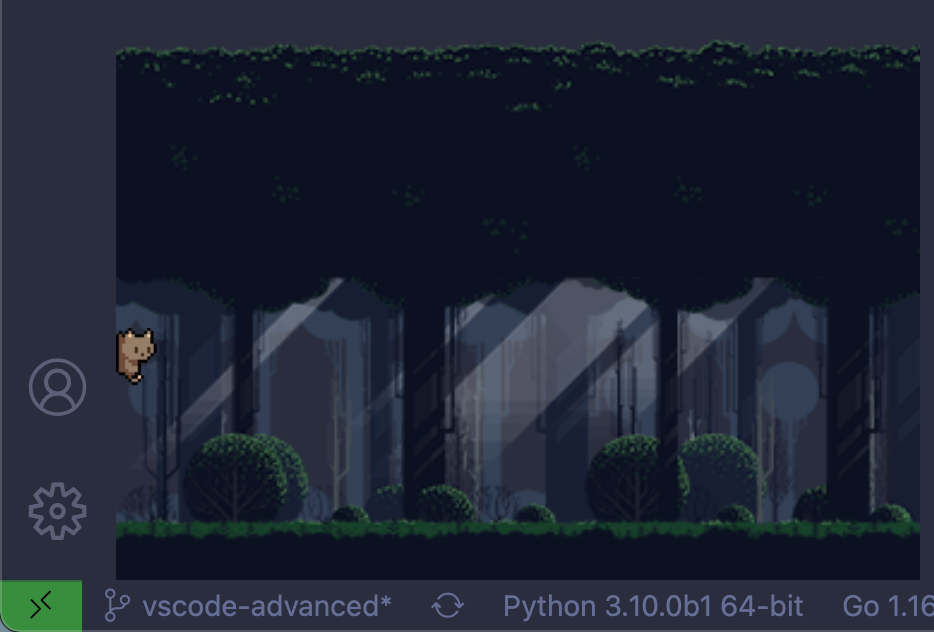
You can customize the pets, customize their environments, and play games with them.
Note: As the author of this tutorial, I’ll say that this is a great extension—but I may be biased because I created it.
This is just a snapshot of the extensions on the marketplace. There are thousands more to discover for additional language support, UI improvements, or even Spotify Integration.
Conclusion
Visual Studio Code’s Python tooling is evolving rapidly, and the team is putting out updates with bug fixes and new features monthly. Make sure you install any new updates to keep your environment on the latest and greatest.
In this tutorial, you’ve seen an overview of some of the more advanced features in Visual Studio Code, the Python and Jupyter extensions, as well as some bonus extensions.
You learned how to:
- Customize your user interface with slick UI customizations and keyboard bindings
- Run and monitor Python tests by integrating your test framework into Visual Studio Code
- Lint and format code with Pylance and external linters
- Debug local and remote environments over SSH and Docker
- Spin up data science tools to work with Jupyter Notebooks
You can use this knowledge to put yourself on track to be a VS Code power user.
Play around with some of these extensions and test them out as you work on your next project. You’ll find that some VS Code features will be more useful for you than others. Once you get a feel for some of the customizations and extensions, you’ll likely find yourself in the VS Code docs looking for more or even coding your own extensions!


