A diary is a personal safe space. With the help of Django, you can create a diary on your own computer without storing data in anyone else’s cloud. By following along with the project below, you’ll see how quickly you can build a functioning web app in Django without any external dependencies.
In this tutorial, you’ll learn how to:
- Set up a Django project
- Work with the standard SQLite database
- Make use of the Django admin site
- Create models and class-based views
- Nest and style templates
- Secure your diary with authentication
This tutorial will guide you step-by-step to your final diary. If you’re just starting out with Django and want to finish your first real project, then this tutorial is for you!
To get the complete source code for the Django project and its steps, click the link below:
Get Source Code: Click here to get the source code you’ll use to build a personal diary web app with Django and Python in this tutorial.
Demo Video
On the main page of your diary, you’ll have a list of entries. You can scroll through them and create new ones with a click of a button. The styling is provided in this tutorial, so you can focus on the Django part of the code. Here’s a quick demo video of how it will look in action:
By the end of the tutorial, you’ll be able to flawlessly navigate your diary to create, read, update, and delete entries on demand.
Project Overview
The tutorial is divided into multiple steps. That way, you can take breaks and continue at your own pace. In each step, you’ll tackle a specific area of your diary project:
- Setting up your Django diary project
- Creating entries on the back end
- Displaying entries on the front end
- Adding styling
- Managing entries on the front end
- Improving your user experience
- Implementing authentication
By following along, you’ll explore the basics of web apps and how to add common features of a Django project. After finishing the tutorial, you’ll have created your own personal diary app and will have a Django project blueprint to build upon.
Prerequisites
You don’t need any previous knowledge of Django to complete this project. If you want to learn more about the topics you encounter in this tutorial, you’ll find links to resources along the way.
However, you should be comfortable using the command line and have a basic knowledge of Python and classes. Although it helps to know about virtual environments and pip, you’ll learn how to set everything up as you work through the tutorial.
Step 1: Setting Up Your Django Diary
Start the project by creating your project directory and setting up a virtual environment. This setup will keep your code isolated from any other projects on your machine. You can name your project folder and the virtual environment any way you want. In this tutorial, the project folder is named my-diary, and the virtual environment is named .venv:
$ mkdir my-diary
$ cd my-diary
$ python3 -m venv .venv
$ source .venv/bin/activate
Your prompt now starts with the name of your virtual environment in parenthesis. This is an indicator that the virtual environment is activated. For the rest of the tutorial, your virtual environment must be activated. All of the following steps will take place inside this directory or its subdirectories.
Note: To activate your virtual environment on Windows, you might need to run this command:
c:\> python -m venv .venv
c:\> .venv\Scripts\activate.bat
For other platforms and shells, you might need to use a different command.
The only other requirement for your diary is Django itself. Install the specific version of this tutorial with pip:
(.venv) $ python -m pip install Django==3.2.1
This command installs Django and some dependencies that Django requires. That’s everything you need.
Initialize Django
With all the requirements in place, it’s time to start the Django project itself. Use Django’s command-line utility to create the base project structure:
(.venv) $ django-admin startproject diary .
Don’t forget to add the dot (.) at the end of the command above. The dot prevents Django from creating another directory for your diary project.
Django just created a manage.py file and a folder named diary with five files. You don’t have to understand what they do precisely. If you’re curious, you can take a glimpse into the files. They all contain an explanation at the beginning that describes why they exist. During this tutorial, you’ll only need to edit two of them:
| File | Edited during tutorial? |
|---|---|
manage.py |
❌ |
diary/__init__.py |
❌ |
diary/asgi.py |
❌ |
diary/settings.py |
✅ |
diary/urls.py |
✅ |
diary/wsgi.py |
❌ |
From now on, the manage.py file will take over administrative tasks in the command line. You’ll meet some of them during this tutorial.
Create the Database
Now that the basis of your Django diary project is prepared, you need a place to store the future contents of your diary. For this, you must create a database.
Django is shipped with support for multiple databases and works with an SQLite database by default if no other database configurations are provided. An SQLite database is all you need because you are the only user that connects to it, and your Django diary project will only run locally.
The best part is that you can create an SQLite database with a single command. By running migrations, you apply changes of a database schema into the database:
(.venv) $ python manage.py migrate
When you look in your project directory, you should see a db.sqlite3 file. Give yourself a pat on the shoulder: You just created a database!
To compare the current state of your project with the downloadable files for this tutorial, click the link below:
Get Source Code: Click here to get the source code you’ll use to build a personal diary web app with Django and Python in this tutorial.
The files related to this section are in the source_code_step_1/ directory.
Be a Superuser
As the owner of your personal diary, you’ve earned yourself the role of the superuser. Claim it with this command:
(.venv) $ python manage.py createsuperuser
Username (leave blank to use 'root'): admin
Email address: admin@example.com
Password: RealPyth0n
Password (again): RealPyth0n
Superuser created successfully.
You’ll be prompted to choose a username, provide an email address, and set a password. This is the key to your diary, so make sure to remember it.
Run a Development Web Server
Another command that you’ll use frequently is runserver. This command runs a lightweight development web server:
(.venv) $ python manage.py runserver
You can specify the IP address and the port of runserver. By default, the server runs on port 8000 on 127.0.0.1 and is only accessible on your computer. With the server running, you can visit your Django project in your browser by using either http://127.0.0.1:8000 or http://localhost:8000:
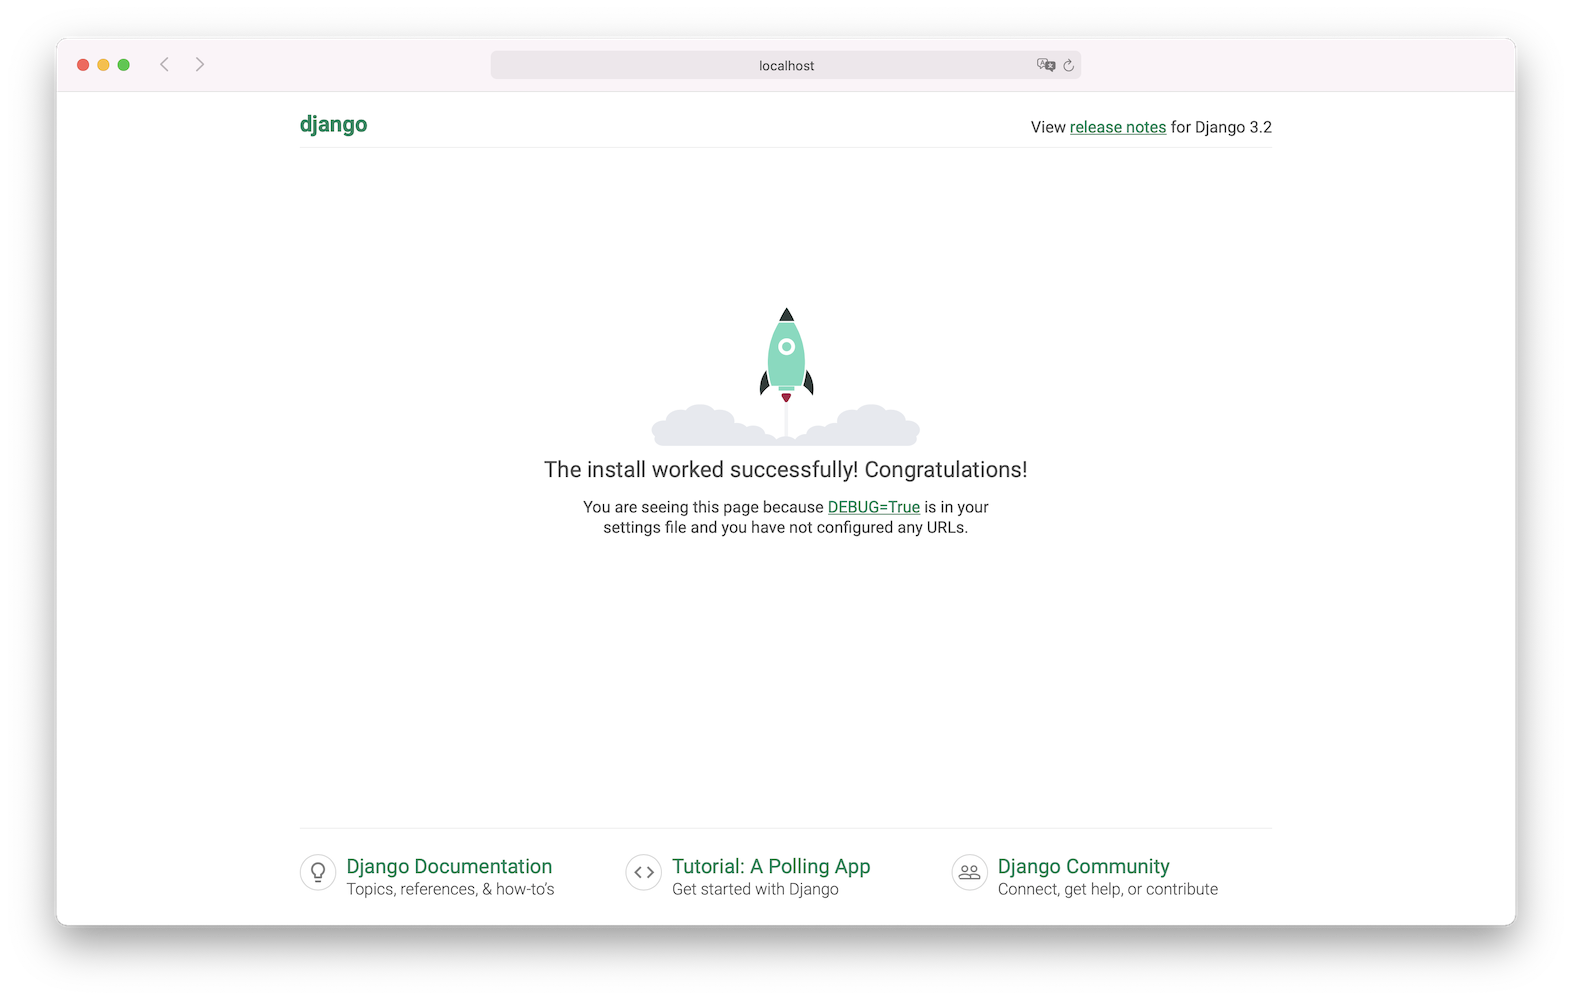
This is the home page of your diary. So far, there’s only a rocket to see. That means the installation was successful.
Important: Every time you visit your diary project in the browser, you must start your local development web server first if it is not running already.
Finish the first step of this tutorial by visiting http://localhost:8000/admin and logging in with your credentials:
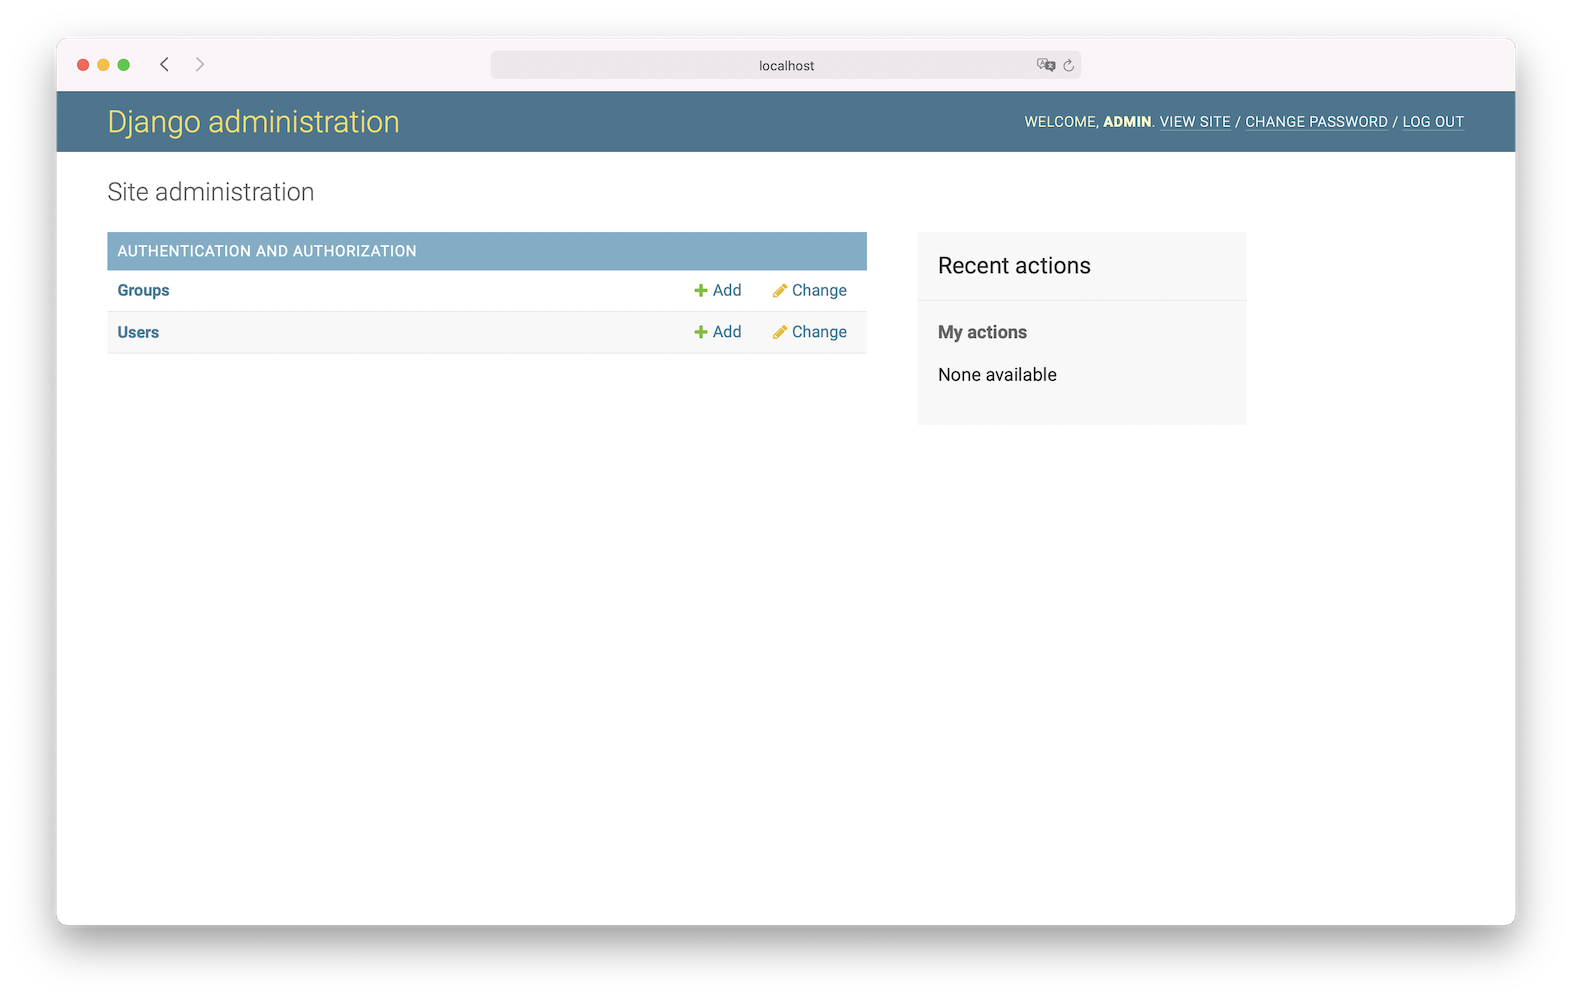
This is your very own Django admin site! It’s one of the most powerful features of Django. With just a few adjustments, it gives you the ability to manage content and users right away. For now, there’s not much to see in the Django admin site. Time to change that!
Step 2: Adding Your Diary Entries to the Back End
A Django project contains one or more applications. The scope of an app should be limited. In the beginning, differentiating between a project and apps can be confusing. But in big Django projects, this separation of concerns keeps the codebase clean. Another advantage of this structure is that you can reuse apps for other projects.
Connect the Entries App
In your terminal, the Django development web server may still be running. Stop it by pressing Ctrl+C in the terminal.
Tip: Open a second terminal window to control the server in one window and run commands in the other:
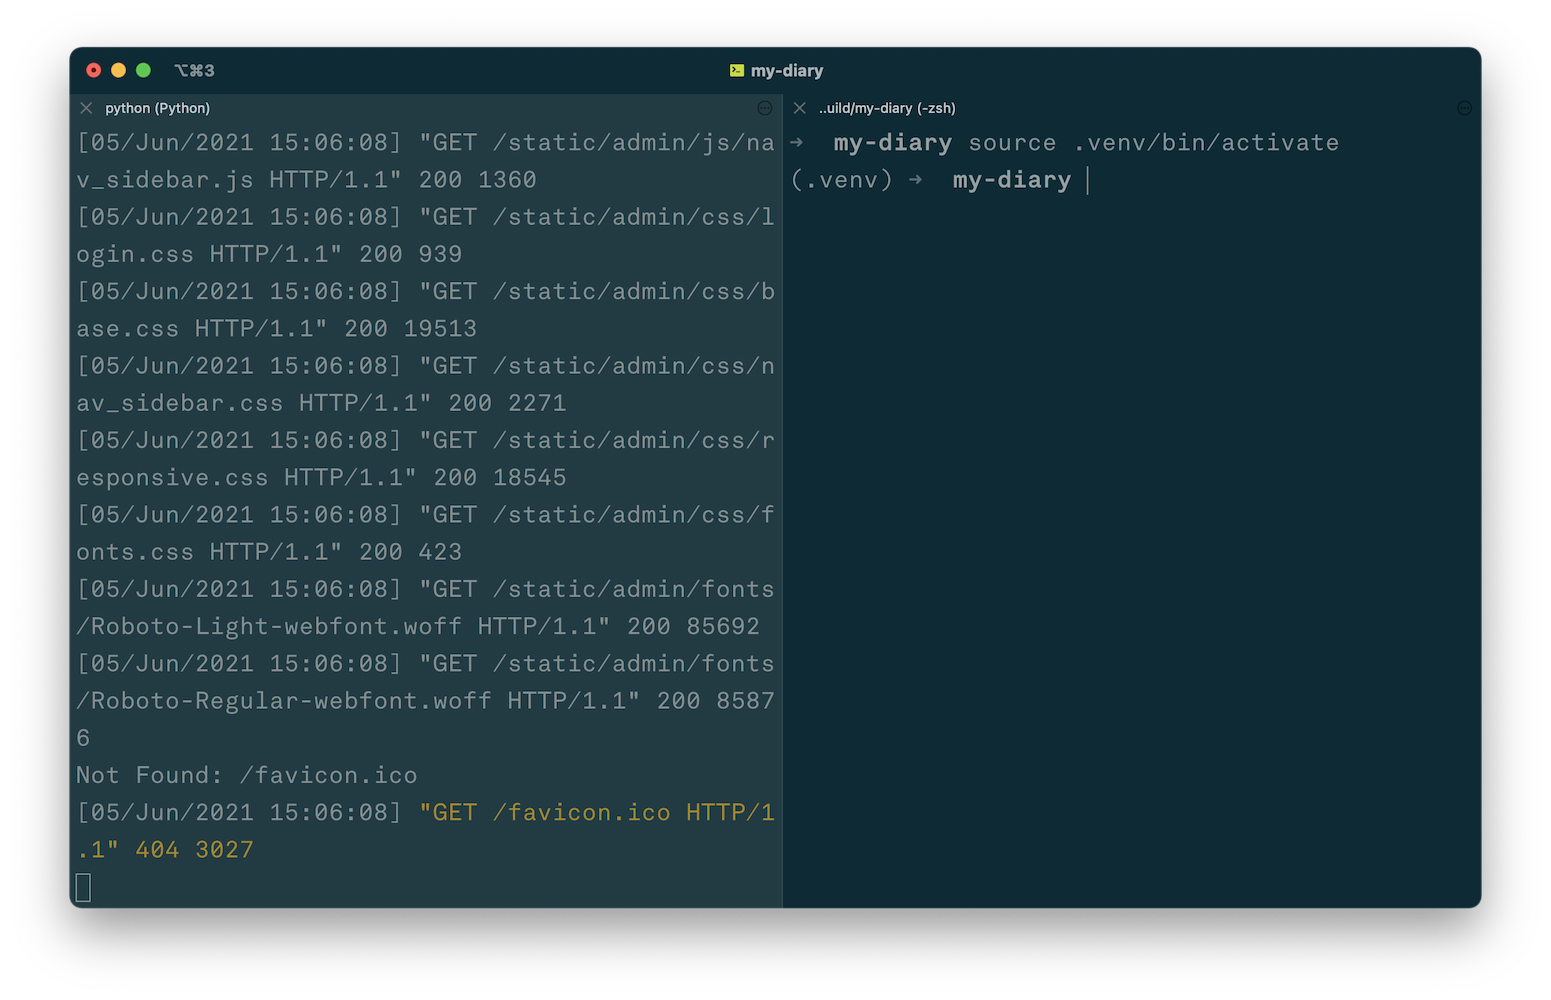
After you’ve navigated to your project and activated the virtual environment, you can run the upcoming commands of this project in the second terminal window.
In this tutorial, you need only one additional app. The primary purpose of that app is to handle your diary entries, so let’s call the app entries. Run the command to create the entries app:
(.venv) $ python manage.py startapp entries
This command creates an entries folder in your project with some predefined files. You’ll need to edit only three of them later in this tutorial:
| File | Edited during tutorial? |
|---|---|
entries/__init__.py |
❌ |
entries/admin.py |
✅ |
entries/apps.py |
❌ |
entries/models.py |
✅ |
entries/tests.py |
❌ |
entries/views.py |
✅ |
As you can see, some of them have the same name as files in the diary/ directory. By clicking the link below, you can compare your folder structure with the one in the source_code_step_2/ directory:
Get Source Code: Click here to get the source code you’ll use to build a personal diary web app with Django and Python in this tutorial.
So far, Django doesn’t know the app you just created. To connect the entries app to the Django diary project, add the path to the configuration class at the beginning of the INSTALLED_APPS list in diary/settings.py:
# diary/settings.py

INSTALLED_APPS = [
  "entries.apps.EntriesConfig",
  "django.contrib.admin",
  "django.contrib.auth",
  "django.contrib.contenttypes",
  "django.contrib.sessions",
  "django.contrib.messages",
  "django.contrib.staticfiles",
]
The entries app is plugged into the diary project now, and Django finds its configurations. One of these configurations is the model that describes how your diary entries should look in the database.
Create the Entries Model
You already created the database. Now it’s time to define the database table where the entries of your diary will be stored. In Django, you do that with a model class. Just like conventional classes in Python, model names should be singular and uppercase. While your app is called entries, your model will be called Entry.
The fields of the Entry model are the elements that a diary entry will have. In the front, those fields will be displayed as a form. In the back, they will be the columns of your Entry database table. A diary entry in this tutorial contains three fields:
titleis the headline.contentis the main text body.date_createdis the creation-date and -time.
In entries/models.py, first import timezone from django.utils. Then create the Entry class in the same file as shown below:
 1# entries/models.py
 2
 3from django.db import models
 4from django.utils import timezone
 5
 6class Entry(models.Model):
 7    title = models.CharField(max_length=200)
 8    content = models.TextField()
 9    date_created = models.DateTimeField(default=timezone.now)
10
11    def __str__(self):
12        return self.title
13
14    class Meta:
15        verbose_name_plural = "Entries"
By importing the timezone module, you can use timezone.now as the default argument for date_created in line 9. That way, the current date and time will be used by default if you don’t define a specific value for it when creating an entry. You’ll make use of this behavior later when you create a form for your diary entries.
In addition to title, content, and date_created, Django will automatically add id as a unique primary key. The string representation of an entry with the primary key 1 would be Entry object (1) by default. When you add .__str__(), you can customize what is shown instead. For a diary entry, the title is a better string representation.
Another variable you have to adjust is verbose_name_plural. Otherwise, Django would spell the plural of your Entry as Entrys and not Entries.
Register the Entry Model
To also see the Entry model in the Django admin site, you need to register it in entries/admin.py:
# entries/admin.py

from django.contrib import admin
from .models import Entry

admin.site.register(Entry)
Django won’t throw an error when you forget to register a model in the admin site. After all, not every model needs to be managed in a user interface. But for the minimal viable product of your diary, you will take advantage of the built-in Django admin site.
Migrate the Entry Model
After adding the new class and registering it on the admin site, you need to make migration files for Django and run them. With makemigrations, you create the migration files, which contain Django’s instructions for building a database. With migrate, you implement them:
(.venv) $ python manage.py makemigrations
(.venv) $ python manage.py migrate
Once the migrations are finished, run the development web server, move to the browser, and visit the Django admin site at http://localhost:8000/admin:
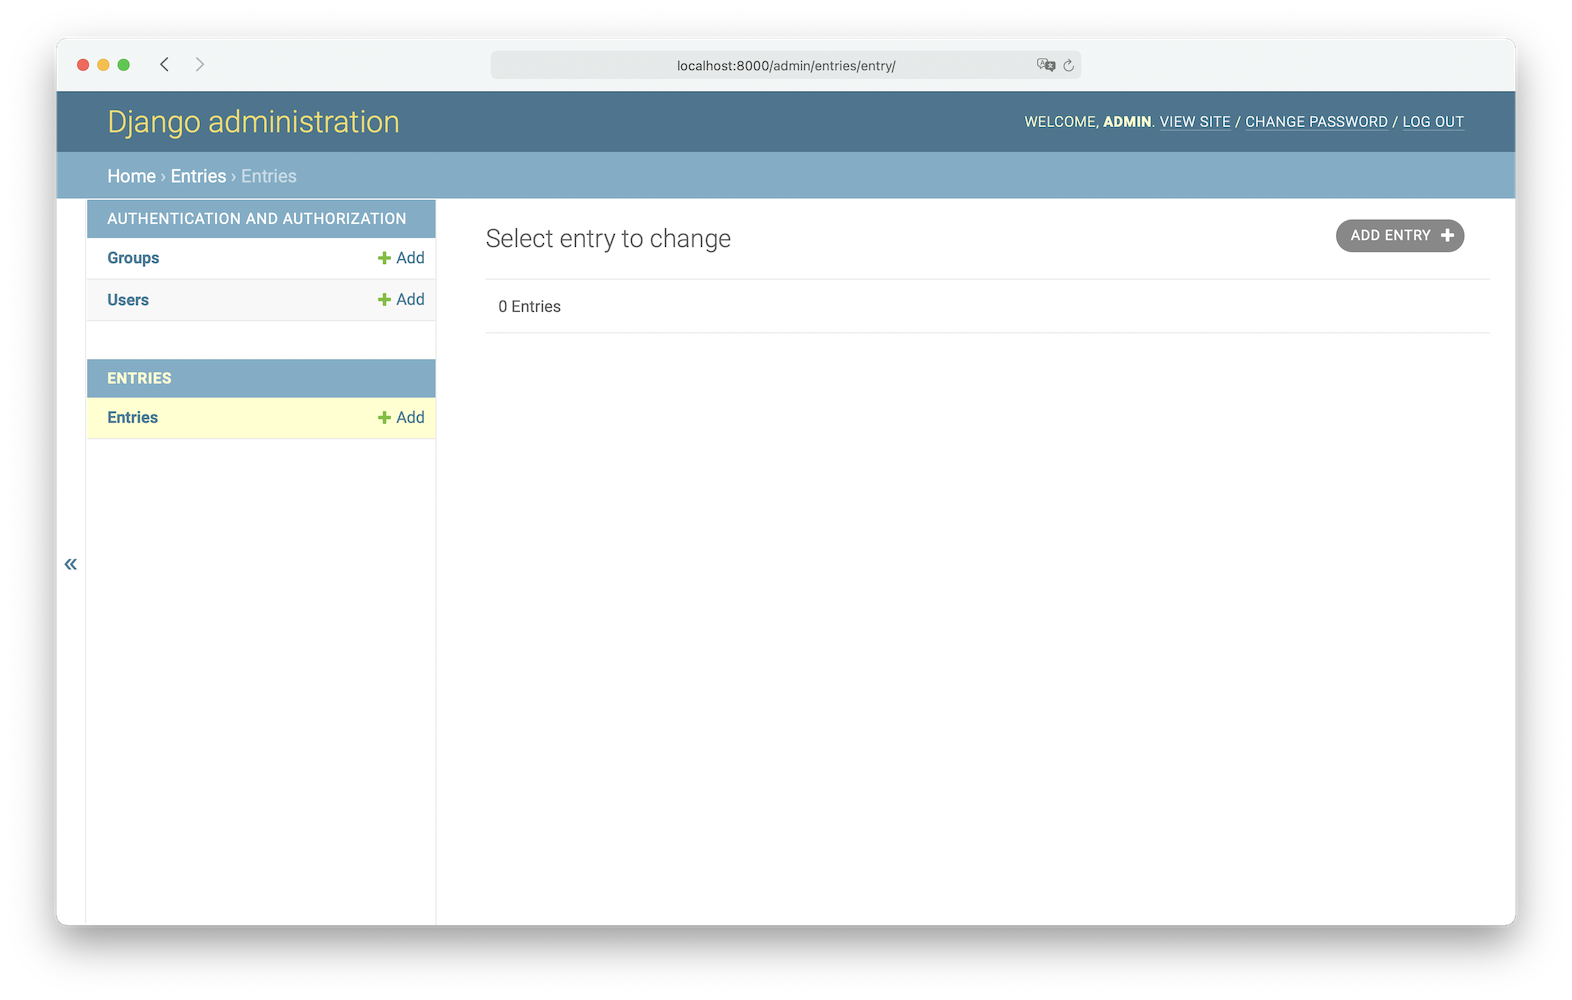
Currently, there are no entries listed. Finish this step by creating at least one entry to your diary by clicking Add Entry. Not sure what to write? Maybe reflect on how awesome it is that you have a fully functional back end for your Django diary project!
Step 3: Displaying Your Diary Entries on the Front End
You’re now able to add new entries in the Django admin site. But when you visit the homepage of your diary in the browser, it still shows the jittering rocket. In this step, you’ll learn how to display your diary entries on the front end.
If you want to see how the code looks at the end of this step, click the link below:
Get Source Code: Click here to get the source code you’ll use to build a personal diary web app with Django and Python in this tutorial.
The files related to this step are in the source_code_step_3/ directory.
Create List and Detail Views
There are two kinds of views in Django: function-based views and class-based views. Both take a web request and return a web response. Generally speaking, function-based views give you more control but also more work. Class-based views give you less control but also less work.
Less work sounds good. But that’s not the only reason you’ll use class-based views for your diary. Your Django diary will use views that are typical for a web app, such as showing a list of database items or their details. That’s why class-based views are a good choice for your diary views.
Django provides many generic views out of the box. In this case, you’ll create subclasses of a DetailView and a ListView and connect them to your Entry model in entries/views.py:
 1# entries/views.py
 2
 3from django.views.generic import (
 4    ListView,
 5    DetailView,
 6)
 7
 8from .models import Entry
 9
10class EntryListView(ListView):
11    model = Entry
12    queryset = Entry.objects.all().order_by("-date_created")
13
14class EntryDetailView(DetailView):
15    model = Entry
As promised, there’s not much code for you to write at this time. The query Entry.objects.all() on line 12 would return all entries ordered by their primary key. Enhancing it with .order_by("-date_created") will return your entries in ascending order, with the newest entry on top of the list.
When you write a view like this, Django will make assumptions in the background, such as the name and location of the template to render by the view.
Create Your Templates
With templates, you can generate HTML dynamically. Django expects the templates for the class-based views you just created to be in a specific location with a particular name. Create the subfolders for your templates:
(.venv) $ mkdir -p entries/templates/entries
Granted, the path to the templates looks a bit odd. But this way you make sure that Django will find exactly the right templates, even when other apps share the same model names. Inside of entries/templates/entries/, you’ll store all template files for the Entry model. Start by creating entry_list.html and adding this content:
 1<!-- entries/templates/entries/entry_list.html -->
 2
 3{% for entry in entry_list %}
 4    <article>
 5        <h2 class="{{ entry.date_created|date:'l' }}">
 6            {{ entry.date_created|date:'Y-m-d H:i' }}
 7        </h2>
 8        <h3>
 9            <a href="{% url 'entry-detail' entry.id %}">
10                {{ entry.title }}
11            </a>
12        </h3>
13    </article>
14{% endfor %}
In Django templates, you can even reference CSS classes dynamically. When you take a look at <h2> on line 5, you can see that class="{{ entry.date_created|date:'l' }}" is added to it. This shows the timestamp with a special formatting. That way, the <h2> element has the weekday as a class, and you can give every weekday a unique color in the CSS later.
Inside the entry_list loop, you can access the fields of the Entry model. To not clutter the list with too much information, you’ll only show the content when you visit the detail page of an entry. Create this detail page in entries/templates/entries/ with entry_detail.html as the filename and add this content:
<!-- entries/templates/entries/entry_detail.html -->

<article>
    <h2>{{ entry.date_created|date:'Y-m-d H:i' }}</h2>
    <h3>{{ entry.title }}</h3>
    <p>{{ entry.content }}</p>
</article>
A detail template expects exactly one entry object. That’s why you can access it directly here without a loop.
Add Routes to Your Views
To see the templates in action, you need to connect your views to URLs. Django works with a urls.py file to dispatch the incoming requests from users in the browser. A file like this already exists in the diary project folder. For the entries app, you must create it first at entries/urls.py and add the paths to EntryListView and EntryDetailView:
 1# entries/urls.py
 2
 3from django.urls import path
 4
 5from . import views
 6
 7urlpatterns = [
 8    path(
 9        "",
10        views.EntryListView.as_view(),
11        name="entry-list"
12    ),
13    path(
14        "entry/<int:pk>",
15        views.EntryDetailView.as_view(),
16        name="entry-detail"
17    ),
18]
The path() function on lines 8 and 13 must have at least two arguments:
- A route string pattern, which contains a URL pattern
- The reference to a view, which is an
as_view()function for class-based views
Additionally, you can pass arguments as kwargs and provide a name. With a name, you can reference views easily in your Django project. So even if you decide to change the URL pattern, you don’t have to update your templates.
Now that the URLs for the entries app are in place, you need to connect them to the urlpatterns list of diary. When you open diary/urls.py, you’ll see the urlpatterns your Django Diary project uses. So far, there’s only the route to "admin/", which is added by default so you can reach the Django admin site. To show the entries of your diary when you visit http://localhost:8000, you first need to dispatch the root URL to the entries app:
# diary/urls.py

from django.contrib import admin
from django.urls import path, include

urlpatterns = [
    path("admin/", admin.site.urls),
    path("", include("entries.urls")),
]
After you create new templates, manually restart the Django development web server. Then visit http://localhost:8000 and enjoy your views:

You can see the details of an entry by clicking the link to it in the list or visiting http://localhost:8000/entries/1, where 1 is the ID of an existing entry.
Now everything is in place to see your entries in the front end. Your diary still looks a bit unstyled, though. Let’s change that in the next step!
Step 4: Making Your Django Diary Look Nice
In this step, you’ll add some style to your diary. If you want to take a look at the finished code of this step, then click the link below and check out the source_code_step_4/ directory:
Get Source Code: Click here to get the source code you’ll use to build a personal diary web app with Django and Python in this tutorial.
While your writing is creative, the design of the diary is currently a bit basic. You can start spicing things up by creating a base template at entries/templates/entries/base.html with this content:
<!-- entries/templates/entries/base.html -->

{% load static %}
<!DOCTYPE html>
<html lang="en">

<head>
    <meta charset="UTF-8">
    <title>My Diary</title>
    <link rel="stylesheet" href="{% static 'css/diary.css' %}">
</head>

<body>
    <h1><a href="/">Dear diary …</a></h1>

    {% block content %}{% endblock %}

</body>

</html>
With template inheritance, you don’t have to repeat markup in your templates. Instead, you extend your child templates. Django then automatically merges them together when serving them in the view.
Add a Stylesheet
By inserting {% load static %} at the beginning of a template file, you can reference static files with the {% static %} template tag and a relative path to the CSS file. Create diary.css in entries/static/css/ and expand the box below to view the CSS code you’ll add to the file.
Copy and paste the CSS code below into diary.css:
/* entries/static/css/diary.css */

* {
    box-sizing: border-box;
}

body {
    font-family: sans-serif;
    font-size: 18px;
}

a {
    color: inherit;
}
a:hover {
    opacity: 0.7;
}

h1 {
    font-size: 2.8em;
}

h1 a {
    text-decoration: none;
}

h2, h3 {
    font-size: 1.4em;
    margin: 0;
    display: inline-block;
    padding: 0.5rem 1rem;
    vertical-align: top;
}

h2 {
    background-color: aquamarine;
}

.mark {
    background-color: gainsboro;
}
.mark a {
    text-decoration: none;
}

article {
    margin-bottom: 0.5rem;
}

p {
    font-size: 1.2em;
    padding-left: 1rem;
    line-height: 1.3em;
    max-width: 36rem;
    color: dimgray;
}

em {
    font-style: normal;
    font-weight: bold;
}

/* Form */

label {
    display: block;
}

button,
textarea,
input {
    font-size: inherit;
    min-height: 2.5em;
    padding: 0 1rem;
}

input[type="text"],
textarea {
    width: 100%;
}

textarea {
    padding: 0.5rem 1rem;
    font-family: sans-serif;
}

button,
input[type="submit"] {
    margin: 0 1rem 2px 1rem;
    cursor: pointer;
    font-weight: bold;
    min-width: 8rem;
}

/* Day coloring */

.Saturday,
.Sunday {
    background-color: lightsalmon;
}
Feel free to enhance and optimize the code above to adjust any elements to your taste. If you don’t know CSS, it’s worth learning the basics if you are into web development.
As stated before, every <h2> element in the entry list has its weekday as a class. By styling .Saturday and .Sunday differently, you can easily spot weekends in the list.
Extend Child Templates
Now it’s time to connect the child templates with the base.html parent template. Update entries/templates/entries/entry_list.html so it looks like this:
 1<!-- entries/templates/entries/entry_list.html -->
 2
 3{% extends "entries/base.html" %}
 4
 5{% block content %}
 6    {% for entry in entry_list %}
 7        <article>
 8            <h2 class="{{ entry.date_created|date:'l' }}">
 9                {{ entry.date_created|date:'Y-m-d H:i' }}
10            </h2>
11            <h3>
12                <a href="{% url 'entry-detail' entry.id %}">
13                    {{ entry.title }}
14                </a>
15            </h3>
16        </article>
17    {% endfor %}
18{% endblock %}
The {% block %} template tag defines a part of the document that a child template can override. To enable this, you must declare that your child template extends the parent template and define a block element with the same name. With the {% extends %} template tag on line 3, you define entries/base.html as the parent. {% block %} and {% endblock %} on lines 5 and 18 wrap the markup that will be placed in the content block of the parent.
Do the same for entries/templates/entries/entries_detail.html:
<!-- entries/templates/entries/entries_detail.html -->

{% extends "entries/base.html" %}

{% block content %}
    <article>
        <h2>{{ entry.date_created|date:'Y-m-d H:i' }}</h2>
        <h3>{{ entry.title }}</h3>
        <p>{{ entry.content }}</p>
    </article>
{% endblock %}
Both templates inherit the HTML structure and styling from their parent template. They share the same title and <h1> headline, plus the styling provided by diary.css. To see this in action, start your Django development server and go to http://localhost:8000:

You can now read your entries with style. However, when you want to create, update, or delete an entry, you have to go to the Django admin site. That’s way too many clicks for when you want to quickly jot down some thoughts. In the next step, you’ll improve your workflow by adding this functionality to the front end.
Step 5: Managing Your Diary Entries on the Front End
When you build and use web apps, there are four basic operations that you perform all the time. These operations are so common that they are frequently just referred to by the CRUD acronym:
- Create
- Read
- Update
- Delete
In the Django admin site, you can perform all these actions already. In the front end, you only can read your entries so far. To resemble the functionality of the Django admin site, you’ll repeat what you’ve done already for the EntryDetail and EntryList, adding a view, a template, and a URL.
Add the Views
In entries/views.py you’ve imported ListView and DetailView so far. Update your import statements so they look like this:
# entries/views.py

from django.urls import reverse_lazy
from django.views.generic import (
    ListView,
    DetailView,
    CreateView,
    UpdateView,
    DeleteView,
)
Add your three subclasses at the bottom of entries/views.py:
 1# entries/views.py
 2
 3class EntryCreateView(CreateView):
 4    model = Entry
 5    fields = ["title", "content"]
 6    success_url = reverse_lazy("entry-list")
 7
 8class EntryUpdateView(UpdateView):
 9    model = Entry
10    fields = ["title", "content"]
11
12    def get_success_url(self):
13        return reverse_lazy(
14            "entry-detail",
15            kwargs={"pk": self.entry.id}
16        )
17
18class EntryDeleteView(DeleteView):
19    model = Entry
20    success_url = reverse_lazy("entry-list")
This time, it’s not enough to connect the classes to your Entry model. For EntryCreateView and EntryUpdateView, you also need to define which model fields should be displayed in the form, as you can see in lines 5 and 10. Your EntryDeleteView in line 18 only performs the action of deleting an entry item, so you don’t need to define any fields in it.
Additionally, you need to define where the user should be redirected after submitting the form of the view. By default, .get_success_url() simply returns the value of success_url. In EntryUpdateView, you need to overwrite this method.
By providing the entry.id as a keyword argument in line 15, you stay on the entry detail page after editing it. Instead of using URLs, you use reverse_lazy to refer to them by name, just like you did in your templates.
Create the Templates
Like before, Django looks for templates with a specific name:
- For
EntryDeleteView, it’sentry_confirm_delete.html. - For
EntryCreateView, it’sentry_form.html. - For
EntryUpdateViewit would beentry_update_form.html.
When Django does not find entry_update_form.html, it tries entry_form.html as a fallback. You can take advantage of this by creating a template that handles both views in entries/templates/entries/ and adding a basic submit form:
 1<!-- entries/templates/entries/entry_form.html -->
 2
 3{% extends "entries/base.html" %}
 4{% block content %}
 5    <form method="post">
 6        {% csrf_token %}
 7        {{ form.as_p }}
 8        <input type="submit" value="Save">
 9    </form>
10    {% if entry %}
11        <a href="{% url 'entry-detail' entry.id %}">
12            <button>Cancel</button>
13        </a>
14    {% else %}
15        <a href="{% url 'entry-list' %}">
16            <button>Cancel</button>
17        </a>
18    {% endif %}
19{% endblock %}
When this template is loaded by CreateView, the form will be empty, and canceling it will bring you to the list of entries again. When loaded by CreateUpdateView, it will be prefilled with the current title and content of the entry. Canceling will bring you to the entry detail page.
There are multiple ways to render a form in a template. With {{ form.as_p }} in line 7, Django will display the fields you defined in the view wrapped in paragraphs. Whenever you post content in Django forms, you must also include the {% csrf_token %} template tag in line 6 to it. This is a security measure to prevent cross-site request forgery.
As with the other templates, you add {% extends "entries/base.html" %} in line 3 to extend the base template. Then you define what to include in the block content tag between lines 4 and 18. You use the same pattern for entry_confirm_delete.html in entries/templates/entries/:
<!-- entries/templates/entries/entry_confirm_delete.html -->

{% extends "entries/base.html" %}
{% block content %}
    <form method="post">{% csrf_token %}
        <p>
            Are you sure you want to delete
            <em>"{{ entry.title }}"</em>
            created on {{ entry.date_created|date:'Y-m-d' }}?
        </p>
        <input type="submit" value="Confirm">
    </form>
    <a href="{% url 'entry-detail' entry.id %}">
        <button>Cancel</button>
    </a>
{% endblock %}
This template will show up when you are about to delete an entry. Mentioning "{{ entry.title }}" and {{ entry.created_date|date:'Y-m-d' }} in the form reminds you which entry you would delete by pressing Confirm.
Create the URLs
After you’ve created the views and their templates, create their routes to access them in the front end. Add three additional paths to urlpatterns in entries/urls.py:
# entries/urls.py

urlpatterns = [
    path(
        "",
        views.EntryListView.as_view(),
        name="entry-list"
    ),
    path(
        "entry/<int:pk>",
        views.EntryDetailView.as_view(),
        name="entry-detail"
    ),
    path(
        "create",
        views.EntryCreateView.as_view(),
        name="entry-create"
    ),
    path(
        "entry/<int:pk>/update",
        views.EntryUpdateView.as_view(),
        name="entry-update",
    ),
    path(
        "entry/<int:pk>/delete",
        views.EntryDeleteView.as_view(),
        name="entry-delete",
    ),
]
For entry-create, you only need a basic create path. Like the entry-detail created earlier, entry-update and entry-delete need a primary key to identify which entry should be updated or deleted.
Now you can create, update, and delete entries for your diary directly in the front end. Start the development web server and visit http://localhost:8000/create to test it. If you want to compare your code with the one from this tutorial, then click the link below:
Get Source Code: Click here to get the source code you’ll use to build a personal diary web app with Django and Python in this tutorial.
You can find the files related to this step in the source_code_step_5/ directory.
Step 6: Improving Your User Experience
Using your diary, you may have stumbled over a few quirks that make navigating around a bit annoying. In this step, you’ll tackle them one by one. You’ll see that small changes in the interface can have a big impact on your diary user experience.
Handle Your Success
It’s always nice to get some feedback, especially when it’s positive. Using the messages framework, you can quickly define one-time flash messages that display after you submit your forms. To make use of this feature, import messages and SuccessMessageMixin to entries/views.py:
# entries/views.py

from django.contrib import messages
from django.contrib.messages.views import SuccessMessageMixin
EntryListView and EntryDetailView are read views and don’t handle a form. They may display a message in the template, but they don’t send one. That means you don’t need to subclass SuccessMessageMixin for them. EntryCreateView, EntryUpdateView and EntryDeleteView, on the other hand, do add a notification to the message storage, so you need to adjust their functionality:
 1# entries/views.py
 2
 3class EntryCreateView(SuccessMessageMixin, CreateView):
 4    model = Entry
 5    fields = ["title", "content"]
 6    success_url = reverse_lazy("entry-list")
 7    success_message = "Your new entry was created!"
 8
 9class EntryUpdateView(SuccessMessageMixin, UpdateView):
10    model = Entry
11    fields = ["title", "content"]
12    success_message = "Your entry was updated!"
13
14    def get_success_url(self):
15        return reverse_lazy(
16            "entry-detail",
17            kwargs={"pk": self.object.pk}
18        )
After inheriting SuccessMessageMixin in EntryCreateView on line 3 and in EntryUpdateView on line 9, you define a success_message for them on lines 7 and 12. Especially when you perform a destructive action like deleting an entry, it’s crucial to give feedback that everything went fine. To show a message in a DeleteView, you have to add a custom .delete() method and add your custom success_message to the messages framework manually:
 1# entries/views.py
 2
 3class EntryDeleteView(DeleteView):
 4    model = Entry
 5    success_url = reverse_lazy("entry-list")
 6    success_message = "Your entry was deleted!"
 7
 8    def delete(self, request, *args, **kwargs):
 9        messages.success(self.request, self.success_message)
10        return super().delete(request, *args, **kwargs)
You need this extra method on line 8 because the DeleteView class is not an ancestor of a FormView. That’s why you can skip adding the SuccessMessageMixin in your EntryDeleteView on line 3.
Click the link below to see the full content of entries/views.py. You can find it in source_code_step_6/ directory:
Get Source Code: Click here to get the source code you’ll use to build a personal diary web app with Django and Python in this tutorial.
Now that the views send messages, you need to enhance the templates to display them.
Get the Message
Messages are stored in the message storage. By looping through it, you show all messages that are currently in the message storage. In Django templates, you accomplish this by using the messages template tag. The way you built the diary and structured the templates, you only need to add it to entries/base.html:
 1<!-- entries/base.html -->
 2
 3<h1><a href="/">Dear diary …</a></h1>
 4
 5{% if messages %}
 6    <ul class="messages">
 7    {% for message in messages %}
 8        <li class="message">
 9            {{ message }}
10        </li>
11    {% endfor %}
12    </ul>
13{% endif %}
14
15{% block content %}{% endblock %}
By wrapping the messages list in {% if messages %} on lines 4 and 12, you ensure it will only be shown conditionally, if there are any messages in the storage.
Improve Your Navigation
To create, edit, or delete an entry, you need to remember the corresponding URLs and then type them in the address bar. How tedious! Luckily, you can fix this by adding links to the views. Start with a link to the entry-create view in the entries/templates/entries/entry_list.html template:
 1<!-- entries/templates/entries/entry_list.html -->
 2
 3{% block content %}
 4<article>
 5    <h2 class="mark">{% now "Y-m-d H:i" %}</em></h2>
 6    <a href="{% url 'entry-create' %}"><button>Add new entry</button></a>
 7</article>
 8
 9{% for entry in entry_list %}
This markup will resemble the other diary entry list items. Add a new paragraph to entries/templates/entries/entry_detail.html template right after </article> to quickly edit or delete an entry:
<!-- entries/templates/entries/entry_detail.html -->

</article>
<p>
    <a href="{% url 'entry-update' entry.id %}">✍️ Edit</a>
    <a href="{% url 'entry-delete' entry.id %}">⛔ Delete</a>
</p>
{% endblock %}
This code adds two links underneath the entry details that link to entry-update and entry-delete, respectively.
Style Your Messages
Finally, style the flash messages by adding .messages and .message at the end of entries/static/css/diary.css:
/* entries/static/css/diary.css */

/* Messages */

.messages {
    padding: 0;
    list-style: none;
}

.message {
    width: 100%;
    background: lightblue;
    padding: 1rem;
    text-align: center;
    margin: 1rem 0;
}
Stop the development web server by pressing Ctrl+C in the terminal and restart it. Then visit http://localhost:8000 to see your changes in action. If the messages look unstyled, you may have to clear the cache of your browser so it reloads the stylesheet changes:

You now own a fully usable diary web app built entirely in Django. Although your diary is only stored locally, it is a good idea to make sure only you can access it. Let’s add that restriction before you start journaling.
Step 7: Putting a Lock on Your Django Diary
What a small, golden lock is for a physical diary, a login form is for your digital one. The key to this lock is the name and password combination that you’re already using to log in to the Django admin site.
Reuse Your Django Admin Login
The authentication system that Django provides is quite basic. For other projects with regular users, you may consider customizing it. But for your Django diary, it’s sufficient to reuse the login of the Django admin site. You’ll see that this works just fine in a moment. First, let’s take care of logging out.
Add a Logout Link
You log out by visiting a special URL. Django already provides a URL with the name admin:logout to log you out of the Django admin site. When you are logged in and visit this URL from anywhere in your project, Django automatically logs you out. To quickly access this URL, add a link to it at the bottom of entries/templates/entries/base.html:
<!-- entries/templates/entries/base.html -->

{% load static %}
<!DOCTYPE html>
<html lang="en">

<head>
    <meta charset="UTF-8">
    <title>My Diary</title>
    <link rel="stylesheet" href="{% static 'css/diary.css' %}">
</head>

<body>
<h1><a href="/">Dear diary …</a></h1>

{% if messages %}
    <ul class="messages">
    {% for message in messages %}
        <li class="message">
            {{ message }}
        </li>
    {% endfor %}
    </ul>
{% endif %}

{% block content %}{% endblock %}

<hr>
<a href="{% url 'admin:logout' %}">Logout</a>
</body>

</html>
Start your development web server, go to your homepage at http://localhost:8000, and click the Logout link. Now when you visit http://localhost:8000/admin, you see the login form. That means you’re logged out. When you visit http://localhost:8000 again, your diary entries are still accessible, though. Time to change that!
Restrict Access to Your Views
In Django, you can define who is allowed to see which views. By default, they are open to everyone who visits your website. To make sure that the views require an authenticated user to be accessed, import LoginRequiredMixin at the top of entries/views.py:
# entries/views.py

from django.contrib.auth.mixins import LoginRequiredMixin
from django.contrib import messages
from django.contrib.messages.views import SuccessMessageMixin
from django.urls import reverse_lazy
from django.views.generic import (
    ListView,
    DetailView,
    CreateView,
    UpdateView,
    DeleteView,
)

from .models import Entry
Once a view class uses the LoginRequiredMixin, it requires a successful login first. Additionally, you must define a login_url so Django knows where to redirect you when you’re not logged in. Instead of doing this for all classes individually, you can create a base class that inherits LoginRequiredMixin and defines the login_url in entries/views.py:
# entries/views.py

class LockedView(LoginRequiredMixin):
    login_url = "admin:login"
Now you can inherit LockedView in all your other views that should only be accessible for authenticated users. Edit entries/views.py so your classes look like this:
# entries/views.py

class EntryListView(LockedView, ListView):
    model = Entry
    queryset = Entry.objects.all().order_by("-created_date")

class EntryDetailView(LockedView, DetailView):
    model = Entry

class EntryCreateView(LockedView, SuccessMessageMixin, CreateView):
    model = Entry
    fields = ["title", "content"]
    success_url = reverse_lazy("entry-list")
    success_message = "Your new entry was created!"

class EntryUpdateView(LockedView, SuccessMessageMixin, UpdateView):
    model = Entry
    fields = ["title", "content"]
    success_message = "Your entry was updated!"

    def get_success_url(self):
        return reverse_lazy("entry-detail", kwargs={"pk": self.object.pk})

class EntryDeleteView(LockedView, SuccessMessageMixin, DeleteView):
    model = Entry
    success_url = reverse_lazy("entry-list")
    success_message = "Your entry was deleted!"

    def delete(self, request, *args, **kwargs):
        messages.success(self.request, self.success_message)
        return super().delete(request, *args, **kwargs)
Now when you visit http://localhost:8000, you’ll be redirected to the Django login form. After logging in, you’ll be redirected to the entries list and see everything that is for your eyes only:

And that’s it! You’ve successfully built your very own personal diary in Django. If you want to compare your code with the final code of the project, then click the link below:
Get Source Code: Click here to get the source code you’ll use to build a personal diary web app with Django and Python in this tutorial.
The complete code for the project is in the source_code_step_final/ directory.
Next Steps
The diary you built is fully functional and ready to use. But it is also an excellent foundation to build upon. Maybe you already have some ideas as to how you can improve your diary even more. Or you can try out one of the ideas below:
- Add a page for your most recent entries.
- Give every weekday a color.
- Show the creation date in the HTML
<title>tag. - Create an emoji of the day selection for an entry.
- Paginate the list of entries.
Throughout this tutorial, you were introduced to some base concepts and patterns that Django provides. Hopefully, it sparked some interest to dive deeper into this Python web framework. If you want to continue your journey and learn more, you can check out these tutorials:
- Your First Steps With Django: Set Up a Django Project
- Get Started With Django Part 1: Build a Portfolio App
- What You Need to Know to Manage Users in Django Admin
- Customize the Django Admin With Python
- Build a Blog Using Django, Vue, and GraphQL
You can apply the knowledge you gained by completing your diary project to other Django tutorials and take your web app skills to the next level!
Conclusion
In this tutorial, you created a personal diary from scratch using Django. You learned how to build a full-featured web application that you can use day to day. It takes advantage of Django’s many strengths, including the admin site, class-based views, the message framework, and the templating system.
This Django project is also a perfect basis for your future Django projects. The steps you finished in this diary project are basically the same for other projects, like a blog or a to-do app.
In this tutorial, you learned how to:
- Set up a Django project
- Work with the standard SQLite database
- Make use of the Django admin site
- Create models and class-based views
- Nest and style templates
- Secure your diary with authentication
You can download the complete source code for the Django diary by clicking the link below:
Get Source Code: Click here to get the source code you’ll use to build a personal diary web app with Django and Python in this tutorial.


