Bridging Node.js and Python with PyNode to Predict Home Prices
 By
By

Introduction
In this article I demonstrate a novel Node.js package named PyNode used to invoke Python code within a Node.js application and, more importantly, receive Python return types in the calling Node.js application. To facilitate demonstrating this awesomeness I use the popular scikit-learn Python library to load the included California Housing dataset from the 1990 US Census and build a Linear Regression model for predicting home values within a Express.js application. This may sound odd at first but, if you consider the enormous amount of functionality this unleashes by lowering the bar to harnessing the powerful Data Science and Machine Learning Python ecosystem its easy to get excited about.
The code for the demo app is available on GitHub for you to experiment with.
Contents
- Introducing PyNode
- A Note on Installing PyNode
- Setting Up the Demo Project
- The Python Code
- The Node.js Code (Calling PyNode from Node.js)
- The UI Code
- Learn More
Introducing PyNode
Executing a program (ie, a Python script) within a Node.js application is not something that would usually warrant a custom library or, a dedicated blog post for that matter. Such things are as simple as requiring the Node.js child_process package, using it to spawn a subprocess, invoke the Python interpreter, pass a path to a Python script with some optional arguments similar to what is done via the command line. See this StackOverflow post for example.
PyNode instead fully bridges the two environments by utilizing both the Node.js and Python C / C++ API bindings to seamlessly interoperate from Node.js to Python and back. In this way JavaScript function parameters are converted to Python types during the call of specified Python functions all the while converting returned pure Python types to JavaScript types. In my opinion this is a significant improvement over streaming and parsing data as it comes back from Python via standard output affording a layer of type safety at the interface between the two languages.
PyNode is a fairly new project but, the underlying C/C++ code is reasonably approachable and the client facing JavaScript is simple to use. Once installed, using PyNode in a Node.js application requires relatively minimal ceremony limited to the following general steps expanded from the PyNode GitHub repo:
1) Require the package
const pynode = require('@fridgerator/pynode');2) Launch the Python interpreter
pynode.startInterpreter();3) Update the Python search path to point to your Python modules
pynode.appendSysPath('./');
pynode.appendSysPath('./some/other/folder/with/python/modules');
4) Load the Python module containing functions you want to use
pynode.openFile('test');5) Invoke PyNode's call function to call Python functions while optionally passing in parameters you would like it to use.
let x = pynode.call('add', 1, 2)
x === 3 // true
Where the Python module test.py is as follows.
def add(a, b):
  return a + b
A Note on Installing PyNode
As you may have guessed installing the PyNode C++ extension module is a bit pecular but, to be fair bridging Python execution with Node.js is, albeit totally awesome, pecularly in an of itself at the same time. To properly build the link between the CPython C API and Node.js's v8 C++ bindings you need to have the python-config script in your environment's PATH variable so the compiler flags can be easily found when building the Node.js addon.
Setting Up the Demo Project
Ready for some code yet? Me too but, first I gotta install my dev toolset then I can get to building the demo app.
First things first, I initialize the project with npm init.
$ npm init
This utility will walk you through creating a package.json file.
It only covers the most common items, and tries to guess sensible defaults.

See `npm help json` for definitive documentation on these fields
and exactly what they do.

Use `npm install <pkg>` afterwards to install a package and
save it as a dependency in the package.json file.

Press ^C at any time to quit.
package name: (pynode_demo)
version: (1.0.0)
description:
entry point: (index.js) server.js
test command:
git repository:
keywords:
author:
license: (ISC)
About to write to /Users/adammcquistan/pynode_demo/package.json:

{
  "name": "pynode_demo",
  "version": "1.0.0",
  "description": "",
  "main": "server.js",
  "scripts": {
    "test": "echo \"Error: no test specified\" && exit 1"
  },
  "author": "",
  "license": "ISC"
}


Is this OK? (yes)
Following that I create a Python 3 virtual environment, a must do anytime I start a Python related project, then symlink my python-config to the bin directory of the virtual environment folder as show below.
$ python3 -m venv venv
$ ln -s /usr/local/bin/python3.6-config venv/bin/python-config
$ ls -l venv/bin/
total 64
-rw-r--r--  1 adammcquistan  staff  2229 Aug 19 14:17 activate
-rw-r--r--  1 adammcquistan  staff  1285 Aug 19 14:17 activate.csh
-rw-r--r--  1 adammcquistan  staff  2437 Aug 19 14:17 activate.fish
-rwxr-xr-x  1 adammcquistan  staff   283 Aug 19 14:17 easy_install
-rwxr-xr-x  1 adammcquistan  staff   283 Aug 19 14:17 easy_install-3.7
-rwxr-xr-x  1 adammcquistan  staff   265 Aug 19 14:17 pip
-rwxr-xr-x  1 adammcquistan  staff   265 Aug 19 14:17 pip3
-rwxr-xr-x  1 adammcquistan  staff   265 Aug 19 14:17 pip3.7
lrwxr-xr-x  1 adammcquistan  staff     7 Aug 19 14:17 python -> python3
lrwxr-xr-x  1 adammcquistan  staff    31 Aug 19 14:18 python-config -> /usr/local/bin/python3.6-config
lrwxr-xr-x  1 adammcquistan  staff    42 Aug 19 14:17 python3 -> /usr/local/Cellar/python/3.7.2/bin/python3
Next up I activate the Python virtual environment and install PyNode.
$ source venv/bin/activate
(venv) $ npm install @fridgerator/pynode --save

> @fridgerator/pynode@0.2.8 install /Users/adammcquistan/pynode_demo/node_modules/@fridgerator/pynode
> node-gyp rebuild

  CXX(target) Release/obj.target/PyNode/src/main.o
  CXX(target) Release/obj.target/PyNode/src/helpers.o
  SOLINK_MODULE(target) Release/PyNode.node
npm WARN sass-loader@7.0.1 requires a peer of webpack@^3.0.0 || ^4.0.0 but none is installed. You must install peer dependencies yourself.
npm WARN adammcquistan@1.0.0 No description
npm WARN adammcquistan@1.0.0 No repository field.

+ @fridgerator/pynode@0.2.8
added 2 packages from 9 contributors in 10.401s
Next I add a couple of other standard Node.js packages for building an Express.js app.
(venv) $ npm install --save express body-parser nodemonAnd following that I install Python's scikit-learn library with pip.
(venv) $ pip install -U scikit-learnThe Python Code
As mentioned previously the demo project utilizes the scikit-learn Python scientific computing library which comes with the California Housing Price dataset from the 1990 US Census. I utilize the California housing dataset to build a Linear Regression machine learning model as shown below from the housing_analyzer.py module.
# housing_analyzer.py

import numpy as np
from sklearn.datasets import fetch_california_housing
from sklearn.linear_model import LinearRegression

def py_float(val, decimals=2):
    return float(round(val, decimals))

class Variable:
    def __init__(self, metadata, data, idx=-1, regressor=None):
        metadata = metadata.strip()[2:].split()
        self.name = metadata[0]
        self.desc = ' '.join(metadata[1:]).strip()
        self.coef = py_float(regressor.coef_[idx], decimals=3) if regressor else None
        self.idx = idx
        self._min = py_float(np.min(data))
        self._max = py_float(np.max(data))
        self.mean = py_float(np.mean(data))
        self.median = py_float(np.median(data))
        self.std = py_float(np.std(data))
        self.first = py_float(np.percentile(data, 0.25))
        self.third = py_float(np.percentile(data, 0.75))

    def to_dict(self):
        return {
            'name':   self.name,
            'desc':   self.desc,
            'coef': self.coef,
            'min':    self._min,
            'max':    self._max,
            'mean':   self.mean,
            'median': self.median,
            'std':    self.std,
            'first':  self.first,
            'third':  self.third,
            'value':  0
        }

def build_regression_model():
    cali_housing = fetch_california_housing()

    select_columns = [0,1,2,3,6,7]

    metadata_lines = [line for idx, line in enumerate(cali_housing.DESCR.split('\n')[12:20]) if idx in select_columns]

    regressor = LinearRegression()
    data = cali_housing.data[:, select_columns]
    regressor.fit(data, cali_housing.target)

    indep_variables = {}

    for idx, line in enumerate(metadata_lines):
        variable = Variable(line, data[:, idx], idx, regressor=regressor)
        indep_variables[variable.name] = variable.to_dict()

    return {
      'intercept':py_float(regressor.intercept_, decimals=3),
      'indepVariables':indep_variables,
      'depVariable':Variable('- ActualValues: the actual values of homes', cali_housing.target).to_dict()
    }
The function that will be called from the Node.js application is build_regression_model which loads the housing dataset, trains a regression model, then uses the metadata in the dataset DESCR variable to parse out the names and description of the variables. Since the primary focus of this article is to introduce the PyNode package and demonstrate how it can be used to hook in Python code within a Node.js app I will be skimping on the details of anyting that isn't directly necessary for using PyNode. However, please check the links in Learning More About Python, Node.js, and scikit-learn for related material if your interested.
The important thing to note here is that the data that is returned from the build_regression_model destined for the calling Node.js code is of a pure Python data type (ie, ints, floats, str, list, or dict). This is necessary because PyNode is only able to convert native Python data types back into JavaScript data types.
If it helps the reader below is the output of the DESCR variable's contents from the California housing dataset in scikit-learn's library.
>>> from sklearn.datasets import fetch_california_housing
>>> cali_housing = fetch_california_housing()
>>> print(cali_housing.DESCR)
.. _california_housing_dataset:

California Housing dataset
--------------------------

**Data Set Characteristics:**

    :Number of Instances: 20640

    :Number of Attributes: 8 numeric, predictive attributes and the target

    :Attribute Information:
        - MedInc        median income in block
        - HouseAge      median house age in block
        - AveRooms      average number of rooms
        - AveBedrms     average number of bedrooms
        - Population    block population
        - AveOccup      average house occupancy
        - Latitude      house block latitude
        - Longitude     house block longitude

    :Missing Attribute Values: None

This dataset was obtained from the StatLib repository.
http://lib.stat.cmu.edu/datasets/

The target variable is the median house value for California districts.

This dataset was derived from the 1990 U.S. census, using one row per census
block group. A block group is the smallest geographical unit for which the U.S.
Census Bureau publishes sample data (a block group typically has a population
of 600 to 3,000 people).

It can be downloaded/loaded using the
:func:`sklearn.datasets.fetch_california_housing` function.

.. topic:: References

    - Pace, R. Kelley and Ronald Barry, Sparse Spatial Autoregressions,
      Statistics and Probability Letters, 33 (1997) 291-297
And here are the independent variable's regression coefficients from training the model.
>>> from sklearn.linear_model import LinearRegression
>>> regressor = LinearRegression()
>>> regressor.fit(cali_housing.data, cali_housing.target)
>>> for variable, coef in zip(cali_housing.feature_names, regressor.coef_):
...     print(variable, coef)
...
MedInc 0.4366932931343245
HouseAge 0.009435778033237972
AveRooms -0.10732204139090447
AveBedrms 0.645065693519812
Population -3.976389421211576e-06
AveOccup -0.003786542654971
Latitude -0.42131437752714385
Longitude -0.43451375467477743
The Node.js Code, Including Calling Python via PyNode
The Express.js app is quite simple as well in that it only contains a single GET route handler which will be requested via an AJAX call from JavaScript in the browser. Below are the contents of server.js but, again I will be limiting my discussion to only the parts necessary to utilize the PyNode package since I assume the reader is reasonably familar with both Python and Node.js development. So check the links in Learning More About Python, Node.js, and scikit-learn for additional context if necessary.
// server.js

const express = require('express');
const bodyParser = require('body-parser');
const pynode = require('@fridgerator/pynode');
const _ = require('lodash');

pynode.startInterpreter();
pynode.appendSysPath('./');

// needed this so the Python interpreter can find numpy and sklearn package
// imported at the top of housing_analyzer.py module
pynode.appendSysPath('./venv/lib/python3.6/site-packages');
pynode.openFile('housing_analyzer');

const app = express();
let regressionModel = {};

app.use(bodyParser.json());
app.use(express.static(__dirname + '/static'));

app.get('/api/house-price-model', (req, res) => {
  new Promise((resolve, reject) => {
      try {
        if (_.isEmpty(regressionModel)) {
          console.log('calling python');
          regressionModel = pynode.call('build_regression_model');
        }
        resolve(regressionModel);
      } catch(err) {
        console.log(err);
        reject('failed to load housing variables');
      }
  })
  .then(response => res.send(response))
  .catch(err => res.err(err));
});

app.listen(3000, () => {
  console.log('Server is up and running on port 3000');
});
The first thing to draw attention to after I require the PyNode library is that I launch the Python interpreter via pynode.startInterpreter() then add the current directory to the Python search path so it knows where to find housing_analyzer.py module (it lives in the same directory as the server.js file). I must also add the path to the site-packages directory within the virtual environment so when I tell PyNode to load the housing_analyzer module using pynode.openFile(...) it doesn't crash and burn because it can't find the scikit-learn and Numpy packages I imported. Lastly I ask you to focus in on the GET request handler where I use pynode.call('build_regression_model') to call the previously discussed Python function and assign the returned JavaScript object to the globally scoped regressioModel variable. I made the regressionModel variable globally scoped, effectively caching the regression model data, so on subsequent GET requests its readily available rather than sourcing the data again and building the regressor via Python which can take some time.
The UI Code
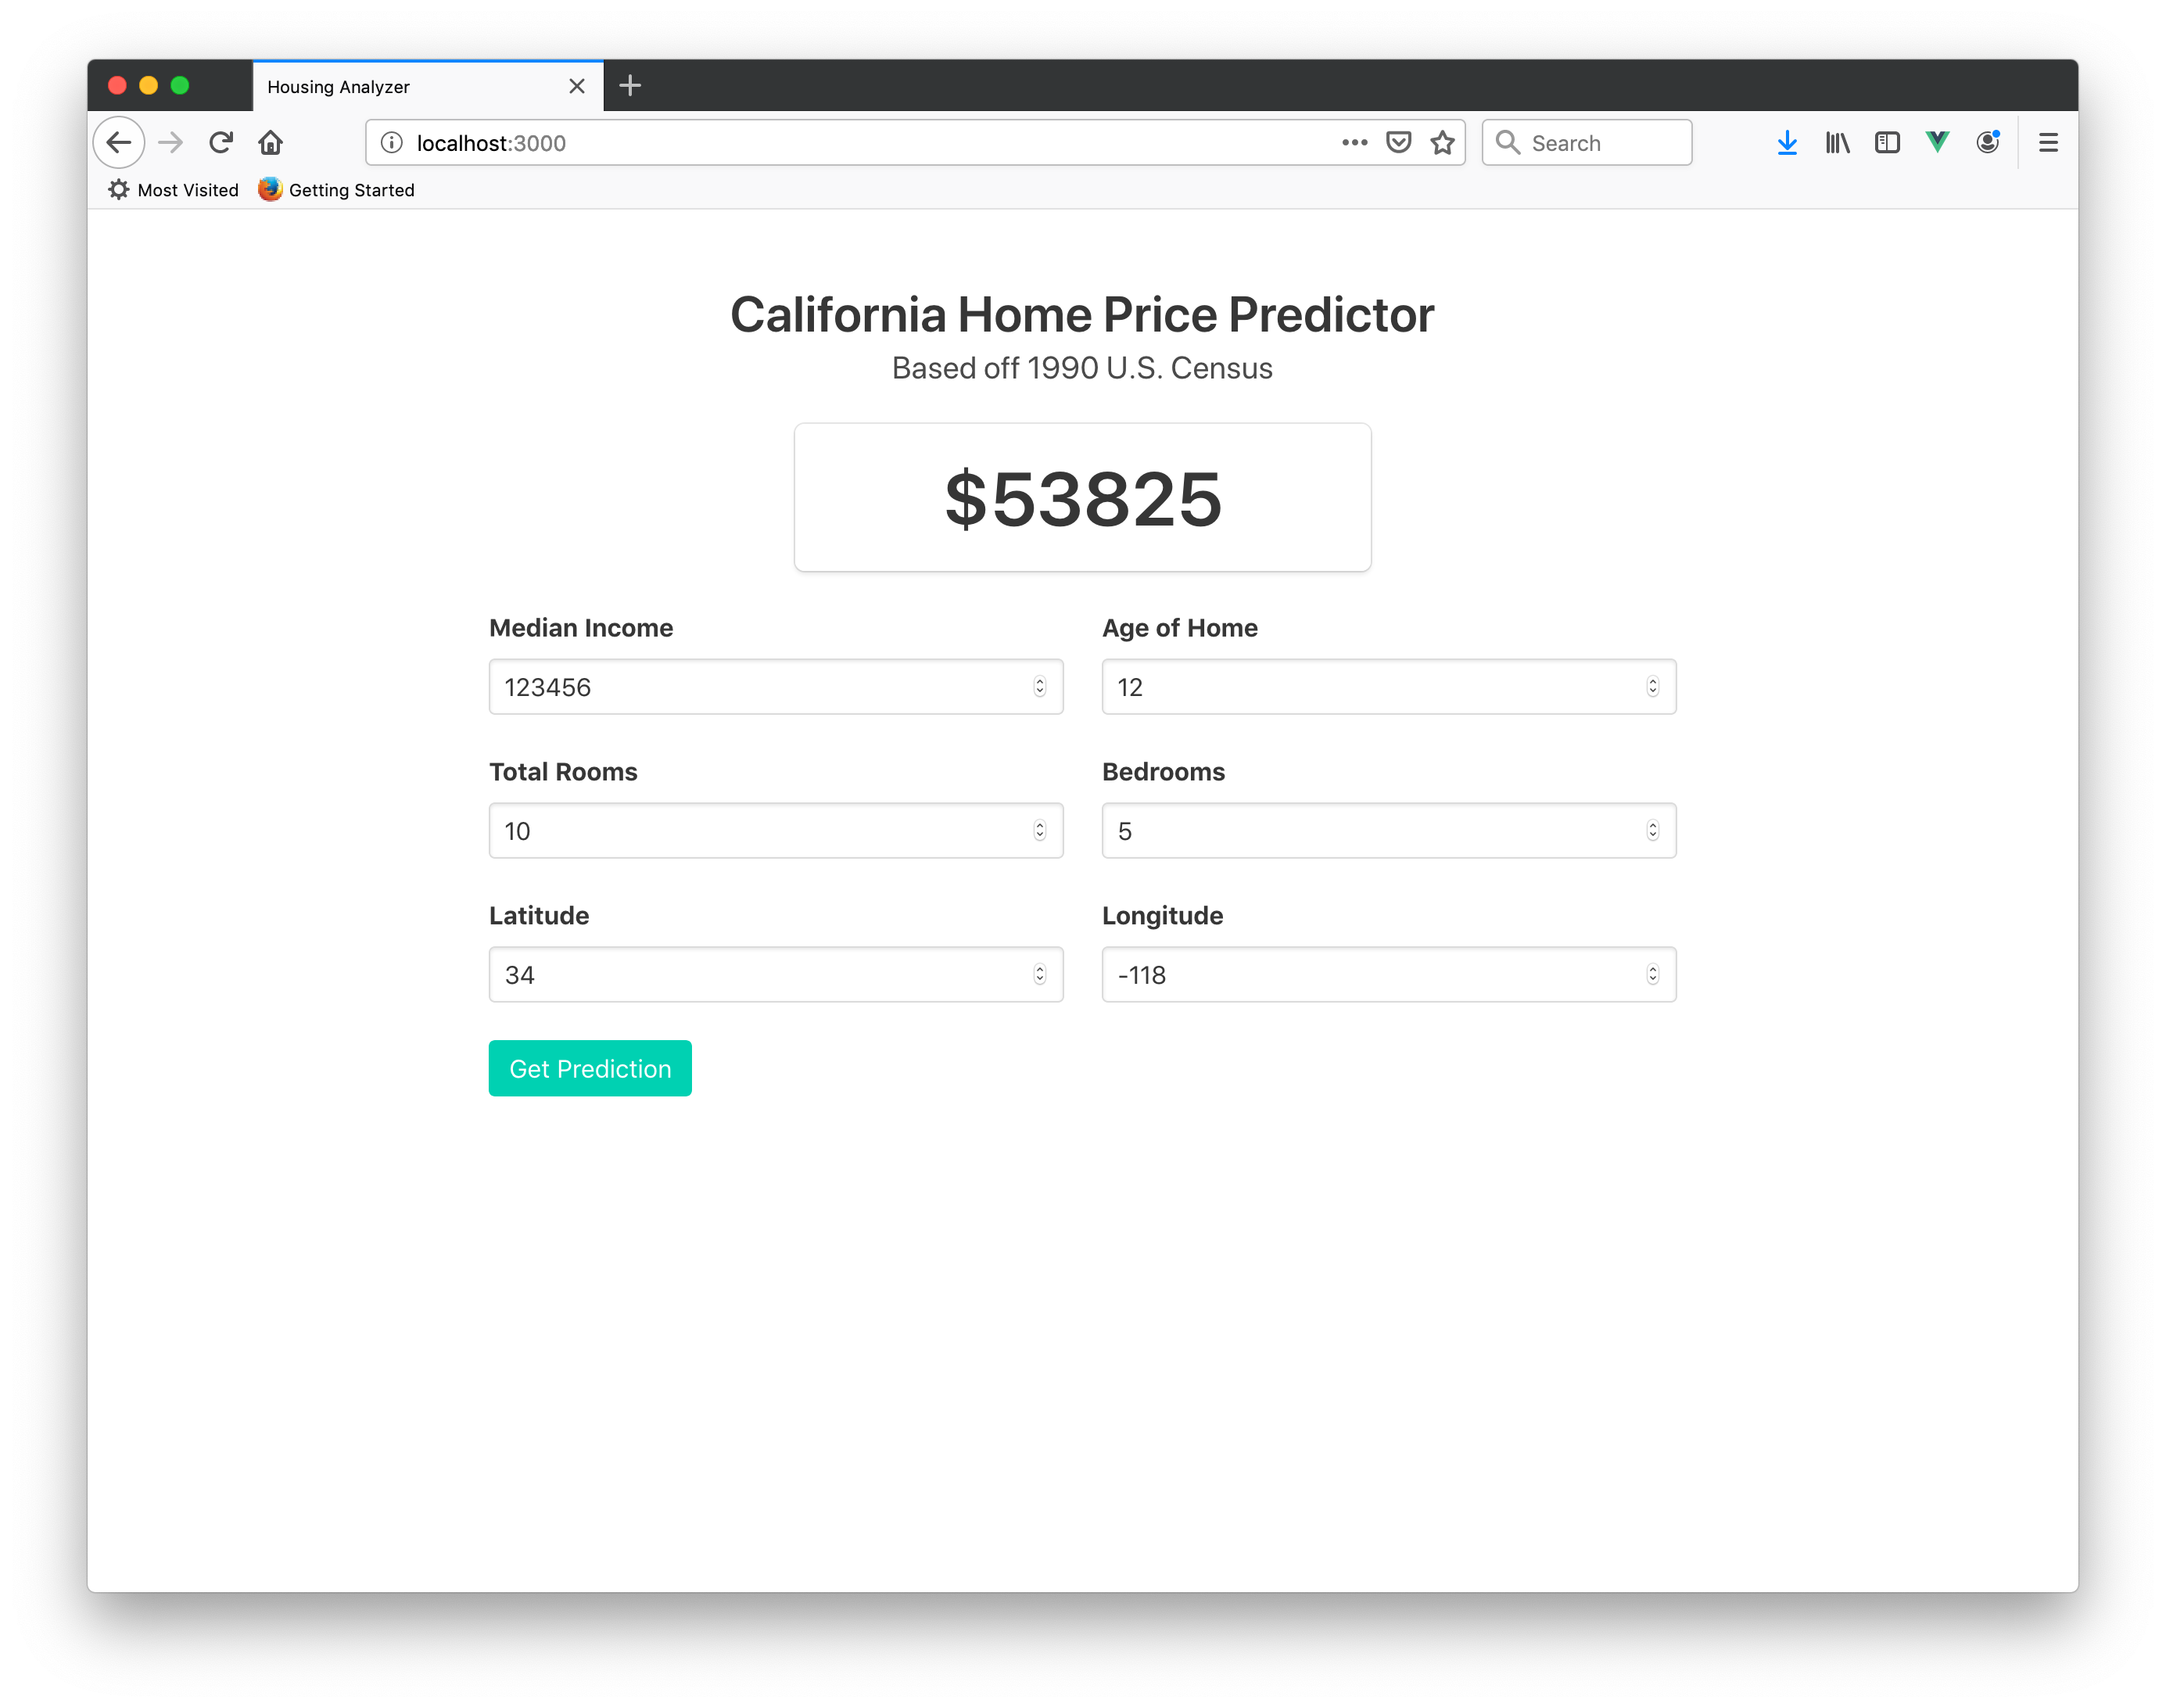
The UI consists of a minimal HTML view utilizing my favorite frontend library, Vue.js. Upon loading the HTML view the Express.js GET endpoint is called via an AJAX request using Axios.js to fetch the regression model data and presents numeric input fields for a user to enter values for the independent variables used to predict housing prices. Upon clicking the Get Prediction button the independent variables' inputs and regression model coefficients are used to make the prediction.
<!DOCTYPE html>
<html lang="en">
<head>
  <meta charset="UTF-8">
  <meta name="viewport" content="width=device-width, initial-scale=1.0">
  <meta http-equiv="X-UA-Compatible" content="ie=edge">
  <link rel="stylesheet" href="css/bulma-0.7.5/css/bulma.min.css">
  <script src="js/vue.min.js"></script>
  <!-- <script src="https://unpkg.com/axios/dist/axios.min.js"></script> -->
  <script src="js/axios.min.js"></script>
  <title>Housing Analyzer</title>
</head>
<body>
  <body>
    <div class="section">

      <div class="container" id="app">
        <h1 class="title has-text-centered">California Home Price Predictor</h1>
        <h3 class="subtitle has-text-centered">Based off 1990 U.S. Census</h3>

        <div v-if="ready">
          <div class="columns">
            <div class="column is-offset-4 is-4">
              <div class="box">
                <h2 class="title has-text-centered is-size-1">
                  ${{prediction}}
                </h2>
              </div>
            </div>
          </div>

          <div class="columns">
            <div class="column is-offset-2 is-8">
              <div class="columns">
                <div class="column">
                  <div class="field">
                    <label for="" class="label">Median Income</label>
                    <div class="control">
                      <input v-model="vars.MedInc.value" type="number" :placeholder="vars.MedInc.desc" class="input">
                    </div>
                    <p class="help is-danger" v-if="!validIncome">
                      Income must be positive
                    </p>
                  </div>
                </div>
                <div class="column">
                  <div class="field">
                    <label for="" class="label">Age of Home</label>
                    <div class="control">
                      <input v-model="vars.HouseAge.value" type="number" :placeholder="vars.HouseAge.desc" class="input">
                    </div>
                    <p class="help is-danger" v-if="!validHomeAge">
                      Home age must be positive
                    </p>
                  </div>
                </div>
              </div>

              <div class="columns">
                <div class="column">
                  <div class="field">
                    <label for="" class="label">Total Rooms</label>
                    <div class="control">
                      <input v-model="vars.AveRooms.value" type="number" :placeholder="vars.AveRooms.desc" class="input">
                    </div>
                    <p class="help is-danger" v-if="!validTotalRms">
                      Rooms must be positive
                    </p>
                  </div>
                </div>
                <div class="column">
                  <div class="field">
                    <label for="" class="label">Bedrooms</label>
                    <div class="control">
                      <input v-model="vars.AveBedrms.value" type="number" placeholder="vars.AveBedrms.desc" class="input">
                    </div>
                    <p class="help is-danger" v-if="!validBedrms">
                      Bedrooms must be positive
                    </p>
                  </div>
                </div>
              </div>

              <div class="columns">
                <div class="column">
                  <div class="field">
                    <label for="" class="label">Latitude</label>
                    <div class="control">
                      <input v-model="vars.Latitude.value" type="number" :placeholder="`${vars.Latitude.desc} (${vars.Latitude.min} - ${vars.Latitude.max})`" class="input">
                    </div>
                    <p class="help is-danger" v-if="!validLat">
                      Must be between {{vars.Latitude.min}} - {{vars.Latitude.max}}
                    </p>
                  </div>
                </div>
                <div class="column">
                  <div class="field">
                    <label for="" class="label">Longitude</label>
                    <div class="control">
                      <input v-model="vars.Longitude.value" type="number" :placeholder="`${vars.Longitude.desc} (${vars.Longitude.min} - ${vars.Longitude.max})`" class="input">
                    </div>
                    <p class="help is-danger" v-if="!validLong">
                      Must be between {{vars.Longitude.min}} - {{vars.Longitude.max}}
                    </p>
                  </div>
                </div>
              </div>

              <div class="field">
                <div class="field-label">
                  <!-- Left empty for spacing -->
                </div>
                <div class="field-body">
                  <div class="field">
                    <div class="control">
                      <button @click="predictHomeValue" class="button is-primary" :disable="!canMakePrediction">
                        Get Prediction
                      </button>
                    </div>
                  </div>
                </div>
              </div>
            </div>
          </div>

        </div>

      </div>

    </div>


    <script>
      new Vue({
        el: '#app',
        data: {
          ready: false,
          apiBaseURL: 'http://localhost:3000/api',
          vars: {
            MedInc: {},
            HouseAge: {},
            AveRooms: {},
            AveBedrms: {},
            Latitude: {},
            Longitude: {}
          },
          target: {},
          intercept: 0,
          prediction: 0
        },
        methods: {
          loadVariables() {
            const self = this;
            return axios.get(`${this.apiBaseURL}/house-price-model`)
              .then(response => {
                  console.log(response.data);
                  const { indepVariables, intercept } = response.data;
                  self.vars = indepVariables;
                  self.intercept = intercept;
                  self.ready = true;
              });
          },
          predictHomeValue () {
            this.prediction = Math.floor(Object.values(this.vars)
                              .filter(v => v.value)
                              .map(v => parseInt(v.value) * v.coef)
                              .reduce((acc, val) => acc + val) + this.intercept);
          },
          parseToNumeric(value) {
            try {
              return parseFloat(value);
            } catch(e) {
              return 0.0;
            }
          }
        },
        computed: {
          canMakePrediction () {
            return this.validLat
              && this.validLong
              && this.validIncome
              && this.validTotalRms
              && this.validBedrms
              && this.validHomeAge
          },
          validLat () {
            const { value, min, max } = this.vars.Latitude;
            const lat = this.parseToNumeric(value);
            return lat >= min && lat <= max;
          },
          validLong () {
            const { value, min, max } = this.vars.Longitude;
            const long = this.parseToNumeric(value);
            return long >= min && long <= max;
          },
          validIncome () {
            return this.parseToNumeric(this.vars.MedInc.value) >= 0;
          },
          validTotalRms () {
            return this.parseToNumeric(this.vars.AveRooms.value) >= 0;
          },
          validBedrms () {
            return this.parseToNumeric(this.vars.AveBedrms.value) >= 0;
          },
          validHomeAge () {
            return this.parseToNumeric(this.vars.HouseAge.value) >= 0;
          }
        },
        beforeMount() {
            return this.loadVariables()
        }
      })
    </script>
  </body>
</body>
</html>
Learning More About Python, Node.js, and scikit-learn
- Got a great balance of breadth and depth in developing Node.js / Express.js apps the book Express in Action: Writing, building, and testing Node.js applications is a great choice
- The best coverage I've found for using Python machine learning with scikit-learn as well as a few other choice ML libraries is Hands-On Machine Learning with Scikit-Learn, Keras, and TensorFlow: Concepts, Tools, and Techniques to Build Intelligent Systems
- You may also be interested in taking a look at my StackAbuse.com article titled Using Machine Learning to Predict the Weather where I go into depth on how to build more advanced Linear Regression models with Python
Conclusion
In this article I have demonstrated the novel Node.js C++ extension package, PyNode, that enables Node.js / Python interoperability in a way that allows near seamless passing of data when calling Python functions from within Node.js applications. As a developer who works in the domains of both JavaScript/Node.js as well as Python I have to admit that I am quite excited at the opportunity to utilize the expansiveness and maturity the Python data science and machine learning community.