If you've ever used ChatGPT, then you've witnessed its intuition. With OpenAI's APIs, code generation, text completion, text comparison, model training, and image generation are all in the bag for developers to explore and integrate into apps.
In this tutorial, you'll learn how to use OpenAI's API with Python to generate, edit, and vary images using natural language prompts.
Getting Started With OpenAI Using Python
You need to set up a few things before starting this tutorial. First, ensure you've installed Python's latest version on your computer. If you use a Linux distribution like Ubuntu, you might also want to see how to install Python on Ubuntu.
Create a new folder for your project and open your command line to your project directory.
Next is the OpenAI package installation. You need to install pillow to convert images to RGBA while using the image editing endpoint. You might also want to install python-dotenv; you'll use this to mask secret keys.
We recommend creating a dedicated Python virtual environment to isolate dependencies.
The code used in this project is available in a GitHub repository and is free for you to use under the MIT license.
To install the python-dotenv, pillow, and openai packages, run the following command in the terminal:
pip install openai python-dotenv pillow
Now head over to OpenAI and log in to your dashboard to grab your API key:
-
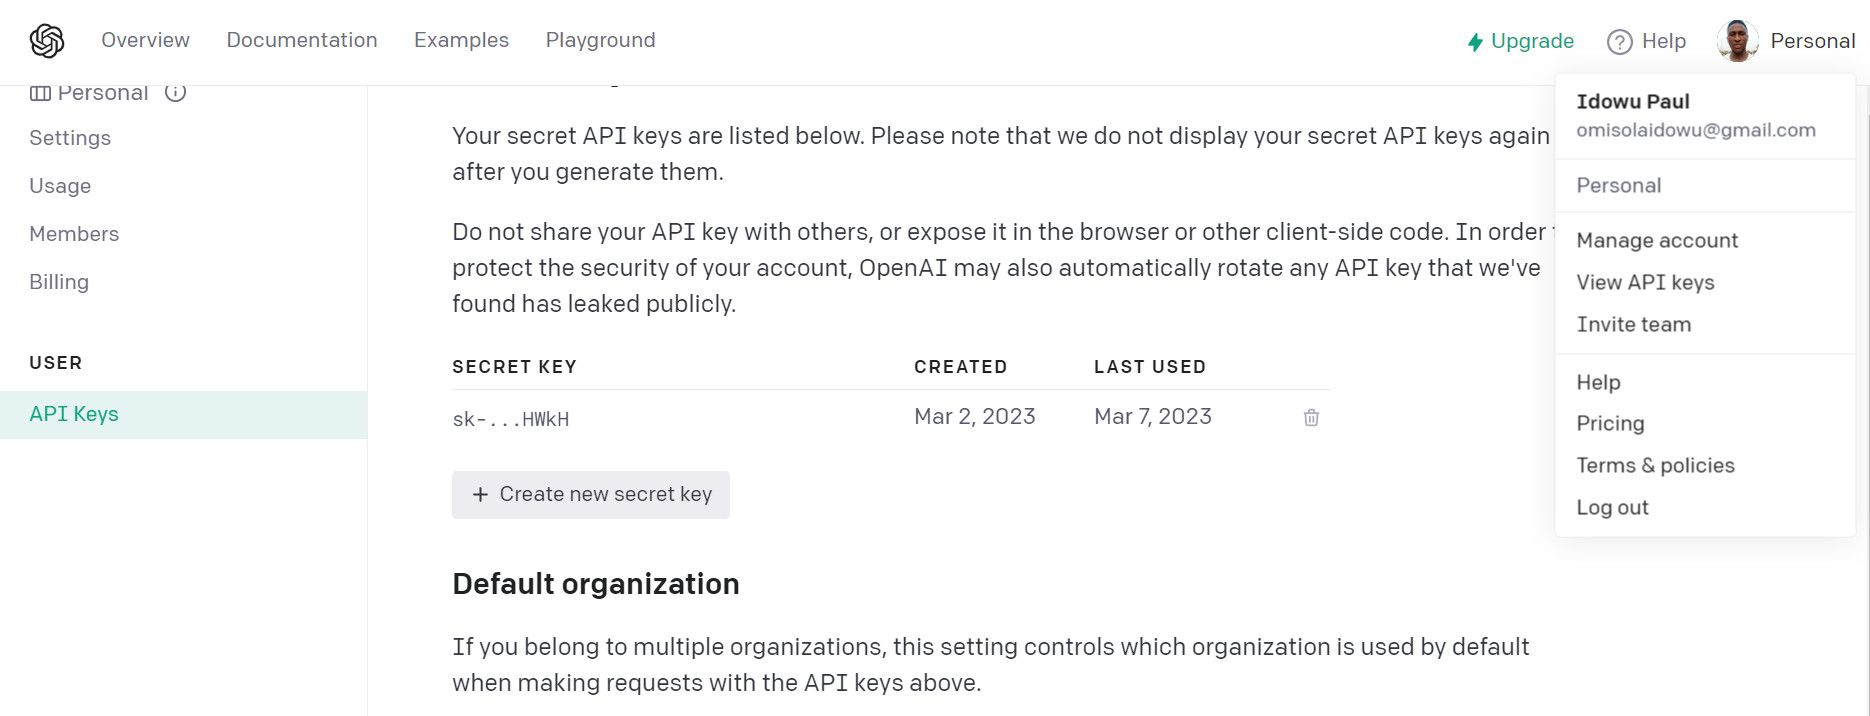
Once you've logged in, click your profile icon at the top right section.
-
Go to View API Keys. If your API key isn't visible, click Create new secret key to generate a new one.
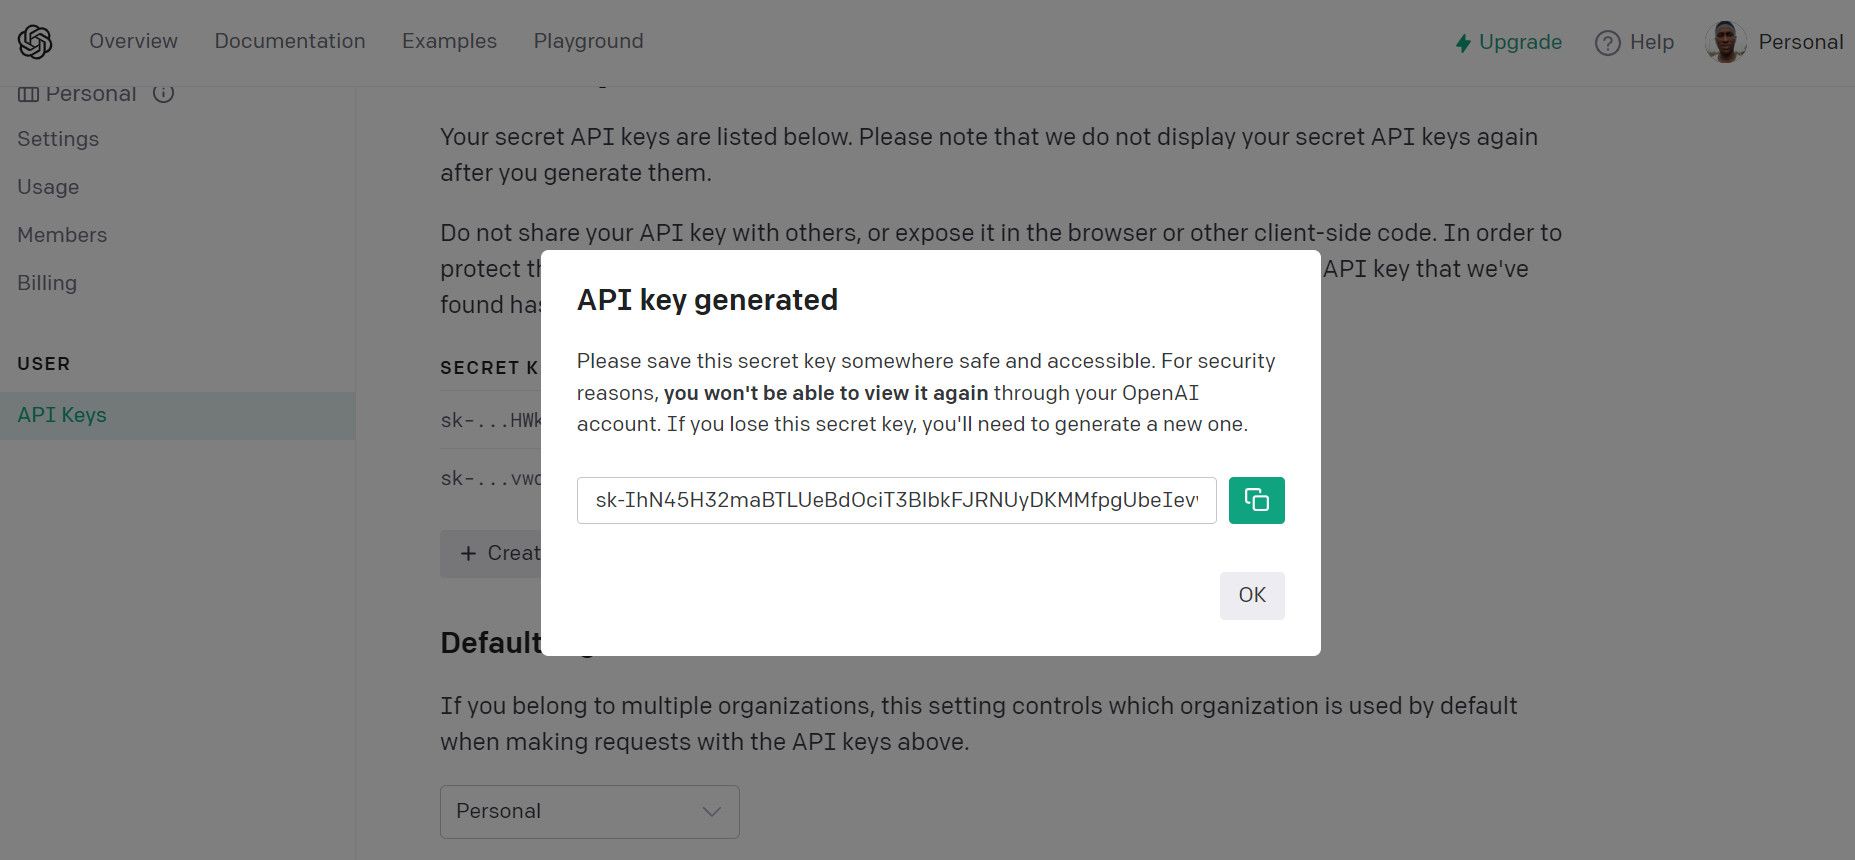
- Copy the generated secret key and paste it somewhere safe on your computer. You might want to paste it into an environment variable file in your project root directory for security.


How to Generate and Edit Images With OpenAI API in Python
OpenAI API's image generation features endpoints for generating new images, creating image variations, and editing them.
In the following sections, you'll explore these endpoints to generate, edit, tweak, and download images using natural language prompts.
Generating Images Using the OpenAI API
The image generation endpoint accepts three keyword arguments. These include prompt, n, and size.
The prompt keyword is a string of text describing the image you wish to generate, while n is the number of images to generate during an API call. The size is the image size, and as of writing, it only accepts 256x256, 512x512, and 1024x1024 pixels, according to the official OpenAI image generation documentation.
The following code generates images using natural language prompts and outputs their URL (image addresses):
        import openai
import os
import requests
from dotenv import load_dotenv
from PIL import Image
load_dotenv()


class ImageGenerator:
    def __init__(self) -> str:
        self.image_url: str
        openai.api_key = os.getenv("OPENAI_API_KEY")
        self.APIKey = openai.api_key
        self.name = None

    def generateImage(self, Prompt, ImageCount, ImageSize):
        try:
            self.APIKey
            response = openai.Image.create(
            prompt = Prompt,
            n = ImageCount,
            size = ImageSize,
            )
            self.image_url = response['data']

            self.image_url = [image["url"] for image in self.image_url]
            print(self.image_url)
            return self.image_url
        except openai.error.OpenAIError as e:
            print(e.http_status)
            print(e.error)

    def downloadImage(self, names)-> None:
        try:
            self.name = names
            for url in self.image_url:
                image = requests.get(url)
            for name in self.name:
                with open("{}.png".format(name), "wb") as f:
                    f.write(image.content)
        except:
            print("An error occured")
            return self.name

# Instantiate the class
imageGen = ImageGenerator()

# Generate images:
imageGen.generateImage(
Prompt = "Giant lion, bear, ape, and tiger standing on a water water fall",
ImageCount = 2,
ImageSize = '1024x1024'
)

# Download the images:
imageGen.downloadImage(names=[
"Animals",
"Animals2"
])
The above code contains an ImageGenerator class with the image_url and APIKey attributes. The generateImage method adapts the requirements of the image generation endpoint. It generates n URLs using the natural language prompt, depending on the ImageCount value.
However, self.image_url extracts the generated image URLs from the JSON response into a list using the for loop in a list comprehension.
The output looks like this:

Finally, the downloadImage method downloads each image by requesting the generated addresses. This method accepts n number of names that you wish to give each image.
Editing Images Using the OpenAI API
The editing endpoint allows you to edit an existing image based on a mask template. The mask is an RGBA format with an annotated, transparent area and must be the same size as the image you want to edit.
When you provide a mask, the editing endpoint replaces its masked area with the new prompt in the existing image to produce a new one. Add the following methods to the above previous class:
        class ImageGenerator:
    def __init__(self, ...):
        ..............

    def convertImage(self, maskName):
       image = Image.open("{}.png".format(maskName))
       rgba_image = image.convert('RGBA')
       rgba_image.save("{}.png".format(maskName))

       return rgba_image


    def editImage(self, imageName, maskName, ImageCount, ImageSize, Prompt) -> str:
        self.convertImage(maskName)
        response = openai.Image.create_edit(
          image = open("{}.png".format(imageName), "rb"),
          mask = open("{}.png".format(maskName), "rb"),
          prompt = Prompt,
          n = ImageCount,
          size = ImageSize,
          )
        self.image_url = response['data']
        self.image_url = [image["url"] for image in self.image_url]

        print(self.image_url)
        return self.image_url

# Edit an existing image:
imageGen.editImage(
   imageName = "Animals",
   maskName = "mask",
   ImageCount = 1,
   ImageSize = "1024x1024",
   Prompt = "An eagle standing on the river bank drinking water with a big mountain"
)

# Download the edited image:
imageGen.downloadImage(names=[
"New Animals",
])
The convertImage method converts the mask image to RGBA format. You can achieve this using the convert method from Python's pillow package (imported as PIL).
Once converted, it saves the new mask as an override of the existing one. Thus, image conversion is the first task the editing method (editImage) executes.
The image reads the target image from an existing file, while the mask reads the converted mask image, which must have a transparent area.
You can mark out a transparent area in the mask using photo editing software like Gimp or Photoshop.
For example, the image we want to edit using the prompt in the code above is:

Now, assume you want to replace the antelope standing by the river bank with an eagle, as stated in the prompt.
Here's what the mask looks like:

Since the keyword in the prompt from the above code says, "an eagle standing on the river bank," the blank spot gets filled up by an eagle, replacing the antelope that was previously there.
Here's the new image in this case:

You can try playing around with the image editing endpoint using other photos.
Generating Image Variations in Python Using the OpenAI API
The variation endpoint generates alternative images from an existing image. Expand the image generator class further by adding an image variation method as shown below:
        class ImageGenerator:
    def __init__(self) -> str:
        .............

    def imageVariations(self, ImageName, VariationCount, ImageSize):
        response = openai.Image.create_variation(
            image = open("{}.png".format(ImageName), "rb"),
            n = VariationCount,
            size = ImageSize
            )

        self.image_url = response['data']

        self.image_url = [image["url"] for image in self.image_url]
        print(self.image_url)
        return self.image_url

# Instantiate the class
imageGen = ImageGenerator()

# Generate variations for an existing image
imageGen.imageVariations(
    ImageName = "New_Animals",
    VariationCount = 2,
    ImageSize = "1024x1024"
)

# Download the variations
imageGen.downloadImage(names=[
    "Variation1",
    "Variation2",
    ]
)
The above code generates variations of an image.
Use OpenAI to Your Advantage
While some people fear AI might steal their jobs, it might be a haven, after all—if you learn to control and use it. This OpenAI image creation tutorial is just one of many use cases of AI in the real world. The OpenAI APIs provide handy pre-trained models you can easily integrate into your app. So you can take up the challenge and build something worthwhile from this tutorial.
Although the image generation API is still in beta as of writing, it already lets you craft imaginary artworks. Hopefully, it gets further updates to allow upscaling and accept varying image sizes.