Watch Now This tutorial has a related video course created by the Real Python team. Watch it together with the written tutorial to deepen your understanding: Create a Python Wordle Clone With Rich
In this tutorial, you’ll build your own Wordle clone for the terminal. Since Josh Wardle launched Wordle in October 2021, millions of people have played it. While you can play the original game on the Web, you’ll create your version as a command-line application and then use the Rich library to make it look good.
As you follow along in this step-by-step project, you’ll practice how to set up a simple prototype game before iteratively developing it into a solid application.
In this tutorial, you’ll learn how to:
- Build out a command-line application from a prototype to a polished game
- Read and validate user input
- Use Rich’s console to create an attractive user interface in the terminal
- Organize your code into functions
- Provide your users with actionable feedback
You’ll create Wyrdl, your own Wordle clone in Python. This project is for anyone getting comfortable with Python who wants to build a terminal application from the ground up. Throughout the tutorial, you’ll build your code step-by-step while focusing on having a game that you can play from the start. You can download all the code by clicking below:
Free Source Code: Click here to download the free source code that you’ll use to build a Wordle clone with Python and Rich.
Read on to see what you’ll be building.
Demo: Your Python Wordle Clone
In Wordle, you have six attempts to guess a secret five-letter word. After each guess, you’ll get feedback about which letters are correctly placed, which are misplaced, and which are wrong.
The New York Times bought the original Wordle in early 2022, and you can now play the game on their website. The game has a social aspect that you won’t re-create in this project. There’s one secret word per day, and all players are guessing the same word.
Your version of the game will look like the following:
After you make a guess, each letter is categorized. Correct letters are marked in green, misplaced letters are marked in yellow, and wrong letters are marked in gray.
If you make any mistakes, like guessing a word with six letters, then the game will give you appropriate feedback and let you take another guess.
Project Overview
An important part of this project is bootstrapping the application early. You want to have code that runs so that you can test that your code works, and you can experiment with different ways of implementing the features that you need in your game.
You’ll build your Wordle clone iteratively, going through the following steps:
-
Create a simple prototype that allows you to guess a secret word and gives you feedback on the individual letters.
-
Make the game more interesting by including a list of words that the game randomly chooses from.
-
Refactor the code to use functions.
-
Add color and style to the game using the Rich library.
-
Provide actionable feedback to your users when they play the game.
-
Improve the user interface by adding the status of all the letters in the alphabet.
As you work through the tutorial, you’ll see how you can start with a small idea and grow it into a full-featured application. After all, that was Wordle’s journey!
Prerequisites
In this tutorial, you’ll build a Wordle clone using Python and Rich. While working through the steps, it’s helpful if you’re comfortable with the following concepts:
- Reading input from the user at the terminal
- Using
ifstatements to check different conditions - Repeating actions with
forandwhileloops - Organizing data in structures like lists and dictionaries
- Encapsulating code with functions
If you’re not confident in your knowledge of these prerequisites, then that’s okay too! In fact, going through this tutorial will help you practice these concepts. You can always stop and review the resources linked above if you get stuck.
It’s time to dive in!
Step 1: Guess a Word
In this step, you’ll build a very basic word-guessing game. The game won’t look good, and the feedback from the game will be hard to parse. Still, the building blocks for your Wordle clone will be in place. This animation shows how your game will look at the end of this step:
Your users can guess words and get information about which letters they placed correctly, which letters they misplaced, and which letters aren’t part of the word at all.
You can download the source code as it’ll look at the end of this step by clicking the link below and entering the source_code_step_1/ directory:
Free Source Code: Click here to download the free source code that you’ll use to build a Wordle clone with Python and Rich.
In this step, you’ll use input() to read words from your players, a for loop to give your users several guesses, and sets to find which letters your users have guessed correctly.
Get User Information With input()
You can get information from the user with input(). This built-in function is a great way to provide simple interactivity on the command line.
Open your REPL to try it out. Write the following:
>>> guess = input("Guess a word: ")
Guess a word: snake

>>> guess
'snake'
You can provide an optional prompt to input(). The user will see this before they enter any information. In the example above, the highlighted line shows both the prompt and the user input. The prompt asks the user to guess a word. The user enters snake and then hits Enter.
The call to input() returns the text that the user enters. You can see this in the example above, as the string "snake" has been assigned to guess.
It’s never too early to start building your game. Open your editor and create the file wyrdl.py with the following content:
# wyrdl.py

guess = input("Guess a word: ")
if guess == "SNAKE":
    print("Correct")
else:
    print("Wrong")
After you’ve read the user’s guess, you check whether their guess is equal to the secret word, "SNAKE". You evaluate their guess and inform them whether they were correct or wrong.
Note: It’s usually a good idea to create your code such that it runs as early as possible. Even if the code is just doing something small and is far away from your end goals, making it runnable means that you can start experimenting, testing, and debugging.
This may not feel like much of a game. And if you think of it as a game, it’s surely one of the most boring and frustrating ones around. There’s little replayability because the secret word is always the same. And the feedback isn’t actionable for the user since they don’t learn anything from being told they’re wrong.
You’ll soon improve your game and make something more interesting to play. To round out this subsection, you’ll fix a small usability issue. Consider the following game:
$ python wyrdl.py
Guess a word: snake
Wrong
Here, you guess correctly that the secret word is snake. However, the game tells you that’s wrong because it’s comparing your guess to the uppercase string "SNAKE". In this game, the goal is to guess words and not to figure out whether the letters are lowercase or uppercase. How can you compare two words regardless of their case?
The simplest solution is probably to explicitly convert the guess to uppercase. Then it doesn’t matter how the user inputs the word:
# wyrdl.py

guess = input("Guess a word: ").upper()
if guess == "SNAKE":
    print("Correct")
else:
    print("Wrong")
You’ve added .upper(), which forces the user’s guesses to be uppercase. This manipulation immediately makes the game more user-friendly:
$ python wyrdl.py
Guess a word: snake
Correct
Now snake is reported as correct even if you spell it in lowercase. Still, you’re only giving your users one chance to guess correctly. In the next section, you’ll expand your game with more guesses.
Use Loops to Avoid Repetitive Code
When playing Wordle, you get up to six chances to guess the correct word. One way to achieve the same in your game would be to copy the code that you’ve already written and repeat it six times. That’s a bad idea for several reasons. Most importantly, it’ll be inefficient and complicated to maintain.
Instead, you’ll use loops to achieve the repeating behavior. Python supports two main looping constructs: for and while. Typically, you’ll use for when doing definite iteration—you know in advance how many times you want to loop. On the other hand, while is great for indefinite iteration, when you don’t know up front how many times you need to repeat an action.
Note: There are other ways to create loops. Some programming languages rely on recursive function calls to create loops. Later, you’ll see an example of a recursive loop in Python, as well.
In general, though, you shouldn’t use recursion for looping in Python. Function calls are quite slow, and there are no optimizations for recursion, like you may find in other languages. You’re usually better off sticking to regular loops.
In this case, you want to ask the user six times to guess the word, so you’ll use a for loop:
# wyrdl.py

for guess_num in range(1, 7):
    guess = input(f"\nGuess {guess_num}: ").upper()
    if guess == "SNAKE":
        print("Correct")
        break

    print("Wrong")
By looping over a range, you also count the number of guesses and display that number to the user:
$ python wyrdl.py

Guess 1: wyrdl
Wrong

Guess 2: snake
Correct
There’s no point in letting the user keep guessing once they’ve found the correct answer. You use a break statement to break out of your loop early if the user guesses the right word. An additional bonus of introducing break is that you don’t need the explicit else anymore. Your code only continues if the guess is wrong.
It’s time to make the game playable, by adding some proper feedback for the user. In the next subsection, you’ll see how you can enumerate which letters the users guess correctly.
Check Letters With Sets
So far, you’ve only told the user whether they’ve guessed the correct word or not. To give them some hints that they can use to deduce the secret word, you’ll add feedback about the individual letters they guess. You’ll classify each letter as belonging to one of three categories:
- A correct letter appears in the same position in the secret word as in the guess.
- A misplaced letter appears in the secret word but in a different position.
- A wrong letter doesn’t appear in the secret word.
For example, if the secret word is SNAKE, then you classify the letters in some guesses as follows:
| Guess | Correct letters | Misplaced letters | Wrong letters |
|---|---|---|---|
| BLACK | A | K | B, C, L |
| ADDER | A, E | D, R | |
| LEARN | A | E, N | L, R |
| QUAKE | A, E, K | Q, U | |
| CRANE | A, E | N | C, R |
| SNAKE | A, E, K, N, S | ||
| WYRDL | D, L, R, W, Y |
How can you find which letters belong to which category? Start by figuring out which letters are correctly placed. Python’s zip() function is great for doing element-by-element comparisons of two sequences. In this case, you’re comparing the letters of two strings:
>>> for snake_letter, crane_letter in zip("SNAKE", "CRANE"):
...     if snake_letter == crane_letter:
...         print(snake_letter)
...
A
E
In this code snippet, you find the two correctly placed letters in CRANE by comparing SNAKE and CRANE one letter at a time. Even though there’s an N in both words, it’s not reported since it’s in different positions.
Now, you need to collect the letters and not only print them out. Comprehensions are powerful constructions in Python that you use to transform one or more sequences into another. Here, you’ll use a set comprehension to collect the correct letters:
>>> word = "SNAKE"
>>> guess = "CRANE"
>>> {letter for letter, correct in zip(guess, word) if letter == correct}
{'A', 'E'}
A set comprehension is similar to a list comprehension but outputs a set instead of a list. It works well in this situation because the order of the correct letters isn’t important.
One advantage of sets is that Python offers powerful operations on them. You can quickly use unions, intersections, and differences between two sets to find elements that appear in at least one set, both sets, or only one of the sets.
For example, if you have two strings, then you can use set intersection (&) to find all the letters that appear in both:
>>> set("SNAKE") & set("CRANE")
{'A', 'E', 'N'}
The intersection tells you that A, E, and N are in both SNAKE and CRANE. Similarly, you can use the set difference to find letters that appear in one set and not the other:
>>> set("CRANE") - set("SNAKE")
{'C', 'R'}
Indeed, C and R are the letters in CRANE that don’t appear in SNAKE.
Note: The set intersection (&), set union (|), and set difference (-) operators are used to implement set-theoretic operations in Python. These are different from Boolean logic operators like and, or and not.
Because the operands are sets, Python understands that you’re not using - as an arithmetic operator.
It’s time to use sets to improve your game. However, before you start the implementation, you’ll make one other change. Currently, you’ve hard-coded the secret word into the if test. You’ll use that word when you classify letters, so you’ll refer to it using a constant:
# wyrdl.py

WORD = "SNAKE"

for guess_num in range(1, 7):
    guess = input(f"\nGuess {guess_num}: ").upper()
    if guess == WORD:
        print("Correct")
        break

    print("Wrong")
Introducing WORD makes it easier to change the secret word. In the next section, you’ll add a word list that you’ll choose the word from, making the game more interesting.
Using what you’ve explored above about sets, you can now calculate and display the correct, misplaced, and wrong letters. Update your code so that it looks like the following:
# wyrdl.py

WORD = "SNAKE"

for guess_num in range(1, 7):
    guess = input(f"\nGuess {guess_num}: ").upper()
    if guess == WORD:
        print("Correct")
        break

    correct_letters = {
        letter for letter, correct in zip(guess, WORD) if letter == correct
    }
    misplaced_letters = set(guess) & set(WORD) - correct_letters
    wrong_letters = set(guess) - set(WORD)

    print("Correct letters:", ", ".join(sorted(correct_letters)))
    print("Misplaced letters:", ", ".join(sorted(misplaced_letters)))
    print("Wrong letters:", ", ".join(sorted(wrong_letters)))
You use the set comprehension to find all the correctly placed letters. The misplaced letters are the ones that are in both the guess and the secret word but aren’t correctly placed. Finally, the letters in the guess that aren’t in the secret word are categorized as wrong.
Note: Sets are powerful data structures that tend to be underused by Python developers. Luciano Ramalho gave a great presentation on their usefulness at PyCon US 2019.
For now, you’re only listing the categories and the letters. For example:
$ python wyrdl.py

Guess 1: crane
Correct letters: A, E
Misplaced letters: N
Wrong letters: C, R

Guess 2: snake
Correct
While the information is there, it’s not so easy to understand. Later, you’ll improve your user interface and make the game both nicer to look at and nicer to play. However, the next order of business is to use a word list to bring some variety.
Step 2: Use a Word List
In this step, you won’t change the functionality of your game. Still, you’ll make it more fun and replayable by adding a word list. So far, the secret word’s always been the same. That’s about to change:
The game still looks the same, but you’re trying to guess a different word each time you play.
If you want to follow along, you can download the source code as it looks before starting this step by clicking the link below and checking out the source_code_step_1/ directory:
Free Source Code: Click here to download the free source code that you’ll use to build a Wordle clone with Python and Rich.
In this step, you’ll first create a small word list manually and integrate it into your game. Then you’ll explore how to turn any text into a word list.
Create a Word List Manually
Your word list will be a plain text file containing one word per line. This follows a long tradition on Unix systems where a file named words is used by spell checkers and similar applications.
To get started, create a new file that you name wordlist.txt with the following content:
adder
black
crane
learn
quake
snake
wyrdl
You’ve added the words that you investigated as possible guesses in the previous step. Feel free to expand the list yourself. However, don’t put too much effort into it, as you’ll soon create the word list automatically.
Before creating a better word list, you’ll look at how you can read this list of words into your program. Python’s pathlib module is great for working with different files and reading them into memory. Try it out:
>>> import pathlib

>>> pathlib.Path("wordlist.txt").read_text(encoding="utf-8")
'adder\nblack\ncrane\nlearn\nquake\nsnake\nwyrdl\n'
The .read_text() method reads the whole file as one text string. Note that \n symbols separate the words. These represent the newlines in the file. You can strip off the last newline and split on the rest to convert the file into a list of words:
>>> WORDLIST = pathlib.Path("wordlist.txt")
>>> [
...     word.upper()
...     for word in WORDLIST.read_text(encoding="utf-8").strip().split("\n")
... ]
['ADDER', 'BLACK', 'CRANE', 'LEARN', 'QUAKE', 'SNAKE', 'WYRDL']
You use .strip() to remove any extra lines at the end of the file and .split() to convert the file into a list of words. To avoid having to care about lowercase and uppercase, you convert all words to uppercase as well.
Note: When playing the original Wordle game, you’re restricted to only guessing actual words. You’re not going to implement the same restriction in your Wordle clone because it requires an exhaustive word list. A limited word list will frustrate your users as they try to figure out which words you’ve included in the allowed list.
You’re now able to include a list of words in your program. How can you choose one random word from that word list?
Choose a Random Word From a Word List
Python comes with a powerful random module in the standard library. You can use it to generate all kinds of randomness in your projects. Here, you’ll use random.choice(), which randomly chooses one item from a sequence:
>>> import random

>>> random.choice(["SNAKE", "ADDER", "CRANE"])
'CRANE'

>>> random.choice(["SNAKE", "ADDER", "CRANE"])
'ADDER'

>>> random.choice(["SNAKE", "ADDER", "CRANE"])
'ADDER'
Your results will likely be different if you run the same code.
It’s time to add the word list functionality to your Wordle clone. Edit your game as follows:
# wyrdl.py

import pathlib
import random

WORDLIST = pathlib.Path("wordlist.txt")

words = [
    word.upper()
    for word in WORDLIST.read_text(encoding="utf-8").strip().split("\n")
]
word = random.choice(words)

for guess_num in range(1, 7):
    guess = input(f"\nGuess {guess_num}: ").upper()
    if guess == word:
        print("Correct")
        break

    correct_letters = {
        letter for letter, correct in zip(guess, word) if letter == correct
    }
    misplaced_letters = set(guess) & set(word) - correct_letters
    wrong_letters = set(guess) - set(word)

    print("Correct letters:", ", ".join(sorted(correct_letters)))
    print("Misplaced letters:", ", ".join(sorted(misplaced_letters)))
    print("Wrong letters:", ", ".join(sorted(wrong_letters)))
You’ve added the code that can read a word list and choose a random word from that list at the top of your script. Since the secret word isn’t constant any longer, you’ve also renamed WORD to word.
One small frustration is that if you don’t guess the word correctly, you’ll never get to know which secret word your Wordle clone randomly chose. To fix that, you can add the following at the end of your code:
# wyrdl.py

# ...

for guess_num in range(1, 7):
    guess = input(f"\nGuess {guess_num}: ").upper()
    if guess == word:
        print("Correct")
        break
    # ...

else:
    print(f"The word was {word}")
It’s not common to use the else clause with for, but it’s quite powerful in the right use case. The code inside the else will run if the for loop doesn’t terminate naturally—that is, if break stops the loop. In practice, that means that the secret word is printed if all the guesses are different from word.
Note: While you’re developing your game, you’ll run it many times. To test your code effectively, you may want to cheat and know the secret word up front. While testing your code, you can add the following line just before calling input():
print(word)
This will print the secret word to the console.
Try your game a few times. It’s already more challenging and fun since you don’t know the exact word up front. Still, with a limited word list, the game gets repetitive. Next, you’ll see how you can create bigger word lists.
Convert a Text Into a List of Words
You probably already have a word list on your system, and you can download word lists online. Still, for flexibility and control, you may want to create your own list. This allows you to create special, themed word lists containing programming-related terms, city names, or non-English words, for example.
You’ll create a script that converts any text file into a nicely formatted word list that you can use in your Wordle clone. Add a new file, named create_wordlist.py, to your project with the following content:
 1# create_wordlist.py
 2
 3import pathlib
 4import sys
 5from string import ascii_letters
 6
 7in_path = pathlib.Path(sys.argv[1])
 8out_path = pathlib.Path(sys.argv[2])
 9
10words = sorted(
11    {
12        word.lower()
13        for word in in_path.read_text(encoding="utf-8").split()
14        if all(letter in ascii_letters for letter in word)
15    },
16    key=lambda word: (len(word), word),
17)
18out_path.write_text("\n".join(words))
Your script uses sys.argv to read information from the command line. In particular, you’re expected to provide the path to an existing text file and the location of the new word list file. The first two command-line arguments are converted to paths and named in_path and out_path on lines 7 and 8.
You can use the script to, for example, convert your current version of wyrdl.py to a word list as follows:
$ python create_wordlist.py wyrdl.py wordlist.txt
This reads wyrdl.py, looks for words, and stores them in wordlist.txt in the current directory. Note that this overwrites wordlist.txt, which you created manually. Have a look at your new word list:
if
in
for
word
break
guess
words
import
letter
random
correct
pathlib
wordlist
You’ll recognize some words from your code. However, note that only some words went into the word list. Look back at create_wordlist.py and pay special attention to line 14. This line acts as a filter in your set comprehension and won’t pass through words that contain any character that’s not ASCII. In practice, it only allows the letters A to Z.
Note: Only allowing the letters A to Z may be too limiting, especially if you want to create a word list in a language other than English. In that case, you could use a regular expression. The \w special sequence matches most of the characters that can be part of a word in any language.
You get a more permissive filter by replacing line 14 with the following:
if re.fullmatch(r"\w+", word):
If you go this route, remember to import re at the top of your code. This filter will also allow underscores, so something like guess_num will be included in your word list. You can avoid underscores and numbers by using r"[^\W0-9_]+". This uses a negative character group, listing characters that aren’t allowed in the words.
Note that you don’t filter out words that are more or less than five letters long. You could do that when you’re building the word list. However, by leaving that job for your wyrdl.py code, you gain some flexibility. It makes it possible to use general word lists and to change the word length in the game. Maybe you want to create a Wordle variant that quizzes the user about seven-letter words.
You also sorted the word list. This isn’t strictly necessary but makes it easier to manually peruse the list. On line 16, you specified key to customize the sorting order.
With key=lambda word: (len(word), word) you end up first sorting on the length of each word and next on the word itself. The effect is that your word list starts with all one-letter words, followed by two-letter words, and so on. Each batch of words with the same length is sorted alphabetically.
You can now generate your personal word list. Find any plain text file and run your create_wordlist.py script. You could, for example, download the complete works of Shakespeare to create an old-style word list, or a version of Alice in Wonderland retold in words of one syllable to create a list of simpler words.
Since your word list now contains words that aren’t five letters long, you should add a filter to your list comprehension that parses the word list. Add the following filter:
# wyrdl.py

import pathlib
import random
from string import ascii_letters

# ...

words = [
    word.upper()
    for word in WORDLIST.read_text(encoding="utf-8").split("\n")
    if len(word) == 5 and all(letter in ascii_letters for letter in word)
]

# ...
You also remove .strip() since empty words are filtered out in the if test anyway. Expand the following box to see the full source code at this point:
# wyrdl.py

import pathlib
import random
from string import ascii_letters

WORDLIST = pathlib.Path("wordlist.txt")

words = [
    word.upper()
    for word in WORDLIST.read_text(encoding="utf-8").split("\n")
    if len(word) == 5 and all(letter in ascii_letters for letter in word)
]
word = random.choice(words)

for guess_num in range(1, 7):
    guess = input(f"\nGuess {guess_num}: ").upper()
    if guess == word:
        print("Correct")
        break

    correct_letters = {
        letter for letter, correct in zip(guess, word) if letter == correct
    }
    misplaced_letters = set(guess) & set(word) - correct_letters
    wrong_letters = set(guess) - set(word)

    print("Correct letters:", ", ".join(sorted(correct_letters)))
    print("Misplaced letters:", ", ".join(sorted(misplaced_letters)))
    print("Wrong letters:", ", ".join(sorted(wrong_letters)))
else:
    print(f"The word was {word}")
Your game is more interesting now that the secret word is chosen at random from a word list. Later, you’ll work on making the user experience nicer with more intuitive feedback. However, you’ll first reorganize your code so that it’ll be easier to work with in the long run.
Step 3: Organize Your Code With Functions
So far, you’ve written your game as a script. It’s essentially a list of commands that run one after the other. While this is great for getting started quickly and for testing out a simple prototype of your game, these kinds of programs don’t scale well. As your program grows in complexity, you’ll want to group your code into functions that you can reuse.
At the end of this step, the game will still look the same for your users. But the underlying code will be easier to extend and build out later.
To download the source code as it looks before starting this third step, click the link below and check out the source_code_step_2/ directory:
Free Source Code: Click here to download the free source code that you’ll use to build a Wordle clone with Python and Rich.
You’ll start by explicitly setting up the main loop of your game. Then, you’ll move the supporting code into functions. Finally, you’ll think about how you can test your game to ensure it works the way you expect.
Set Up Your Main Loop
So far, you’ve set up a basic version of Wyrdl. Think of this as a prototype where you’ve tested out some of the features that you want in the game and you’ve gotten a feeling for which features are important in the game.
You’ll now refactor your code into something that’s better prepared for your next extensions and improvements. You’ll create functions that’ll work as building blocks for your program.
To figure out which functions will be useful in your program, you can do a small exercise where you think of the functionality in your program top-down. At a high level, what’s the flow of your program? Feel free to try this on your own before continuing. Expand the box below to see one possible solution:
The following graph shows one example of how you can describe the main flow of your program. Click the figure to zoom in and see the details:

This shows that your game will first get a random word and then enter a loop where the user will guess words until they guess correctly or run out of guesses.
Note that you don’t need to go into much detail in this chart. For example, you don’t worry about how to get a random word or how to check a user’s guess. You only note that it should be done.
Your next step is to translate the figure into code. Add the following to the bottom of your wyrdl.py file. Don’t delete any of your existing code yet, because you’ll use it soon:
# wyrdl.py

# ...

def main():
    # Pre-process
    word = get_random_word(...)

    # Process (main loop)
    for guess_num in range(1, 7):
        guess = input(f"\nGuess {guess_num}: ").upper()

        show_guess(...)
        if guess == word:
            break

    # Post-process
    else:
        game_over(...)
The highlighted lines show that main() calls three functions that don’t exist yet: get_random_word(), show_guess(), and game_over(). You’ll create these soon, but for now, you can revel in the freedom of just imagining that these building blocks are available.
Note: You haven’t decided which parameters you need to send to your supporting functions. For now, you’re using an ellipsis (...) as a placeholder.
The code inside main() is also split into three sections: pre-process, process, and post-process. Once you get used to identifying the main flow of a program, you’ll note that you can often divide it like this:
- Pre-process includes everything that needs to happen before your main loop runs.
- Process is the job your program does during the main loop.
- Post-process is the work needed to clean up after the main loop.
In your Wordle clone, you pick a random word before the main loop, and you let your users know that the game is over after the main loop. During the main loop, you handle the user’s guesses. Your main loop can end in one of two ways: the user guesses correctly or they make too many wrong guesses.
Unfortunately, wishful thinking isn’t enough to make main() work. In the next section, you’ll implement the missing functions.
Create Supporting Functions
Currently, your main() function won’t run. You haven’t implemented get_random_word(), show_guess(), and game_over() yet. That’s a bad situation, because if you can’t run your function, then you can’t test it to make sure it does what you expect it to do. You’ll now implement these three functions, mostly by moving the code that you wrote earlier.
Start by considering get_random_word(). What should this function do? You can use the following requirements as a guide when implementing it:
- Choose a word at random from an existing word list.
- Ensure that the word is five letters long.
When implementing a new function, an important decision is which parameters the function should accept. In this case, you could pass in a word list or a path to a word list. However, to keep things simple, you’ll hard-code the path to the word list within the function. This means that you don’t need any parameters.
Add the following function to your source code. Note that you’ve already written most of the code that ends up inside get_random_word(). You can move the lines from your earlier implementation into this function:
# wyrdl.py

# ...

def get_random_word():
    wordlist = pathlib.Path(__file__).parent / "wordlist.txt"
    words = [
        word.upper()
        for word in wordlist.read_text(encoding="utf-8").split("\n")
        if len(word) == 5 and all(letter in ascii_letters for letter in word)
    ]
    return random.choice(words)
As earlier, you read a word list from a file and then filter the list so that you’re left with words of the correct length. Reading the word list each time you get a new word could potentially be slow. However, in this game, you’re only calling get_random_word() once, so it won’t be an issue.
The next function you need to implement is show_guess(). This code will correspond to the following part of your current code:
# ...

correct_letters = {
    letter for letter, correct in zip(guess, word) if letter == correct
}
misplaced_letters = set(guess) & set(word) - correct_letters
wrong_letters = set(guess) - set(word)

print("Correct letters:", ", ".join(sorted(correct_letters)))
print("Misplaced letters:", ", ".join(sorted(misplaced_letters)))
print("Wrong letters:", ", ".join(sorted(wrong_letters)))

# ...
You compare the user’s guess and the secret word. When moving this to a function, you need to identify which parameters the function will accept and what its return value should be.
In this case, you want to pass in the user’s guess and the correct word. The function will display its result in the console, so it doesn’t need to return anything. Move the code into the following function:
# wyrdl.py

# ...

def show_guess(guess, word):
    correct_letters = {
        letter for letter, correct in zip(guess, word) if letter == correct
    }
    misplaced_letters = set(guess) & set(word) - correct_letters
    wrong_letters = set(guess) - set(word)

    print("Correct letters:", ", ".join(sorted(correct_letters)))
    print("Misplaced letters:", ", ".join(sorted(misplaced_letters)))
    print("Wrong letters:", ", ".join(sorted(wrong_letters)))
Your new function first categorizes the letters in your user’s guess into correct, misplaced, and wrong letters like earlier. Then these are printed to the console.
The last function that you’ll implement now is game_over(). At the moment, it might be overkill to refactor this into a separate function, as it’ll only print a message to the screen. Still, by dividing your code like this, you’re naming that particular part of the code, clearly indicating what the code is doing. You can also expand on the code later if needed.
As noted earlier, you want to tell the user what the word was if they’re not able to guess it. You can do so by adding the following function:
# wyrdl.py

# ...

def game_over(word):
    print(f"The word was {word}")
Your function accepts word as a parameter and notifies the user by printing it to the terminal with an f-string.
You’re now ready to do the final tweaks on main(), which you set up earlier. In particular, you need to fill in the ellipses that you used as placeholders and call main() to start your game.
Update main() as follows:
# wyrdl.py

# ...

def main():
    # Pre-process
    word = get_random_word()

    # Process (main loop)
    for guess_num in range(1, 7):
        guess = input(f"\nGuess {guess_num}: ").upper()

        show_guess(guess, word)
        if guess == word:
            break

    # Post-process
    else:
        game_over(word)
You’ve added the necessary arguments to each function call. To finish up your refactoring, you can remove any code—except imports—that’s left outside of function definitions. Then call main() using the name-main idiom by adding the following at the end of your source file:
# wyrdl.py

# ...

if __name__ == "__main__":
    main()
These lines make sure your code is called when the file is executed.
You’ve done changes all over your file in this step. To check the current state of your code, you can expand the section below and compare.
# wyrdl.py

import pathlib
import random
from string import ascii_letters

def main():
    # Pre-process
    word = get_random_word()

    # Process (main loop)
    for guess_num in range(1, 7):
        guess = input(f"\nGuess {guess_num}: ").upper()

        show_guess(guess, word)
        if guess == word:
            break

    # Post-process
    else:
        game_over(word)

def get_random_word():
    wordlist = pathlib.Path(__file__).parent / "wordlist.txt"
    words = [
        word.upper()
        for word in wordlist.read_text(encoding="utf-8").split("\n")
        if len(word) == 5 and all(letter in ascii_letters for letter in word)
    ]
    return random.choice(words)

def show_guess(guess, word):
    correct_letters = {
        letter for letter, correct in zip(guess, word) if letter == correct
    }
    misplaced_letters = set(guess) & set(word) - correct_letters
    wrong_letters = set(guess) - set(word)

    print("Correct letters:", ", ".join(sorted(correct_letters)))
    print("Misplaced letters:", ", ".join(sorted(misplaced_letters)))
    print("Wrong letters:", ", ".join(sorted(wrong_letters)))

def game_over(word):
    print(f"The word was {word}")

if __name__ == "__main__":
    main()
With all these changes, your game should be back in a playable state. Run your code and make sure the game works as it should.
Test Your Code
Repeatedly running your code while you’re developing it is a great way to ensure that the code does what you expect. Organizing your code in functions opens up another avenue for staying in control: unit tests.
You can add tests that can check each of your functions. You won’t do much more automated testing in this tutorial. However, this example will show you one way to get started. Feel free to expand the tests to the rest of the code.
Note: Test-driven development (TDD) is a popular practice that focuses on automated testing. If you practice TDD, you’ll write tests before you write code. To learn more, check out Build a Hash Table in Python With TDD.
The great feature of unit testing is that you can test each part of your code in isolation. To see an example, you’ll create a doctest for show_guess(). A doctest is a special unit test integrated into your documentation.
You write doctests inside docstrings. A docstring is a comment written as a string on the first line inside a function definition. It’s good practice to include these, as they give information to Python’s help system as well as tools like editors and auto-generated documentation systems.
If you include a code example prefixed by the Python REPL prompt (>>>) inside the docstring, then you can use the doctest module to test the function. To see this in action, add the following docstring to show_guess():
# wyrdl.py

# ...

def show_guess(guess, word):
    """Show the user's guess on the terminal and classify all letters.

    ## Example:

    >>> show_guess("CRANE", "SNAKE")
    Correct letters: A, E
    Misplaced letters: N
    Wrong letters: C, R
    """
    correct_letters = {
        letter for letter, correct in zip(guess, word) if letter == correct
    }
    misplaced_letters = set(guess) & set(word) - correct_letters
    wrong_letters = set(guess) - set(word)

    print("Correct letters:", ", ".join(sorted(correct_letters)))
    print("Misplaced letters:", ", ".join(sorted(misplaced_letters)))
    print("Wrong letters:", ", ".join(sorted(wrong_letters)))

# ...
The docstring is a comment, and it won’t affect how your program runs. However, writing this documentation has two immediate advantages:
- It helps developers, including yourself, understand how to use the function.
- It can be automatically tested with
doctest.
To test that the docstring example works, you can call doctest as follows:
$ python -m doctest -v wyrdl.py
Trying:
    show_guess("CRANE", "SNAKE")
Expecting:
    Correct letters: A, E
    Misplaced letters: N
    Wrong letters: C, R
ok
4 items had no tests:
    wyrdl
    wyrdl.game_over
    wyrdl.get_random_word
    wyrdl.main
1 items passed all tests:
   1 tests in wyrdl.show_guess
1 tests in 5 items.
1 passed and 0 failed.
Test passed.
Here, you included the -v flag, which triggers verbose mode. Without -v, you wouldn’t see anything unless you had a failing test. In practice, that’s often what you want. However, the verbose mode can be instructive to look at.
In this case, you can see that doctest found the example that you added to show_guess(). It picks up the call to show_guess() comparing CRANE and SNAKE, as well as the output you expect.
Adding a few doctests is a great way to get started with testing. See Python’s doctest: Document and Test Your Code at Once to learn more about the features of doctest.
Sometimes you may want to change your code to make it easier to test. You’ve already seen how refactoring wyrdl.py to use functions made it possible to add a doctest. However, if you were to add a similar test to get_random_word(), then you’d quickly run into a few challenges:
- The return value of the function is random, so which value should be expected?
- The function implicitly depends on
wordlist.txt. If you change that file, then the return value of the function will change.
These challenges hint that you could improve the implementation of get_random_word(). For example, you can read the word list outside the function and pass it in as a parameter. You can, for example, change the function as follows:
# wyrdl.py

# ...

def get_random_word(word_list):
    words = [
        word.upper()
        for word in word_list
        if len(word) == 5 and all(letter in ascii_letters for letter in word)
    ]
    return random.choice(words)

# ...
Here, you assume that word_list will be a list of strings that’s passed to get_random_word(). If you do this, then you need to update main() correspondingly:
# wyrdl.py

# ...

def main():
    # Pre-process
    words_path = pathlib.Path(__file__).parent / "wordlist.txt"
    word = get_random_word(words_path.read_text(encoding="utf-8").split("\n"))

    # ...
You’ve moved the responsibility of reading the word list file to main(). The advantage of this is that get_random_word() has a clearer purpose and can be tested more easily.
You can now add the following doctest, which checks that get_random_word() correctly filters out words in the word list with the wrong length or with non-letter characters:
# wyrdl.py

# ...

def get_random_word(word_list):
    """Get a random five-letter word from a list of strings.

    ## Example:

    >>> get_random_word(["snake", "worm", "it'll"])
    'SNAKE'
    """
    words = [
        word.upper()
        for word in word_list
        if len(word) == 5 and all(letter in ascii_letters for letter in word)
    ]
    return random.choice(words)

# ...
Here "worm" should be rejected since it only has four letters, and "it'll" should be rejected since it contains an apostrophe ('), which isn’t a letter. This only leaves "snake" as an alternative in the given word list. The function should therefore always return this word in uppercase.
Testing random results is hard. One possible workaround is to set the seed of the random number generator in your test. You could, for example, do the following:
>>> import random
>>> random.seed(42)
>>> get_random_word(["snake", "crane", "wyrdl"])
'WYRDL'
By setting a fixed random seed, you get deterministic randomness. In this example, WYRDL is chosen at random, but get_random_word() will always return WYRDL as long as the seed is set to 42 immediately before you call it.
Another possibility is using a different and more powerful testing framework. For example, with pytest, you can write more complex assertions:
# test_wyrdl.py

import wyrdl

def test_get_random_word():
    """Test that a random word from the word list is chosen."""
    word_list = ["SNAKE", "CRANE", "WYRDL"]
    assert wyrdl.get_random_word(word_list) in word_list
In this case, you’re only making sure that the random word is one of the words in the original list. See Effective Python Testing With Pytest to learn more about pytest, including how to install it and how to run the test file above.
Adding tests to your code is a worthwhile exercise. It’ll make you more conscious about the assumptions you make, and it’ll help you debug your code when it’s not working as expected. To keep the scope focused, you won’t work on any more tests in this tutorial. However, feel free to add them yourself.
The following collapsed block shows the code at this stage, although without any of the tests:
# wyrdl.py

import pathlib
import random
from string import ascii_letters

def main():
    # Pre-process
    words_path = pathlib.Path(__file__).parent / "wordlist.txt"
    word = get_random_word(words_path.read_text(encoding="utf-8").split("\n"))

    # Process (main loop)
    for guess_num in range(1, 7):
        guess = input(f"\nGuess {guess_num}: ").upper()

        show_guess(guess, word)
        if guess == word:
            break

    # Post-process
    else:
        game_over(word)

def get_random_word(word_list):
    words = [
        word.upper()
        for word in word_list
        if len(word) == 5 and all(letter in ascii_letters for letter in word)
    ]
    return random.choice(words)

def show_guess(guess, word):
    correct_letters = {
        letter for letter, correct in zip(guess, word) if letter == correct
    }
    misplaced_letters = set(guess) & set(word) - correct_letters
    wrong_letters = set(guess) - set(word)

    print("Correct letters:", ", ".join(sorted(correct_letters)))
    print("Misplaced letters:", ", ".join(sorted(misplaced_letters)))
    print("Wrong letters:", ", ".join(sorted(wrong_letters)))

def game_over(word):
    print(f"The word was {word}")

if __name__ == "__main__":
    main()
Next, you’ll learn how you can improve the look and feel of your game, even though it runs in the terminal.
Step 4: Style Your Game With Rich
In the last step, you laid the groundwork for bigger changes. Now it’s time to improve the user experience of your game dramatically. You’ll use Rich, a library for adding color and style to text in the terminal:
If you’ve played Wordle online, then you’ll recognize the table of guesses and the colored letters indicating whether a letter is correct, misplaced, or wrong.
To follow along, you should make sure your code is up to date with all the changes from the previous step. If you prefer, you’ll find the source code by clicking the link below and checking out the source_code_step_3/ directory:
Free Source Code: Click here to download the free source code that you’ll use to build a Wordle clone with Python and Rich.
In this step, you’ll start by familiarizing yourself with Rich, before adding some color and style to your game.
Get to Know the Rich Console Printer
Rich was originally developed by Will McGugan and is currently maintained by Will’s company, Textualize.io. Rich helps you color, style, and format text in the terminal.
Note: Rich is the main building block for Textual. Textual is a framework for building text user interfaces (TUI). You won’t be using Textual in this tutorial. However, check out the tutorial if you want to create full-fledged applications inside the terminal.
Rich is a third-party library that you need to install before you can use it. Before you install Rich, you should create a virtual environment where you can install your project dependencies. Choose your platform below, and type the following commands:
Once you’ve created and activated your virtual environment, you can install Rich with pip:
(venv) $ python -m pip install rich
Once Rich is installed, you can try it out. A quick way to get started using Rich is to override the print() function:
>>> from rich import print
>>> print("Hello, [bold red]Rich[/] :snake:")
Hello, Rich 🐍
While it doesn’t show up in this code block, Rich will render the word Rich in bold with red text color. Rich uses its own markup syntax that’s inspired by Bulletin Board Code. You add style directives in square brackets, like [bold red] above. The style applies until you close it with [/].
You can also use emoji names enclosed between colons to print emojis. In the example above, you used :snake: to print a snake emoji (🐍). Run python -m rich.emoji to see a list of all the available emojis.
Note: Emoji support is limited on Windows 10 and earlier. However, you can install the Windows terminal to get the full Rich experience. Most Linux and macOS terminals have good support for emojis.
Overriding print() like this may be convenient, but it’s not flexible in the long run. The preferred way to use Rich is to initialize a Console object and use it for printing:
>>> from rich.console import Console
>>> console = Console()
>>> console.print("Hello, [bold red]Rich[/] :snake:")
Hello, Rich 🐍
Just like above, this will output Rich in bold and red.
One way you’ll use Rich to make your game look better is by clearing the screen between guesses. You do this with console.clear(). Add the following function to your code:
# wyrdl.py

# ...

def refresh_page(headline):
    console.clear()
    console.rule(f"[bold blue]:leafy_green: {headline} :leafy_green:[/]\n")

# ...
Here, console.clear() will clear the screen. Then console.rule() will print a headline on top of the screen. With rule(), you’re adding a horizontal rule for decoration, giving some extra weight to your printed text:
>>> from rich.console import Console
>>> console = Console(width=40)
>>> console.rule(":leafy_green: Wyrdl :leafy_green:")
───────────── 🥬 Wyrdl 🥬 ──────────────
Since refresh_page() refers to console, you need to import Rich and initialize a Console object on the top of your code:
# wyrdl.py

import pathlib
import random
from string import ascii_letters

from rich.console import Console

console = Console(width=40)

# ...
You specify the width of the console. This is useful when using elements like rule() that expand to fill the full width. If you don’t specify a width, then Rich will use the actual width of your terminal.
One neat feature of Rich is that you can add custom styles. As an example, you can add a style to warn the user that they’ve done something wrong. You do this by instantiating Theme and passing it to Console:
# wyrdl.py

import pathlib
import random
from string import ascii_letters

from rich.console import Console
from rich.theme import Theme

console = Console(width=40, theme=Theme({"warning": "red on yellow"}))

# ...
This adds warning as a new style that’ll display as red text on yellow background:
You’ll use this style later, when you add user validation to your game. You can also do a quick test of refresh_page() in your REPL:
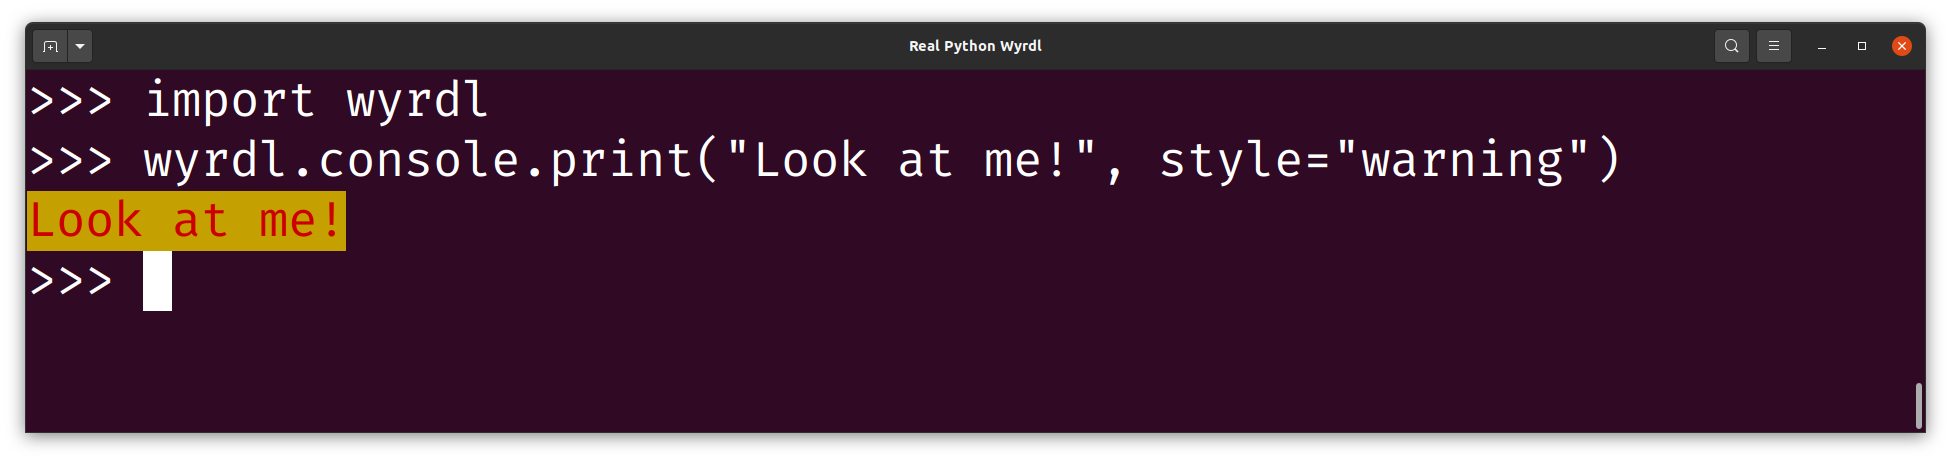
>>> import wyrdl

>>> wyrdl.refresh_page("Wyrdl")
───────────── 🥬 Wyrdl 🥬  ─────────────

>>> wyrdl.console.print("Look at me!", style="warning")
Look at me!
As you enter the code, you should see that the screen is cleared before the Wyrdl headline is printed. Next, Look at me! is printed with the warning style, red text on yellow background.
Keep Track of Previous Guesses and Color Them
If you clear the screen between guesses, the game will look cleaner, but your users will also miss some critical information about their previous guesses. You’ll therefore keep track of previous guesses and show information about them to the user.
To keep track of all your guesses, you’ll use a list. You can initialize the list with "_____", five underscores, as placeholders for future guesses. Then, as the user makes a guess, you’ll overwrite the placeholder.
Start by updating main() as follows:
# wyrdl.py

# ...

def main():
    # Pre-process
    words_path = pathlib.Path(__file__).parent / "wordlist.txt"
    word = get_random_word(words_path.read_text(encoding="utf-8").split("\n"))
    guesses = ["_" * 5] * 6

    # Process (main loop)
    for idx in range(6):
        guesses[idx] = input(f"\nGuess {idx + 1}: ").upper()

        show_guess(guesses[idx], word)
        if guesses[idx] == word:
            break

    # Post-process
    else:
        game_over(word)

# ...
You’ve added guesses as a list containing all the guesses. Since the list is zero-indexed, you change the range to range(6) so that it runs from zero to five instead of from one to six. You can then refer to the current guess as guesses[idx] instead of guess.
Next, you’ll update how you present the user’s guesses. The new function will print all guesses to the screen, using Rich for nice colors and formatting. As you’ll be choosing an appropriate color for each letter, you’ll loop over the letters in each guess.
To facilitate this, you change how you categorize each letter, moving away from the set-based logic that you used earlier. Replace show_guess() with show_guesses() with the following code:
# wyrdl.py

# ...

def show_guesses(guesses, word):
    for guess in guesses:
        styled_guess = []
        for letter, correct in zip(guess, word):
            if letter == correct:
                style = "bold white on green"
            elif letter in word:
                style = "bold white on yellow"
            elif letter in ascii_letters:
                style = "white on #666666"
            else:
                style = "dim"
            styled_guess.append(f"[{style}]{letter}[/]")

        console.print("".join(styled_guess), justify="center")

# ...
For each guess, you create a styled string that wraps each letter in a markup block adding the appropriate color. To classify each letter, you loop over the letters in the guess and in the secret word in parallel using zip().
If the letter is correct, then you style it with a green background. If the letter is misplaced—the letter isn’t correct but is in the secret word—then you add a yellow background. If the letter is wrong, then you show it on a gray background, here represented with the hexadecimal code, #666666. Finally, you show the placeholder symbols in a dimmed style.
You use console.print() so that Rich renders the colors correctly. To make the table of guesses line up nicely, you use justify to center each guess.
Make sure to delete the old show_guess() function. Before you can use your new function to show the user’s guesses, you need to update main() to call it:
# wyrdl.py

# ...

def main():
    # Pre-process
    words_path = pathlib.Path(__file__).parent / "wordlist.txt"
    word = get_random_word(words_path.read_text(encoding="utf-8").split("\n"))
    guesses = ["_" * 5] * 6

    # Process (main loop)
    for idx in range(6):
        refresh_page(headline=f"Guess {idx + 1}")
        show_guesses(guesses, word)

        guesses[idx] = input("\nGuess word: ").upper()
        if guesses[idx] == word:
            break

    # Post-process
    else:
        game_over(word)

# ...
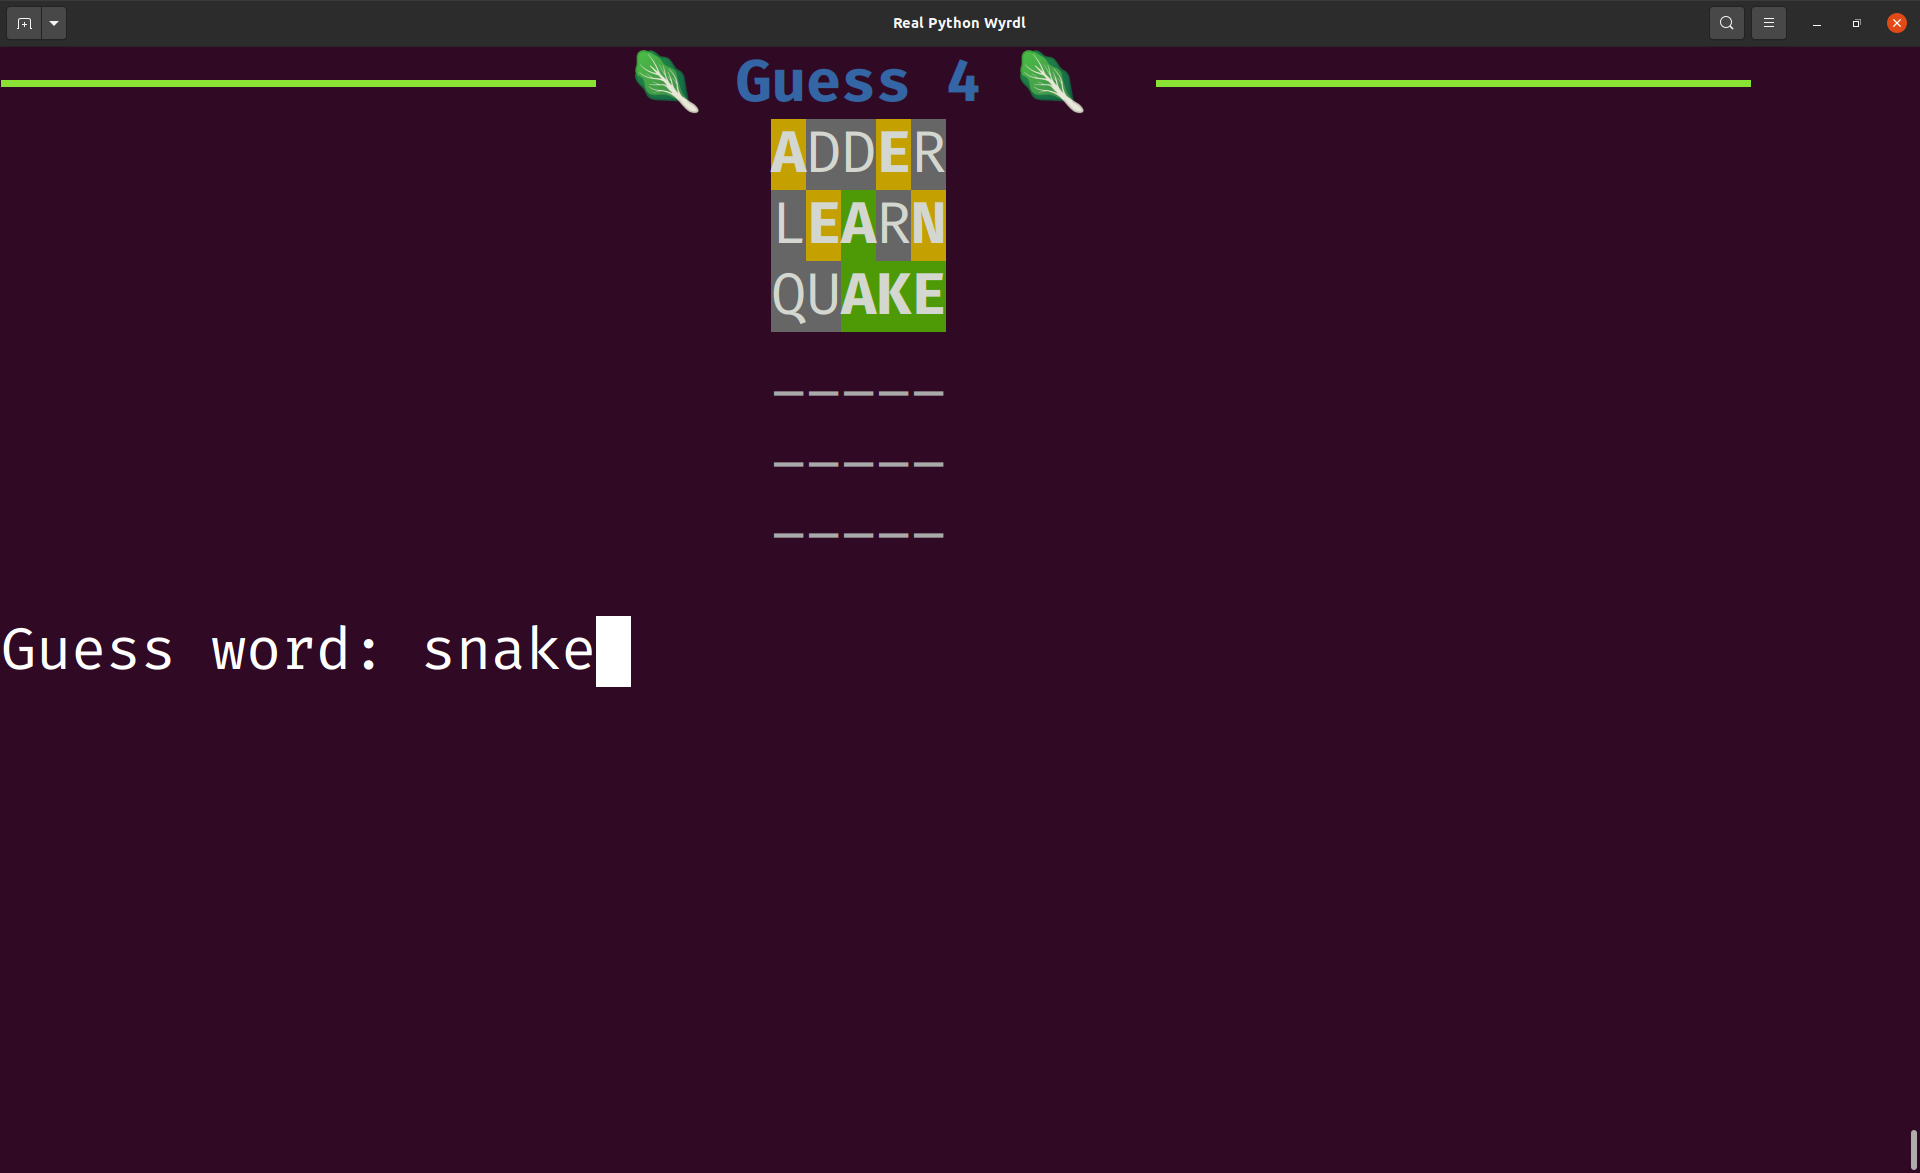
Note that you now show the guesses before getting a new guess from the user. This is necessary because refresh_page() clears the screen of all previous guesses.
Run your code. If all works as expected, then you should see your guesses line up in nice colors:
As you play, you’ll note that your basic game_over() now feels a bit out of place. In the next section, you’ll give the ending of your game the Rich treatment as well.
Wrap Up the Game in Style
One problem with the current implementation of game_over() is that it doesn’t update the table of guesses with the final guess. This happens because you moved show_guesses() before input().
You can fix this by calling show_guesses() from within game_over():
# wyrdl.py

# ...

def game_over(guesses, word):
    refresh_page(headline="Game Over")
    show_guesses(guesses, word)

# ...
In order to call show_guesses(), though, you need information about the previous guesses. Therefore, you change the signature of game_over() to include guesses.
You need to make the corresponding change in main():
# wyrdl.py

# ...

def main():
    # Pre-process
    words_path = pathlib.Path(__file__).parent / "wordlist.txt"
    word = get_random_word(words_path.read_text(encoding="utf-8").split("\n"))
    guesses = ["_" * 5] * 6

    # Process (main loop)
    for idx in range(6):
        refresh_page(headline=f"Guess {idx + 1}")
        show_guesses(guesses, word)

        guesses[idx] = input("\nGuess word: ").upper()
        if guesses[idx] == word:
            break

    # Post-process
    # Remove else:
    game_over(guesses, word)

# ...
You want to call game_over() regardless of whether your user guessed the word correctly or not. That means that you don’t need the else clause any longer, so you remove it.
Your game now shows the final guess correctly. However, the users get no feedback about whether they were able to guess the secret word correctly.
Add the following lines at the end of game_over():
# wyrdl.py

# ...

def game_over(guesses, word, guessed_correctly):
    refresh_page(headline="Game Over")
    show_guesses(guesses, word)

    if guessed_correctly:
        console.print(f"\n[bold white on green]Correct, the word is {word}[/]")
    else:
        console.print(f"\n[bold white on red]Sorry, the word was {word}[/]")

# ...
You added a new parameter, guessed_correctly, that you use to give the user the correct feedback. To finish this refactoring, you need to pass in the correct value when you call game_over():
# wyrdl.py

# ...

def main():
    # ...

    # Post-process
    game_over(guesses, word, guessed_correctly=guesses[idx] == word)

# ...
You compare the last guess and the secret word in order to see if the user guessed the word correctly.
Test your game. It looks a lot better than it did before. You’ve only used the basic features of Rich, but it’s improved the user experience a lot.
You’ve made several big changes to your code in this step. Expand the section below to see the full source code of your project:
# wyrdl.py

import pathlib
import random
from string import ascii_letters

from rich.console import Console
from rich.theme import Theme

console = Console(width=40, theme=Theme({"warning": "red on yellow"}))

def main():
    # Pre-process
    words_path = pathlib.Path(__file__).parent / "wordlist.txt"
    word = get_random_word(words_path.read_text(encoding="utf-8").split("\n"))
    guesses = ["_" * 5] * 6

    # Process (main loop)
    for idx in range(6):
        refresh_page(headline=f"Guess {idx + 1}")
        show_guesses(guesses, word)

        guesses[idx] = input("\nGuess word: ").upper()
        if guesses[idx] == word:
            break

    # Post-process
    game_over(guesses, word, guessed_correctly=guesses[idx] == word)

def refresh_page(headline):
    console.clear()
    console.rule(f"[bold blue]:leafy_green: {headline} :leafy_green:[/]\n")

def get_random_word(word_list):
    words = [
        word.upper()
        for word in word_list
        if len(word) == 5 and all(letter in ascii_letters for letter in word)
    ]
    return random.choice(words)

def show_guesses(guesses, word):
    for guess in guesses:
        styled_guess = []
        for letter, correct in zip(guess, word):
            if letter == correct:
                style = "bold white on green"
            elif letter in word:
                style = "bold white on yellow"
            elif letter in ascii_letters:
                style = "white on #666666"
            else:
                style = "dim"
            styled_guess.append(f"[{style}]{letter}[/]")

        console.print("".join(styled_guess), justify="center")

def game_over(guesses, word, guessed_correctly):
    refresh_page(headline="Game Over")
    show_guesses(guesses, word)

    if guessed_correctly:
        console.print(f"\n[bold white on green]Correct, the word is {word}[/]")
    else:
        console.print(f"\n[bold white on red]Sorry, the word was {word}[/]")

if __name__ == "__main__":
    main()
Your game now works quite well, as long as the user plays as you expect. Try what happens if your guess isn’t five letters long! In the next step, you’ll add some feedback mechanisms that can guide your users if they do something wrong.
Step 5: Add Validation and User Feedback
In the previous step, you added Rich and rewrote your game to use color for a better presentation. Next, you’ll build on this work to also show a few warnings if your users do something wrong:
Note how you get warnings if your guess isn’t five letters long or if you repeat the same guess as earlier.
Before starting this step, make sure that you’ve got the code from step 4 in good working order. You can download the source code by clicking the link below and looking in the source_code_step_4/ directory:
Free Source Code: Click here to download the free source code that you’ll use to build a Wordle clone with Python and Rich.
In this step, you’ll make your game more user-friendly by adding features that can guide your users if they do something unexpected.
Make Sure the Word List Isn’t Empty
In theory, you can use any text file as a word list. If that word list doesn’t contain any five-letter words, then get_random_word() will fail. But which message will your users see?
Open your REPL and try to get a random word from an empty word list:
>>> import wyrdl
>>> wyrdl.get_random_word([])
Traceback (most recent call last):
  ...
IndexError: Cannot choose from an empty sequence
You’re seeing a traceback and an IndexError. Without any other context, your users may not realize that the problem is the word list.
It’s hard to recover from not having any valid words in the word list, but you can at least provide a more explicit and actionable error message. Update get_random_word() to check that the list of valid words isn’t empty:
# wyrdl.py

# ...

def get_random_word(word_list):
    if words := [
        word.upper()
        for word in word_list
        if len(word) == 5 and all(letter in ascii_letters for letter in word)
    ]:
        return random.choice(words)
    else:
        console.print("No words of length 5 in the word list", style="warning")
        raise SystemExit()

# ...
You use the walrus operator (:=) to create the list of valid words and check that it contains at least one word. When you use the walrus operator, you’re writing an assignment expression, which does the assignment as part of an expession.
In this case, you assign the list of words to words as before. However, now you’re immediately using the list in the if test to check that it’s not empty. If the list is empty, then you print a warning in the else clause, explicitly describing the problem:
>>> import wyrdl
>>> wyrdl.get_random_word(["one", "four", "eleven"])
No words of length 5 in the word list
This way, you shield your users from seeing the traceback. Instead, you provide actionable feedback that they can use to fix the problem.
Note that you add style="warning" to your call to console.print(). This uses the warning style that you defined earlier in your custom theme when you initialized Console.
Since your game needs a secret word, you end the program by raising SystemExit. Next, you’ll consider issues that you can recover from. For example, the user guesses a word that isn’t five letters long. First, though, consider which words you’ll accept as valid guesses.
Think About Which Words to Accept
One of the challenges in the original Wordle game is that your guesses must be actual words from a dictionary. Currently, you haven’t implemented the same restriction in your Wordle clone. Any combination of letters constitutes a valid guess.
You could require that the guess is also in your existing word list. However, if you’re playing with a limited word list, this can get frustrating for the users, as they end up needing to first figure out which words are actually in the word list.
A better option might be to use a second, comprehensive word list when checking if a guess is valid. The important part is that any reasonable word should be considered valid. Without a broad dictionary available, it’s probably a better user experience to allow any combination of five letters.
In this tutorial, you won’t tackle adding such a second word list for validating guesses. However, feel free to give it a go. It’s a great exercise to try!
Validate the Words That the User Guesses
While you won’t check the user’s guesses against a word list, you should do some validation and alert the user if they’re doing something wrong. In this section, you’ll improve the user feedback that you provide when the users make their guesses.
Currently, you handle user input in the following line of code:
guesses[idx] = input("\nGuess word: ").upper()
To improve the handling of guesses, you’ll start by refactoring this into a separate function. First, add guess_word() to your file:
# wyrdl.py

# ...

def guess_word(previous_guesses):
    guess = console.input("\nGuess word: ").upper()
    return guess

# ...
The Rich Console includes an .input() method that mirrors the input() function but allows you to add rich formatting to the input prompt. While you don’t take advantage of this feature, it’s nice to use console here as well for consistency.
You also include previous_guesses as a parameter because you’ll soon use it to check that the user isn’t repeating a guess. Before implementing any checks, though, update main() to call your new function:
# wyrdl.py

# ...

def main():
    # Pre-process
    words_path = pathlib.Path(__file__).parent / "wordlist.txt"
    word = get_random_word(words_path.read_text(encoding="utf-8").split("\n"))
    guesses = ["_" * 5] * 6

    # Process (main loop)
    for idx in range(6):
        refresh_page(headline=f"Guess {idx + 1}")
        show_guesses(guesses, word)

        guesses[idx] = guess_word(previous_guesses=guesses[:idx])
        if guesses[idx] == word:
            break

    # Post-process
    game_over(guesses, word, guessed_correctly=guesses[idx] == word)

# ...
You create a list of previous guesses by only including elements in guesses that have already been filled in. Then you pass this list to guess_word().
Now, use previous_guesses to check if the user makes the same guess twice. If they do, you’ll warn them about this and let them guess again. You can implement that with the following if test:
# wyrdl.py

# ...

def guess_word(previous_guesses):
    guess = console.input("\nGuess word: ").upper()

    if guess in previous_guesses:
        console.print(f"You've already guessed {guess}.", style="warning")
        return guess_word(previous_guesses)

    return guess

# ...
Using the warning style that you defined earlier, you print a message to the user informing them that they’ve already guessed the word. To let the user make a new guess, you call guess_word() one more time and return that guess.
Note: As you learned earlier in this tutorial, recursive calls are usually not the best way to create loops in Python. However, in this case, it’s quite elegant. The typical downsides aren’t relevant. For example, the time it takes to call the function is negligible compared to the time it takes the user to enter their guess.
Since all your words are five letters long, you should also check that all the guesses are five letters long. You can do this by adding a second conditional:
# wyrdl.py

# ...

def guess_word(previous_guesses):
    guess = console.input("\nGuess word: ").upper()

    if guess in previous_guesses:
        console.print(f"You've already guessed {guess}.", style="warning")
        return guess_word(previous_guesses)

    if len(guess) != 5:
        console.print("Your guess must be 5 letters.", style="warning")
        return guess_word(previous_guesses)

    return guess

# ...
This test follows the same structure as the previous one. You check whether there are five letters in the guess. If not, you print a warning and let the user make a second guess.
Finally, you can guide the users to only use the letters in the English alphabet. The if test is a bit more complicated in this case, as you need to check each letter in the user’s guess:
# wyrdl.py

# ...

def guess_word(previous_guesses):
    guess = console.input("\nGuess word: ").upper()

    if guess in previous_guesses:
        console.print(f"You've already guessed {guess}.", style="warning")
        return guess_word(previous_guesses)

    if len(guess) != 5:
        console.print("Your guess must be 5 letters.", style="warning")
        return guess_word(previous_guesses)

    if any((invalid := letter) not in ascii_letters for letter in guess):
        console.print(
            f"Invalid letter: '{invalid}'. Please use English letters.",
            style="warning",
        )
        return guess_word(previous_guesses)

    return guess

# ...
The any() expression checks whether any of the letters in the guess aren’t in ascii_letters, a built-in list of the lowercase and uppercase letters from A to Z.
Note: If you add your own word list with words using different letters, then you need to update this check to allow all the letters that your users can use.
You use the walrus operator inside any() to collect an example of a character that’s invalid. If there’s an invalid letter in the user’s guess, then you report it with console.print() as usual and give the user a new attempt.
Note: Using := inside of any() is powerful, but it may not be obvious why it works. You can read more about this construct to learn the details.
Run your game and try to provoke your code by making different kinds of user errors. Do you get helpful feedback when you guess four-letter words or include numbers in your guesses?
While the core game is the same as before, your program is now more solid and will guide the user if they make any errors. As earlier, you can have a look at the full source code by expanding the following section:
# wyrdl.py

import pathlib
import random
from string import ascii_letters

from rich.console import Console
from rich.theme import Theme

console = Console(width=40, theme=Theme({"warning": "red on yellow"}))

def main():
    # Pre-process
    words_path = pathlib.Path(__file__).parent / "wordlist.txt"
    word = get_random_word(words_path.read_text(encoding="utf-8").split("\n"))
    guesses = ["_" * 5] * 6

    # Process (main loop)
    for idx in range(6):
        refresh_page(headline=f"Guess {idx + 1}")
        show_guesses(guesses, word)

        guesses[idx] = guess_word(previous_guesses=guesses[:idx])
        if guesses[idx] == word:
            break

    # Post-process
    game_over(guesses, word, guessed_correctly=guesses[idx] == word)

def refresh_page(headline):
    console.clear()
    console.rule(f"[bold blue]:leafy_green: {headline} :leafy_green:[/]\n")

def get_random_word(word_list):
    if words := [
        word.upper()
        for word in word_list
        if len(word) == 5 and all(letter in ascii_letters for letter in word)
    ]:
        return random.choice(words)
    else:
        console.print("No words of length 5 in the word list", style="warning")
        raise SystemExit()

def show_guesses(guesses, word):
    for guess in guesses:
        styled_guess = []
        for letter, correct in zip(guess, word):
            if letter == correct:
                style = "bold white on green"
            elif letter in word:
                style = "bold white on yellow"
            elif letter in ascii_letters:
                style = "white on #666666"
            else:
                style = "dim"
            styled_guess.append(f"[{style}]{letter}[/]")

        console.print("".join(styled_guess), justify="center")

def guess_word(previous_guesses):
    guess = console.input("\nGuess word: ").upper()

    if guess in previous_guesses:
        console.print(f"You've already guessed {guess}.", style="warning")
        return guess_word(previous_guesses)

    if len(guess) != 5:
        console.print("Your guess must be 5 letters.", style="warning")
        return guess_word(previous_guesses)

    if any((invalid := letter) not in ascii_letters for letter in guess):
        console.print(
            f"Invalid letter: '{invalid}'. Please use English letters.",
            style="warning",
        )
        return guess_word(previous_guesses)

    return guess

def game_over(guesses, word, guessed_correctly):
    refresh_page(headline="Game Over")
    show_guesses(guesses, word)

    if guessed_correctly:
        console.print(f"\n[bold white on green]Correct, the word is {word}[/]")
    else:
        console.print(f"\n[bold white on red]Sorry, the word was {word}[/]")

if __name__ == "__main__":
    main()
You’ve done a great job implementing your Wordle clone. Before ending this tutorial, you’ll tweak your code here and there by smoothing out a few sharp edges.
Step 6: Clean Up the Game and Your Code
In step 5, you improved the user experience by adding some messages that help the user if they do anything wrong. In this final step, you’ll add one more feature that can help the users, namely a list of all the letters and their status:
The list of letters below your table of guesses shows the current status of each letter. As usual, green letters are correct, yellow letters are misplaced, and gray letters are wrong.
Before embarking on this final step, check that the code from step 5 runs smoothly. You can download the code written so far in the tutorial by clicking the link below and navigating to source_code_step_5/:
Free Source Code: Click here to download the free source code that you’ll use to build a Wordle clone with Python and Rich.
All right, time for the final tweaks.
Use Constants to Name Your Concepts
Magic values usually make your code less readable. A magic value is a value, typically a number, that appears in your program without any context. As an example, consider the following line of code:
guesses = ["_" * 5] * 6
What’s the meaning of 5 and 6 here? As you’re currently deeply immersed in your game, you may immediately point out that 5 indicates the number of letters in a word and 6 refers to the number of guesses allowed. However, if you leave the code untouched for a few days, that may not be as obvious any longer.
Another problem with magic values is that they’re hard to change. Say that you want to change up your game a little, and guess at seven-letter words instead. You’d then need to replace all instances of 5 that describe the number of letters with 7. This is both cumbersome and error-prone.
A good practice is to replace magic values with properly named constants. For example, you can define NUM_LETTERS = 5 and then replace all occurrences of 5 with NUM_LETTERS.
Note: Python doesn’t have any special support for constants. Technically, a constant is just a variable that doesn’t change its value. However, it’s a convention to use capital letters for the names of variables that are supposed to be constant.
Add a few descriptive constants to the top of your code file:
# wyrdl.py

import pathlib
import random
from string import ascii_letters

from rich.console import Console
from rich.theme import Theme

console = Console(width=40, theme=Theme({"warning": "red on yellow"}))

NUM_LETTERS = 5
NUM_GUESSES = 6
WORDS_PATH = pathlib.Path(__file__).parent / "wordlist.txt"

# ...
With these constants in place, you can start to replace your magic values with these constants. For example, you can now write the initialization of guesses as follows:
guesses = ["_" * NUM_LETTERS] * NUM_GUESSES
The constants help you understand what the code is doing. Go ahead and add the constants throughout your code. You can expand the following section to see all changes that you can make:
# wyrdl.py

import pathlib
import random
from string import ascii_letters

from rich.console import Console
from rich.theme import Theme

console = Console(width=40, theme=Theme({"warning": "red on yellow"}))

NUM_LETTERS = 5
NUM_GUESSES = 6
WORDS_PATH = pathlib.Path(__file__).parent / "wordlist.txt"

def main():
    # Pre-process
    word = get_random_word(WORDS_PATH.read_text(encoding="utf-8").split("\n"))
    guesses = ["_" * NUM_LETTERS] * NUM_GUESSES

    # Process (main loop)
    for idx in range(NUM_GUESSES):
        refresh_page(headline=f"Guess {idx + 1}")
        show_guesses(guesses, word)

        guesses[idx] = guess_word(previous_guesses=guesses[:idx])
        if guesses[idx] == word:
            break

    # Post-process
    game_over(guesses, word, guessed_correctly=guesses[idx] == word)

def refresh_page(headline):
    console.clear()
    console.rule(f"[bold blue]:leafy_green: {headline} :leafy_green:[/]\n")

def get_random_word(word_list):
    if words := [
        word.upper()
        for word in word_list
        if len(word) == NUM_LETTERS
        and all(letter in ascii_letters for letter in word)
    ]:
        return random.choice(words)
    else:
        console.print(
            f"No words of length {NUM_LETTERS} in the word list",
            style="warning",
        )
        raise SystemExit()

def show_guesses(guesses, word):
    for guess in guesses:
        styled_guess = []
        for letter, correct in zip(guess, word):
            if letter == correct:
                style = "bold white on green"
            elif letter in word:
                style = "bold white on yellow"
            elif letter in ascii_letters:
                style = "white on #666666"
            else:
                style = "dim"
            styled_guess.append(f"[{style}]{letter}[/]")

        console.print("".join(styled_guess), justify="center")

def guess_word(previous_guesses):
    guess = console.input("\nGuess word: ").upper()

    if guess in previous_guesses:
        console.print(f"You've already guessed {guess}.", style="warning")
        return guess_word(previous_guesses)

    if len(guess) != NUM_LETTERS:
        console.print(
            f"Your guess must be {NUM_LETTERS} letters.", style="warning"
        )
        return guess_word(previous_guesses)

    if any((invalid := letter) not in ascii_letters for letter in guess):
        console.print(
            f"Invalid letter: '{invalid}'. Please use English letters.",
            style="warning",
        )
        return guess_word(previous_guesses)

    return guess

def game_over(guesses, word, guessed_correctly):
    refresh_page(headline="Game Over")
    show_guesses(guesses, word)

    if guessed_correctly:
        console.print(f"\n[bold white on green]Correct, the word is {word}[/]")
    else:
        console.print(f"\n[bold white on red]Sorry, the word was {word}[/]")

if __name__ == "__main__":
    main()
One way to check if you’ve replaced all occurrences of 5 is to change the value of NUM_LETTERS. Does your program still work if you get eight guesses to figure out a six-letter word? If not, then you’ve missed an occurrence.
Add an Overview of Used Letters
The colors that Rich provides give your users nice clues about which letters they’ve guessed correctly. However, it’s not easy to see at a glance which letters the user has already guessed. To help your users, you’ll add a line showing the status of each letter in the alphabet:
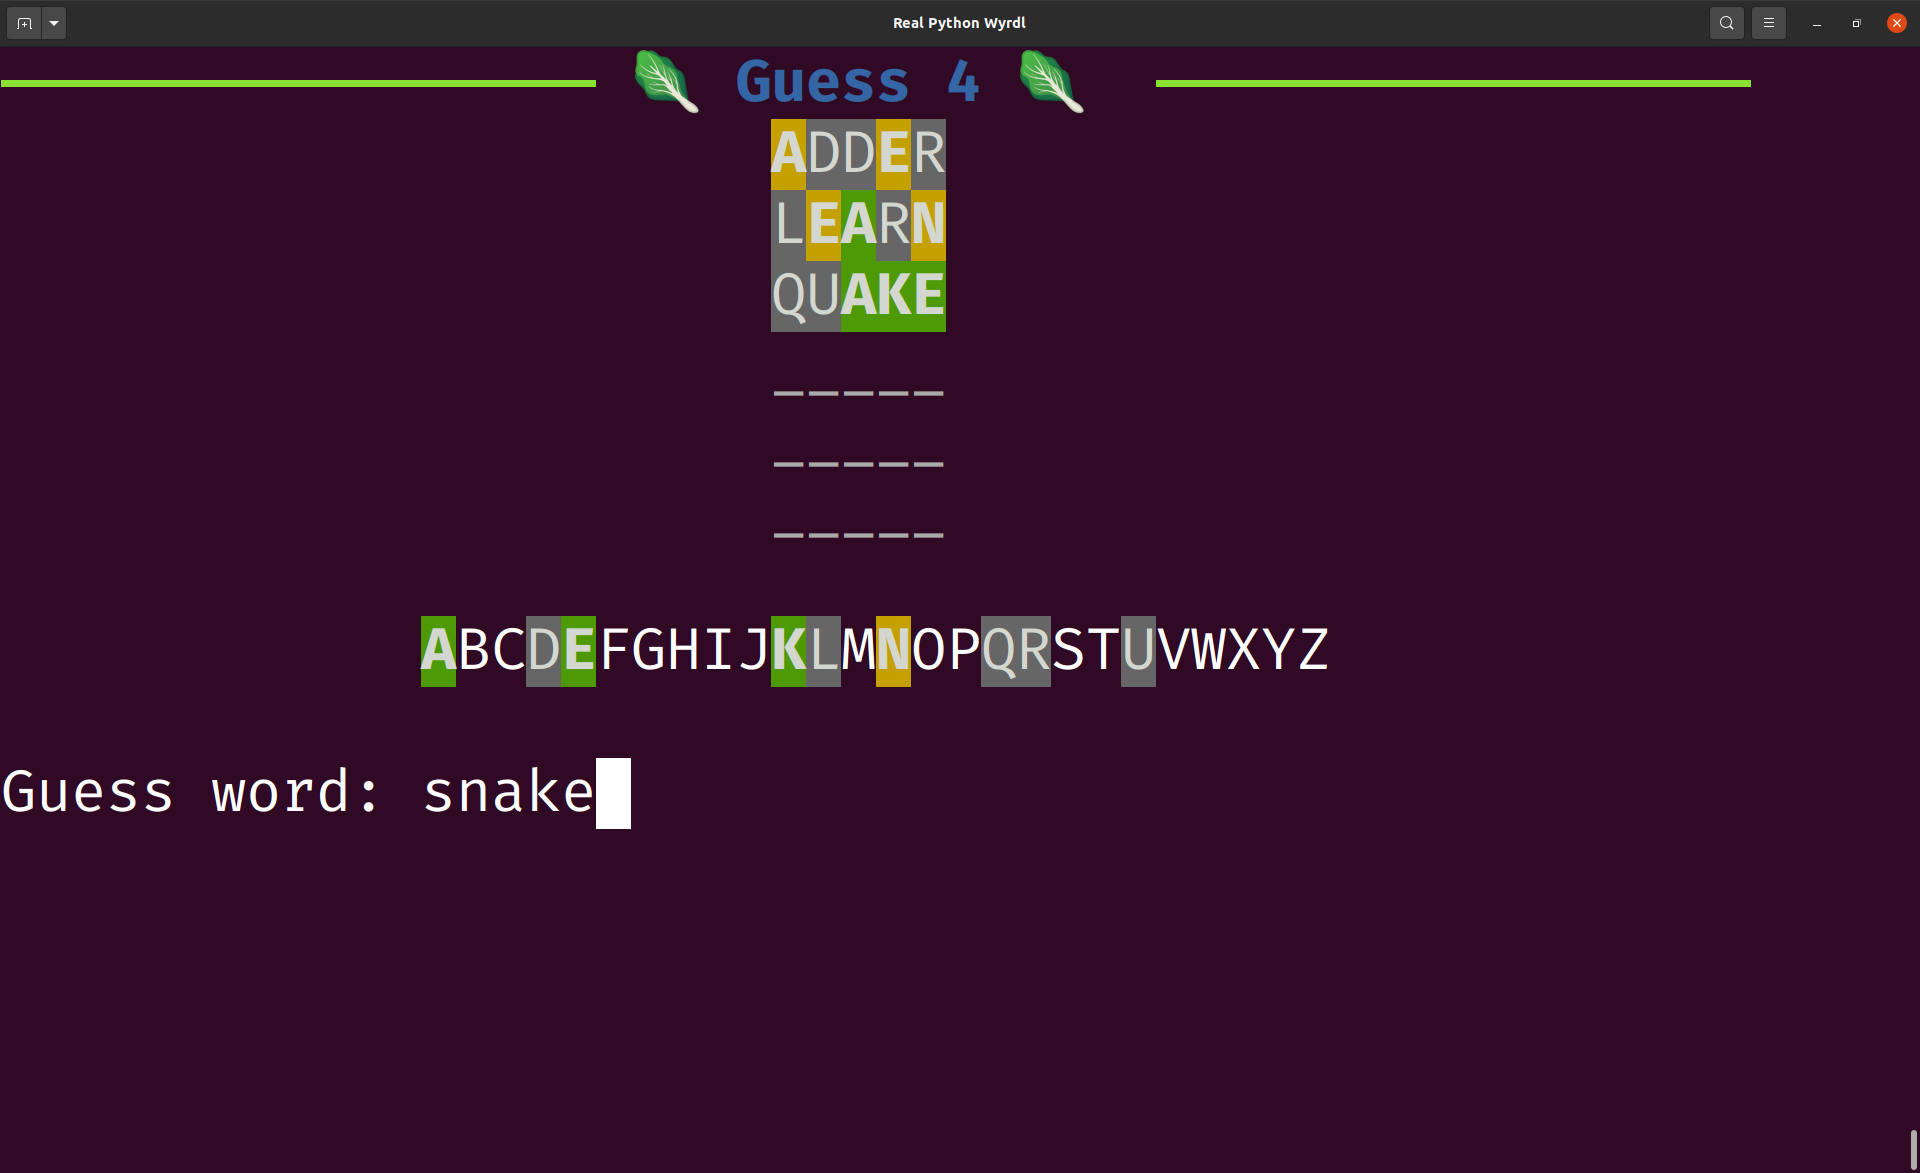
You already have the necessary information available inside show_guesses(), so you’ll expand that function to show individual letter statuses:
# wyrdl.py

import pathlib
import random
from string import ascii_letters, ascii_uppercase

# ...

def show_guesses(guesses, word):
    letter_status = {letter: letter for letter in ascii_uppercase}
    for guess in guesses:
        styled_guess = []
        for letter, correct in zip(guess, word):
            if letter == correct:
                style = "bold white on green"
            elif letter in word:
                style = "bold white on yellow"
            elif letter in ascii_letters:
                style = "white on #666666"
            else:
                style = "dim"
            styled_guess.append(f"[{style}]{letter}[/]")
            if letter != "_":
                letter_status[letter] = f"[{style}]{letter}[/]"

        console.print("".join(styled_guess), justify="center")
    console.print("\n" + "".join(letter_status.values()), justify="center")

# ...
You use the dictionary letter_status to keep track of the status of each letter. First, you initialize the dictionary with all uppercase letters. Then, as you process each letter of every guess, you update letter_status with properly styled letters. Once you’re done, you join all the letters and print them out with their individual styling.
Putting this information in front of the user makes your game easier and more enjoyable to play.
Exit the Game Cleanly
Earlier, you made sure the user wasn’t greeted by an incomprehensible traceback if the word list happened to be empty. As you’ve improved your game, there are fewer possibilities for your users to be exposed to Python error messages.
One possibility that still exists is that they can hit Ctrl+C to end the game early. You don’t want to disable their ability to break out of the game. However, you can make the game exit cleanly in this case.
When the user types Ctrl+C, Python raises a KeyboardInterupt. This is an exception that you can catch with a try … except block. In this case, though, you don’t need to do any special handling of the exception. You can therefore use contextlib.suppress().
By adding the context manager outside your main loop, you ensure that Ctrl+C breaks out of that loop and runs your post-processing code:
# wyrdl.py

import contextlib
import pathlib
import random
from string import ascii_letters, ascii_uppercase

# ...

def main():
    # Pre-process
    word = get_random_word(WORDS_PATH.read_text(encoding="utf-8").split("\n"))
    guesses = ["_" * NUM_LETTERS] * NUM_GUESSES

    # Process (main loop)
    with contextlib.suppress(KeyboardInterrupt):
        for idx in range(NUM_GUESSES):
            refresh_page(headline=f"Guess {idx + 1}")
            show_guesses(guesses, word)

            guesses[idx] = guess_word(previous_guesses=guesses[:idx])
            if guesses[idx] == word:
                break

    # Post-process
    game_over(guesses, word, guessed_correctly=guesses[idx] == word)

# ...
Note that you indent your whole main loop inside the suppress() context manager. If a KeyboardInterrupt is raised inside the loop, then control is immediately passed out of the loop, and game_over() is called.
The effect of this is that the game will end after displaying the secret word to the user.
That’s the final tweak that you’ll make in this tutorial. Check out the collapsed box below if you want to see the complete source code:
# wyrdl.py

import contextlib
import pathlib
import random
from string import ascii_letters, ascii_uppercase

from rich.console import Console
from rich.theme import Theme

console = Console(width=40, theme=Theme({"warning": "red on yellow"}))

NUM_LETTERS = 5
NUM_GUESSES = 6
WORDS_PATH = pathlib.Path(__file__).parent / "wordlist.txt"

def main():
    # Pre-process
    word = get_random_word(WORDS_PATH.read_text(encoding="utf-8").split("\n"))
    guesses = ["_" * NUM_LETTERS] * NUM_GUESSES

    # Process (main loop)
    with contextlib.suppress(KeyboardInterrupt):
        for idx in range(NUM_GUESSES):
            refresh_page(headline=f"Guess {idx + 1}")
            show_guesses(guesses, word)

            guesses[idx] = guess_word(previous_guesses=guesses[:idx])
            if guesses[idx] == word:
                break

    # Post-process
    game_over(guesses, word, guessed_correctly=guesses[idx] == word)

def refresh_page(headline):
    console.clear()
    console.rule(f"[bold blue]:leafy_green: {headline} :leafy_green:[/]\n")

def get_random_word(word_list):
    if words := [
        word.upper()
        for word in word_list
        if len(word) == NUM_LETTERS
        and all(letter in ascii_letters for letter in word)
    ]:
        return random.choice(words)
    else:
        console.print(
            f"No words of length {NUM_LETTERS} in the word list",
            style="warning",
        )
        raise SystemExit()

def show_guesses(guesses, word):
    letter_status = {letter: letter for letter in ascii_uppercase}
    for guess in guesses:
        styled_guess = []
        for letter, correct in zip(guess, word):
            if letter == correct:
                style = "bold white on green"
            elif letter in word:
                style = "bold white on yellow"
            elif letter in ascii_letters:
                style = "white on #666666"
            else:
                style = "dim"
            styled_guess.append(f"[{style}]{letter}[/]")
            if letter != "_":
                letter_status[letter] = f"[{style}]{letter}[/]"

        console.print("".join(styled_guess), justify="center")
    console.print("\n" + "".join(letter_status.values()), justify="center")

def guess_word(previous_guesses):
    guess = console.input("\nGuess word: ").upper()

    if guess in previous_guesses:
        console.print(f"You've already guessed {guess}.", style="warning")
        return guess_word(previous_guesses)

    if len(guess) != NUM_LETTERS:
        console.print(
            f"Your guess must be {NUM_LETTERS} letters.", style="warning"
        )
        return guess_word(previous_guesses)

    if any((invalid := letter) not in ascii_letters for letter in guess):
        console.print(
            f"Invalid letter: '{invalid}'. Please use English letters.",
            style="warning",
        )
        return guess_word(previous_guesses)

    return guess

def game_over(guesses, word, guessed_correctly):
    refresh_page(headline="Game Over")
    show_guesses(guesses, word)

    if guessed_correctly:
        console.print(f"\n[bold white on green]Correct, the word is {word}[/]")
    else:
        console.print(f"\n[bold white on red]Sorry, the word was {word}[/]")

if __name__ == "__main__":
    main()
You’ve written quite a bit of code. By building your Wordle clone step by step, you’ve seen how each part fits into the whole. Implementing your code in an iterative fashion like this is a great way to stay on top of everything that your program does.
Conclusion
Congratulations! You’ve built a feature-rich Wordle clone that you can play with yourself and share with all your friends—at least the ones who know how to run Python programs in the terminal.
Along the way, you’ve gotten familiar with Rich and learned how to use the library to add color and style to your terminal applications.
In this step-by-step project, you’ve learned to:
- Have a good strategy for iteratively creating a command-line application
- Use Rich’s console to create an attractive user interface in the terminal
- Read and validate user input
- Work with data represented in strings, lists, and dictionaries
- Work with data stored in text files
Next, have some fun challenging yourself to a few rounds of your Wordle clone! You may also look for ways to continue developing the game. Please share your experiences in the discussion section below.
Next Steps
While your Wordle clone already has the most important features in place, there are many ways in which you can change or improve the project. You’ve already noted some of these in the tutorial:
-
Only allow guesses from a list of valid words: This will make the game extra challenging because you can’t just throw some letters together to check if they appear in the secret word. To implement this, you need a comprehensive word list.
-
Create a topical Wordle clone: The word list that you’ve downloaded in this tutorial is based on the words in the tutorial itself. It might be more interesting to create a word list based on a theme that interests you. Maybe you can create a list of programming terms, people’s names, or Shakespearean plays.
-
Add a splash screen: A splash—or intro—screen is a nice way to prepare your user for what they’re in for. To make your application easier to use, you can also add some in-game instructions—for example, to explain the aim of the game and what the different colors represent.
Have fun exploring your own Wordle variants. Also, remember that you can use most of the principles you’ve learned in this tutorial when you build other command-line applications. So, what will you make next?
Watch Now This tutorial has a related video course created by the Real Python team. Watch it together with the written tutorial to deepen your understanding: Create a Python Wordle Clone With Rich